1. Introduktion
This manual provides comprehensive instructions for the installation, operation, and maintenance of your PANOEAGLE DS-7608NI-I2/8P 8-Channel 4K Network Video Recorder (NVR). Please read this manual thoroughly before using the product to ensure proper setup and functionality. Retain this manual for future reference.
The PANOEAGLE DS-7608NI-I2/8P is an embedded Plug and Play 4K NVR designed for robust 24/7 surveillance recording. It supports up to 8 cameras simultaneously, offering high-resolution recording up to 12MP and utilizing H.264+/H.264/H.265 video compression for efficient storage. Its Power over Ethernet (PoE) capability simplifies camera installation by providing both power and data through a single cable.
2. Produktet er slutview
Familiarize yourself with the components and interfaces of your NVR.
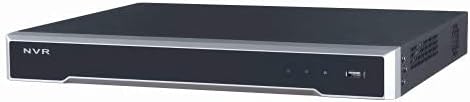
Figur 2.1: Frontpanel View
This image displays the front panel of the NVR, featuring the 'NVR' branding, status indicators, and a USB port for peripheral connections.

Figur 2.2: Bagpanel View
This image shows the rear panel of the NVR, highlighting the power input, cooling fan, 8 PoE ports, network port, USB ports, audio input/output, VGA, and HDMI video outputs, and alarm/control terminals.

Figure 2.3: Angled Rear View
An angled perspective of the NVR's rear panel, providing a clearer view of the various connectivity options and ventilation.
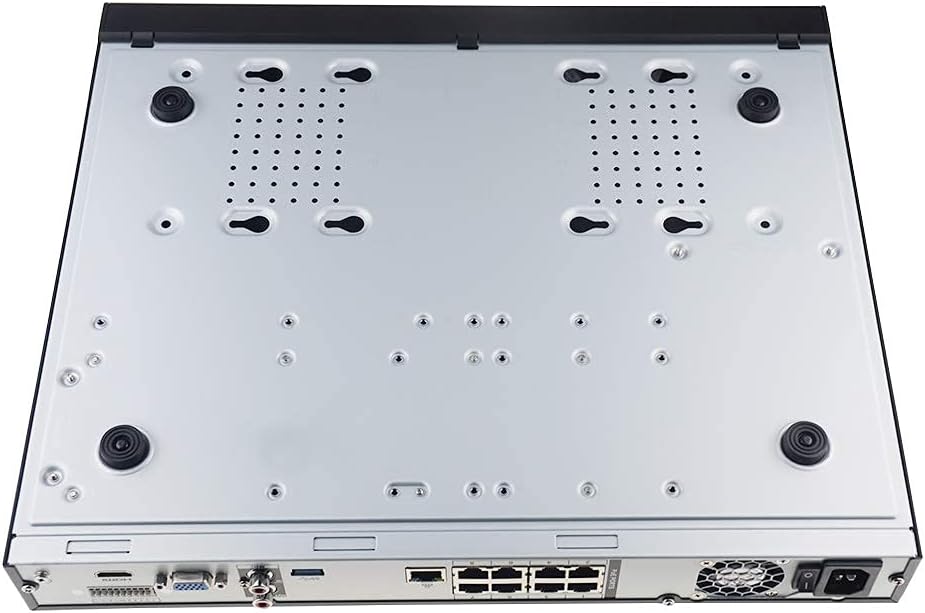
Figure 2.4: Bottom Panel View
This image displays the bottom of the NVR, showing mounting points and ventilation holes, along with rubber feet for stable placement.
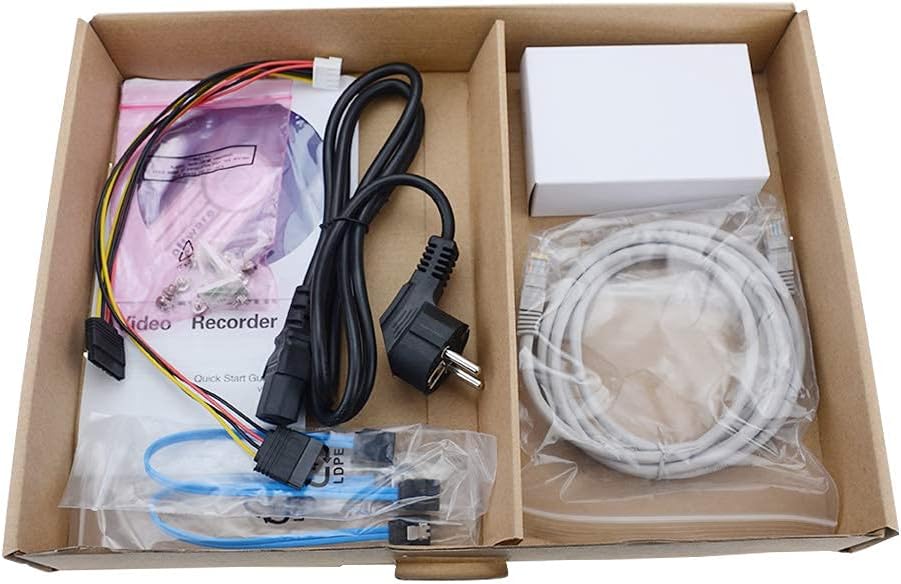
Figur 2.5: Pakkens indhold
A view of the accessories included with the NVR, typically comprising a power cable, network cable, USB mouse, SATA cables for hard drive installation, and a quick start guide.
3. Nøglefunktioner
- 8-kanals optagelse: Supports simultaneous recording from up to 8 IP cameras.
- Understøttelse af 4K-opløsning: Capable of recording and displaying video resolutions up to 12MP.
- PoE Easy Setup: Integrated Power over Ethernet (PoE) ports for direct connection and power supply to IP cameras via a single Ethernet cable.
- Advanced Video Compression: Utilizes H.264+/H.264/H.265 codecs for efficient storage and bandwidth usage.
- 24/7 optagelse: Designed for continuous, reliable surveillance monitoring.
- HDMI udgang: High-definition video output for connecting to monitors or TVs.
- SATA support: Features 2 SATA interfaces for internal hard drive installation (HDDs not included).
4. Opsætningsvejledning
4.1. Installation af harddisk (valgfrit)
If your NVR did not come with a pre-installed hard drive, follow these steps:
- Power off the NVR and disconnect all cables.
- Skru topdækslet på NVR-chassiset af og fjern det.
- Connect the SATA data cable and power cable from the NVR to the hard drive.
- Secure the hard drive to the NVR chassis using the provided screws.
- Sæt topdækslet på igen, og fastgør det med skruer.
4.2. Indledende forbindelser
- Connect a Monitor: Tilslut en skærm til NVR'ens HDMI- eller VGA-udgangsport.
- Connect a Mouse: Sæt USB-musen i en af NVR'ens USB-porte.
- Opret forbindelse til netværk: Connect the NVR's LAN port to your router or network switch using an Ethernet cable.
- Connect IP Cameras: Connect your PoE IP cameras to the NVR's PoE ports using Ethernet cables. The NVR will provide power and data to the cameras.
- Tænd: Connect the power adapter to the NVR and then plug it into a power outlet. The NVR will power on automatically.
4.3. Indledende konfiguration
Ved første opstart vil NVR'en guide dig gennem en indledende opsætningsguide. Dette inkluderer typisk:
- Setting up an administrator password.
- Configuring network settings (DHCP is usually default).
- Initializing the hard drive (if newly installed).
- Søger efter og tilføjer tilsluttede IP-kameraer.
- Indstilling af dato og klokkeslæt.
Følg anvisningerne på skærmen for at fuldføre opsætningen.
5. Betjeningsvejledning
5.1. Lev View
After logging in, the NVR will typically display the live view af alle tilsluttede kameraer. Du kan skifte mellem enkeltkamera-visning view, multikameragitter view, and customize display layouts.
5.2. Optagelse
- Kontinuerlig optagelse: Records 24/7. Configure schedules in the NVR's menu.
- Optagelse af bevægelsesdetektering: Records only when motion is detected. Sensitivity and detection zones can be adjusted.
- Planlagt optagelse: Indstil specifikke tidspunkter for optagelse.
Access recording settings via the NVR's main menu, usually under "Record" or "Storage" settings.
5.3. Afspilning
Til review optaget footage:
- From the main menu, select "Playback".
- Choose the camera(s) and date/time range you wish to review.
- Use the timeline to navigate through recorded events. Options for fast-forward, rewind, and pause are available.
5.4. Fjernadgang
The NVR supports remote viewing via a mobile app or web browser. Refer to the NVR's network settings for details on enabling P2P (peer-to-peer) or port forwarding for remote access. Download the official PANOEAGLE mobile application from your device's app store.
6. Vedligeholdelse
- Regelmæssig rengøring: Keep the NVR free from dust. Use a soft, dry cloth for exterior cleaning. Ensure ventilation openings are clear.
- Firmwareopdateringer: Periodically check the PANOEAGLE official website for firmware updates. Updates can improve performance, add features, and enhance security. Follow update instructions carefully.
- Harddiskens tilstand: Monitor the health of your hard drive(s) through the NVR's system information. Replace failing drives promptly to avoid data loss.
- Adgangskodesikkerhed: Regularly change your administrator password and use strong, unique passwords.
7. Fejlfinding
| Problem | Mulig årsag | Løsning |
|---|---|---|
| Ingen videoudgang på skærmen. | Løs kabelforbindelse, forkert inputkilde på skærmen, NVR ikke tændt. | Check HDMI/VGA cable connections. Ensure monitor is set to correct input. Verify NVR power. |
| Kameraer viser ikke live view. | Camera not powered, network issue, camera not added to NVR, incorrect IP address. | Check camera power and Ethernet cables. Ensure cameras are connected to PoE ports. Use NVR's camera management to search and add cameras. Verify camera IP addresses. |
| Ingen optagelse eller manglende footage. | Hard drive not installed/initialized, recording schedule not configured, hard drive full, hard drive failure. | Install and initialize HDD. Configure recording schedules. Check HDD status and capacity. Replace faulty HDD. |
| Kan ikke få fjernadgang til NVR. | Network configuration issues, P2P disabled, incorrect app settings, firewall blocking. | Ensure NVR has internet access. Enable P2P service. Verify app settings and NVR's network configuration. Check router firewall settings. |
8. Specifikationer
| Feature | Detalje |
|---|---|
| Model | DS-7608NI-I2/8P |
| Mærke | PANOEAGLE (Compatible with Hi-k USA systems) |
| Antal kanaler | 8 |
| Max opløsning | Op til 12 MP |
| Videokomprimering | H.264+/H.264/H.265 |
| Video output | HDMI, VGA |
| Lydindgang | RCA |
| SATA-grænseflader | 2 (for HDD) |
| Forbindelsesteknologi | HDMI, Ethernet (PoE) |
| Dato først tilgængelig | 28. juli 2021 |
9. Garanti og support
For warranty information, please refer to the warranty card included with your product or visit the official PANOEAGLE website. Technical support may be available through the manufacturer's website or by contacting their customer service department.
Always ensure you are using official channels for support and firmware downloads to maintain product integrity and security.


