Indledning
This manual provides detailed instructions for setting up, operating, and maintaining your Gamrombo Wireless Gaming Controller, Model RH-102A. Please read this manual thoroughly before use to ensure proper functionality and to maximize your gaming experience. This controller is designed for use with Xbox One, Xbox Series X/S, PC, Android, and iOS devices.

Billede: Forside view of the Gamrombo Wireless Gaming Controller, showcasing its black design with vibrant RGB lighting on the joysticks, buttons, and grip areas.
Opsætning
Pakkens indhold
- Gamrombo Wireless Gaming Controller (Model RH-102A)
- USB Charging/Data Cable (assumed)
- Brugervejledning (dette dokument)
Installation af batteri
The controller requires two (2) AA batteries (not included) for wireless operation. Locate the battery compartment on the back of the controller, open the cover, insert the batteries according to the polarity indicators, and close the cover securely.
Tilslutning af controlleren
The Gamrombo controller supports multiple connection methods: Wireless (for Xbox), Bluetooth (for PC, Android, iOS), and Wired (for PC).

Billede: Overview of the controller highlighting its compatibility with various platforms including PC, Mac, Android, iOS, and Steam.
1. Wireless Connection (Xbox Consoles)
- Ensure your Xbox console (Xbox Series X, Xbox Series S, Xbox One S, Xbox One X) is powered on.
- Tryk og hold på Hjem-knap on the controller until the LED indicator begins to flash, indicating pairing mode.
- På din Xbox-konsol skal du trykke på Parringsknap (usually located on the front or side of the console).
- The controller's LED will become solid when successfully paired.
- Vigtig bemærkning: Due to Xbox system updates, third-party controllers may require a software update to maintain compatibility. If you experience pairing issues, please visit the Gamrombo support website for the latest software updates and instructions.
2. Bluetooth Connection (PC, Android, iOS)
- Ensure the controller has sufficient battery power.
- Activate Bluetooth on your device (PC, Android, iOS).
- Tryk og hold på Bluetooth-parringsknap (refer to controller diagram for exact location, often a small button near the top) until the LED indicator flashes rapidly.
- On your device, search for new Bluetooth devices and select "Gamrombo Controller" (or similar name) from the list.
- The controller's LED will become solid when successfully paired.
3. Wired Connection (PC)
- Connect one end of the USB cable to the controller's USB port.
- Tilslut den anden ende af USB-kablet til en ledig USB-port på din pc.
- The controller should be automatically recognized by your PC. Drivers may install automatically.
Betjeningsvejledning
Knaplayout
Familiarize yourself with the controller's button layout for optimal use.

Image: Diagram illustrating the front and back button layout of the Gamrombo controller, labeling joysticks, D-pad, A/B/X/Y buttons, triggers, bumpers, Home, View, Menu, Share, Turbo, Light keys, 3.5mm stereo port, and programmable back paddles (PR/PL).
Særlige funktioner
1. TURBO-funktion
The TURBO function allows for rapid-fire action by repeatedly pressing a button as long as it is held down. This can provide a competitive edge in certain games.

Image: Close-up of the controller with an overlay explaining the TURBO function, showing different rapid-fire rates (5/s, 12/s, 20/s) and the 'T' button icon.
- Sådan aktiveres: Tryk og hold på TURBO button (T), then press the desired action button (e.g., A, B, X, Y, LB, RB, LT, RT). The button will now have TURBO functionality.
- To Adjust Speed: While holding the TURBO button, move the Højre analog pind op eller ned to cycle through different TURBO speeds (e.g., 5/s, 12/s, 20/s).
- For at deaktivere: Tryk og hold på TURBO button (T), og tryk derefter på den samme handlingsknap igen.
2. Macro Programming (Back Paddles)
The controller features two back-mappable buttons (PR and PL) that can be programmed with up to 16 button inputs, allowing for complex actions with a single press.

Billede: Bagside view of the controller highlighting the PR and PL programmable back paddles and the 'SET' button, with an illustration of how multiple button presses can be mapped to a single paddle.
- For at gå ind i programmeringstilstand: Tryk på SET knap (located on the back of the controller). The indicator light will flash.
- For at programmere: Tryk på enten PR or PL paddle you wish to program. Then, input the sequence of up to 16 buttons you want to map.
- At gemme: Tryk på SET knap again to exit programming mode. The indicator light will stop flashing.
- To Clear Macro: Enter programming mode, press the PR or PL paddle, then press the SET button again without inputting any sequence.
3. Tilpasning af RGB-belysning
Customize the controller's RGB lighting with 7 colors and multiple lighting modes to match your preference.

Image: Visual representation of different RGB lighting modes including Breathing LED Mode, Fixed LED Mode, Flickering LED Mode, and Single Zone Mode, with color options.
- To Change Color/Mode: Tryk på Lysnøgle (refer to button layout diagram) to cycle through 7 bright colors and various lighting modes (multi-zone, breathing, solid).
- Sådan justerer du lysstyrken: Hold Lysnøgle og bruge Venstre analog pind op eller ned for at justere lysstyrkeniveauet.
4. 6-akset gyrosensor
The built-in 6-axis gyroscope provides more accurate somatosensory control, enhancing immersion in games that support motion sensing.
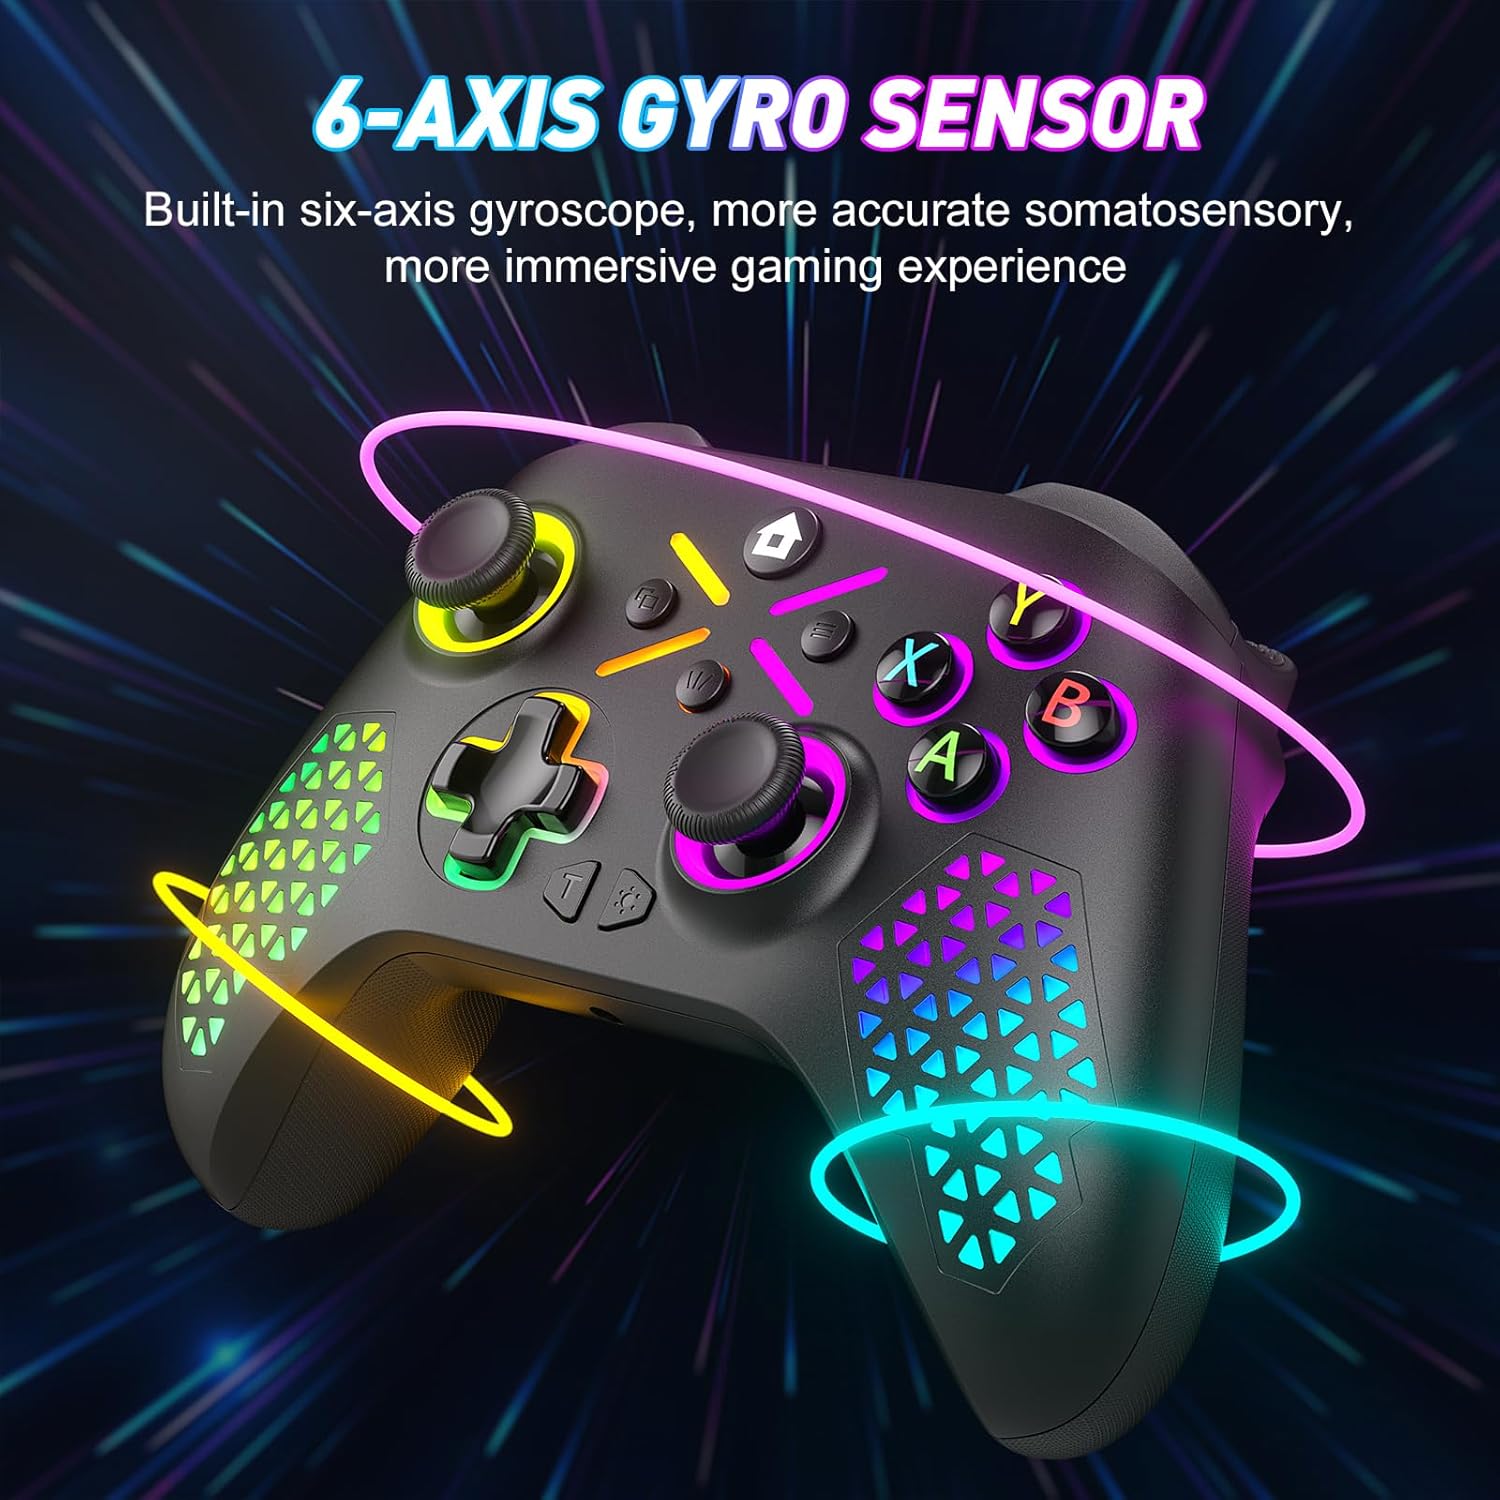
Image: The controller shown with glowing lines indicating motion, illustrating the 6-axis gyro sensor functionality for immersive gaming.
5. 3.5 mm lydstik
Connect your compatible headset to the 3.5mm audio jack for in-game audio and communication.

Image: A split image showing the 6-axis gyro sensor on one side and the adjustable vibration feature with the 3.5mm audio jack on the other, emphasizing enhanced game immersion.
Opretholdelse
Rensning
- Brug en blød, tør klud til at tørre overfladen på controlleren af.
- Til genstridigt snavs, let dampRengør kluden med vand eller en mild rengøringsopløsning. Undgå skrappe kemikalier.
- Lad ikke væsker trænge ind i betjeningsenhedens åbninger.
Opbevaring
- Opbevar controlleren et køligt, tørt sted væk fra direkte sollys og ekstreme temperaturer.
- If storing for an extended period, remove the AA batteries to prevent leakage.
Fejlfinding
Fælles problemer og løsninger
- Controller not pairing with Xbox:
Ensure the controller has fresh batteries. Verify that the controller's software is up-to-date. Xbox system updates can sometimes affect third-party controller compatibility. Visit the Gamrombo support website for the latest software updates and detailed pairing instructions. - Controller not connecting via Bluetooth/Wired:
Check battery levels. For wired connection, ensure the USB cable is securely connected to both the controller and the PC. For Bluetooth, ensure Bluetooth is enabled on your device and the controller is in pairing mode. Try restarting both the controller and the device. - Buttons or Joysticks not responding:
Check for any physical obstructions or debris around the buttons or joysticks. Ensure the controller has sufficient power. If the issue persists after a drop, internal damage may have occurred, which might not be repairable or covered under warranty. - RGB-lys virker ikke eller er forkerte:
Ensure the controller has power. Try cycling through the light modes and adjusting brightness using the Light Key. - Forbindelsen afbrydes ofte:
Ensure you are within the 10m (32.8ft) wireless range. Minimize interference from other wireless devices. Ensure the controller's software is updated.
Specifikationer
Tekniske detaljer
| Modelnummer | RH-102A |
| ASIN | B0FWCDB6F |
| Fabrikant | Garombo |
| Forbindelse | Wireless (WiFi), Bluetooth, Wired (USB) |
| Wireless Range | Op til 10 meter (32.8 fod) |
| Batteritype | 2 x AA batterier (medfølger ikke) |
| Varens vægt | 10.5 ounce |
| Pakkedimensioner | 12.68 x 9.88 x 0.55 tommer |
| Første ledige dato | 15. oktober 2025 |
Garanti og support
Garantioplysninger
Specific warranty details for the Gamrombo Wireless Gaming Controller are not provided within this manual. For information regarding warranty coverage, terms, and conditions, please refer to the product packaging or contact Gamrombo customer support directly.
Kundesupport
If you encounter any issues or have questions not addressed in this manual, please contact Gamrombo customer support. Contact information can typically be found on the product packaging, the official Gamrombo webwebstedet eller gennem dit købssted.


