Indledning
This manual provides detailed instructions for the safe and efficient operation of your KBS 20-in-1 Bread Maker, Model MBF-014A. Please read all instructions carefully before first use and retain this manual for future reference.
Vigtige sikkerhedsinstruktioner
- Always ensure the bread maker is placed on a stable, heat-resistant surface.
- Nedsænk ikke apparatet, ledningen eller stikket i vand eller andre væsker.
- Hold nøje opsyn med børn, når apparatet er i brug.
- Undgå kontakt med bevægelige dele under drift.
- Do not touch hot surfaces. Use oven mitts or the provided hook tool when handling the hot bread pan or bread.
- Unplug the appliance from the outlet when not in use and before cleaning. Allow to cool before adding or removing parts.
- Betjen ikke noget apparat med en beskadiget ledning eller stik, eller efter at apparatet ikke fungerer korrekt eller er blevet beskadiget på nogen måde.
- Brug ikke tilbehør, der ikke er anbefalet af producenten.
- Må ikke bruges udendørs.
- Lad ikke ledningen hænge ud over kanten af et bord eller bord, eller rør ved varme overflader.
- Må ikke placeres på eller i nærheden af en varm gas- eller elektrisk brænder eller i en opvarmet ovn.
- Udvis ekstrem forsigtighed, når du flytter et apparat, der indeholder varm olie eller andre varme væsker.
- For at afbryde forbindelsen skal du slukke for en vilkårlig knap og derefter tage stikket ud af stikkontakten.
- Brug ikke apparatet til andet end tilsigtet brug.
Produkt overview
The KBS 20-in-1 Bread Maker is designed for versatile bread making with 20 pre-programmed menus and a customizable mode. It features a nonstick ceramic pan, a durable stainless steel paddle, and a user-friendly touch panel.

Figure 1: KBS 20-in-1 Bread Maker
Opsætning
Udpakning og indledende rengøring
- Tag forsigtigt brødbagemaskinen og alt tilbehør ud af emballagen.
- Vask brødformen, æltepadden, målebægeret og måleskeen med varmt sæbevand. Skyl grundigt og tør dem helt.
- Tør brødbagemaskinens yderside af med enamp klæde. Brug ikke slibende rengøringsmidler.
- Sørg for, at alle dele er tørre før montering og brug.
Inkluderet tilbehør
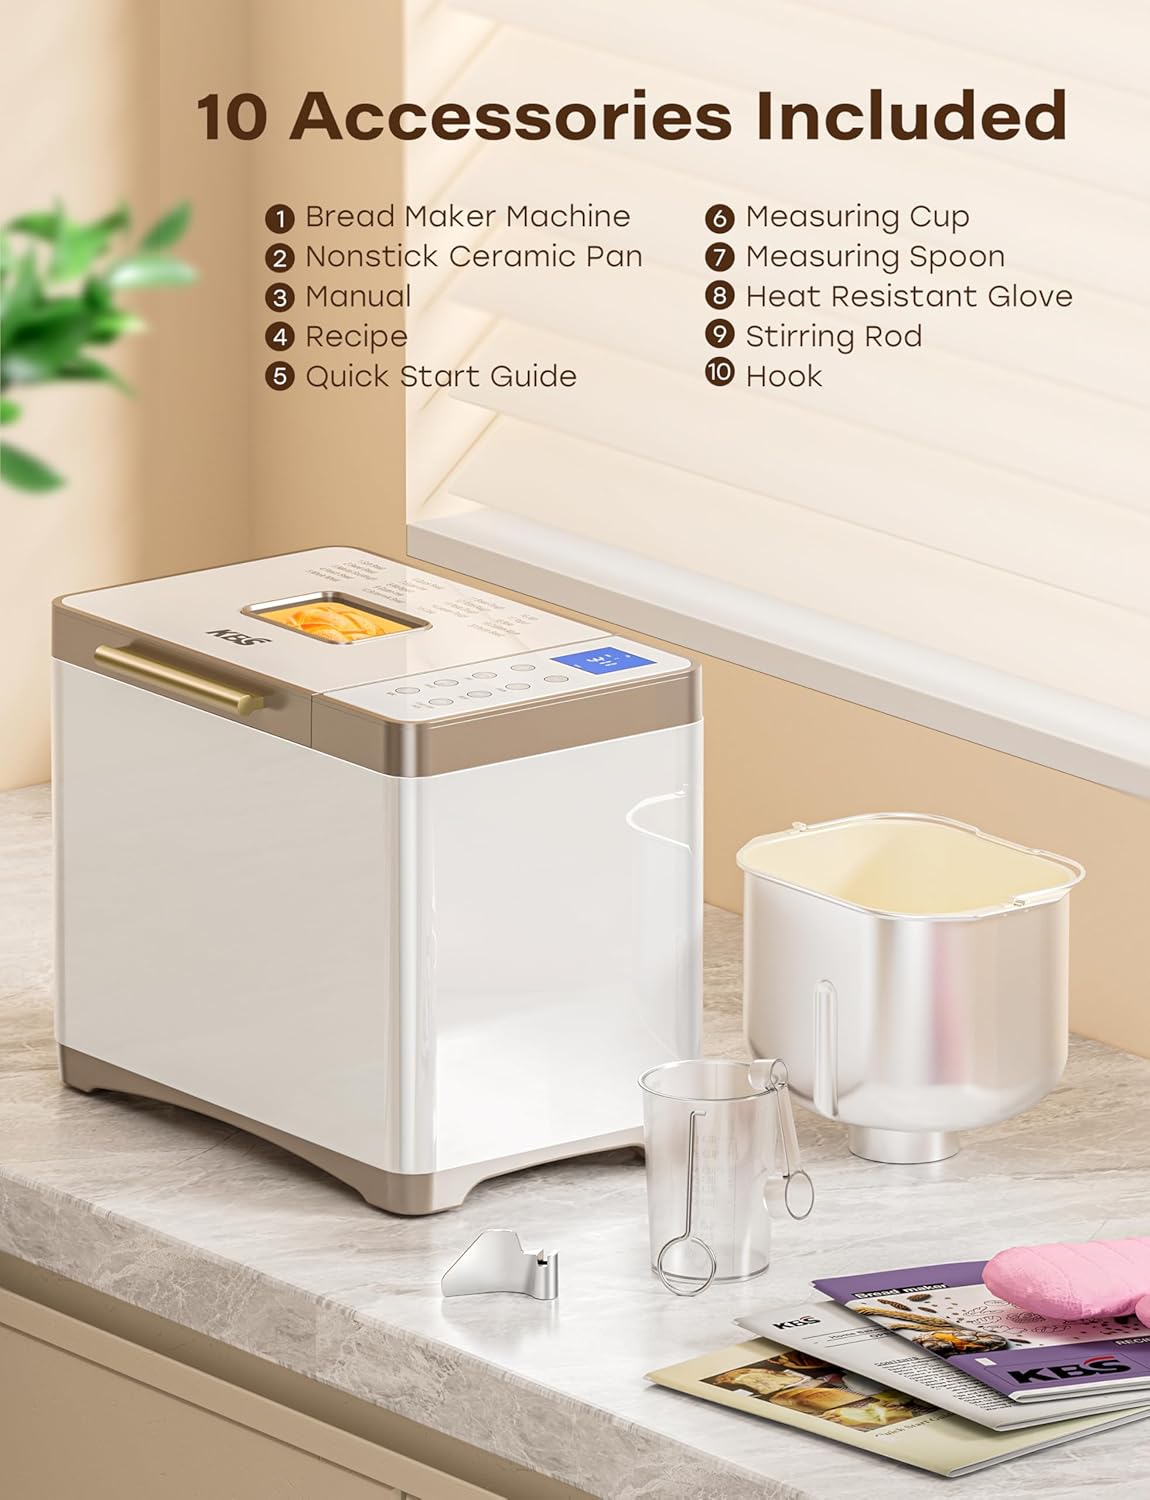
Figur 2: Medfølgende tilbehør
Your KBS Bread Maker comes with the following accessories:
- 1 Nonstick Ceramic Pan
- 1 Stainless Steel Kneading Paddle
- 1 Varmebestandig handske
- 1 Målebæger
- 1 Måleske
- 1 Hook (for removing the kneading paddle)
- 1 Brugsanvisning (dette dokument)
- 1 opskriftsbog
- 1 Hurtig startvejledning
Installing the Bread Pan and Kneading Paddle
- Place the bread pan into the baking chamber, ensuring it is securely seated. Twist gently if needed to lock it into place.
- Attach the kneading paddle onto the shaft at the bottom of the bread pan. Ensure it clicks into place.
Betjeningsvejledning
Kontrolpanel overview

Figure 3: Control Panel and Menu Options
The bread maker features a seamless glass digital touch panel for easy operation and cleaning.
- MENU: Press to cycle through the 20 pre-programmed settings.
- LOAF: Select desired loaf size (1 LB, 1.5 LB, 2 LB).
- FARVE: Choose crust color (Light, Medium, Dark).
- ÆLTE: Dedicated button for kneading functions.
- DIY: Access the custom mode (Menu 19) for personalized settings.
- BRØD: Dedicated button for bread making functions.
- , Adjust time for delayed start or custom mode settings.
- START/STOP/PAUSE: Initiate, pause, or cancel a program.
Tilføjelse af ingredienser
Always add ingredients in the order specified by your recipe, typically liquids first, followed by dry ingredients, and yeast last. Ensure the kneading paddle is correctly installed before adding ingredients.
Valg af et program
The bread maker offers 20 programs, including:
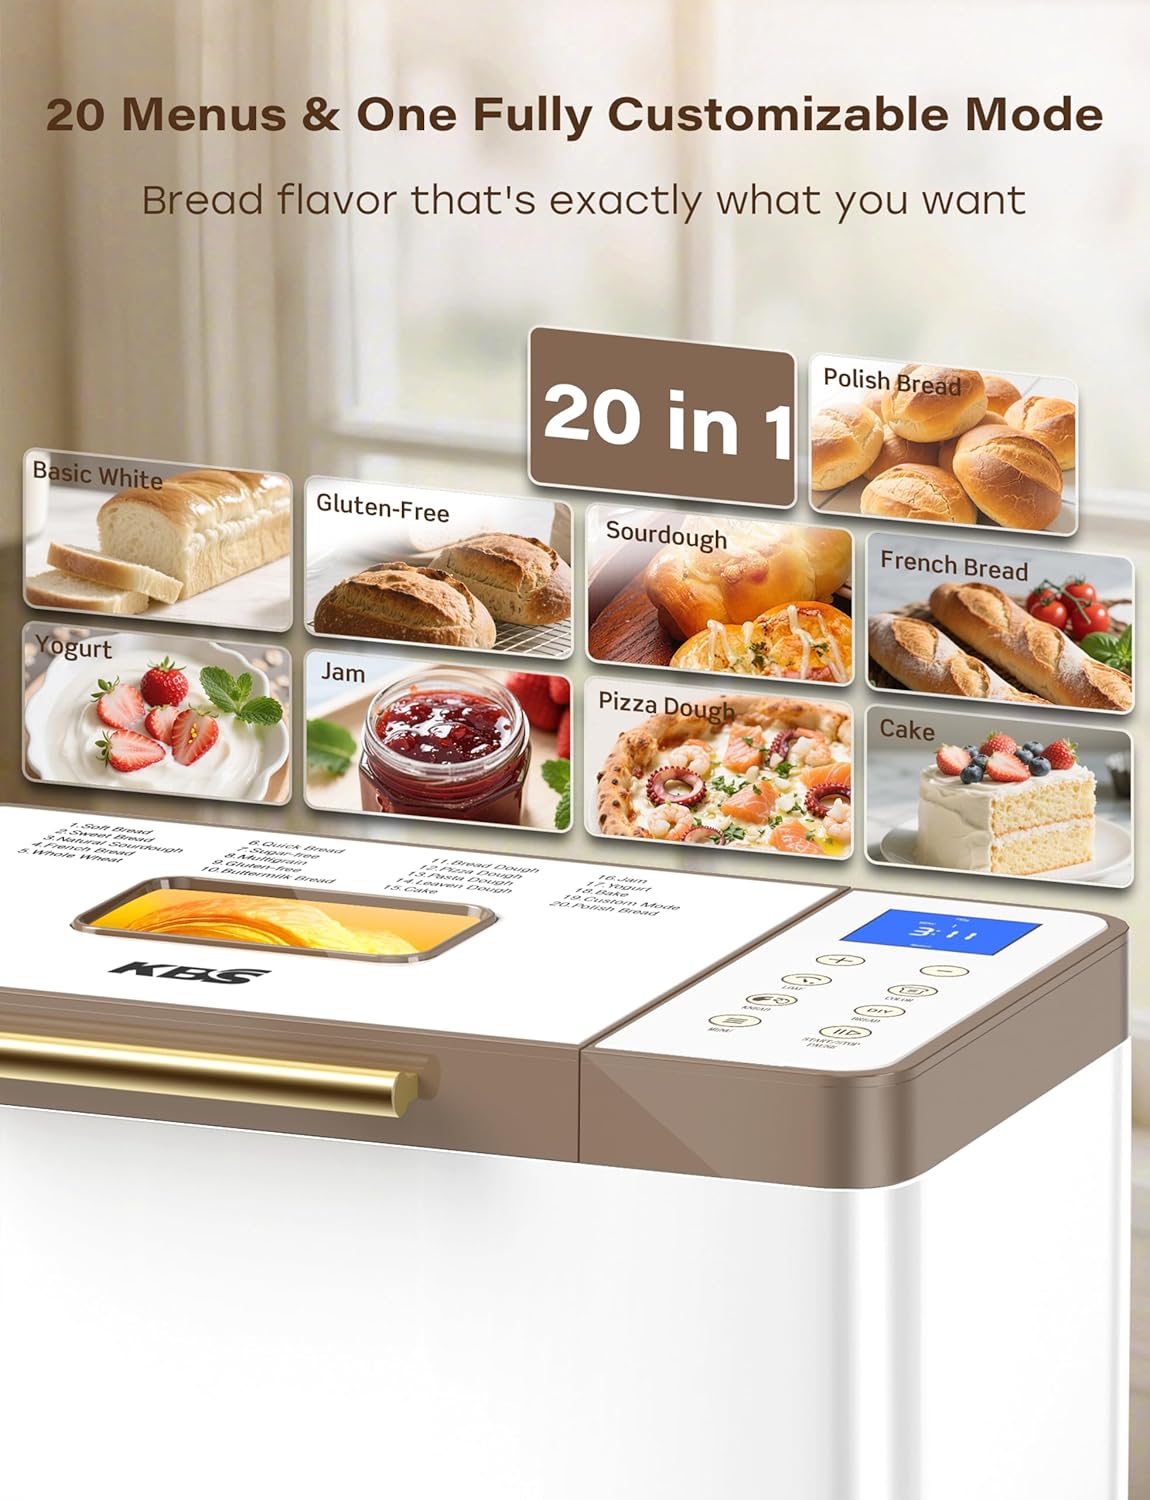
Figure 4: 20 Menu Options
- Soft Bread, Sweet Bread, Natural Sourdough, French Bread, Whole Wheat
- Quick Bread, Sugar-free, Multigrain, Gluten-free, Buttermilk Bread
- Bread Dough, Pizza Dough, Pasta Dough, Leaven Dough, Cake
- Jam, Yogurt, Bake, Custom Mode, Polish Bread
Tryk på MENU button repeatedly until the desired program number appears on the display.
Brødstørrelse og skorpefarve
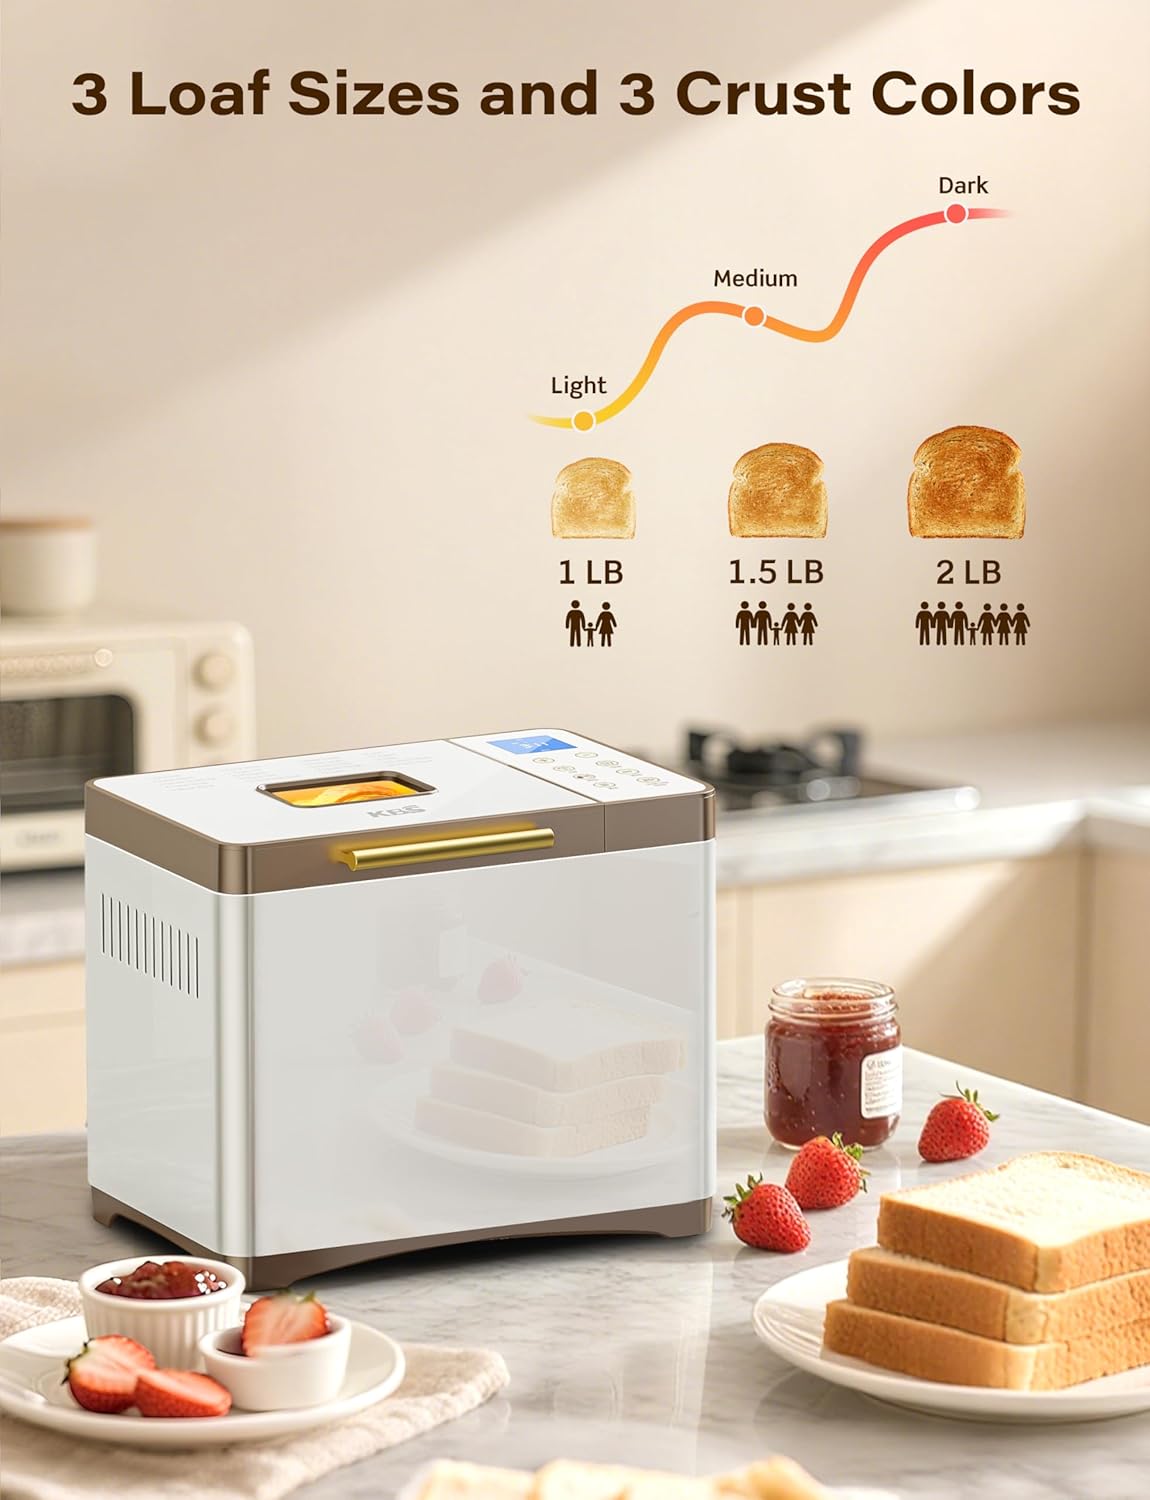
Figure 5: Loaf Size and Crust Color Selection
Når du har valgt et program, skal du bruge LOAF button to choose between 1 LB, 1.5 LB, or 2 LB loaf sizes. Use the FARVE button to select your preferred crust darkness: Light, Medium, or Dark.
Custom Mode (Menu 19)
Menu 19 allows for full customization of each baking stage: autolysing, basic rise, degassing, re-rise, reshape, last rise, and bake. Use the +/- buttons to adjust the time for each step. Settings can be saved for future use.
Delayed Start, Keep Warm, and Power Outage Backup
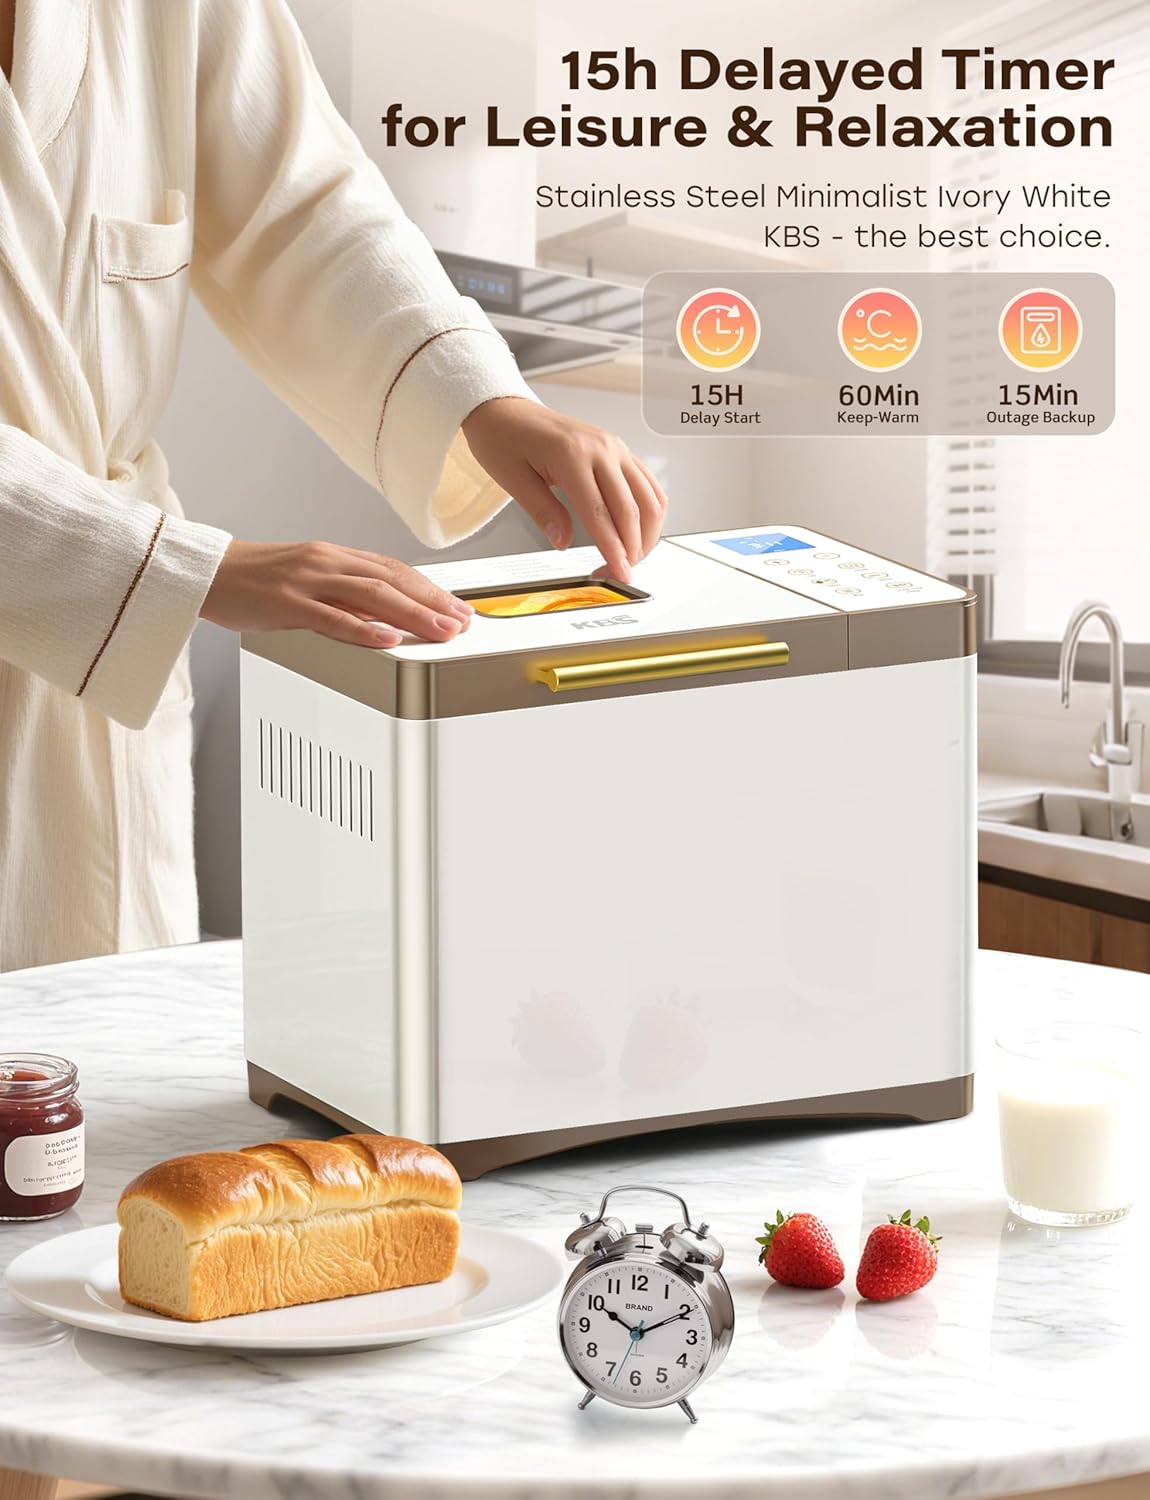
Figure 6: Timer and Power Features
- 15-Hour Delayed Start: Program the bread maker to finish baking at a later time. Use the +/- buttons to set the delay.
- 60 minutters varmholdning: After baking, the bread maker automatically enters a 60-minute keep warm cycle to maintain optimal bread temperature.
- 15-Minute Power Outage Backup: In case of a power interruption, the bread maker can resume its program if power is restored within 15 minutes.
Start af programmet
Once ingredients are added and settings are selected, press the START/STOP/PAUSE button to begin the baking cycle.
Pleje og vedligeholdelse
Rengøring af brødformen og æltepaden

Figure 7: Nonstick Ceramic Pan and Stainless Steel Paddle
- After use, allow the bread pan and kneading paddle to cool completely.
- Remove the kneading paddle from the pan using the provided hook tool.
- Wash the ceramic pan and stainless steel paddle with warm, soapy water. The ceramic pan is fired at 3000°F for long-lasting nonstick properties and is dishwasher safe.
- For stubborn residue, soak the pan and paddle in warm water for a short period before cleaning.
- Ensure all parts are thoroughly dried before reassembling or storing.
Rengøring af ydersiden
- Tør brødbagemaskinens yderside af med en blød, tør klud.amp klæde.
- The seamless glass digital panel can be easily wiped clean.
- Do not use abrasive cleaners or scouring pads, as these can damage the surface.
Fejlfinding
If you encounter issues with your bread maker, refer to the common problems and solutions below.
| Problem | Mulig årsag | Løsning |
|---|---|---|
| Brødet hæver ikke eller hæver for meget. | Incorrect yeast amount, expired yeast, incorrect water temperature, wrong flour type. | Ensure yeast is fresh and measured accurately. Use water at the correct temperature (typically lukewarm). Verify flour type matches the recipe. |
| Bread is dense or heavy. | For meget mel, for lidt væske, utilstrækkelig æltning. | Measure ingredients precisely. Adjust liquid slightly if dough appears too dry during kneading. Ensure the correct program is selected for adequate kneading time. |
| Æltepaddel sidder fast i brød. | Common occurrence, especially with larger loaves. | Allow bread to cool slightly. Use the provided hook tool to carefully remove the paddle. |
| Uneven baking or browning. | Improper ingredient distribution, lid not fully closed, external temperature fluctuations. | Ensure ingredients are evenly distributed. Confirm the lid is securely closed. The 360° hot air circulation and NTC/PID system help maintain even temperature. |
Specifikationer
| Feature | Detalje |
|---|---|
| Modelnummer | MBF-014A |
| Mærke | KBS |
| Farve | Creamy White Stainless Steel |
| Produktdimensioner | 8" D x 13.4" B x 11" H |
| Varens vægt | 12.97 pund |
| Antal programmer | 20 (including Custom Mode) |
| Brødstørrelser | 1 pund, 1.5 pund, 2 pund |
| Skorpeindstillinger | Lys, medium, mørk |
| Brød materiale | Nonstick Ceramic (3000°F-fired) |
| Paddle Material | Rustfrit stål |
| Motorkraft | 650W Variable-Frequency Motor |
| Temperaturkontrol | Dual NTC and PID System |
| Delayed Start Timer | Op til 15 timer |
| Hold varm funktion | 60 minutter |
| Power Outage Backup | 15 minutter |
| Produktpleje | Dishwasher Safe (pan), Hand Wash (general) |
Garanti og support
Your KBS Bread Maker comes with a 2-year warranty. For technical support or customer service inquiries, please contact our team. We aim to provide customized solutions with a rapid response within 12 hours.
- Garantiperiode: 2 år
- Support Response Time: Inden for 12 timer
- Please refer to the contact information provided in your Quick Start Guide or on the official KBS webwebsted for hjælp.


