1. Introduktion
This manual provides detailed instructions for the safe and effective operation, maintenance, and troubleshooting of your DEPSTECH DS620 50ft Endoscope and DS660 Two-Way Articulating Borescope Bundle. Please read this manual thoroughly before using the devices to ensure proper functionality and to prevent damage or injury.
The DEPSTECH DS620 features an extended 50ft cable and an innovative 1080P HD triple lens system, ideal for inspecting long, confined spaces. The DEPSTECH DS660 offers precise 210° two-way articulation with a slim 0.24-inch probe, designed for navigating tight and complex areas. Both devices feature a 5-inch IPS HD display for clear, real-time viewing.
2. Sikkerhedsinstruktioner
Always adhere to the following safety precautions to prevent electric shock, fire, or personal injury:
- Do not immerse the main display unit in water or other liquids. The camera probe and cable are waterproof, but the main unit is not.
- Brug ikke enheden i miljøer med brandfarlige eller eksplosive gasser.
- Hold enheden væk fra stærke elektromagnetiske felter.
- Forsøg ikke at skille enheden ad eller ændre den. Reparationer bør kun udføres af autoriseret personale.
- Sørg for, at enheden er fuldt opladet før brug for at undgå afbrydelser under inspektion.
- Opbevar enheden på et tørt, køligt sted, når det ikke er i brug.
- Opbevares utilgængeligt for børn.
3. Produktet er slutview
This bundle includes two distinct inspection cameras, each designed for specific applications:
3.1 DEPSTECH DS620 Endoscope
The DS620 is equipped with a 50ft semi-rigid cable and a triple-lens camera system, providing extensive reach and multiple viewing angles for comprehensive inspections.

Image: The DEPSTECH DS620 endoscope unit, featuring a large display and a coiled 50ft camera cable connected to the main unit. The camera probe tip is visible with its integrated lights.
- Udvidet rækkevidde: 50-foot semi-rigid cable for deep inspections.
- Tredobbelt linsesystem: Front and two side cameras for comprehensive viewing without changing probes.
- 1080P HD-kamera: High-definition image capture.

Image: A diagram illustrating the 50ft flexible snake camera cable, highlighting its capability to reach deep into drain pipes, walls, automotive engines, and HVAC systems.
3.2 DEPSTECH DS660 Articulating Borescope
The DS660 features a shorter, more flexible metal gooseneck probe with 210° two-way articulation, allowing precise navigation and angle adjustment in tight spaces.

Image: The DEPSTECH DS660 borescope unit, showing the main display attached to a handle with a flexible, articulating probe extending from it. A small carrying case is also visible.
- 210° Precision Articulation: Joystick-controlled two-way bending for optimal viewing vinkler.
- Slim Probe: 0.24-inch diameter for accessing very narrow openings.
- Adaptable Gooseneck: 5ft metal gooseneck that holds its shape for stable positioning.

Image: A diagram illustrating the 210° two-way articulation feature of the borescope probe, showing how it can bend in two directions to inspect tight spaces from various angles.
4. Opsætning og første brug
4.1 Opladning af enheden
Before first use, fully charge the main display unit using the provided USB cable and a compatible power adapter (not included). The charging indicator will show the charging status.
4.2 Tilslutning af kameraproben
For the DS620, securely connect the 50ft endoscope cable to the designated port on the main display unit. For the DS660, the articulating probe is typically integrated or connects via a secure, dedicated port.

Image: A composite image showing both the DEPSTECH DS620 endoscope and the DS660 articulating borescope units. The DS620 has a long coiled cable, while the DS660 has a shorter, flexible probe with a handle.
4.3 Indsættelse af et MicroSD-kort
To save images and videos, insert a MicroSD card (up to 32GB, Class 10 recommended) into the card slot on the main display unit. Ensure the card is inserted correctly before powering on.
5. Betjeningsvejledning
5.1 Tænd/sluk
Press and hold the power button (usually marked with a power symbol) for a few seconds to turn the device on or off. The display will illuminate.
5.2 Navigering i menuen
Use the directional buttons (up, down, left, right) and the OK button to navigate through the on-screen menu. Settings typically include brightness, resolution, language, and date/time.
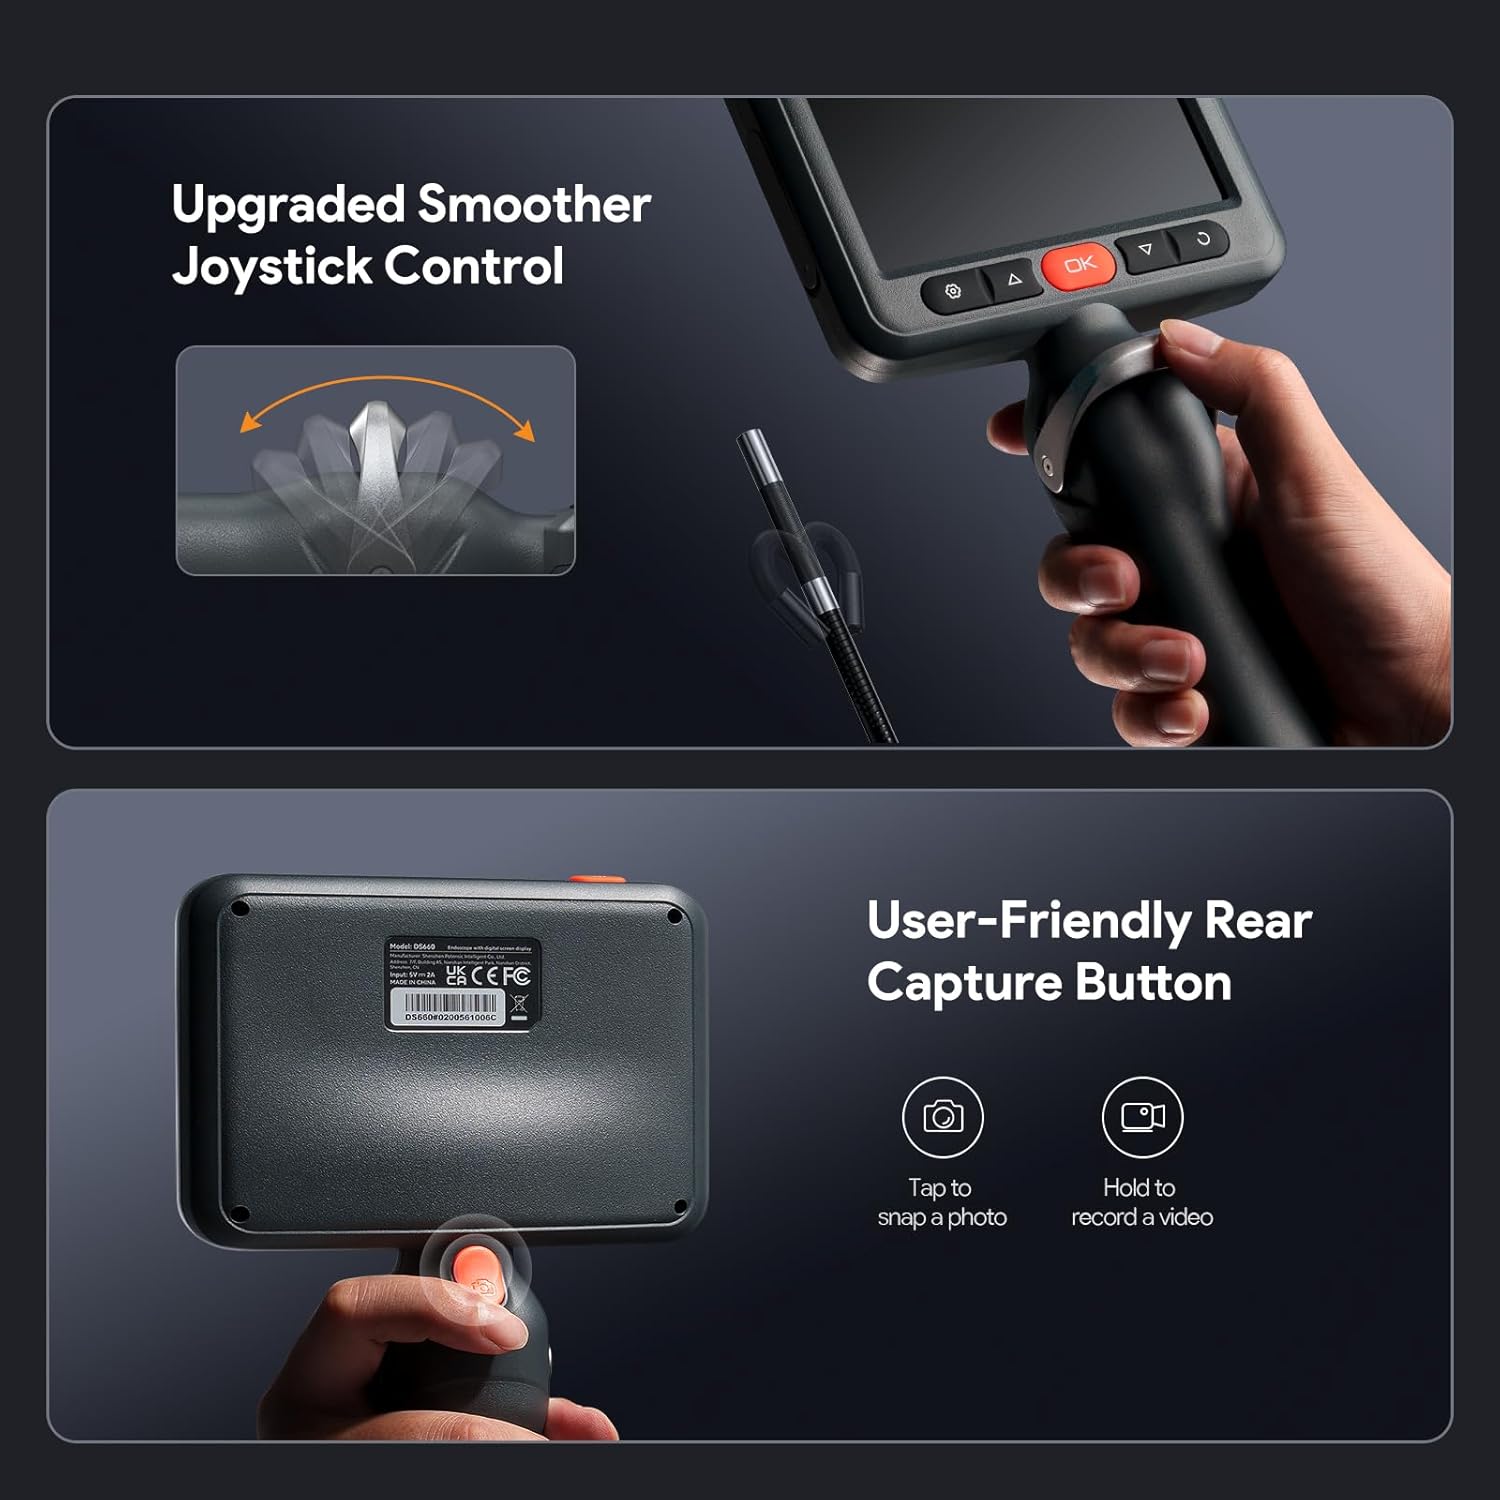
Billede: En detaljeret view of the borescope's control panel, highlighting the joystick for articulation and the user-friendly rear capture button for taking photos or recording videos.
5.3 Justering af LED-lysstyrke
The camera probe features adjustable LED lights. Use the dedicated brightness control button or menu option to increase or decrease illumination as needed for clear viewing.
5.4 Optagelse af billeder og videoer
- Sådan tager du et billede: Press the photo capture button (often marked with a camera icon) once.
- Sådan optager du en video: Press the video record button (often marked with a video camera icon) once to start recording. Press again to stop.
Gemt files can be accessed through the gallery or playback menu on the device.
5.5 Using the DS620 Triple Lens System
The DS620 allows switching between front and side cameras. Use the designated button (often labeled with a lens icon or 'M' for mode) to cycle through the front view, venstre side view, and right side view. This eliminates the need for additional attachments.

Image: A visual representation of the borescope's innovative three-lens system, showing the front camera and two side cameras with their respective focal ranges, allowing for comprehensive inspection.
5.6 Operating the DS660 Articulation
The DS660 features a joystick control for precise two-way articulation of the probe tip. Gently move the joystick to bend the probe in the desired direction (up to 210°). This allows for navigating around obstacles and viewing specific angles.

Image: A person demonstrating the use of the articulating borescope, holding the main unit and guiding the flexible gooseneck probe into a hard-to-reach area, showcasing dens tilpasningsevne.
6. Vedligeholdelse
6.1 Cleaning the Camera Probe
After each use, especially in dirty or oily environments, gently wipe the camera probe and cable with a soft, damp cloth. For stubborn grime, a mild detergent can be used, followed by a clean, damp cloth. Ensure no liquid enters the main unit.
6.2 Cleaning the Display Screen
Use a soft, lint-free cloth to clean the display screen. Avoid abrasive materials or harsh chemicals that could scratch or damage the screen.
6.3 Opbevaring
When not in use, store the device in its original packaging or a protective case in a dry, cool place, away from direct sunlight and extreme temperatures. Ensure the cable is neatly coiled to prevent kinks or damage.
7. Fejlfinding
7.1 Enheden tænder ikke
- Sørg for, at enheden er fuldt opladet. Tilslut den til en strømkilde, og lad den oplade i mindst 30 minutter, før du forsøger at tænde den igen.
- Kontroller, at tænd/sluk-knappen fungerer korrekt.
7.2 Intet billede på skærmen
- Kontroller, at kameraproben er korrekt tilsluttet hovedenheden.
- Check the LED brightness settings; increase if the environment is too dark.
- Genstart enheden.
7.3 Cannot Save Photos/Videos
- Ensure a MicroSD card is inserted correctly.
- Check if the MicroSD card has sufficient free space.
- Format the MicroSD card (this will erase all data, back up important fileførst).
- Ensure the MicroSD card is not locked (read-only).
7.4 Articulation Not Responding (DS660)
- Check for any physical obstructions preventing the probe from bending.
- Ensure the joystick is clean and free of debris.
- Genstart enheden.
8. Specifikationer
| Feature | Beskrivelse |
|---|---|
| Vise | 5-inch IPS HD Display, 854*480 Resolution, 178° Viewing Angle, 340 cd/m² Brightness |
| Camera (DS620) | 1080P HD Triple Lens System (Front, Side A, Side B) |
| Cable Length (DS620) | 50ft (15.24m) Semi-Rigid Cable |
| Articulation (DS660) | 210° Two-Way Precision Joystick Control |
| Probe Diameter (DS660) | 0.24 tommer (6 mm) |
| Gooseneck Length (DS660) | 5ft (1.5m) Metal Gooseneck |
| Opbevaring | MicroSD-kort (op til 32 GB, medfølger ikke) |
| Strømkilde | Rechargeable Battery (details not specified, typically Li-ion) |

Image: A graphic illustrating the key specifications of the 5-inch IPS HD display, including its 854x480 resolution, 178° viewing angle, and 340 cd/m² brightness, emphasizing its clarity and wide view.
9. Garanti og support
DEPSTECH products are designed for reliability and performance. For warranty information, technical support, or service inquiries, please refer to the warranty card included with your product or visit the official DEPSTECH webwebsted. Hav venligst dit modelnummer og købsdato klar, når du kontakter support.
Official DEPSTECH Store: Visit DEPSTECH on Amazon


