1. Introduktion
This manual provides detailed instructions for the installation, operation, and maintenance of your MUBVIEW Bell J7 2K Wireless Video Doorbell Camera with Chime. Please read this manual thoroughly before using the product to ensure proper function and safety. This device is designed to enhance your home security with advanced features like 2K video, motion detection, and two-way audio.
2. Hvad er der i æsken
Kontroller, at alle komponenter er til stede, før du fortsætter installationen:
- Camera Doorbell x1
- Chime x1
- Brugervejledning x1
- Ladekabel x1
- Batteri x3
- Other Accessories (screws, anchors, screwdriver)

Image: Contents of the MUBVIEW Bell J7 package, including the doorbell, chime, and installation tools.
3. Produktet er slutview
Familiarize yourself with the main parts of your video doorbell and chime:
Dørklokke kamera
- 2K Camera Lens: Optager video i høj opløsning.
- PIR Motion Sensor: Registrerer menneskelig bevægelse.
- Mikrofon: Til tovejs audiokommunikation.
- Højttaler: For two-way audio communication and siren.
- Dørklokkeknap: Activates the chime and sends notifications.
- Micro USB-C Port: Til opladning af det interne batteri.
- Nulstil knap: Til nulstilling af enhed.
- Micro SD -kortplads: Til lokal videolagring (op til 128 GB, kort medfølger ikke).
- Anti-Theft Button: Triggers an alarm if the doorbell is removed from its mount.
Trådløs klokke
- Højttaler: Emits doorbell sound.
- Lydstyrkekontrol: Adjusts chime volume.
- Tonevælger: Changes chime melody.
- Strømkilde: Batteridrevet for fleksibel placering.

Billede: Forside view of the MUBVIEW Bell J7 doorbell and chime.
4. Opsætning
Follow these steps to set up your MUBVIEW Bell J7 doorbell camera:
4.1 Opladning af dørklokken
- Before first use, fully charge the doorbell camera using the provided USB charging cable.
- The charging port is located on the side of the doorbell, protected by a rubber flap.
- En fuld opladning kan vare op til 180 dage, afhængigt af brugen.
4.2 Appinstallation og Wi-Fi-forbindelse
- Download CloudEdge or MUBVIEW app from your smartphone's app store (Apple App Store or Google Play Store).
- Opret en konto, eller log ind, hvis du allerede har en.
- Sørg for, at din smartphone er forbundet til en Wi-Fi-netværk på 2.4 GHz. The doorbell is not compatible with 5GHz Wi-Fi.
- In the app, select "Add Device" and choose "Smart Video Doorbell".
- Follow the on-screen prompts to connect the doorbell to your Wi-Fi network. This typically involves scanning a QR code displayed on your phone with the doorbell camera.
- Når du er tilsluttet, kan du navngive din enhed og fuldføre opsætningen.
4.3 Montering af dørklokken
The doorbell can be mounted using screws or strong adhesive tape (not included for all mounting types).
- Attach the mounting bracket to your desired location on the wall or door frame. Ensure it is at an appropriate height for optimal viewing.
- Secure the bracket using the provided screws and anchors.
- Slide the doorbell camera into the mounting bracket until it clicks securely into place.
- For added security, a small screw can be inserted from the bottom of the bracket into the doorbell to prevent easy removal.

Image: Installation of the MUBVIEW Bell J7 doorbell camera onto its mounting bracket.
5. Betjeningsvejledning
5.1 Live View og to-vejs lyd
- Åbn MUBVIEW app to access the live video feed from your doorbell camera.
- Use the microphone icon in the app to enable two-way audio and speak with visitors at your door.
- The voice changer feature can be activated for added privacy and security.

Image: Demonstrating two-way audio and voice message functionality via the app.
5.2 Bevægelsesdetektion og advarsler
- The doorbell features advanced PIR motion and human detection to minimize false alarms.
- When motion is detected, you will receive instant push notifications on your smartphone.
- Adjust motion detection sensitivity and set custom motion zones within the app to suit your environment.

Image: Smartphone notification for human detection from the doorbell camera.
5.3 Nattesyn
- The doorbell camera automatically switches to IR night vision in low-light conditions.
- Enhanced night vision provides clear images up to 33 feet.
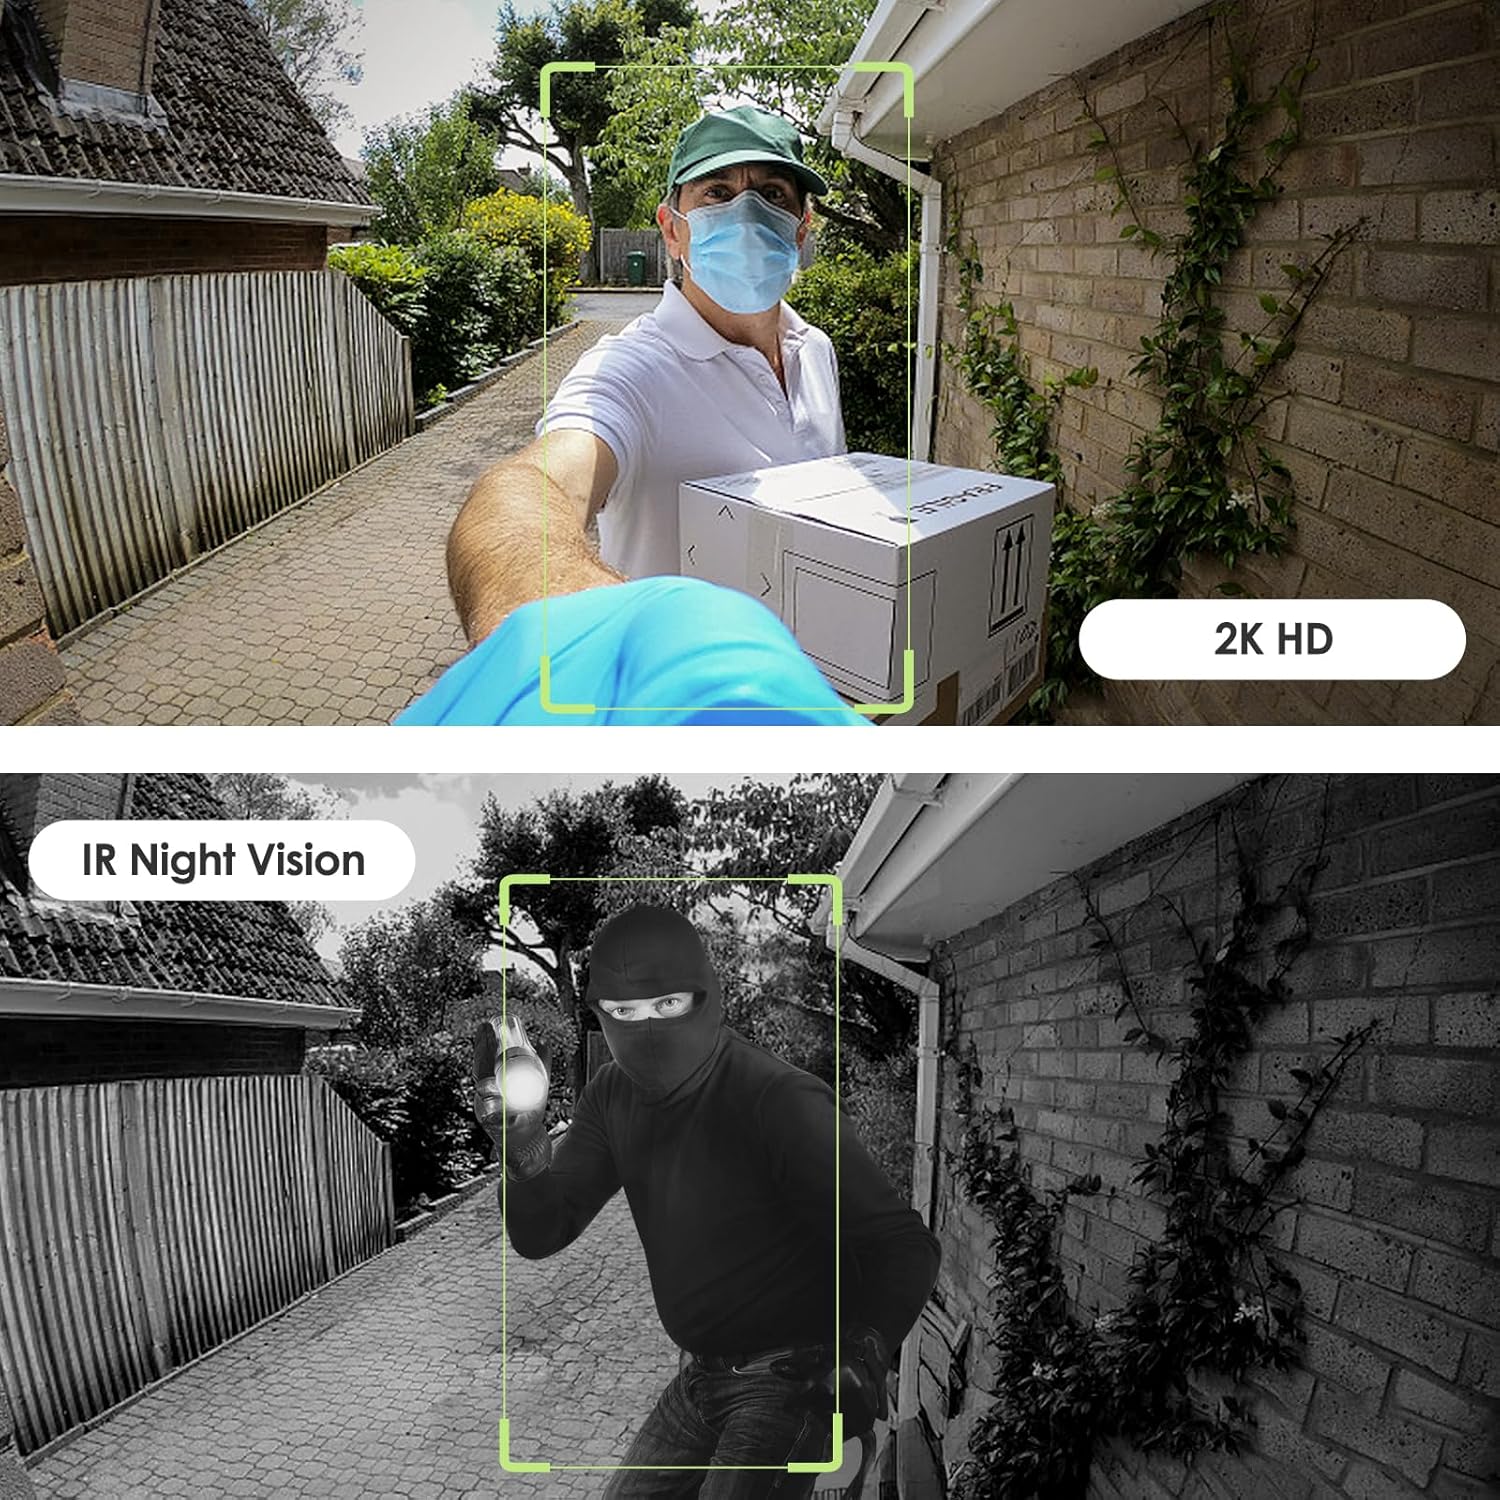
Image: Day and night vision capabilities of the MUBVIEW Bell J7 doorbell.
5.4 Videolagring
- Micro SD-kort: Insert a micro SD card (up to 128GB, not included) into the designated slot for local storage of recorded footage.
- Cloud Storage: Enjoy 7-day free cloud loop storage. Optional premium cloud storage plans are available for extended storage and features.

Image: Multiple storage options: local Micro SD card and cloud service.
6. Funktioner
- 2K Full HD-opløsning: Giver klar og detaljeret video.
- 145° vidvinkelobjektiv: Tilbyder en bred view af din dørtrin.
- Batteridrevet: Ensures easy, wire-free installation.
- 2.4 GHz Wi-Fi-forbindelse: Stable and reliable wireless connection.
- IP65 Vejrbestandighed: Built to withstand various outdoor conditions (rain, heat, hail, sun, dust).
- Tyverisikringsalarm: Siren sounds if the doorbell is tampered med.
- Stemmeskifter: Enhances privacy during two-way audio.
- Pre-Recorded Voice Messages: Respond quickly with custom messages.
- Familiedeling: Supports up to 15 online users and 20 user accounts.
- Kompatibilitet: Fungerer med Alexa og Google Assistant.

Billede: Overview of MUBVIEW Bell J7 features.
7. Vedligeholdelse
7.1 Batteriopladning
The doorbell is powered by rechargeable batteries. Monitor the battery level through the app and recharge as needed. The battery life can extend up to 180 days on a single charge, depending on activity and settings.
7.2 Rengøring
Wipe the camera lens and the doorbell's exterior with a soft, damp cloth to remove dust and debris. Avoid using harsh chemicals or abrasive materials that could damage the device.
7.3 Vejrbestandighed
MUB'enVIEW Bell J7 is IP65 weather-resistant, designed to endure various outdoor conditions. However, extreme weather conditions may still impact performance or battery life.

Image: IP65 Weather Resistance of the MUBVIEW Bell J7 doorbell.
8. Fejlfinding
| Spørgsmål | Mulig løsning |
|---|---|
| Dørklokken opretter ikke forbindelse til Wi-Fi | Ensure your Wi-Fi is 2.4GHz. Move the doorbell closer to your router during setup. Reset the doorbell and try again. |
| Hyppige falske bevægelsesalarmer | Adjust the motion detection sensitivity in the app. Set custom motion zones to exclude busy areas or moving foliage. |
| Dårlig videokvalitet | Tjek din Wi-Fi-signalstyrke i appen. Sørg for, at kameralinsen er ren og fri for blokeringer. |
| Kort batterilevetid | Reducer bevægelsesdetektionsfølsomheden eller hyppigheden af live-signaler view access. Ensure the doorbell is fully charged. |
| Anti-theft alarm not working | Ensure the anti-theft feature is enabled in the app settings. Check if the doorbell is properly seated in its mounting bracket, activating the tamper knap. |
9. Specifikationer
- Modelnavn: Klokke J7
- Videooptagelsesopløsning: 2K
- Forbindelse teknologi: Trådløs (2.4 GHz Wi-Fi)
- Strømkilde: Batteridrevet (3 A-batterier medfølger)
- Indendørs/udendørs brug: Udendørs
- Vandmodstandsniveau: IP65 vandtæt
- Særlige funktioner: 2-Way Audio, Built-In Light, HD Resolution, Image Sensor, Motion Sensor, Voice Changer, Anti-Theft Alarm
- Kompatible enheder: Smartphone (via CloudEdge/MUBVIEW app)
- Produktdimensioner: 1.37 x 5.27 x 2.2 tommer
- Varens vægt: 15.4 ounce
10. Garanti og support
MUBVIEW is committed to providing quality products and customer satisfaction. For any inquiries or support needs, please refer to the following:
- Kundeservice: Available via Call Service (9AM-5PM EST) and Online Email.
- Returnerer: 30-day Amazon return policy applies.
- Beskyttelsesplaner: Der kan købes valgfrie 2-årige og 3-årige beskyttelsesplaner.
For detailed contact information, please visit the official MUBVIEW website or refer to the contact details provided in the product packaging.

Image: MUBVIEW Customer Service details.


