1. Introduktion
This manual provides essential information for setting up, operating, maintaining, and troubleshooting your HP G9 Laptop Computer. The HP G9 is designed for reliable performance, featuring an Intel Celeron Quad Core N4120 processor, 8GB RAM, 256GB PCIe SSD, and Windows 11 Pro operating system. Please read this manual thoroughly to ensure optimal use of your device.
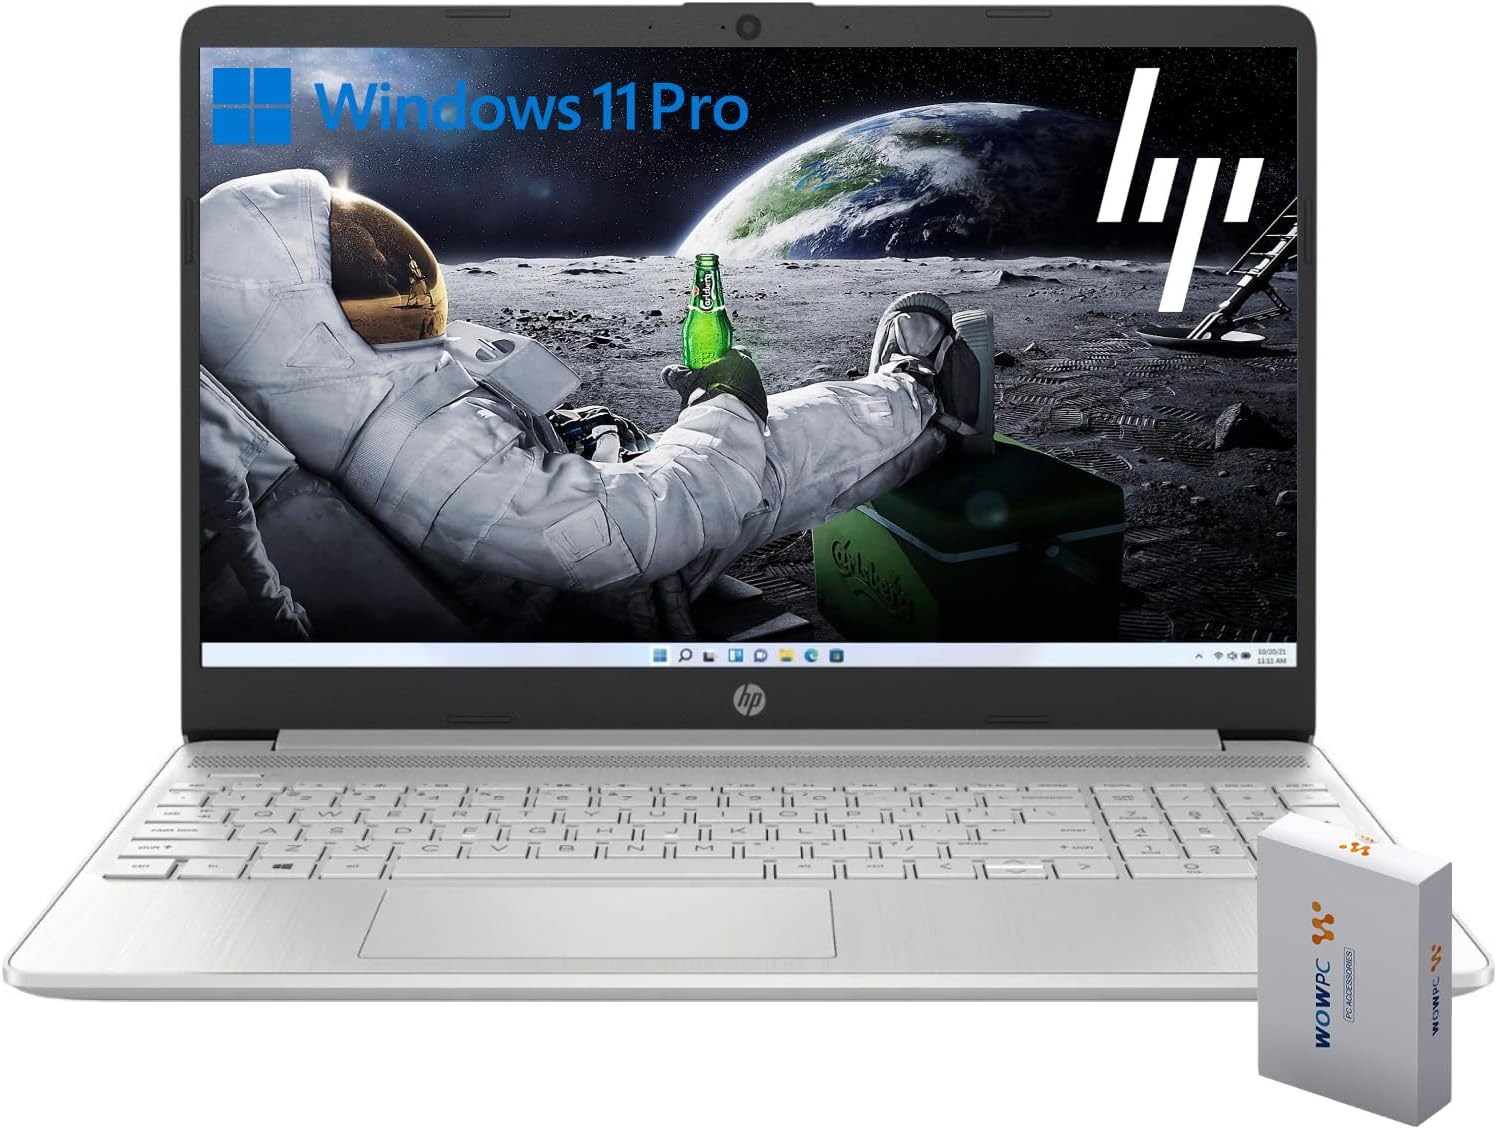
Image 1.1: HP G9 Laptop Computer. This image shows the laptop with its screen displaying the Windows 11 Pro desktop, featuring an astronaut on the moon background. A WOWPC Recovery USB is visible next to the laptop.
2. Pakkens indhold
Kontroller, at alle varer er til stede i produktemballagen:
- HP G9 Laptop Computer
- Strømadapter og kabel
- WOWPC-gendannelses-USB
- Hurtigstartguide (hvis inkluderet)
3. Produktet er slutview
3.1 Nøglefunktioner
- Processor: Intel Celeron Quad Core N4120 (4 Cores, 4 Threads, up to 2.6 GHz Turbo Speed)
- Operativsystem: Windows 11 Pro 64-bit
- Hukommelse (RAM): 8GB DDR4
- Opbevaring: 256GB PCIe-NVMe SSD
- Grafik: Integreret Intel Graphics
- Vise: 15.6-inch HD (1366 x 768) anti-glare panel
- Trådløs forbindelse: Wi-Fi 6, Bluetooth 5.2
- Lyd: Dual stereo speakers, dual array microphones
- Tastatur: Full-size with numeric keypad
- Webcam: Built-in HD 720p

Billede 3.1: Nøglefunktioner ovenforview. This graphic highlights the Intel Quad-Core N4120 Processor, Windows 11 Pro, Storage options, RAM, WOWPC Recovery USB, USB 3.2, Wi-Fi 6, Bluetooth 5.2, RJ-45, and Ergonomic Design.
3.2 Porte og stik
Sæt dig bekendt med de forskellige porte på din bærbare computer:
- Venstre side: Power Connector, USB Type-A (5Gbps signaling rate)
- Højre side: Multi-format SD media card reader, Headphone/microphone combo, USB-C (5Gbps signaling rate), HDMI 1.4b Output, RJ-45 (Ethernet)

Image 3.2: Laptop Port Layout. This image illustrates the location of the Power Connector, USB Type-A port on the left side, and the Multi-format SD media card reader, Headphone/Microphone Combo jack, USB-C port, and HDMI 1.4b port on the right side.
4. Indledende opsætning
4.1 Tilslutning af strøm
- Connect the power adapter to the power connector on the laptop.
- Sæt strømkablet i en stikkontakt.
- Allow the battery to charge for a few minutes before initial use.
4.2 Første opstart og Windows 11 Pro-opsætning
- Åbn låget på den bærbare computer, og tryk på tænd/sluk-knappen.
- Follow the on-screen instructions to complete the Windows 11 Pro initial setup, including language selection, region, keyboard layout, and network connection.
- Create a user account and set up a password or PIN.
4.3 Tilslutning til et netværk
During the initial setup, you will be prompted to connect to a Wi-Fi network. If you skip this step, you can connect later:
- Klik på Netværk icon (Wi-Fi or Ethernet) in the taskbar.
- Select your desired Wi-Fi network from the list and click Forbinde.
- Indtast netværkssikkerhedsnøglen (adgangskoden), hvis du bliver bedt om det.
5. Betjening af din bærbare computer
5.1 Grundlæggende navigation
- Touchpad: Use gestures for scrolling, zooming, and switching applications. Refer to Windows settings for touchpad customization.
- Tastatur: The full-size keyboard includes a numeric keypad for efficient data entry. Function keys (F1-F12) provide quick access to system controls.
5.2 Windows 11 Pro-funktioner
Windows 11 Pro offers enhanced security, productivity tools, and performance:
- Snap Layouts and Groups: Organize your open windows efficiently for improved multitasking.
- Avanceret sikkerhed: Features like Windows Hello, BitLocker, and Windows Security protect your data and device.
- Microsoft Teams-integration: Stay connected with colleagues and friends directly from the taskbar.

Image 5.1: Windows 11 Pro Features. This image highlights the benefits of Windows 11 Pro, including advanced security features and optimized productivity tools for business and professional users.
5.3 Brug af WOWPC Recovery USB
The included WOWPC Recovery USB is designed to assist with system recovery in case of software issues. Keep it in a safe place.
- To use, insert the USB into an available port.
- Restart your laptop and access the boot menu (often by pressing F9, F10, or F12 during startup, consult your laptop's specific boot key).
- Select the WOWPC Recovery USB as the boot device and follow the on-screen instructions for recovery options.
6. Vedligeholdelse og pleje
6.1 Rengøring af din bærbare computer
- Brug en blød, fnugfri klud lidt damprengøres med vand eller en skærmrens til skærmen.
- Brug en blød klud til tastatur og kabinet. Undgå skrappe kemikalier.
- Sørg for, at den bærbare computer er slukket og frakoblet stikket, inden rengøring.
6.2 Softwareopdateringer
Opdater regelmæssigt dit Windows-operativsystem og dine drivere for at sikre optimal ydeevne og sikkerhed:
- Gå til Indstillinger > Windows-opdatering for at søge efter og installere opdateringer.
- Allow updates to complete without interrupting the process.
6.3 Pleje af batterier
- Undgå ekstreme temperaturer.
- For long-term storage, charge the battery to approximately 50% and store the laptop in a cool, dry place.
- Periodically discharge and recharge the battery to maintain its health.
7. Fejlfinding
Dette afsnit omhandler almindelige problemer, du kan støde på.
7.1 Bærbar computer tænder ikke
- Sørg for, at strømadapteren er korrekt tilsluttet både den bærbare computer og en fungerende stikkontakt.
- Kontroller, at stikkontakten fungerer ved at tilslutte en anden enhed.
- Hvis batteriet er helt afladet, skal du lade det oplade i mindst 30 minutter, før du forsøger at tænde det.
7.2 No Wi-Fi Connection
- Check if Wi-Fi is enabled in Windows settings (Indstillinger > Netværk og internet > Wi-Fi).
- Genstart din router og dit modem.
- Sørg for, at du er inden for rækkevidde af dit Wi-Fi-netværk.
- Prøv at glemme netværket og genoprette forbindelsen.
7.3 Langsom ydeevne
- Luk unødvendige programmer, der kører i baggrunden.
- Søg efter og installer eventuelle ventende Windows-opdateringer.
- Kør en diskoprydning for at frigøre lagerplads.
- Scan for malware using Windows Security.
8. Specifikationer
| Feature | Detalje |
|---|---|
| Modelnavn | HP G9 |
| Operativsystem | Windows 11 Pro |
| Processor | Intel Celeron Quad Core N4120 (1.1 GHz base, up to 2.6 GHz turbo) |
| VÆDDER | 8GB DDR4 |
| Opbevaring | 256GB PCIe-NVMe SSD |
| Grafik | Integreret Intel Graphics |
| Vise | 15.6-inch HD (1366 x 768 pixels), anti-glare |
| Trådløs forbindelse | Wi-Fi 6, Bluetooth 5.2 |
| Havne | 1x SuperSpeed USB-C 10Gbps, 2x SuperSpeed USB-A 10Gbps, 1x Headphone/microphone combo, 1x HDMI 1.4 Output, 1x RJ-45, 1x Audio-out, SD-Reader |
| Webcam | HD 720p |
| Dimensioner (L x B x H) | 14.09 x 9.53 x 0.78 tommer |
| Vægt | 4 LB |
9. Garanti og support
9.1 Produktgaranti
Your HP G9 Laptop Computer comes with a standard manufacturer's warranty. Please refer to the warranty card included in your product packaging or visit the official HP support webwebstedet for detaljerede garantivilkår og -betingelser, der er specifikke for din region.
9.2 Teknisk support
For teknisk assistance, download af drivere eller yderligere information, besøg venligst den officielle HP-supportside. website. You can typically find support resources by searching for your specific model (HP G9) on their webwebsted.
The included WOWPC Recovery USB is a valuable tool for system recovery and troubleshooting software-related issues. Keep it accessible for future use.