Indledning
This user manual provides comprehensive instructions for the Chieftec AS-02B-TG-OP Midi Tower PC Case. It covers essential information regarding product features, installation procedures, operational guidelines, maintenance tips, and technical specifications. Please read this manual thoroughly before installing or operating your PC case to ensure proper functionality and longevity.
Produkt overview
The Chieftec AS-02B-TG-OP is a Midi Tower PC case designed for optimal cooling and a modern aesthetic. It features a sleek brushed front panel, a tempered glass side panel, and a pre-installed 120mm PWM fan for efficient heat dissipation.
Nøglefunktioner:
- Sleek brushed front panel design.
- Tempered glass side panel for component visibility.
- Optimized interior layout for efficient cooling.
- Pre-installed 120mm PWM fan at the rear.
- Support for various motherboard form factors (ATX, micro ATX, Mini-ITX).
- Multiple expansion bays for storage devices.
- Front I/O panel with USB 2.0, USB Type-C, and audio ports.
Komponentidentifikation:

Figur 1: Foran til venstre view of the Chieftec AS-02B-TG-OP PC case, showcasing the brushed front panel and the tempered glass side panel.

Figur 2: Direkte front view of the Chieftec AS-02B-TG-OP PC case, highlighting the brushed finish of the front panel.

Figur 3: Front-right angle view of the Chieftec AS-02B-TG-OP PC case, showing the subtle design elements.
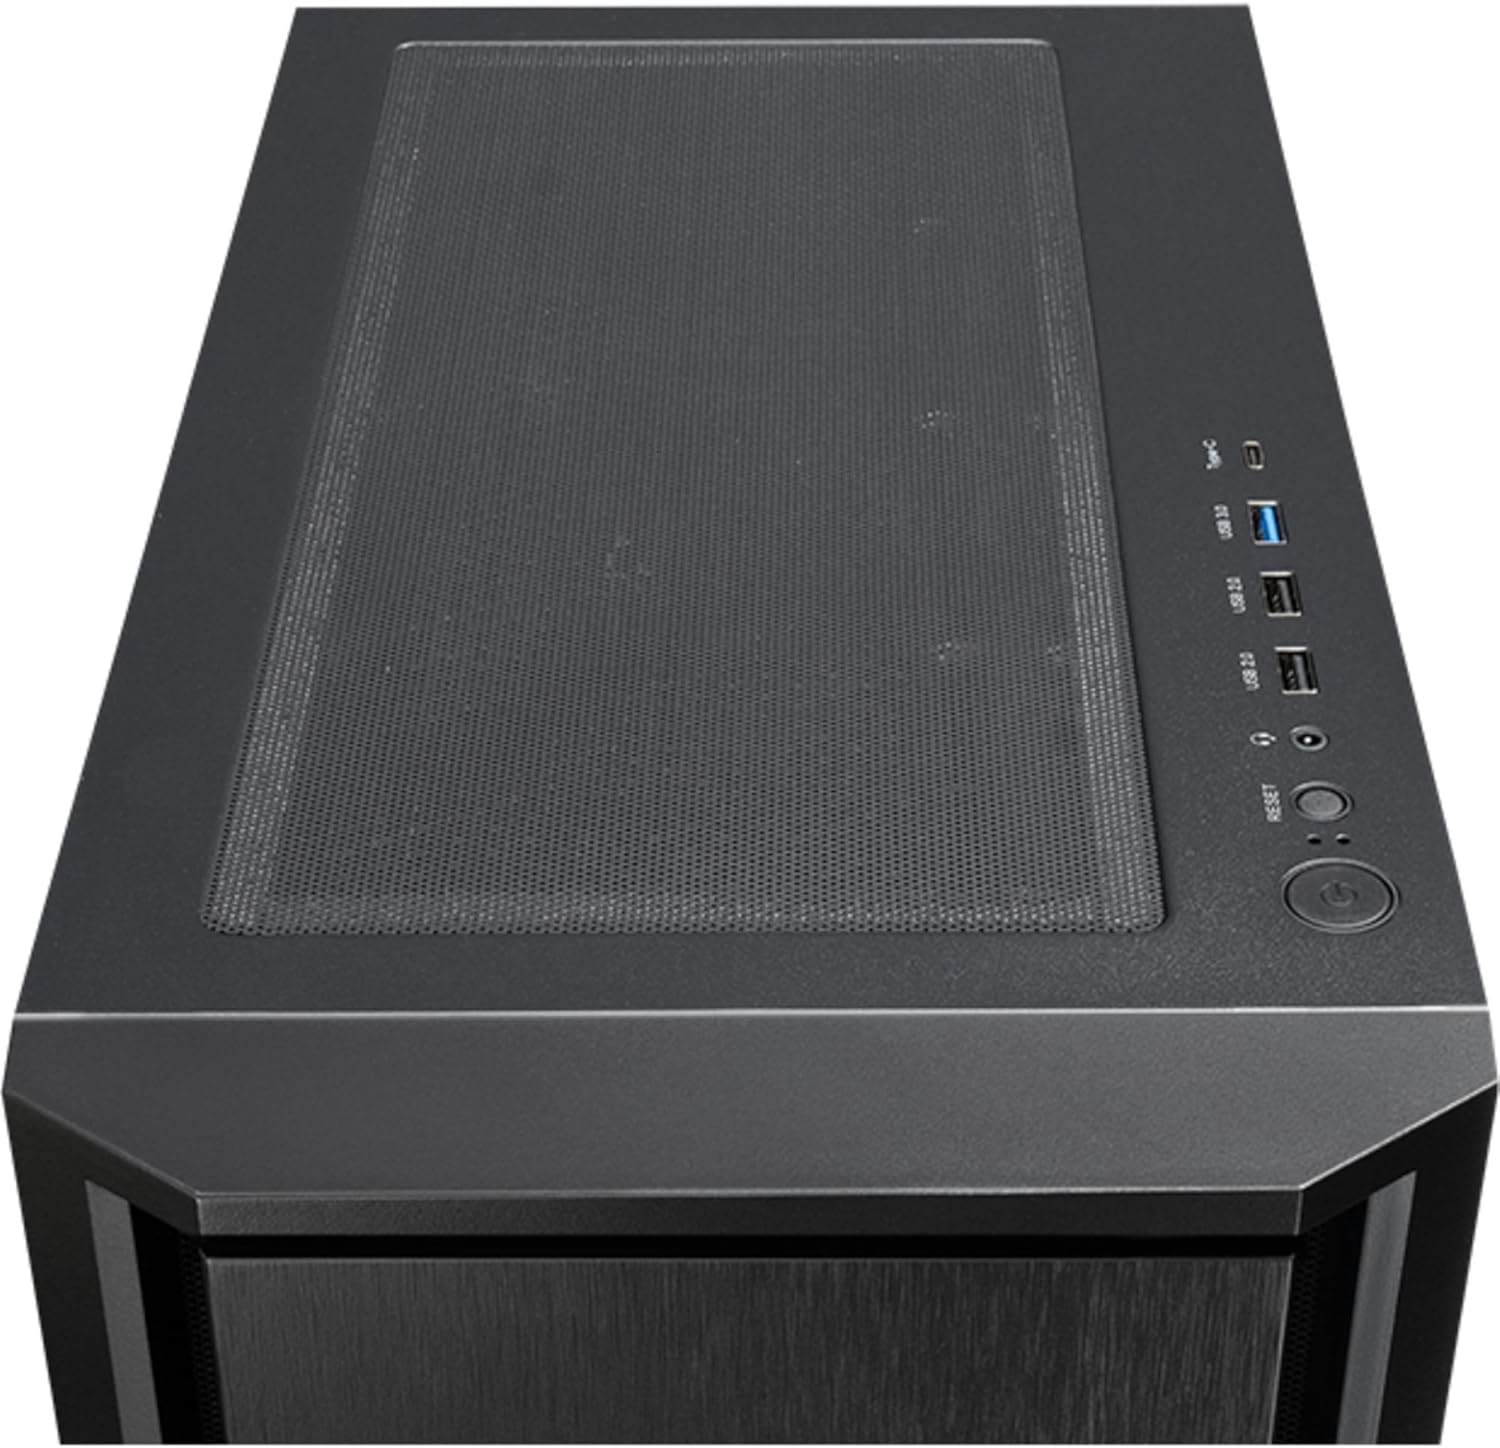
Figur 4: Top view of the Chieftec AS-02B-TG-OP PC case, showing the top ventilation and the front I/O panel with USB ports and audio jacks.

Figur 5: Bag view of the Chieftec AS-02B-TG-OP PC case, detailing the expansion slots, rear fan mount, and PSU opening.

Figur 6: Bund view of the Chieftec AS-02B-TG-OP PC case, showing the case feet and bottom dust filter area.
Opsætning og installation
This section guides you through the process of installing components into your Chieftec AS-02B-TG-OP PC case.
1. Preparing the Case:
- Placer etuiet på en stabil, flad overflade.
- Carefully remove the tempered glass side panel by unscrewing the thumb screws at the rear.
- Remove the opposite side panel to access the cable management area.
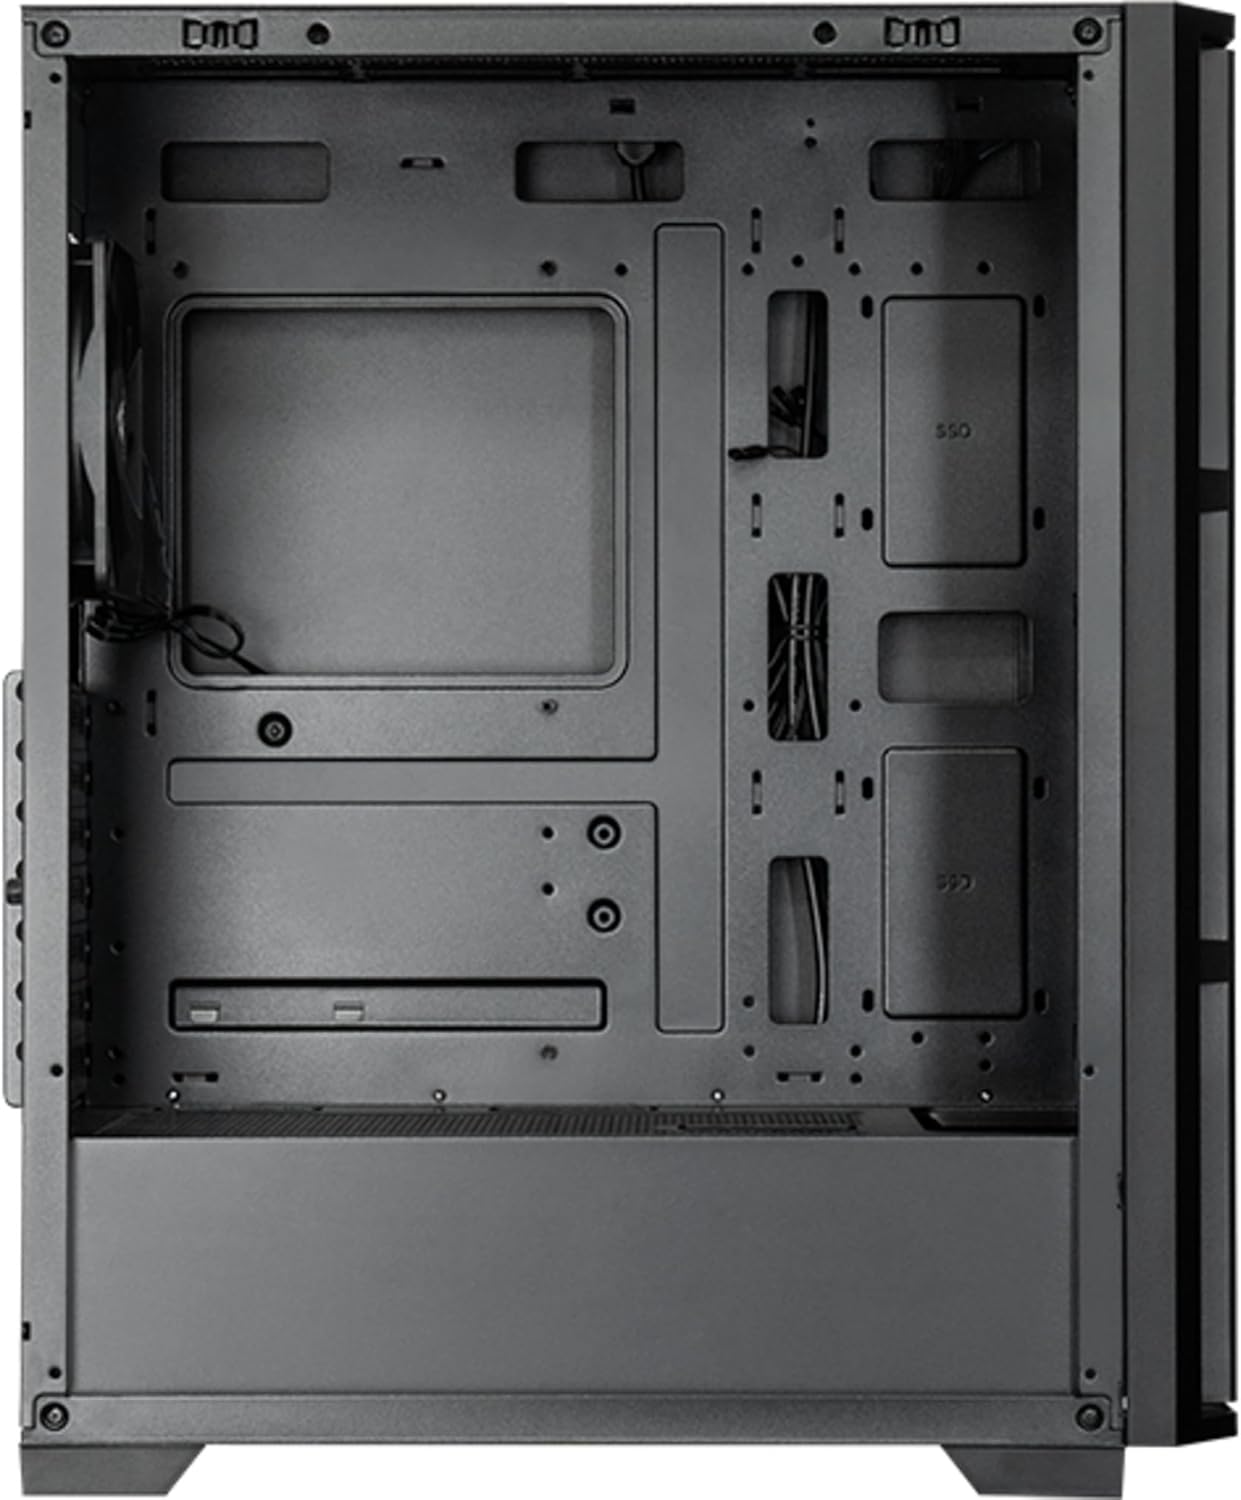
Figur 7: Indre view of the main compartment, showing the motherboard tray and fan mounting points.
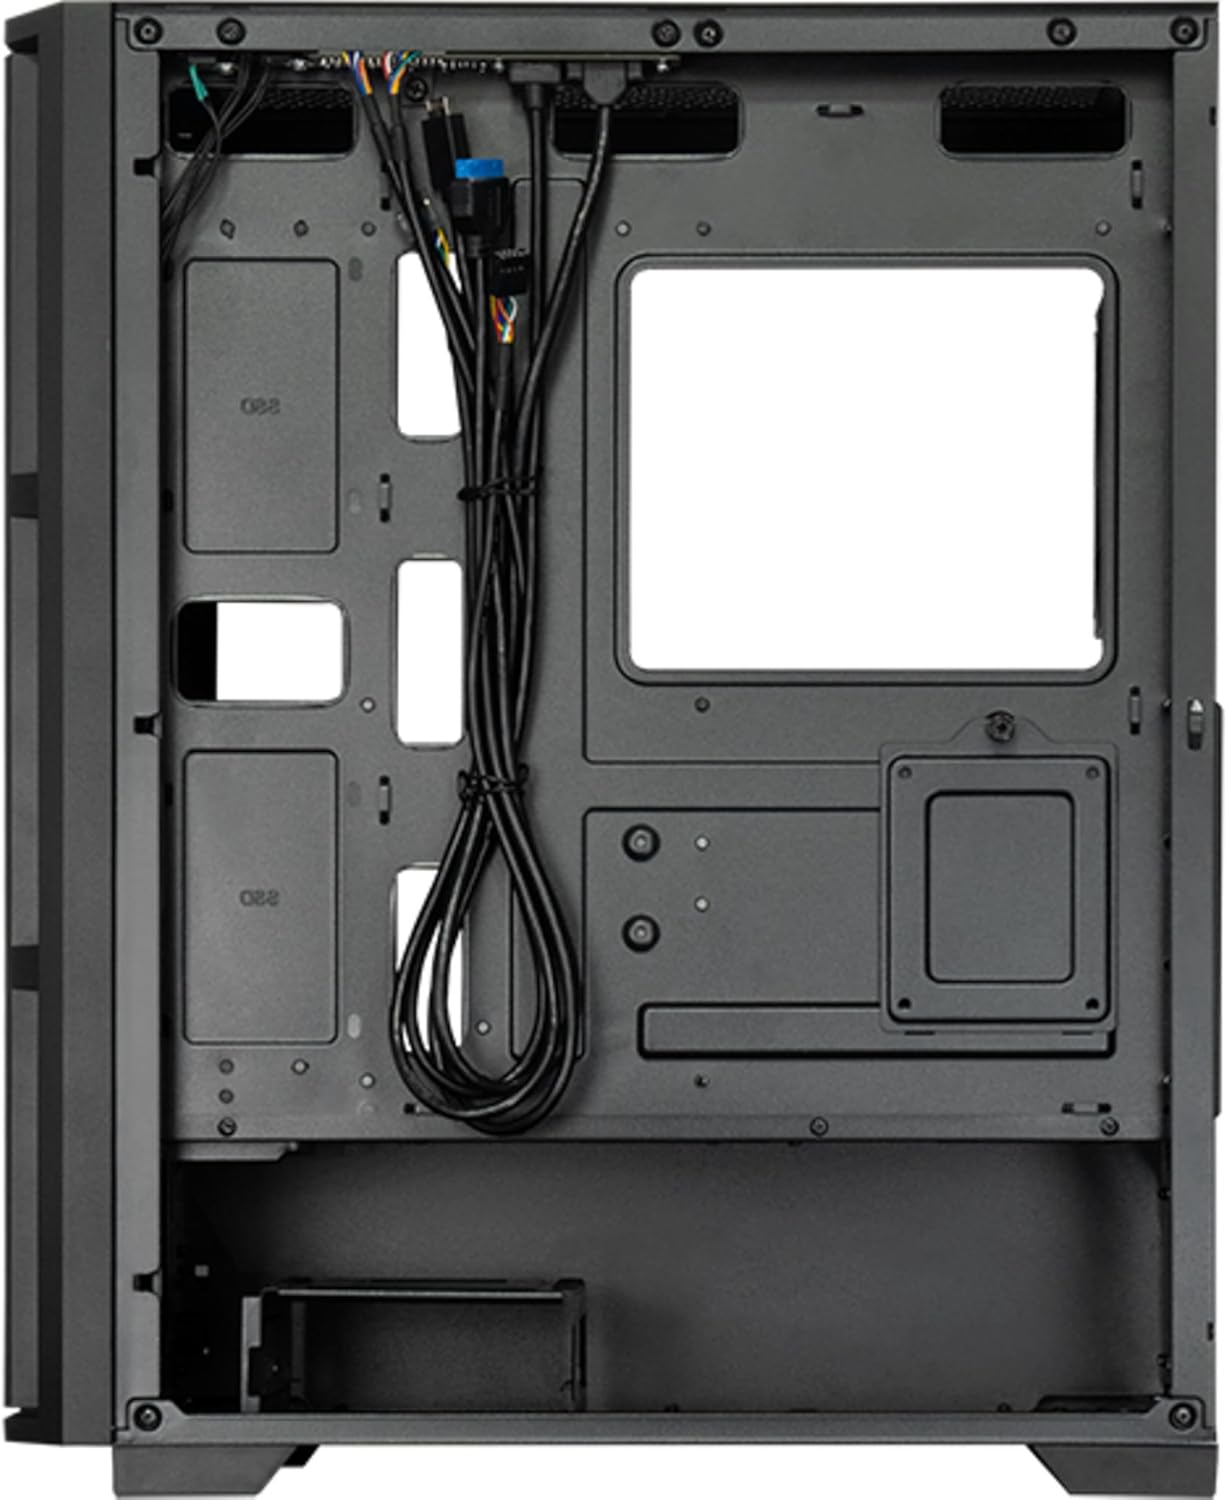
Figur 8: Indre view from the backside, illustrating the cable management routes and drive mounting locations.
2. Installation af bundkort:
- Installer I/O-skjoldet i den bageste åbning af kabinettet.
- Align your ATX, micro ATX, or Mini-ITX motherboard with the standoffs inside the case.
- Fastgør bundkortet med de medfølgende skruer.
3. Power Supply Unit (PSU) Installation:
- The PSU is not included. Install your ATX power supply into the dedicated compartment at the bottom rear of the case.
- Fastgør strømforsyningen med skruer fra bagsiden af kabinettet.
4. Storage Drive Installation:
- Install 3.5" HDDs into the drive cages located at the bottom.
- Install 2.5" SSDs/HDDs into the dedicated mounting points behind the motherboard tray.
- Secure all drives with appropriate screws.
5. Graphics Card and Expansion Cards:
- Fjern de nødvendige dæksler til udvidelsespladserne på bagsiden af kabinettet.
- Insert your graphics card or other expansion cards into the PCIe slots on the motherboard.
- Fastgør kortene med skruer.
6. Kabelstyring:
- Route all power and data cables through the cutouts and tie-down points behind the motherboard tray.
- Connect the front panel I/O cables (USB, audio, power switch, reset switch, LED indicators) to the corresponding headers on your motherboard.
- Ensure cables do not obstruct airflow.
7. Installation af ventilator og kølesystem:
- The case includes one pre-installed 120mm PWM fan at the rear.
- Additional fans can be installed at the front (up to 3x 120mm/140mm) and top (up to 2x 120mm/140mm).
- Radiators up to 360mm can be installed at the front and up to 280mm at the top.
- Connect fan power cables to the motherboard fan headers.
Betjeningsvejledning
Once all components are installed and secured, and the side panels are reattached, your PC is ready for operation.
Tænder:
- Connect the power cable from your power supply to a wall outlet.
- Tryk på tænd/sluk-knappen, der er placeret på kabinettets øverste I/O-panel.
- The system should boot up, and any installed lighting will illuminate.
Front I/O Panel Usage:
- USB 2.0-porte (x2): For connecting peripherals such as keyboards, mice, and USB drives.
- USB Type-C Port (x1): Til tilslutning af moderne USB-C-enheder.
- Lydstik (hovedtelefon/mikrofon): Til tilslutning af hovedtelefoner, højttalere eller mikrofoner.
- Nulstil knap: To restart the computer.
Opretholdelse
Regelmæssig vedligeholdelse er med til at sikre optimal ydeevne og forlænger levetiden for dine pc-komponenter.
Rensning:
- Ydre: Brug en blød, damp cloth to wipe down the exterior surfaces. Avoid abrasive cleaners.
- Støvfiltre: The case features dust filters (e.g., on the top and bottom). Regularly remove and clean these filters with compressed air or by rinsing with water (ensure they are completely dry before reinstallation).
- Indre: Periodically use compressed air to remove dust buildup from fans, heatsinks, and other internal components. Ensure the system is powered off and unplugged before cleaning the interior.
Luftstrøm:
- Sørg for tilstrækkelig plads omkring kabinettet for korrekt luftgennemstrømning.
- Undgå at blokere ventilationsåbninger.
Fejlfinding
Dette afsnit omhandler almindelige problemer, du kan støde på.
Ingen strøm:
- Kontroller, om strømkablet er korrekt tilsluttet til både strømforsyningen og stikkontakten.
- Ensure the power switch on the PSU itself is in the "ON" position.
- Kontroller, at kablet til strømafbryderen på frontpanelet er korrekt tilsluttet bundkortets header.
Ventilatorer der ikke drejer:
- Check if fan power cables are securely connected to the motherboard fan headers or a fan controller.
- Ensure fan speed settings in BIOS/UEFI or operating system are not set to zero RPM.
Frontpanel USB/lyd virker ikke:
- Verify that the USB and audio cables from the front panel are correctly connected to the corresponding headers on the motherboard.
- Check motherboard drivers for USB and audio functionality.
Specifikationer
| Feature | Detalje |
|---|---|
| Modelnavn | AS-02B-TG-OP |
| Mærke | Chieftec |
| Formfaktor | Midi-tårnet |
| Produkt farve | Sort |
| Supported Motherboard Form Factors | ATX, micro ATX, Mini-ITX |
| Dimensioner (B x D x H) | 215 mm x 390 mm x 485 mm (8.46" x 15.35" x 19.09") |
| Varens vægt | 5.3 kg (ca. 11.68 lbs) |
| 3.5" Expansion Bays | 2 |
| 2.5" Expansion Bays | 2 |
| 5.25" Expansion Bays | 0 |
| Udvidelsesslots | 7 |
| Sidevindue | Ja (hærdet glas) |
| Belysning | Yes (Multi-color) |
| Max CPU kølerhøjde | 16.5 cm |
| Front I / O-porte | 2x USB 2.0, 1x USB Type-C, Audio In/Out |
| Forudinstallerede ventilatorer | 1x 120mm PWM (Rear) |
| Supported Front Fans (Max) | 3x 120 mm eller 3x 140 mm |
| Supported Top Fans (Max) | 2x 120 mm eller 2x 140 mm |
| Supported Front Radiators | 120 mm, 140 mm, 240 mm, 280 mm, 360 mm |
| Supported Top Radiators | 120 mm, 140 mm, 240 mm, 280 mm |
| Strømforsyning inkluderet | Ingen |
Garantioplysninger
The Chieftec AS-02B-TG-OP PC case comes with a 2 års producentgaranti from the date of purchase. This warranty covers defects in materials and workmanship under normal use. It does not cover damage caused by misuse, accident, modification, unauthorized repair, or improper installation.
Gem venligst dit købsbevis for garantikrav.
Støtte
For technical assistance, troubleshooting beyond this manual, or warranty inquiries, please contact Chieftec customer support.
- Webwebsted: Refer to the official Chieftec webwebsted for supportressourcer og kontaktoplysninger.
- E-mail/Telefon: Specific contact details can typically be found on the product packaging or the official Chieftec support page.
When contacting support, please have your product model (AS-02B-TG-OP) and proof of purchase readily available.


