1. Introduktion
Thank you for choosing the Rollerhouse DC2702 15-Channel RF Remote Control. This remote is designed to provide convenient and efficient control over your motorized window shades. This manual will guide you through the setup, operation, and maintenance of your new remote control, ensuring optimal performance and longevity.
Læs venligst denne manual grundigt, inden du bruger produktet, og gem den til senere brug.
2. Produktet er slutview og funktioner
The Rollerhouse DC2702 is a versatile 15-channel radio frequency (RF) remote control, ideal for managing multiple motorized window shades individually or in groups. Its robust 433MHz RF signal ensures reliable operation, even through walls and floors, with an effective range of up to 100 meters.
- 15 uafhængige kanaler: Control up to 15 individual shades or groups of shades.
- Lang distance: Strong 433MHz RF signal penetrates walls and floors, offering a range of up to 100 meters.
- DIY-venligt: Easy pairing with compatible motors, requiring no complex wiring.
- Gruppekontrol: Ability to control multiple shades simultaneously on a single channel.
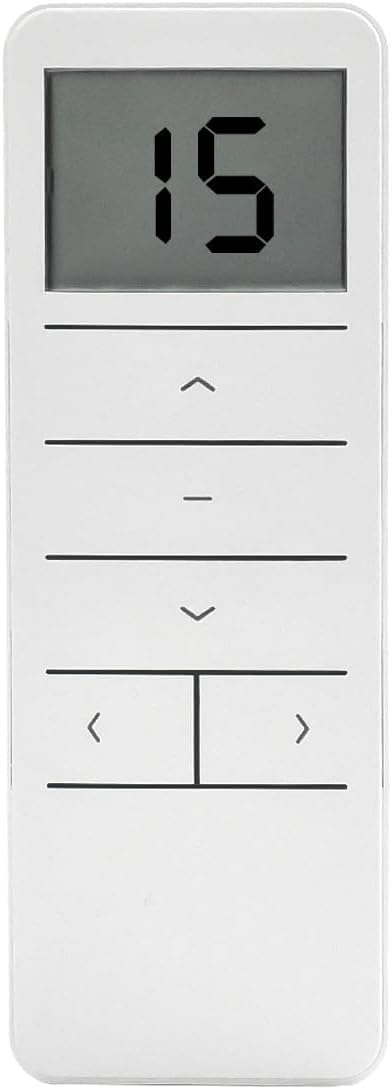
Figur 2.1: Forside view of the Rollerhouse DC2702 remote control, displaying '15' on the LCD screen and showing the control buttons.
3. Pakkens indhold
Når du åbner din pakke, skal du sørge for, at alle følgende varer er til stede:
- DC2702 15-Channel RF Remote Control
- Remote Control Wall Mount/Stand
- Brugervejledning (dette dokument)

Figure 3.1: The DC2702 remote control, its stand, and a small instruction manual laid out, representing the product packaging contents.
4. Opsætning og installation
4.1 Batteriinstallation
- Find batterirummets dæksel på bagsiden af fjernbetjeningen.
- Skub dækslet nedad for at åbne rummet.
- Insert one CR2450 Lithium Metal battery, ensuring the correct polarity (+/-) as indicated inside the compartment.
- Skub dækslet tilbage på plads, indtil det klikker sikkert.

Figure 4.1: Close-up of the back of the DC2702 remote control with the battery cover removed, revealing the CR2450 battery slot and the P2 setting button.
4.2 Mounting the Remote
The included remote stand allows for convenient placement or wall mounting:
- For desktop use, simply place the remote in the stand.
- For wall mounting, use appropriate screws (not included) to secure the stand to a desired wall location. Then, slide the remote into the mounted stand.
5. Betjeningsvejledning
Familiarize yourself with the buttons on your DC2702 remote control:
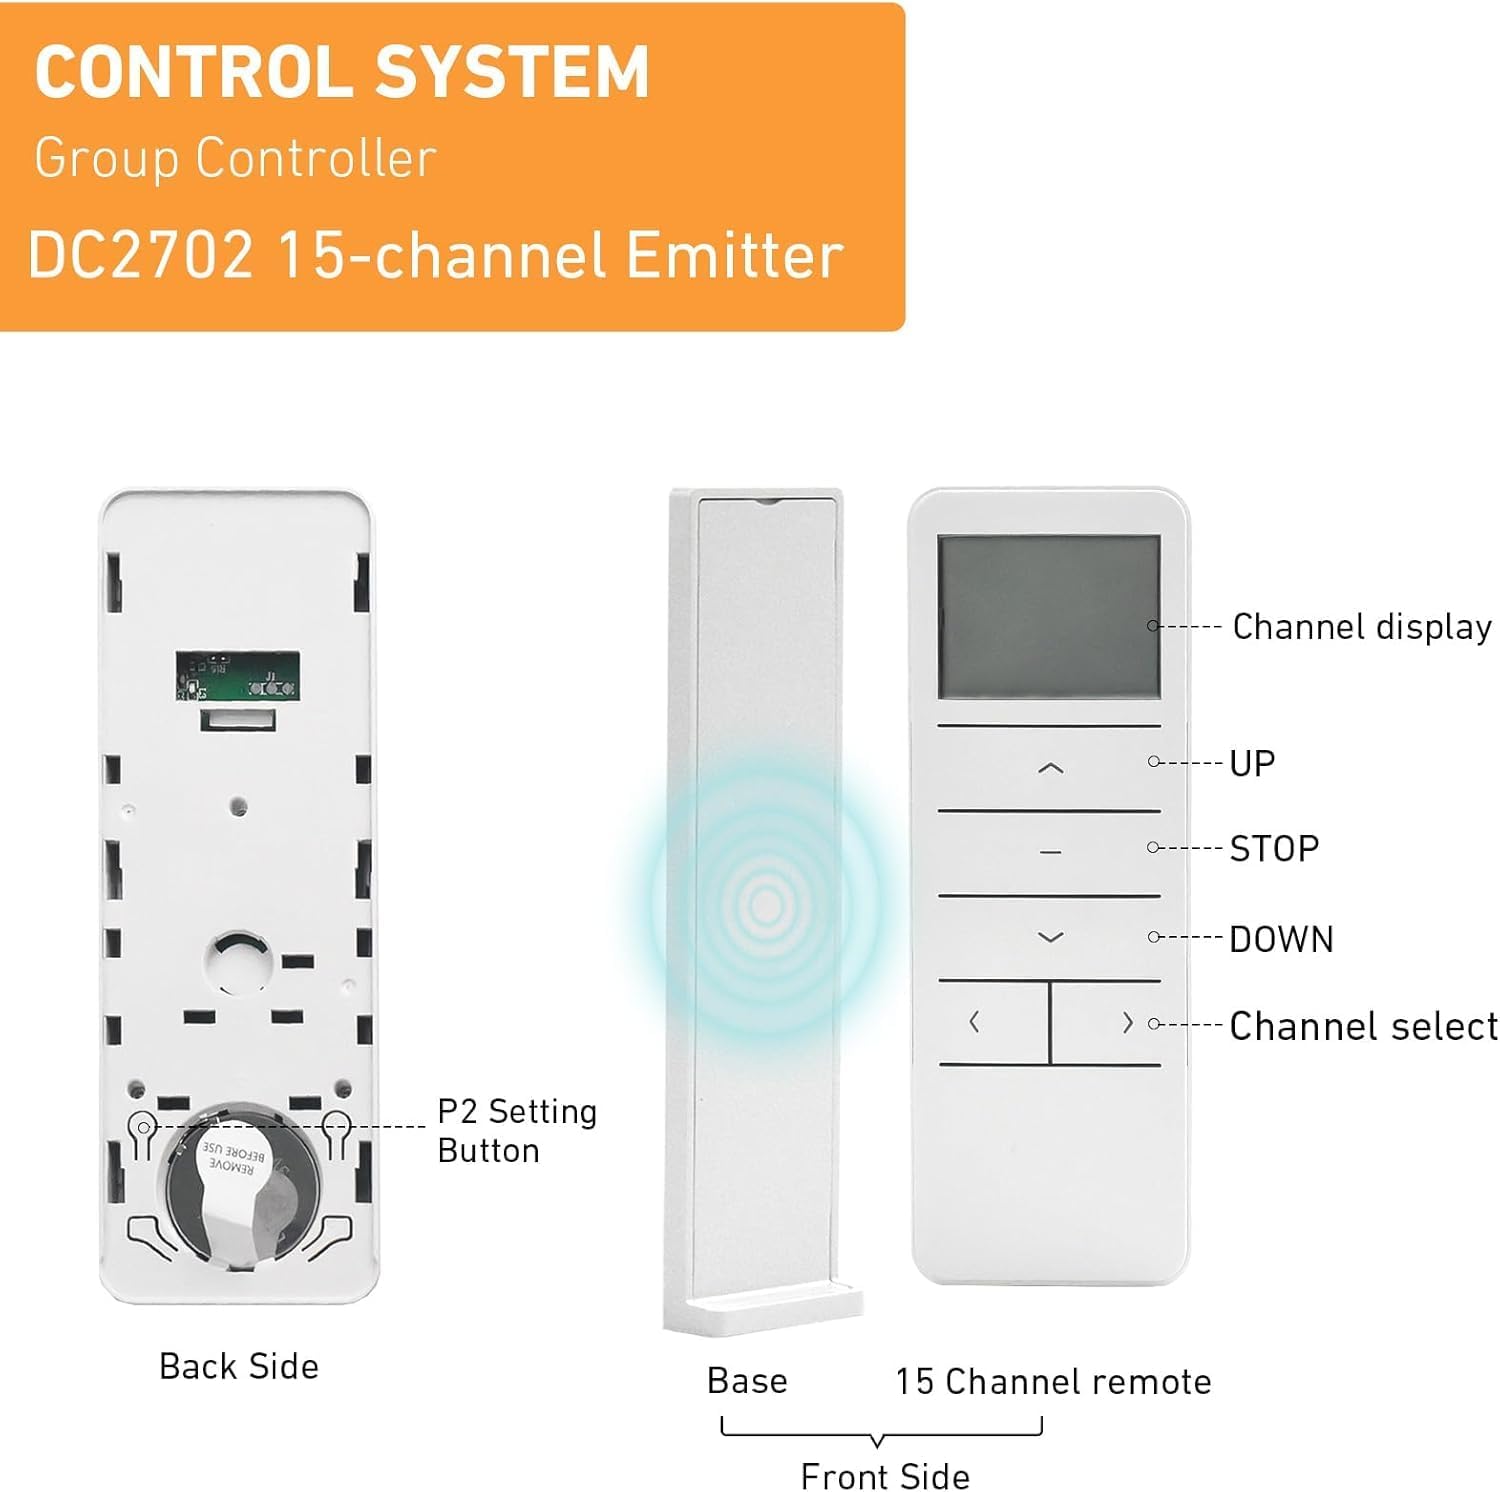
Figure 5.1: Detailed diagram of the DC2702 remote control, showing the front, back (with battery compartment and P2 button), and a base stand. Labels indicate Channel Display, UP, STOP, DOWN, and Channel Select buttons.
- Kanalvisning: Shows the currently selected channel (1-15).
- OP (▲): Moves the shade upwards.
- STOP (-): Stopper gardinet i sin nuværende position.
- NED (▼): Moves the shade downwards.
- Channel Select (< / >): Cycles through channels 1 to 15.
- P2-knap: Located on the back of the remote (under the battery cover), used for programming and pairing.
5.1 Valg af kanal
Tryk på < or > buttons to cycle through the channels. The selected channel number will be displayed on the LCD screen. Each channel can control one individual shade or a group of shades.
5.2 Basic Shade Operation
- To raise the shade: Select the desired channel and press the OP (▲) knap.
- To lower the shade: Select the desired channel and press the NED (▼) knap.
- To stop the shade: Press the STOP (-) button at any point during movement.

Figure 5.2: A person holding the DC2702 remote control, operating motorized window shades in a living room setting.
6. Programming and Pairing
The DC2702 remote control must be paired with your motorized shades to function. The exact pairing procedure may vary slightly depending on your specific motor model. Refer to your motor's instruction manual for detailed pairing steps. Generally, the process involves a combination of pressing the motor's program button and the P2 button on the remote.
6.1 General Pairing Procedure (Exampdet)
- Sørg for, at motoren er tændt.
- On the motor, press and hold its program button until the motor jogs (moves slightly) once.
- Within 5 seconds, select the desired channel on your DC2702 remote (e.g., Channel 1).
- Tryk på P2 knap on the back of the DC2702 remote (you may need a small tool like a paperclip).
- The motor should jog again, indicating successful pairing.
Repeat this process for each shade or group of shades you wish to control on different channels.
6.2 Setting Upper and Lower Limits (Motor Dependent)
If your motor supports limit setting via remote, this is typically done after pairing. Consult your motor's manual for specific instructions, which often involve using the P2 button in conjunction with the UP/DOWN buttons to set the desired stop points.
7. Vedligeholdelse
7.1 Udskiftning af batteri
When the remote's display becomes dim or unresponsive, it's time to replace the battery. Follow the battery installation steps in Section 4.1. Always use a fresh CR2450 Lithium Metal battery.
7.2 Rengøring
Brug en blød, tør klud til at rengøre fjernbetjeningen. Ved genstridige pletter kan du bruge en let tør klud.amp cloth can be used, but ensure no moisture enters the remote. Spot kun rent. Undgå at bruge skrappe kemikalier eller slibende rengøringsmidler.
8. Fejlfinding
- Fjernbetjeningen svarer ikke:
- Kontroller batteriet: Sørg for, at CR2450-batteriet er korrekt installeret og har tilstrækkelig opladning. Udskift det om nødvendigt.
- Range: Ensure you are within the operating range (up to 100m) and there are no major obstructions.
- Shade not pairing:
- Compatibility: Verify that your motorized shade is compatible with the DC2702 remote. This remote is designed to be a replacement for exact same shape and model remotes. It may not clone with existing remotes of different brands or models.
- Motor in pairing mode: Ensure your motor is correctly put into pairing mode as per its own instruction manual.
- Timing: Ensure the P2 button is pressed within the motor's pairing window (usually 5 seconds after the motor jogs).
- Shade moves in the wrong direction:
- This is typically a motor setting. Refer to your motor's instruction manual for reversing direction.

Figure 8.1: An informational image advising users on how to choose the best remote, emphasizing compatibility with the same shape or model and checking the brand.
9. Specifikationer
| Feature | Specifikation |
|---|---|
| Modelnummer | DC2702-1 |
| Kanaler | 15 |
| Radiofrekvens | 433.92 MHz |
| Batteritype | 1 x CR2450 Lithium Metal (3V) |
| Arbejdstemperatur | -10℃ til +50℃ |
| Dimensioner (L x B x H) | 130 x 45 x 10.5 mm (ca. 5.1 cm L x 1.8 cm B x 0.4 cm H) |
| Materiale | Plast |
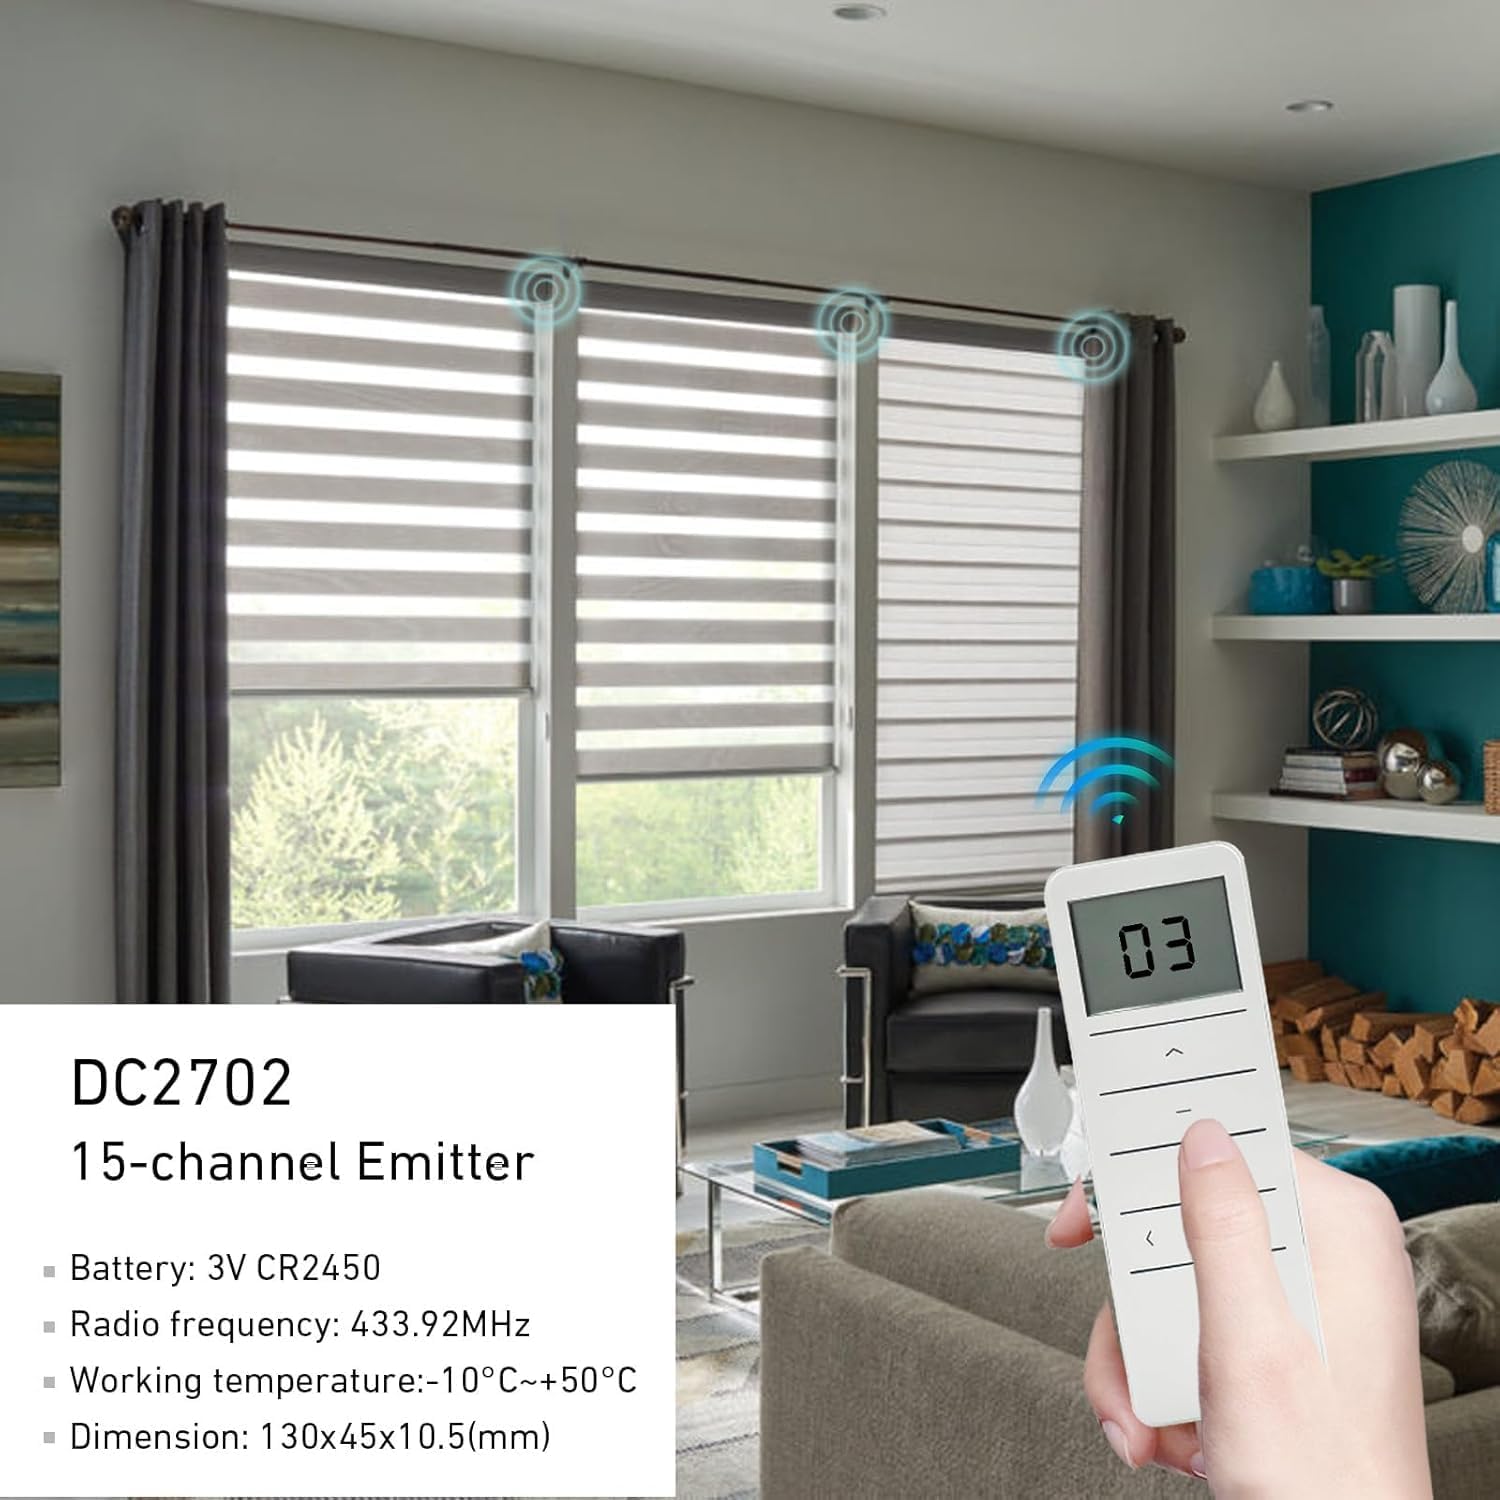
Figure 9.1: The DC2702 remote control being used in a room with multiple motorized window shades, illustrating its 433.92MHz radio frequency signal and displaying key specifications.
10. Garanti og support
Rollerhouse is committed to providing quality products and customer satisfaction. If you encounter any issues or have questions regarding your DC2702 remote control, please contact our customer service team. We can assist you in choosing the correct remote control and provide support for any operational concerns.
For assistance, please refer to the contact information provided with your purchase or visit the official Rollerhouse webwebsted.


