1. Introduktion
This user manual provides detailed instructions for the setup, operation, maintenance, and troubleshooting of your TOMLOV DM301 Pro Digital Microscope. Please read this manual thoroughly before using the device to ensure proper functionality and to maximize your viewing and capturing experience.
2. Hvad er der i æsken
Når du åbner pakken, skal du kontrollere, at alle komponenter er til stede og ubeskadigede. Standardpakken indeholder:
- TOMLOV DM301 Pro Digital Microscope with 7" IPS Display
- USB kabel
- HDMI kabel
- Strømadapter
- Prepared Slides Kit
- Brugermanual
- Rengøringsklud
- (Optional) Handheld Digital Microscope (P30green model)
- (Optional) 16GB MicroSD Card
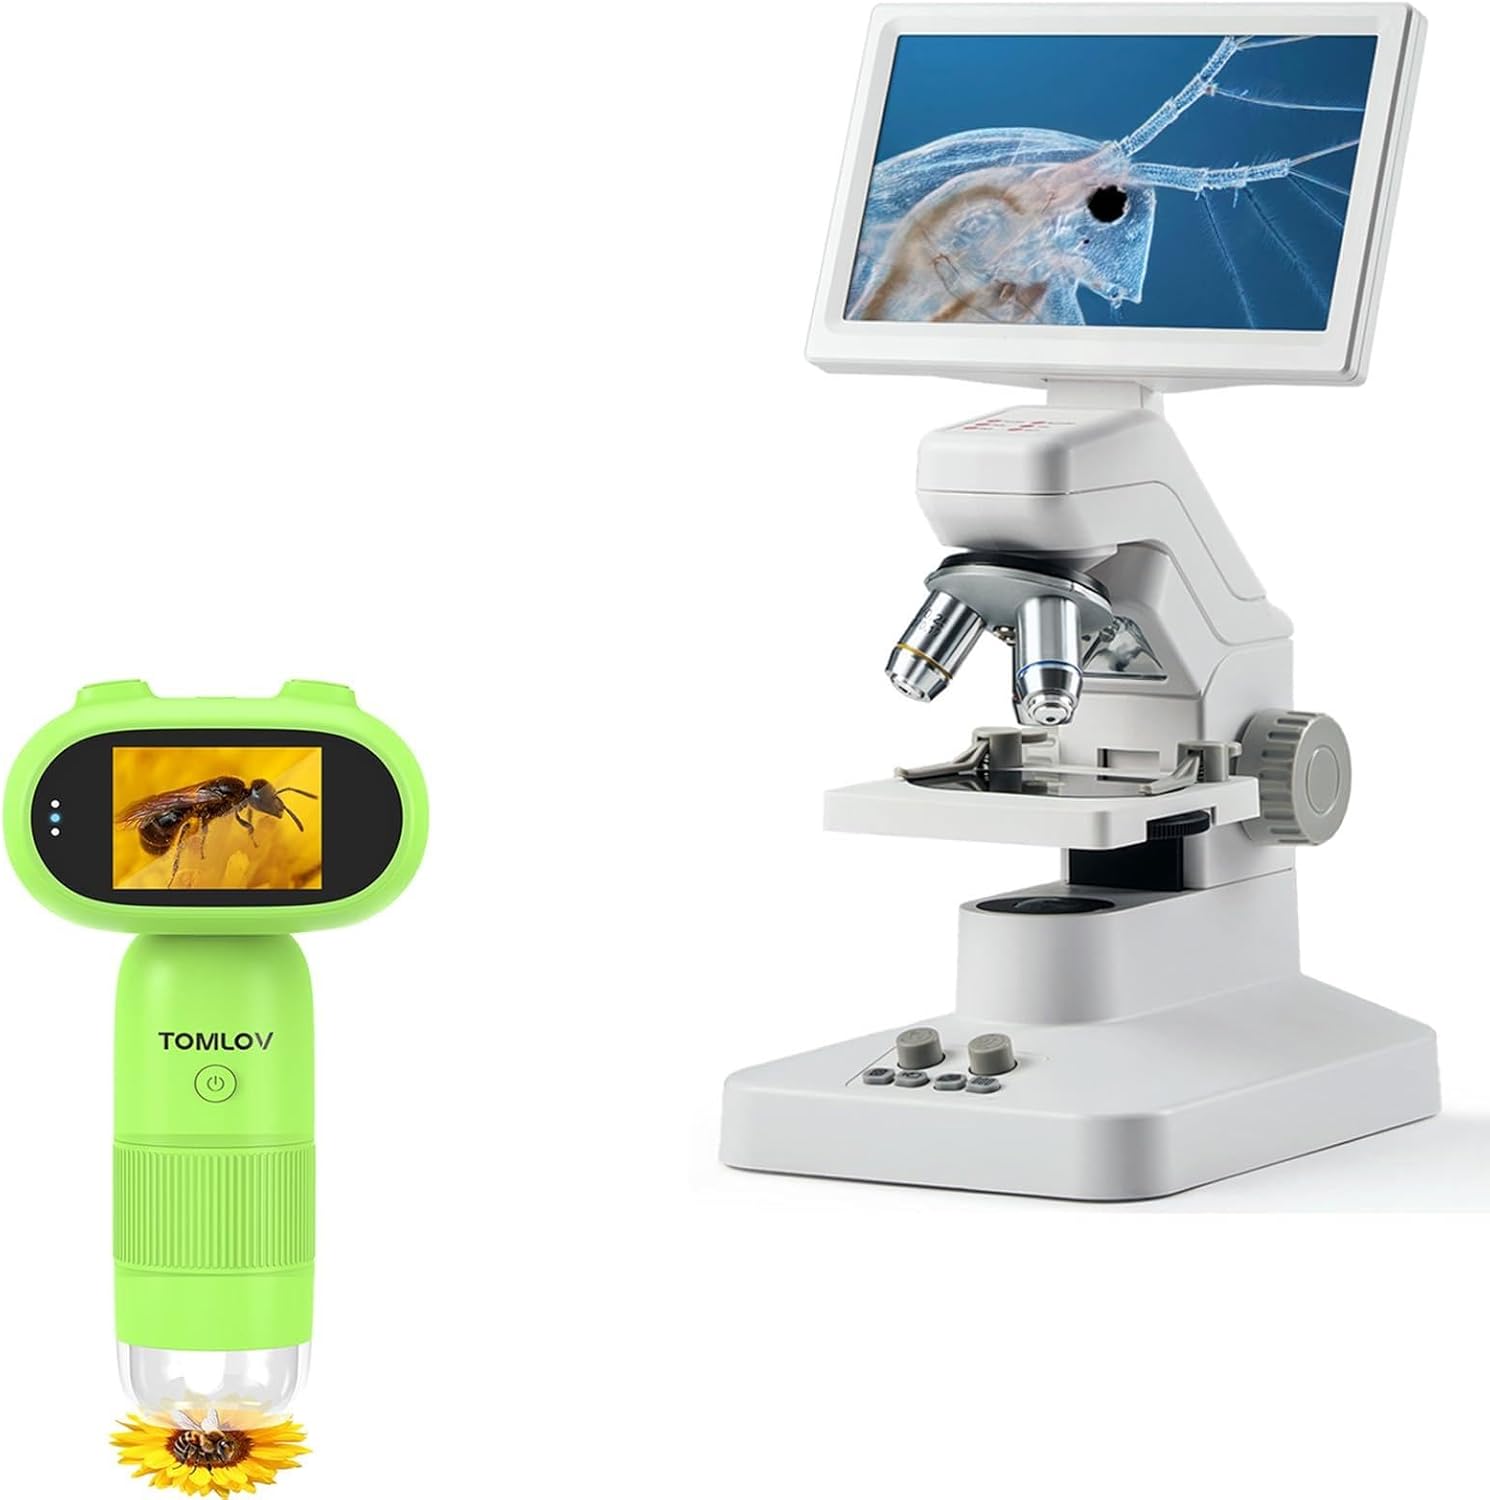
Image: Main components of the TOMLOV DM301 Pro Digital Microscope package, including the primary microscope unit and an optional handheld microscope.

Image: The optional TOMLOV P30green handheld microscope, shown with a 16GB microSD card and a set of prepared slides, indicating included accessories.
3. Produktet er slutview
Familiarize yourself with the various parts and controls of the TOMLOV DM301 Pro Digital Microscope.
- 7" IPS-skærm: Full-color screen for direct viewing.
- Objektive linser: Multiple achromatic lenses for various magnifications (e.g., 4X, 10X, 40X).
- Fokusknapper: Coarse and fine adjustment for clear imaging.
- Stage: Platform for placing specimens.
- LED belysning: Top and bottom light sources for optimal specimen viewing.
- Kontrolknapper: Power, capture, zoom, menu navigation.
- Porte: USB, HDMI, MicroSD card slot.
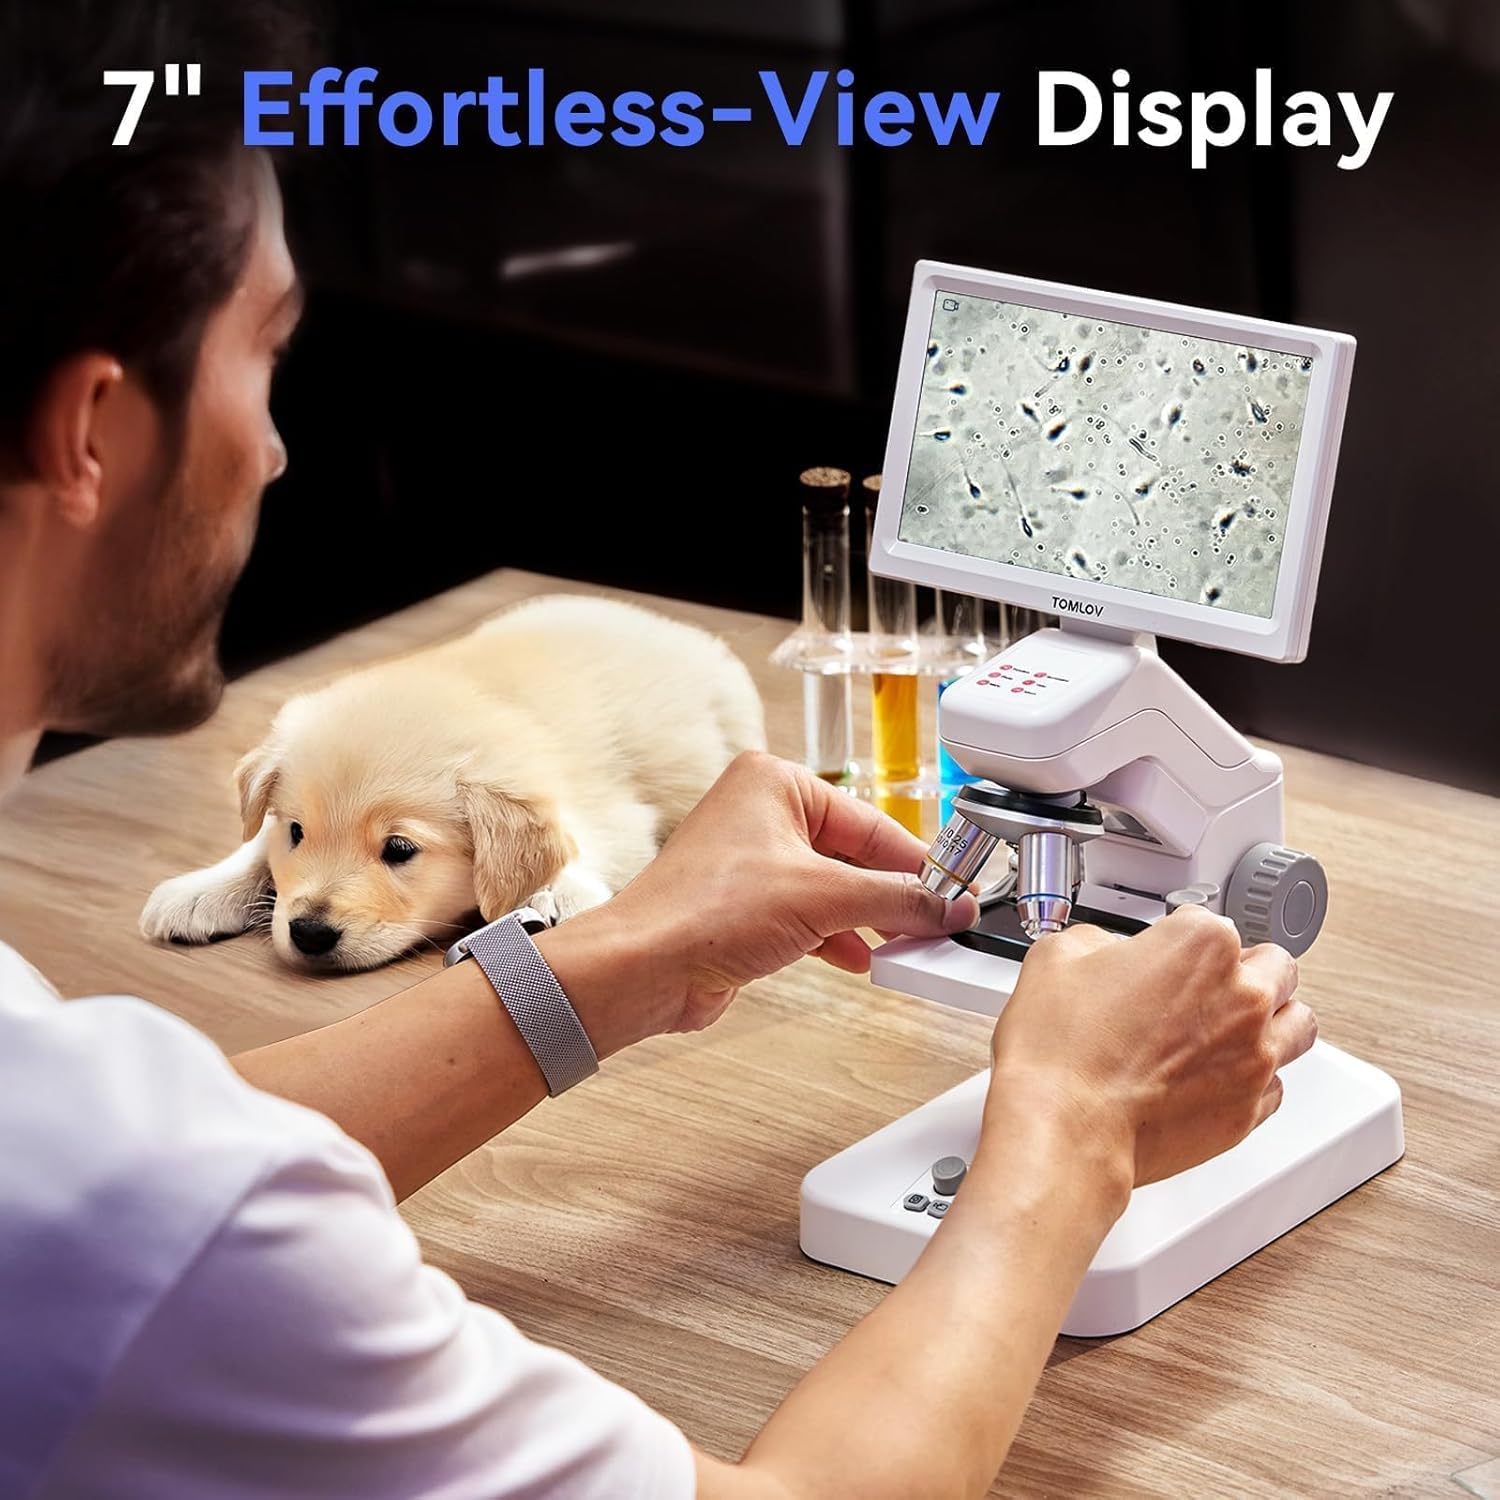
Image: A user observing a specimen through the 7-inch IPS display, highlighting the clear and adjustable viewoplevelse.
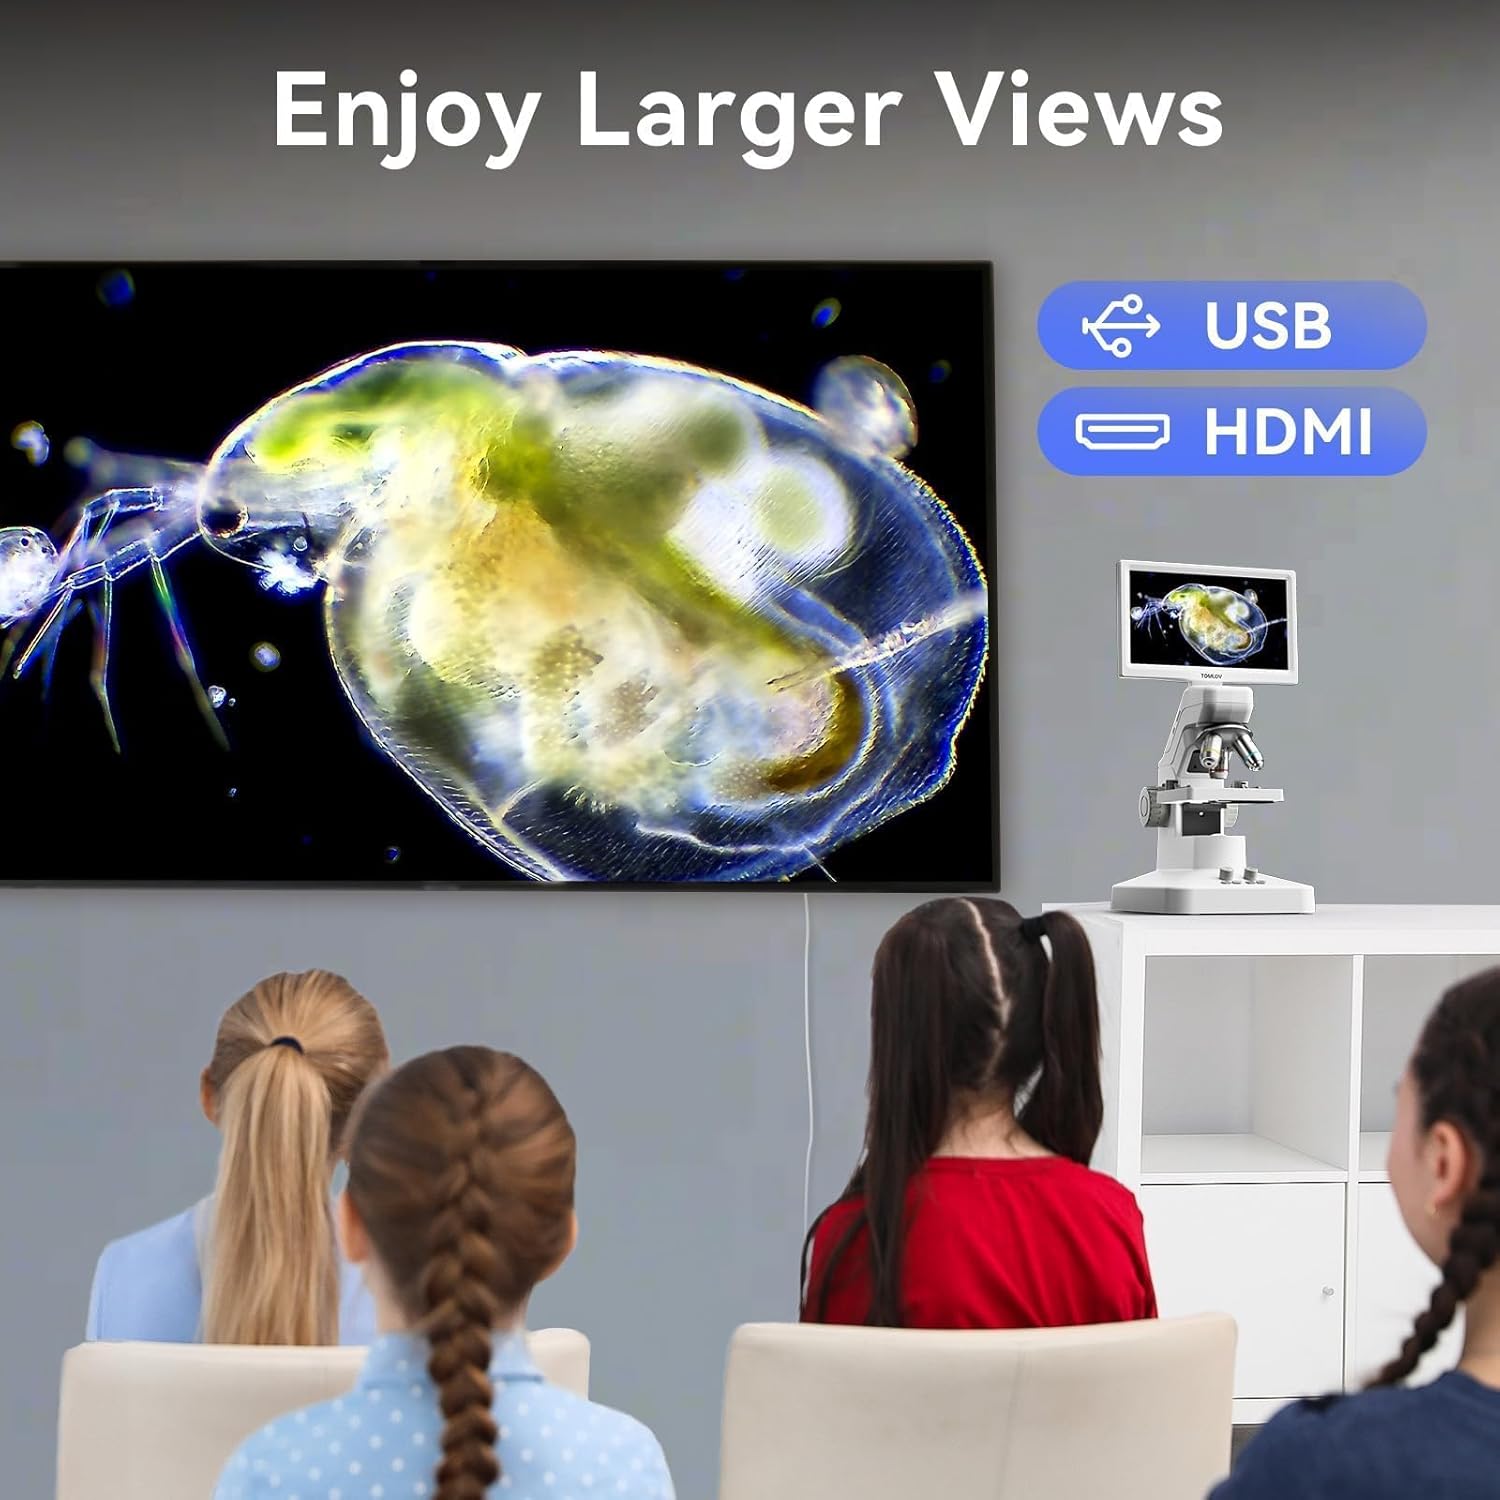
Image: Illustration of the microscope's dual illumination system, featuring both top lighting for opaque objects and bottom lighting for transparent specimens.
4. Opsætning
Follow these steps to set up your TOMLOV DM301 Pro Digital Microscope for first use.
- Udpakning: Fjern forsigtigt alle komponenter fra emballagen.
- Strømtilslutning: Connect the power adapter to the microscope's power input port and plug it into a standard electrical outlet. The microscope can also operate on its built-in rechargeable battery for approximately 3 hours.
- Indledende opkrævning: For optimal performance, fully charge the microscope before first use.
- MicroSD Card Insertion (Optional): If you plan to save photos and videos directly on the device, insert a MicroSD card (up to 32GB, Class 10 recommended) into the designated slot. Ensure the card is inserted correctly until it clicks into place.
- Tænd: Press and hold the power button until the 7" IPS display illuminates.

Image: The TOMLOV DM301 Pro microscope connected to its power adapter, illustrating its rechargeable battery capability with an approximate 3-hour working time.
5. Betjeningsvejledning
5.1 Basic Operation and Magnification
- Place Specimen: Position your prepared slide or object on the microscope stage.
- Adjust Objective Lens: Rotate the revolving nosepiece to select the desired objective lens (e.g., 4X, 10X, 40X). The microscope offers up to 1200X magnification for detailed observation.
- Juster belysning: Use the controls for the top and bottom LED lights to achieve optimal brightness and contrast for your specimen.
- Fokus: Use the coarse and fine focus knobs to bring the image into sharp focus on the 7" IPS display.
5.2 Optagelse af billeder og videoer
The microscope is equipped with an 8MP camera for still images and supports 1080P video recording.
- Fotooptagelse: Press the dedicated photo button to capture a still image of the current view.
- Videooptagelse: Press the video button to start recording. Press it again to stop recording.
- Captured media is saved to the inserted MicroSD card.

Image: A visual representation of the microscope's capability to capture high-resolution 8MP photos and 1080P videos of microscopic details.
5.3 Wireless Control with App Support
For enhanced control and real-time viewing, download the companion app for iOS or Android devices.
- Download app: Søg efter the official TOMLOV microscope app on the Apple App Store or Google Play Store.
- Opret forbindelse via Wi-Fi: Follow the in-app instructions to connect your mobile device to the microscope's Wi-Fi network.
- App funktioner: The app allows for real-time viewing, digital zooming, and remote capture of photos and videos.

Image: A smartphone screen mirroring the microscope's view, demonstrating the wireless app control feature and indicating availability on App Store and Google Play.
5.4 USB/HDMI Output for Larger Displays
The microscope can be connected to external displays such as TVs, laptops, or projectors for larger-scale viewing without requiring additional drivers.
- HDMI-forbindelse: Use the provided HDMI cable to connect the microscope's HDMI output port to an HDMI input port on your TV or monitor.
- USB-forbindelse: Connect the microscope to your computer via the USB cable. The microscope will function as a webcam, allowing you to view the live feed on your computer using compatible software.

Image: A family observing microscopic images projected onto a large television screen, illustrating the USB and HDMI output capabilities for group viewing.
5.5 Two-Way Measurement
The DM301 Pro supports measurement functions directly on the screen and through PC software.
- Screen Scaleplate: Utilize the on-screen scaleplate for direct measurements of observed specimens.
- PC Software Measurement: When connected to a computer, use the dedicated PC software for more advanced and precise measurement capabilities.

Image: Comparison of the microscope's built-in screen scaleplate for direct measurement and the more detailed measurement interface available through PC software.
6. Vedligeholdelse
Korrekt vedligeholdelse sikrer mikroskopets levetid og optimale ydeevne.
- Rengøring af linser: Use a soft, lint-free cloth specifically designed for optical lenses to clean the objective lenses and the display screen. Avoid using abrasive materials or harsh chemicals.
- Generel rengøring: Wipe the body of the microscope with a soft, dry cloth. For stubborn dirt, a slightly damp en klud kan bruges, efterfulgt af en tør aftørring.
- Opbevaring: Store the microscope in a clean, dry, and dust-free environment when not in use. Use the provided dust cover if available.
- Batteripleje: If storing for extended periods, charge the battery periodically to maintain its health.
7. Fejlfinding
Se følgende tabel for almindelige problemer og deres løsninger.
| Problem | Mulig årsag | Løsning |
|---|---|---|
| Intet billede på displayet. | Microscope not powered on; low battery; objective lens not properly engaged; illumination off. | Ensure power is on and battery is charged. Rotate objective lens until it clicks into place. Turn on LED illumination. |
| Billedet er sløret. | Out of focus; incorrect objective lens; dirty lens. | Adjust focus knobs. Select appropriate objective lens. Clean objective lens. |
| Kan ikke oprette forbindelse til Wi-Fi-appen. | Wi-Fi not enabled on microscope; incorrect password; app not updated. | Ensure microscope Wi-Fi is active. Verify Wi-Fi password. Update app to the latest version. |
| Kan ikke gemme billeder/videoer. | No MicroSD card inserted; MicroSD card full or corrupted; card not formatted. | Insert a MicroSD card. Delete unnecessary files or replace card. Format the MicroSD card (this will erase all data). |
8. Specifikationer
- Model: DM301 Pro
- Vise: 7-tommer IPS LCD
- Forstørrelse: Up to 1200X (optical and digital combined)
- Kameraopløsning: 8 Megapixels (for photos)
- Videoopløsning: 1080P
- Produktion: USB, HDMI, Wi-Fi (App Support)
- Opbevaring: MicroSD-kortslot (understøtter op til 32GB)
- Belysning: Top and Bottom LED Light System
- Batteri: Rechargeable, approximately 3 hours working time
9. Garanti og support
TOMLOV products are designed for reliability and performance. For specific warranty details and terms, please refer to the warranty card included with your product or visit the official TOMLOV website. For technical support, troubleshooting assistance, or inquiries about replacement parts, please contact TOMLOV customer service through their official channels.
Online support: Visit the TOMLOV Store on Amazon


