Indledning
Thank you for choosing the Valkyrie VK03 ATX Mid Tower Gaming PC Case. This case is designed to provide a robust and aesthetically pleasing foundation for your high-performance gaming system. Featuring a 270-degree panoramic sight, a 6.2-inch touch screen, and advanced thermal design, the VK03 offers both functionality and visual appeal. This manual will guide you through the installation, operation, and maintenance of your new PC case.
Opsætning og installation
1. Udpakning og inspektion
Carefully remove the PC case from its packaging. Inspect the case for any signs of damage during transit. Ensure all accessories, such as screws, standoffs, and cables, are present.
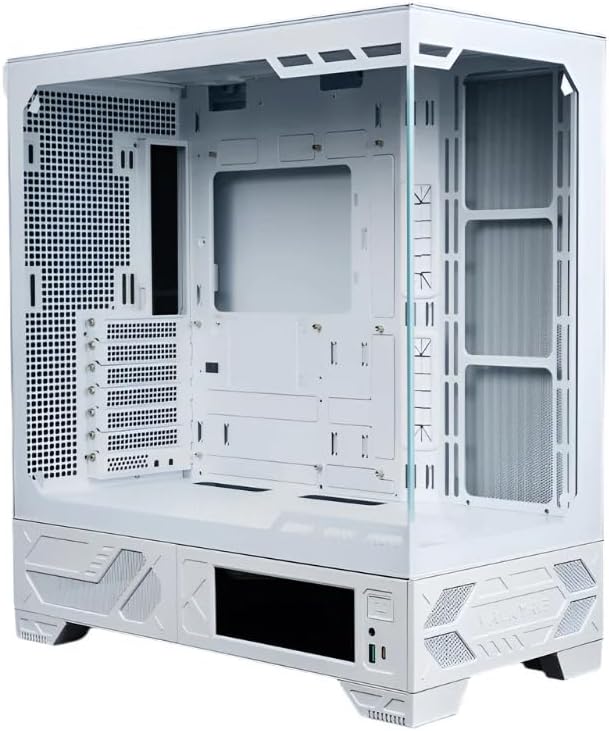
Figur 1: Forside view of the Valkyrie VK03 case, showcasing its spacious interior and panoramic design with the tempered glass panel removed for component installation.
2. Komponentkompatibilitet
- Bundkort: Compatible with M-ATX and ATX back-plug motherboards.
- Grafikkort: Understøtter grafikkort op til 440 mm i længden.
- CPU køler: Accommodates CPU coolers, including water cooling radiators up to 360mm.
- Fans: This case does not include pre-installed fans. Users must install their preferred cooling fans.
3. Installation af bundkort
Install the necessary motherboard standoffs onto the motherboard tray. Carefully align your M-ATX or ATX back-plug motherboard with the standoffs and I/O shield opening, then secure it with screws. The back-plug design simplifies cable management.
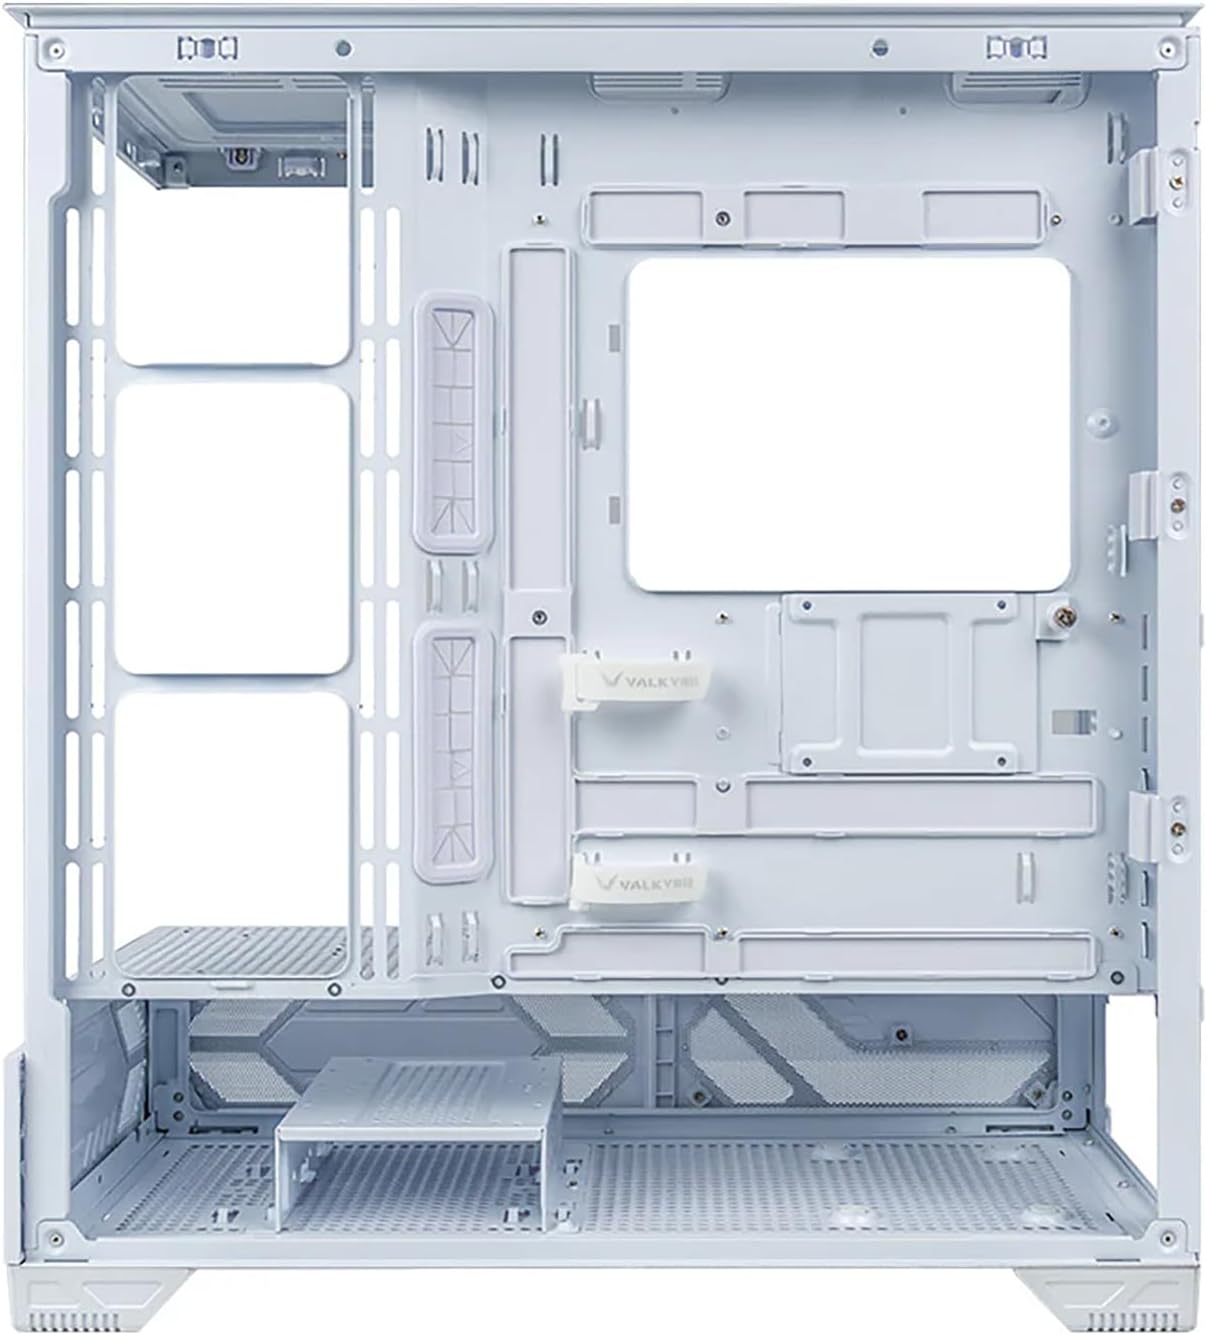
Figur 2: Bageste interiør view of the Valkyrie VK03, highlighting the motherboard tray cutout for CPU cooler access and dedicated channels for efficient cable management.
4. Installation af grafikkort og udvidelseskort
Remove the appropriate PCIe slot covers. Insert your graphics card or other expansion cards into the PCIe slots on the motherboard and secure them with screws.
5. Installation af kølesystem
Install your chosen cooling fans or liquid cooling radiator(s) into the designated mounting points. The case supports up to 360mm water cooling radiators. Ensure proper airflow direction for optimal heat dissipation.
6. Installation af strømforsyning
Mount your ATX power supply unit (PSU) into its dedicated compartment, typically at the bottom rear of the case. Secure it with screws.
7. Installation af lagerdrev
Install your 2.5-inch SSDs or 3.5-inch HDDs into the provided drive bays or mounting points. Secure them with the appropriate screws or tool-less mechanisms.
8. Cable Management and I/O Connections
Connect all necessary power cables from the PSU to your components (motherboard, GPU, drives). Connect the front panel I/O cables (USB, audio, power/reset switches, LED indicators) to the corresponding headers on your motherboard. Utilize the multi-sided quick-release design and cable routing channels for tidy cable management. The I/O panel features magnetic interchangeability for flexible placement.
9. LCD Display Connection
Connect the 6.2-inch touch screen display cable to the appropriate header on your motherboard or a dedicated display port, as per the display's instructions. Ensure the display is securely mounted.

Figur 3: Frontal view of the Valkyrie VK03 with a complete system installed, illustrating the integrated 6.2-inch touch screen and the clean internal layout facilitated by the back-plug motherboard compatibility.

Figur 4: Vinklet view of the Valkyrie VK03, showcasing the 270-degree panoramic sight and the functional 6.2-inch touch screen display at the front base of the case.
Betjening af etuiets funktioner
1. Tænder
Once all components are installed and connected, close the side panels. Connect your monitor, keyboard, and mouse. Plug in the power cable to the PSU and a wall outlet, then press the power button on the case's front I/O panel to start your system.
2. Brug af 6.2-tommer berøringsskærmen
The integrated 6.2-inch touch screen can display system information, custom images, or other relevant data. Refer to the MYTH.COOL Control Center software for configuration options and customization of the display.
3. MYTH.COOL Control Center
Install the MYTH.COOL Control Center software (if applicable, typically available from the manufacturer's website) to manage the LCD display, monitor system parameters, and potentially control RGB lighting (if installed with compatible components).
4. Airflow and Heat Dissipation
The VK03 features a newly designed three-dimensional air duct system to improve heat dissipation efficiency. Ensure your installed fans are configured to create optimal airflow paths (intake and exhaust) to maintain low component temperatures.

Figur 5: Forside view of the Valkyrie VK03 with a system built inside, demonstrating the vertical GPU mounting option and the placement of an All-in-One (AIO) liquid cooler, contributing to efficient thermal management.
Opretholdelse
1. Rengøring af kabinettet
Rengør regelmæssigt ydersiden af kabinettet med en blød, tør klud.amp cloth. Avoid abrasive cleaners or solvents. For the interior, use compressed air to remove dust from components and fan blades. Ensure the system is powered off and unplugged before cleaning.
2. Vedligeholdelse af støvfilter
The VK03 case may include removable dust filters (e.g., on the top, front, or bottom). Periodically remove and clean these filters to maintain optimal airflow and prevent dust buildup inside the system. Wash with water and mild soap if necessary, ensuring they are completely dry before reinstallation.
3. Almen pleje
Avoid placing the case in direct sunlight or near heat sources. Ensure adequate ventilation around the case to prevent overheating. Do not place heavy objects on top of the case.
Fejlfinding
1. Systemet tænder ikke
- Kontroller, om strømkablet er korrekt tilsluttet strømforsyningen og stikkontakten.
- Sørg for, at strømforsyningskontakten er i 'ON'-positionen.
- Kontroller, at kablet til tænd/sluk-knappen på frontpanelet er korrekt tilsluttet bundkortets header.
- Bekræft, at alle interne strømforbindelser (24-bens ATX, CPU, GPU) er sikre.
2. LCD Display Not Working
- Check the display's connection cable to the motherboard or dedicated port.
- Ensure the necessary drivers or software (e.g., MYTH.COOL Control Center) are installed and running.
- Verify power supply to the display, if applicable.
3. Problemer med overophedning
- Ensure all installed fans are operating correctly and are oriented for proper airflow (intake/exhaust).
- Clean any dust filters and internal components to improve airflow.
- Verify CPU cooler and GPU cooler are properly seated and functioning.
Specifikationer
| Feature | Specifikation |
|---|---|
| Model | Valkyrie VK03 |
| Sagstype | ATX Midtårn |
| Farve | Hvid |
| Materiale | Legeret stål |
| Bundkort kompatibilitet | M-ATX / ATX (Back-plug compatible) |
| Max GPU-længde | 440 mm |
| Max radiatorstøtte | 360 mm |
| Integreret display | 6.2-tommer berøringsskærm |
| Panoramadesign | 270-degree column-free sight |
| Varens vægt | 10.6 kg |
| Pakkedimensioner | 61 x 56 x 33 cm |
Garanti og support
The Valkyrie VK03 PC case is covered by a standard manufacturer's warranty. Please refer to your purchase documentation or the retailer's website for specific warranty terms and conditions. For technical support, troubleshooting assistance, or warranty claims, please contact your point of purchase or the official Valkyrie support channels.
For the latest drivers, software (e.g., MYTH.COOL Control Center), and updated support information, please visit the official Valkyrie webwebsted.


