Indledning
This manual provides detailed instructions for the setup, operation, maintenance, and troubleshooting of your MeesMeek Projection Alarm Clock (Model 5282). Please read this guide thoroughly to ensure proper use and to maximize the features of your device.
Produkt overview
The MeesMeek Projection Alarm Clock is designed to provide clear time display, alarm functions, and convenient projection of time onto a wall or ceiling. It features a 3.9-inch LCD screen displaying time, alarm time, calendar date, day of the week, and temperature. The clock supports both USB and battery power options.

Billede 1: Forside view of the MeesMeek Projection Alarm Clock, displaying current time, date, and temperature, with the projection feature active.
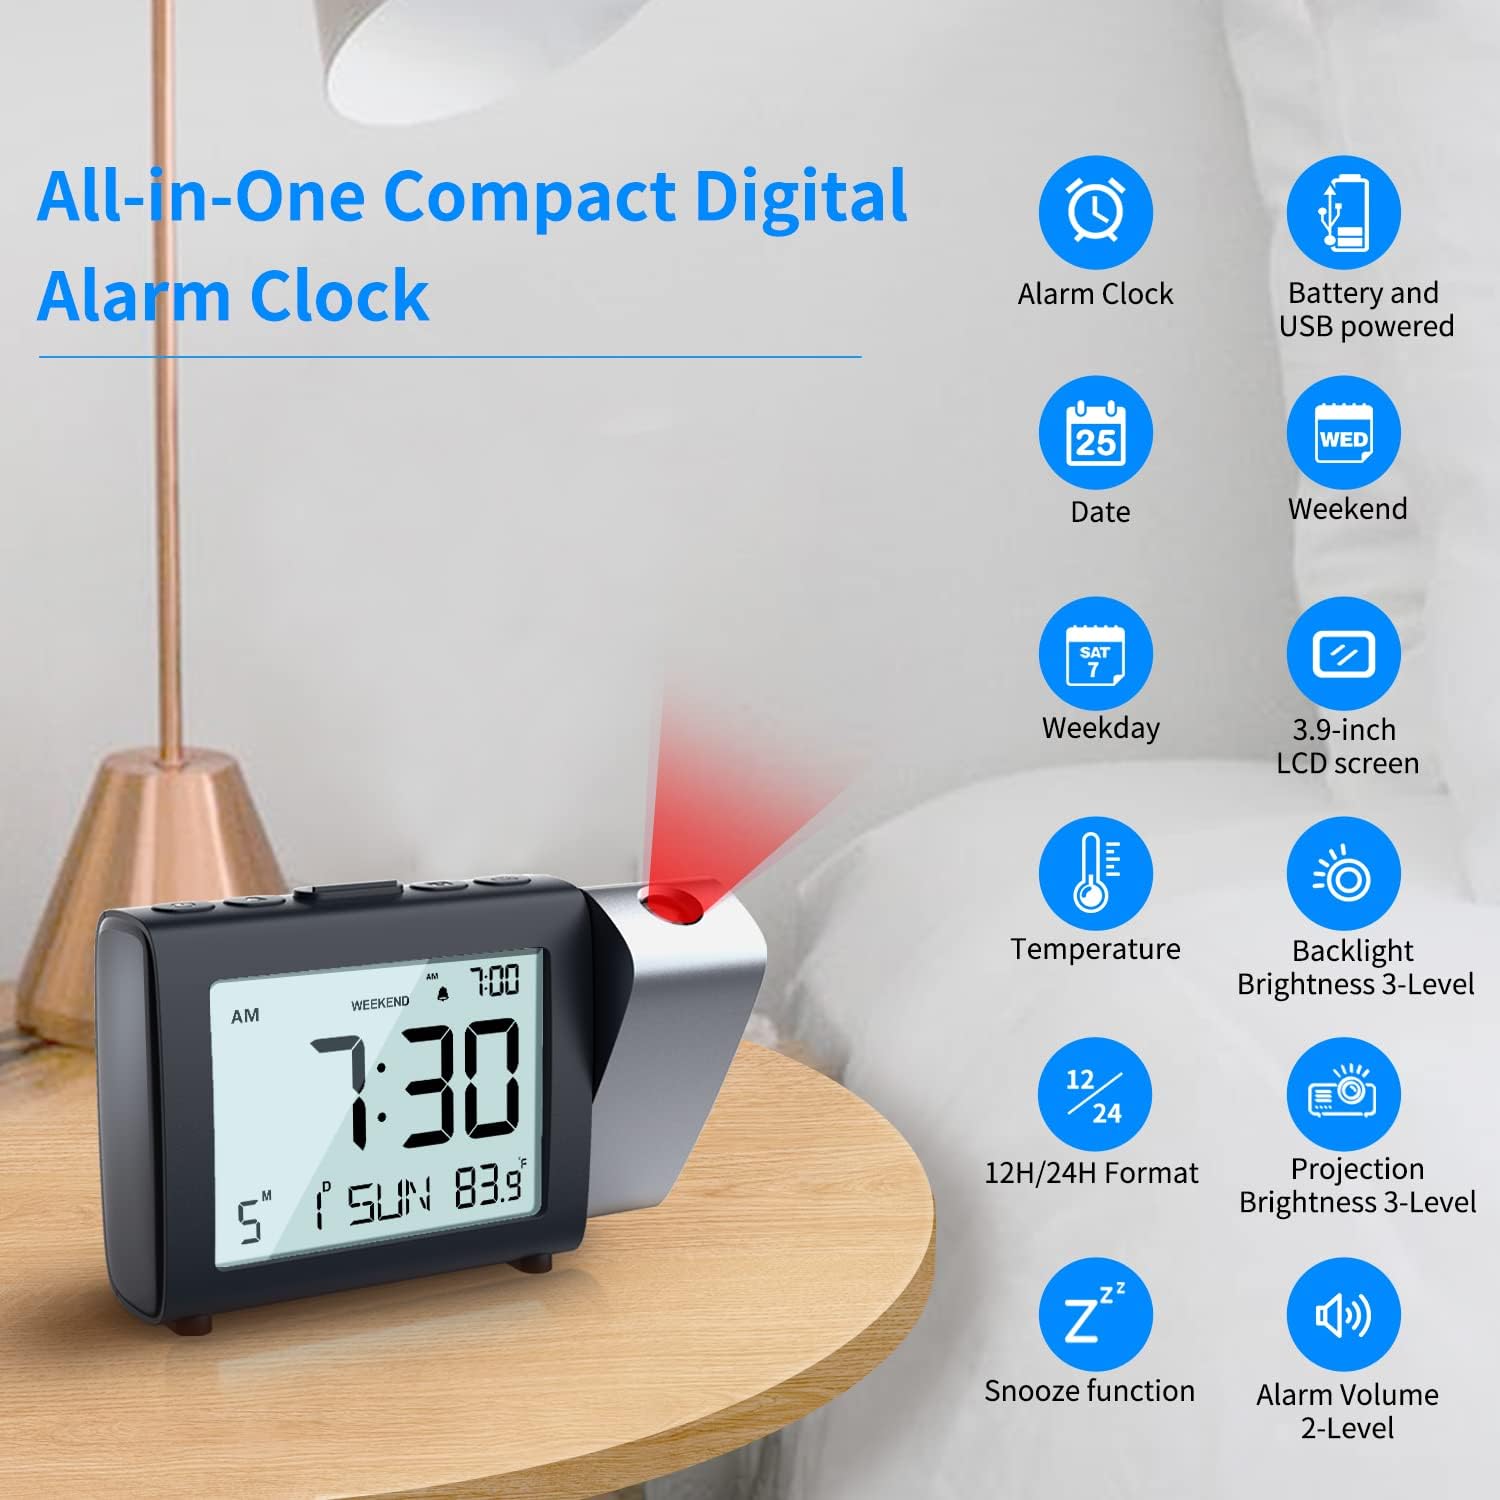
Billede 2: Overview of the MeesMeek Projection Alarm Clock's key features and display elements.
Opsætning
1. Tænd for uret
The clock can be powered in two ways:
- USB Strøm: For continuous projection and backlight, connect the provided micro USB cable to the clock and the 5V 1A power adapter to a wall outlet.
- Batteristrøm: For basic alarm clock functions and as a backup during power outages, insert 3 AAA batteries (not included) into the battery compartment. Note: When powered by batteries only, the projection and backlight will turn off after 5 seconds to conserve power.

Image 3: Illustration of connecting the USB power adapter and inserting AAA batteries for clock operation.
2. Indstilling af tid og dato
Refer to the individual control buttons on the top of the clock for setting the year, month, date, and time. The clock supports both 12-hour and 24-hour formats.
Video 1: Demonstrates how to easily set the calendar (year, month, date) and switch between 12H/24H time formats on the MeesMeek Projection Alarm Clock.
3. Indstilling af alarmen
The alarm can be set with two levels of volume. You can also activate a "Weekend Mode" which prevents the alarm from sounding on Saturdays and Sundays.
4. Justering af projektion
The projector can swivel 180° to direct the time display onto your ceiling or wall. Use the focus ring to adjust the sharpness of the projected image. Projection brightness can be set to 4 levels.

Image 4: Details on adjusting the projection angle, flipping the display, and using the focus ring for clarity.
Betjeningsvejledning
1. LCD Display Information
The 3.9-inch LCD screen displays the following information:
- Current Time (12H/24H format selectable)
- Alarm tid
- Kalender dato
- Ugedag
- Temperatur

Billede 5: Detaljeret view of the LCD display and options for adjusting alarm volume, projection brightness, and backlight brightness.
2. Snooze-funktion
When the alarm sounds, press the "Snooze" button on the top of the clock to temporarily silence the alarm for 9 minutes. The alarm will sound again after this period.

Image 6: Illustration of the snooze function and weekend mode feature.
3. Weekendtilstand
Activate the "Weekend Mode" to prevent the alarm from sounding on Saturdays and Sundays. This feature is useful for maintaining a consistent alarm schedule during weekdays without needing to manually turn off the alarm on weekends.
4. Backlight Brightness
The LCD backlight has 4 adjustable brightness levels (Off, Low, Medium, High) for comfortable viewunder forskellige lysforhold.
5. Projection Brightness
The projection brightness can be adjusted to 4 levels (Off, Low, Medium, High) to suit your preference and room lighting.
Opretholdelse
To ensure optimal performance and longevity of your MeesMeek Projection Alarm Clock, please follow these maintenance tips:
- Batteri-sikkerhedskopi: Before initial use, insert 3 AAA batteries as a backup. This prevents the clock from resetting in case of a power failure.
- Strømtilslutning: If the projection and backlight are not continuously on even when plugged in, check that the USB cable is securely connected and making good contact.
- Rensning: Use a soft, dry cloth to clean the clock's surface and LCD screen. Avoid using abrasive cleaners or solvents.
Fejlfinding
If you encounter any issues with your MeesMeek Projection Alarm Clock, refer to the following common solutions:
- Projection is upside down: Press and hold the projection button for 3 seconds to flip the projected image.
- Projection is blurry: Scroll the focus wheel located on the back of the clock to adjust the sharpness of the projected image.
- Projection/Backlight turns off after 5 seconds: This is normal behavior when the clock is powered by batteries only to save power. For continuous display, ensure the clock is plugged into a USB power source.
- Clock not keeping time: Ensure fresh AAA batteries are installed for backup and that the USB power connection is stable.
Specifikationer
| Feature | Detalje |
|---|---|
| Mærke | MeesMeek |
| Modelnummer | 5282 |
| Display Type | Digital |
| Produktdimensioner | 7 cm B x 3.5 cm H |
| Strømkilde | Elektrisk med ledning, batteridrevet |
| Batterier påkrævet | 3 AAA batterier (medfølger ikke) |
| Særlige funktioner | Calendar Display, Temperature Display, Adjustable Brightness, 12H/24H, Projection Clock, Alarm, Snooze, Weekend Mode |
| Monteringstype | Bordplade |
| Materiale | Plast |
| Varens vægt | 9.9 ounces (280 gram) |
Garantioplysninger
Dette produkt leveres med en Begrænset garanti. For specific details regarding the terms and conditions of your warranty, please refer to the documentation included with your purchase or contact MeesMeek customer support.
Kundesupport
For further assistance, technical support, or inquiries regarding your MeesMeek Projection Alarm Clock, please contact MeesMeek customer service. Contact information can typically be found on the product packaging or on the official MeesMeek webwebsted.


