Indledning
This user manual provides comprehensive instructions for the setup, operation, and maintenance of your ATTACK SHARK X1 Ultralight Wireless Gaming Mouse. Designed for high-performance gaming and daily use, the X1 features a PixArt PAW3395 Pro Sensor, multiple connectivity options, and a magnetic RGB charging dock. Please read this manual thoroughly to ensure optimal performance and longevity of your device.

Image: The ATTACK SHARK X1 gaming mouse in red, shown with its magnetic RGB charging dock. The mouse is ultralight and designed for high-performance use.
Pakkens indhold
Bekræft at alle varer er til stede i din pakke:
- ATTACK SHARK X1 Ultralight Wireless Gaming Mouse
- Magnetisk RGB-opladedock
- USB Type-C opladerkabel
- 2.4 GHz USB trådløs modtager
- Anti-Slip Grip Tape
- Brugervejledning (dette dokument)
Produkt overview
Familiarize yourself with the components and controls of your ATTACK SHARK X1 mouse and charging dock.

Image: Diagram illustrating the various components of the ATTACK SHARK X1 mouse and its charging dock, including dimensions and port locations.
Muskomponenter:
- Venstre/højre klikknapper: Equipped with OMRON optical micro switches for over 100 million clicks.
- Scrollhjul: F-Switch encoder for precise scrolling.
- DPI knap: Located on the top, allows cycling through DPI settings.
- Sideknapper: Programmerbar til forskellige funktioner.
- Indikatorlys: Displays battery status and DPI level.
- Type-C port: Til kabelforbindelse og opladning.
- Skifte: Power and connection mode switch (Wired/2.4Ghz/Bluetooth).
- Bluetooth-skift: For activating Bluetooth mode.
- 2.4GHz Dongle Storage: Compartment for the USB wireless receiver.
- Magnetiske punkter: For secure connection to the charging dock.
- PTFE fødder: For smooth glide on surfaces.
Charging Dock Components:
- Magnetiske punkter: Align with mouse for charging.
- Touchpad for Light Switching: Styrer RGB-lyseffekter.
- USB-A-port: For connecting the 2.4GHz wireless receiver.
- Type-C port: For connecting the dock to a power source.
Opsætning
1. Indledende opladning:
Before first use, it is recommended to fully charge the mouse. Connect the magnetic RGB charging dock to a USB power source using the provided Type-C cable. Place the mouse onto the dock, ensuring the magnetic points align for a secure connection. The RGB lighting on the dock indicates charging status.

Image: The ATTACK SHARK X1 mouse magnetically attached to its charging dock, highlighting the RGB lighting and fast charging capability.
2. Attaching Anti-Slip Grip Tape:
For enhanced grip and comfort, you may apply the included anti-slip grip tape to the designated areas on the mouse. Ensure the mouse surface is clean and dry before application for optimal adhesion.
Betjeningsvejledning
Tilslutningstilstande:
The ATTACK SHARK X1 supports three connection modes: Type-C Wired, 2.4GHz Wireless, and Bluetooth. Switch between modes using the button on the bottom of the mouse.

Image: The ATTACK SHARK X1 mouse connected via its Type-C cable, illustrating the three connectivity options: Bluetooth, 2.4GHz Wireless, and Type-C Wired.
- Type-C kablet tilstand: Connect the mouse directly to your computer using the USB Type-C cable. This mode allows for simultaneous use and charging.
- 2.4 GHz trådløs tilstand:
- Remove the 2.4GHz USB wireless receiver from its storage compartment on the mouse.
- Plug the receiver into an available USB-A port on your computer or into the USB-A port on the charging dock.
- Set the mouse's bottom switch to the 2.4Ghz position. The mouse will automatically connect.
- Bluetooth-tilstand:
- Set the mouse's bottom switch to the Bluetooth position.
- Press and hold the Bluetooth toggle button on the mouse until the indicator light flashes, indicating pairing mode.
- On your computer or device, search for Bluetooth devices and select "ATTACK SHARK X1" to pair.
DPI-justering:
The mouse features a PixArt PAW3395 Pro Sensor with a maximum DPI of 40000. You can cycle through preset DPI levels by pressing the DPI button on the top of the mouse. For fine-tuning and custom DPI settings in 50-unit increments, use the programmable web chauffør.
Programmable Features (Web Driver):
Unlock the full potential of your ATTACK SHARK X1 mouse by utilizing its programmable web driver. This software allows for comprehensive customization, including:
- Creating and assigning macros.
- Re-assigning key functions for all buttons.
- Fine-tuning DPI settings.
- Adjusting polling rate.
Få adgang til web driver via this link: bit.ly/4mqcdwo. No download is required for the web interface, but a small client-side executable may be needed for communication.
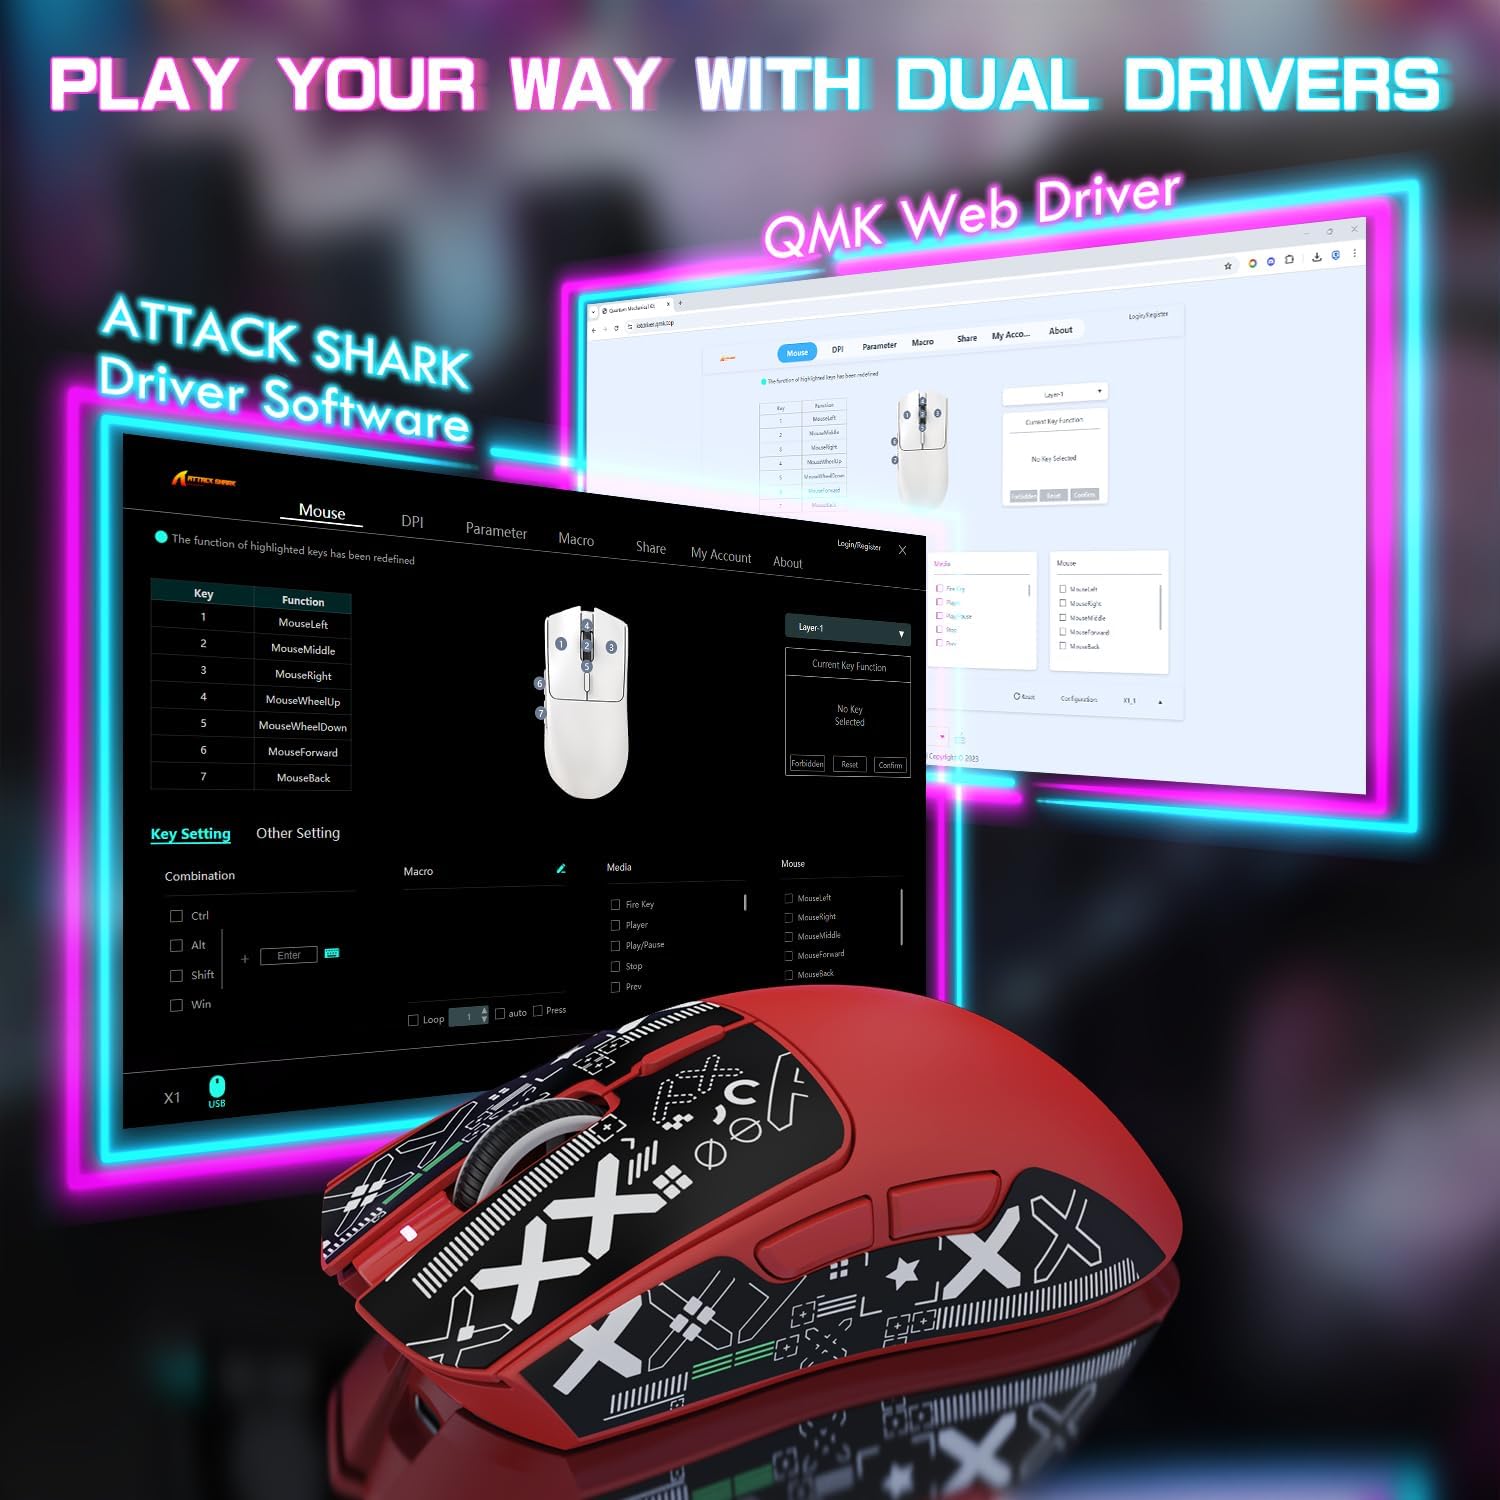
Image: Screenshot of the ATTACK SHARK X1 web driver interface, showing options for key assignment, DPI settings, and macro creation.
RGB-lysstyring:
The magnetic RGB charging dock features dynamic lighting effects. These can be adjusted by clicking the upgraded touchscreen controls located on the dock itself.
Opladning
The ATTACK SHARK X1 mouse is equipped with a large-capacity built-in battery, offering up to 200 hours of usage on a full charge. Charging takes approximately 2-3 hours for a complete charge.
- Via opladningsdock: Place the mouse on the magnetic RGB charging dock. Ensure proper alignment for charging to begin. The dock's RGB lighting will indicate charging status.
- Via Type-C-kabel: Connect the mouse directly to a USB power source or computer using the provided Type-C cable. This allows for continued use while charging.
The mouse features a smart sleep mode to conserve battery life during periods of inactivity.

Image: Visual representation of the ATTACK SHARK X1 mouse's long-lasting battery, indicating up to 200 hours of power and a 2-3 hour charging time.
Opretholdelse
- Rensning: Use a soft, dry cloth to clean the mouse and charging dock. For stubborn dirt, a slightly damp En klud kan bruges, men sørg for, at der ikke kommer fugt ind i enheden. Undgå slibende rengøringsmidler eller opløsningsmidler.
- Opbevaring: When not in use for extended periods, store the mouse and dock in a cool, dry place away from direct sunlight and extreme temperatures.
- PTFE fødder: The Teflon HyperGlide feet are designed for smooth movement. If they become worn, replacement feet may be available from the manufacturer or authorized resellers.
Fejlfinding
| Problem | Mulig årsag | Løsning |
|---|---|---|
| Musen reagerer ikke | Low battery; Incorrect connection mode; USB receiver not plugged in; Bluetooth not paired. | Charge the mouse; Verify the mode switch (Wired/2.4Ghz/Bluetooth) is correct; Ensure USB receiver is securely plugged in; Re-pair Bluetooth connection. |
| DPI/Button customization not working | Web driver not accessed or settings not applied; Client-side executable issue. | Sørg for, at du bruger den rigtige web driver link (bit.ly/4mqcdwo); Follow instructions on the web driver interface to apply settings; Restart the client-side executable if necessary. |
| RGB lighting on dock not working | Dock not powered; Touchpad control not activated. | Ensure the charging dock is connected to a power source; Tap the touchpad on the dock to cycle through lighting effects or turn them on/off. |
| Dårlig batterilevetid | Frequent use of high-performance settings; Battery degradation over time. | Ensure mouse is fully charged (2-3 hours); Consider reducing polling rate or DPI if not needed for current task; Battery life may vary with usage patterns. |
| Mouse wheel feels loose or unresponsive | Accumulated dust/debris; Manufacturing variation. | Attempt to clean around the scroll wheel with compressed air; If issue persists and is significant, contact customer support. |
Specifikationer
| Feature | Detalje |
|---|---|
| Model | ANGREBSHAJ X1 |
| Sensor | PixArt PAW3395 Pro Sensor |
| Max DPI | 40000 (adjustable via web chauffør) |
| Afstemningsfrekvens | 1000 Hz |
| Acceleration | 50 g |
| Sporingshastighed | 650 IPS |
| Forbindelse | Tri-Mode (USB Type-C Wired, 2.4GHz Wireless, Bluetooth) |
| Mikroafbrydere | OMRON Optical Micro Switch (100 million clicks lifespan) |
| Encoder | F-Switch Encoder |
| Vægt | 53g (ultralight) |
| Batterilevetid | Op til 200 timer |
| Opladningstid | 2-3 timer (fuld opladning) |
| Dimensioner | Approx. 4.8in (121.8mm) x 2.41in (61.2mm) |
| Farve | Red+Grip Tape (as per variant) |
Garanti og support
For warranty information, please refer to the documentation included with your purchase or visit the official ATTACK SHARK website. Support for the ATTACK SHARK X1 mouse, including driver updates and FAQs, can be found through the web driver link provided in this manual (bit.ly/4mqcdwo) or by contacting ATTACK SHARK customer service.
For yderligere produktinformation og tilbehør, besøg ATTACK SHARK Butik på Amazon.


