1. Introduktion
The Daitsu Aral ADD-12XB Dehumidifier is designed to efficiently remove excess moisture from indoor environments, helping to prevent mold, mildew, and musty odors. This manual provides essential information for the safe and effective operation, maintenance, and troubleshooting of your dehumidifier. Please read it thoroughly before first use and retain it for future reference.
2. Sikkerhedsinstruktioner
For at sikre sikker drift skal du altid overholde følgende forholdsregler:
- Sørg for, at strømforsyningen matcher voltagsom angivet på enhedens typeskilt.
- Brug ikke affugteren med en beskadiget netledning eller stik.
- Hold enheden oprejst under transport og drift.
- Maintain at least 20 cm (8 inches) of clearance around the unit for proper airflow.
- Stik ikke genstande ind i luftindtaget eller -udtaget.
- Tag stikket ud af enheden, før du rengør eller udfører vedligeholdelse.
- Brug ikke affugteren i områder, hvor der opbevares brandfarlige gasser eller væsker.
- Dette apparat er ikke beregnet til brug af personer (inklusive børn) med nedsatte fysiske, sensoriske eller mentale evner, eller mangel på erfaring og viden, medmindre de har fået opsyn eller instruktion i brugen af apparatet af en person, der er ansvarlig for deres sikkerhed.
3. Produktet er slutview
Familiarize yourself with the main components of your Daitsu Aral ADD-12XB Dehumidifier.
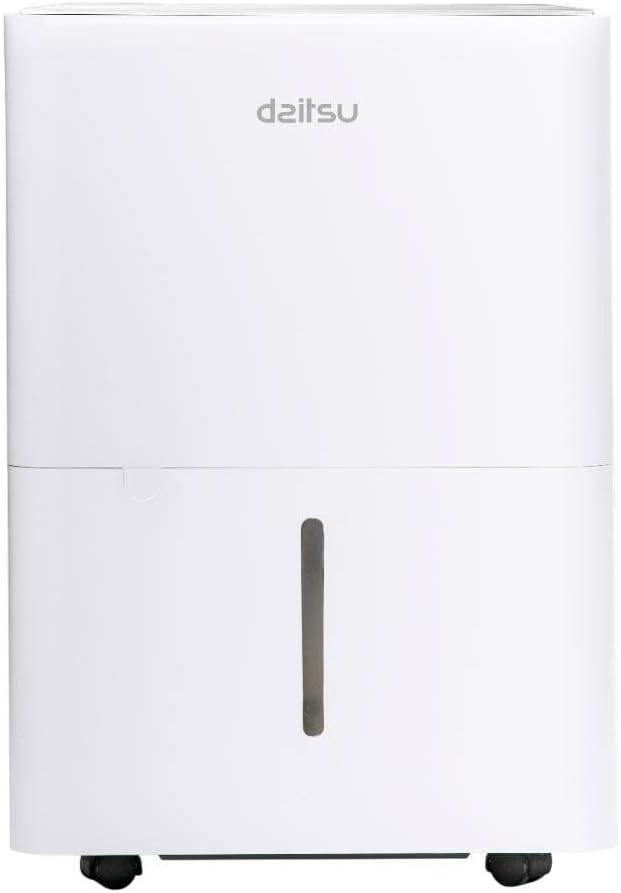
Figur 1: Front view of the Daitsu Aral ADD-12XB Dehumidifier. This image displays the front of the Daitsu Aral ADD-12XB Dehumidifier, featuring its clean white design and the visible water level indicator on the collection tank.

Figur 2: Bag view of the Daitsu Aral ADD-12XB Dehumidifier. The rear view of the dehumidifier shows the removable air filter cover for maintenance and the continuous drainage outlet, typically used for connecting a hose for extended operation.

Figur 3: Control panel of the Daitsu Aral ADD-12XB Dehumidifier. This close-up image shows the top control panel of the dehumidifier, featuring intuitive buttons for power, mode selection (Continuous, Dry, Turbo, Comfort), and timer settings, along with indicator lights.
4. Opsætning
4.1 Udpakning
- Tag forsigtigt affugteren ud af emballagen.
- Fjern alt emballagemateriale, inklusive tape eller beskyttelsesfilm.
- Undersøg enheden for tegn på skader. Hvis den er beskadiget, må den ikke anvendes, og du skal kontakte kundesupport.
4.2 Placering
- Place the dehumidifier on a firm, level surface to minimize vibration and noise.
- Ensure there is at least 20 cm (8 inches) of clear space around the air inlet and outlet to allow for efficient airflow.
- Undgå at placere enheden i nærheden af varmekilder eller i direkte sollys.
- For optimal performance, place the unit in the center of the room where dehumidification is needed most.
4.3 Strømtilslutning
Plug the power cord into a grounded electrical outlet. Ensure the outlet meets the electrical requirements specified on the unit's rating label.
5. Betjeningsvejledning
5.1 Kontrolpanelfunktioner
Se figur 3 for kontrolpanelets layout.
- Power knap: Tryk for at tænde eller slukke enheden.
- Mode knap: Press to cycle through available operating modes:
- Cont. (Continuous): The unit operates continuously regardless of the ambient humidity level.
- Tørre: Designed for drying clothes or in very humid conditions.
- Turbo: Operates at maximum fan speed for rapid dehumidification.
- Komfort: Opretholder automatisk et behageligt luftfugtighedsniveau.
- Timer knap: Press to set the auto-on or auto-off timer (e.g., 24-hour timer).
- Indikator for fuld tank: Illuminates when the water tank is full and needs to be emptied. The unit will automatically stop operating.
5.2 Tømning af vandtanken
When the 'Tank Full' indicator lights up, the unit will stop operating. To empty the tank:
- Træk forsigtigt vandtanken ud fra enhedens forside.
- Bær forsigtigt tanken til en vask eller et afløb.
- Hæld det opsamlede vand ud.
- Skub den tomme tank tilbage i enheden, indtil den klikker på plads. Enheden genoptager driften.
5.3 Kontinuerlig dræning (valgfrit)
For extended operation without needing to empty the water tank, you can set up continuous drainage:
- Locate the continuous drainage outlet at the back of the unit (refer to Figure 2).
- Remove the rubber stopper from the outlet.
- Connect a suitable drain hose (not included) to the outlet. Ensure the connection is secure to prevent leaks.
- Direct the other end of the hose to a floor drain or a large container, ensuring the hose is sloped downwards for gravity drainage.
- The unit will now drain water continuously, bypassing the internal water tank.
6. Vedligeholdelse
Regelmæssig vedligeholdelse sikrer optimal ydeevne og forlænger levetiden på din affugter.
6.1 Rengøring af luftfilteret
Luftfilteret bør rengøres hver anden uge eller oftere afhængigt af brug og luftkvalitet.
- Sluk for affugteren, og tag stikket ud af stikkontakten.
- Locate the air filter cover on the back of the unit (refer to Figure 2).
- Fjern filterdækslet, og træk forsigtigt luftfilteret ud.
- Clean the filter using a vacuum cleaner to remove dust and debris. For heavy dirt, wash the filter with lukewarm water and a mild detergent.
- Rinse the filter thoroughly and allow it to air dry completely before reinserting.
- Place the dry filter back into the unit and close the cover.
6.2 Rengøring af vandtanken
Clean the water tank regularly to prevent mold and bacteria growth.
- Fjern og tøm vandbeholderen.
- Vask tanken med varmt vand og et mildt rengøringsmiddel.
- Skyl grundigt og tør det, inden det sættes tilbage i enheden.
6.3 Udvendig rengøring
Tør ydersiden af enheden af med en blød, damp klud. Brug ikke skrappe kemikalier, slibemidler eller opløsningsmidler, da disse kan beskadige overfladen.
6.4 Opbevaring
Hvis enheden ikke skal bruges i en længere periode:
- Empty and clean the water tank and air filter.
- Tag stikket ud af enheden, og rul netledningen pænt sammen.
- Cover the unit with a plastic bag or cloth to protect it from dust.
- Opbevar affugteren oprejst på et køligt og tørt sted.
7. Fejlfinding
Før du kontakter kundesupport, bedes du læse følgende almindelige problemer og løsninger:
| Problem | Mulig årsag | Løsning |
|---|---|---|
| Enheden tænder ikke | Ingen strømforsyning Netledningen er ikke korrekt tilsluttet Vandtank fuld | Tjek stikkontakten Sørg for, at netledningen er korrekt tilsluttet Tøm vandbeholderen |
| Intet vand opsamlet | Rumfugtigheden er for lav Luftfilter tilstoppet Temperaturen er for lav Unit in continuous drainage mode | Dehumidification may not be needed Rengør luftfilteret Unit may not operate efficiently below 5°C (41°F) Check if continuous drainage hose is connected and draining |
| Enheden er støjende | Enheden står ikke på en plan overflade Luftfilter tilstoppet | Placer enheden på en flad, stabil overflade Rengør luftfilteret |
| Dårlig affugtning | Døre/vinduer åbne Luftfilter tilstoppet Værelsesstørrelsen er for stor | Luk alle døre og vinduer Rengør luftfilteret Ensure unit capacity matches room size |
8. Specifikationer
Technical specifications for the Daitsu Aral ADD-12XB Dehumidifier:
| Feature | Specifikation |
|---|---|
| Modelnavn | ADD-12XB |
| Mærke | Daitsu |
| Affugtningskapacitet | 12 Liters/day (at specified conditions) |
| Vandbeholdervolumen | 1.5 liter |
| Dimensioner (H x B x D) | 38.6 x 28 x 19.5 cm (ca. 15.2 x 11 x 7.7 tommer) |
| Produktets vægt | 23.5 kg (ca. 51.8 lbs) |
| Voltage | 230 volt |
| Magt | 2.5 kW (This value seems unusually high for a dehumidifier, typically it would be in Watts, e.g., 250W. Please verify with product label if possible.) |
| Støjniveau | 54 decibel |
| Særlige funktioner | Automatic Shut-off, Continuous Drainage, Timer |
| Farve | Hvid |
Bemærk: Specifikationerne kan ændres uden varsel. Se produktetiketten for de mest nøjagtige oplysninger.
9. Garanti og support
9.1 Garantioplysninger
This Daitsu product is covered by a manufacturer's warranty. The warranty period and terms may vary by region. Please retain your proof of purchase for warranty claims. For specific warranty details, refer to the warranty card included with your product or contact Daitsu customer service.
9.2 Kundesupport
If you encounter any issues not covered in the troubleshooting section or require further assistance, please contact Daitsu customer support. Contact information can typically be found on the official Daitsu webwebstedet eller på produktemballagen.


