1. Introduktion
Thank you for choosing the HBN Digital Outdoor Timer Socket. This device is designed to provide flexible and reliable control over your outdoor electrical appliances, such as garden lighting, pool pumps, and holiday decorations. With its 8 programmable settings, random function, and IP44 weather resistance, it offers convenience and energy efficiency. Please read this manual thoroughly before use to ensure proper operation and safety.
2. Sikkerhedsinstruktioner
- Ensure the timer is correctly installed and connected to a suitable power outlet.
- Do not exceed the maximum load capacity of 16A/3680W. Overloading can cause damage or fire.
- The timer is rated IP44 for outdoor use, meaning it is protected against splashing water from any direction. However, do not immerse the device in water or expose it to direct, heavy rainfall for extended periods.
- Åbn ikke enheden, og forsøg ikke at reparere den. Overlad al service til kvalificeret personale.
- Keep children away from the device. The integrated child lock provides additional safety.
- Always unplug the timer from the power outlet before cleaning.
3. Pakkens indhold
Din pakke skal indeholde følgende varer:
- HBN Digital Outdoor Timer Socket (x2)
- Instruktionsmanual (dette dokument)
4. Produktet er slutview
The HBN Digital Outdoor Timer Socket features a clear digital display and intuitive buttons for easy programming. Below is an illustration of the device and its main components.
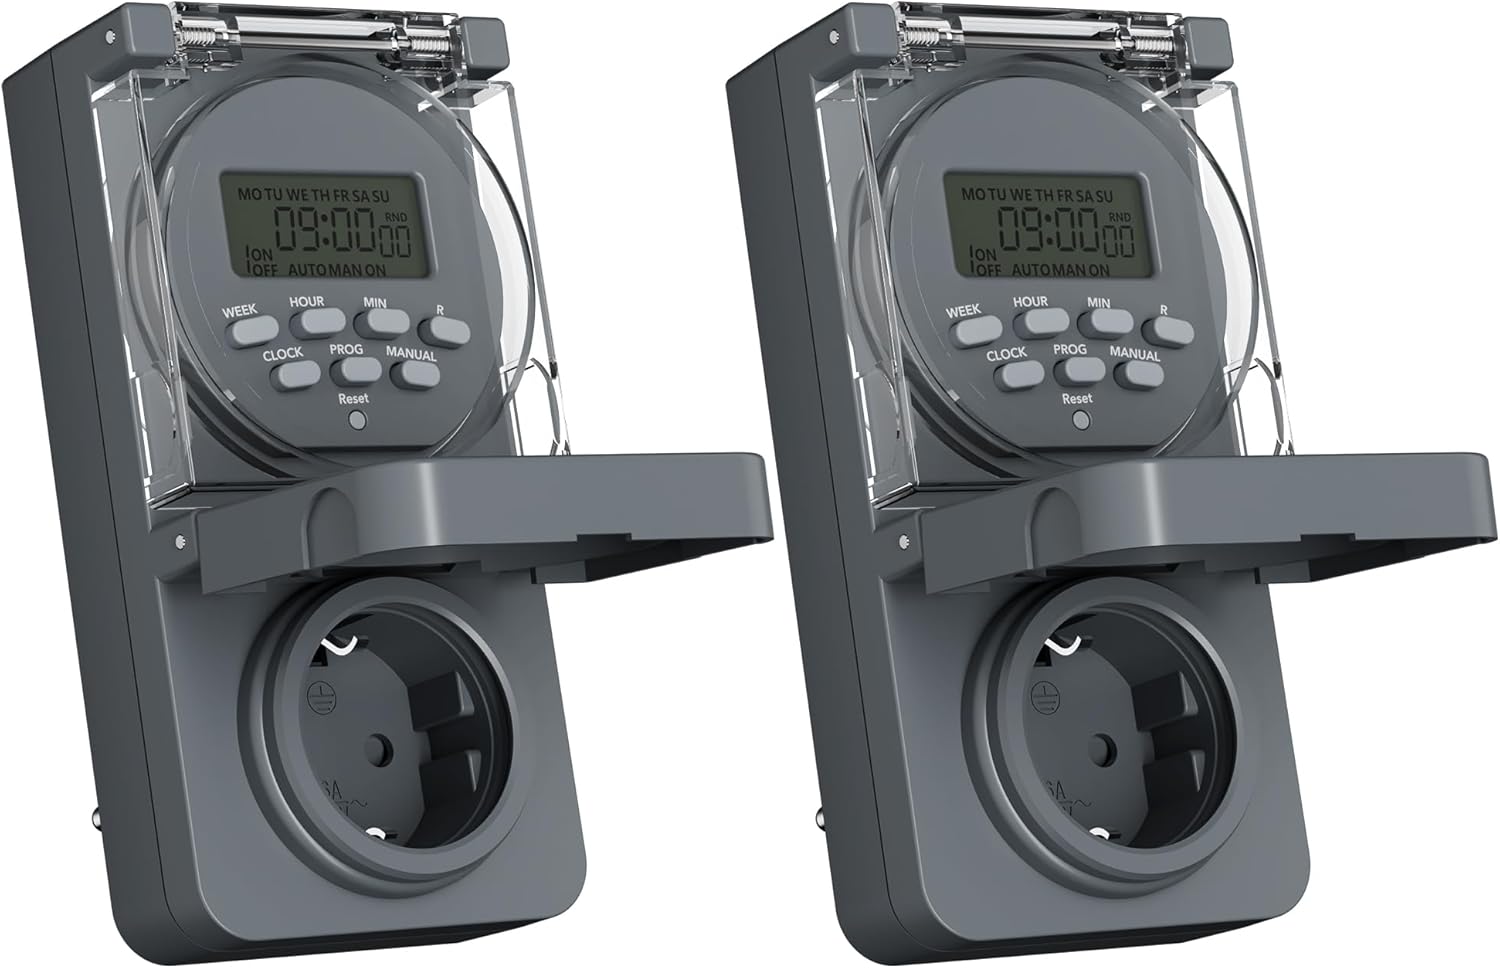
Image 1: Two HBN Digital Outdoor Timer Sockets, front view.

Image 2: Close-up of the timer's display and control buttons.
Knap funktioner:
- UGE: Selects the day(s) of the week for programming.
- TIME: Adjusts the hour setting.
- MIN: Adjusts the minute setting.
- UR: Exits programming mode and displays the current time. Used to set the current time.
- PROG: Enters and cycles through the 8 ON/OFF program settings.
- MANUEL: Skifter mellem ON-, AUTO- og OFF-tilstande.
- RND (Random): Activates or deactivates the random function.
- Nulstil: Clears all settings and returns the timer to factory defaults. Use a pointed object (e.g., a pen tip) to press.
5. Opsætning
5.1 Første opladning og nulstilling
Before first use, or after a long period of inactivity, plug the timer into a live power outlet for at least 30 minutes to charge the internal backup battery. This ensures that settings are retained during power outages.
After charging, press the Nulstil button using a pointed object to clear any pre-existing settings and ensure a fresh start.
5.2 Indstilling af aktuel tid og dag
- Tryk og hold på UR knap.
- Mens du holder UR, tryk UGE repeatedly to set the current day of the week (MO, TU, WE, TH, FR, SA, SU).
- Mens du holder UR, tryk TIME repeatedly to set the current hour (12-hour or 24-hour format).
- Mens du holder UR, tryk MIN repeatedly to set the current minute.
- Slip UR knappen. Det aktuelle klokkeslæt og den aktuelle dag er nu indstillet.
6. Betjeningsvejledning
6.1 Setting ON/OFF Programs
The timer allows you to set up to 8 ON/OFF programs. Each program consists of an ON time and an OFF time, along with specific days of the week.

Billede 3: Eks.amples of setting ON and OFF times for different programs.
- Tryk på PROG button once. The display will show "1 ON". This is for setting the first ON time.
- Trykke UGE repeatedly to select the desired day(s) for this program. Options include individual days, weekdays (MO TU WE TH FR), weekends (SA SU), all days (MO TU WE TH FR SA SU), or various combinations.
- Trykke TIME to set the desired hour for the ON time.
- Trykke MIN to set the desired minute for the ON time.
- Trykke PROG again. The display will show "1 OFF". This is for setting the first OFF time.
- Repeat steps 2-4 to set the day(s), hour, and minute for the OFF time. Ensure the day selection matches the ON time if you want the program to apply to the same days.
- Fortsæt med at trykke PROG to cycle through programs 2 ON, 2 OFF, up to 8 ON, 8 OFF. Repeat the setting process for each program as needed.
- Når du har indstillet alle de ønskede programmer, skal du trykke på UR knappen for at afslutte programmeringstilstanden og vende tilbage til visning af det aktuelle klokkeslæt.
6.2 Tilfældig funktion
The random function is designed to simulate presence by randomly turning the connected appliance ON and OFF within a specific time window, typically around your programmed ON/OFF times. This can deter potential intruders.

Image 4: The random function (RND) activated on the timer display.
- To activate the random function, press the RND button. The display will show "RND".
- For at deaktivere, tryk på RND knappen igen. "RND" forsvinder fra displayet.
6.3 Manual Control (ON/AUTO/OFF)
You can manually override the programmed settings using the MANUEL knap.
- Trykke MANUEL once: The timer switches to ON mode (output is continuously ON).
- Trykke MANUEL again: The timer switches to AUTO mode (follows programmed settings).
- Trykke MANUEL a third time: The timer switches to SLUKKET mode (output is continuously OFF).
6.4 Summer/Winter Time Adjustment
To adjust for daylight saving time:
- Tryk og hold på UR knap.
- Mens du holder UR, tryk på MANUEL button. The display will show "+1h" for summer time or revert to normal for winter time.
7. Vedligeholdelse
7.1 Rengøring
To clean the timer, unplug it from the power outlet. Wipe the exterior with a soft, damp klud. Brug ikke slibende rengøringsmidler, opløsningsmidler, og nedsænk ikke enheden i vand.
7.2 Opbevaring
When not in use for extended periods, store the timer in a cool, dry place, away from direct sunlight and extreme temperatures.
8. Fejlfinding
- Timeren tænder/slukker ikke som programmeret:
- Tjek om timeren er i gang AUTO mode (not ON or OFF manually).
- Verify that the programmed ON/OFF times and days are set correctly.
- Ensure the connected appliance is working and properly plugged into the timer.
- Displayet er tomt:
- Ensure the timer is plugged into a live power outlet.
- The internal backup battery might be completely drained. Plug the timer in for at least 30 minutes to charge it.
- Indstillinger går tabt efter strømafbrydelsetage:
- The internal backup battery may not be sufficiently charged. Ensure the timer is regularly connected to power. If settings are lost, re-enter them after charging.
- Random function not working:
- Sørg for RND function is activated (RND icon visible on display).
- The random function operates around programmed times; ensure at least one program is set.
9. Specifikationer

Image 5: Back of the timer showing electrical specifications.
| Feature | Specifikation |
|---|---|
| Model | CP-GOE22-1 |
| Strømforsyning | 230V~, 50Hz |
| Max belastning | 16A / 3680W |
| Beskyttelsesklasse | IP44 (stænksikker) |
| Antal programmer | 8 ON/OFF programmer |
| Minimum skiftetid | 1 minut |
| Kontroltilstande | ON, AUTO, OFF |
| Særlige funktioner | Random function, Summer/Winter time, 24-hour mode |
| Backup batteri | Integrated (retains settings during power outagr) |
| Dimensioner (ca.) | 5.5D x 8.5B x 12H cm |
| Varens vægt | 160 gram |
| Materiale | Plast |
| UPC | 810079587476 |
| Fabrikant | Ergo I&E CO., LTD |
10. Garanti og support
For garantioplysninger eller teknisk support henvises til den dokumentation, der blev leveret ved køb, eller kontakt din forhandler. Gem din købsbevis i tilfælde af garantikrav.


