1. Introduktion
This manual provides instructions for the safe and effective use of your Vespa Multifunctional LED Torch & Camping Light. This device features a long-range spotlight, expandable camping light, solar charging capability, power bank function, and an emergency mode. Please read this manual thoroughly before operation and retain it for future reference.

Image 1.1: The Vespa Multifunctional LED Torch and Camping Light in its compact form.
2. Pakkens indhold
Bekræft at alle varer er til stede i pakken:
- Vespa Multifunctional LED Torch & Camping lys
- Ladekabel
3. Specifikationer
| Model | Type 5 Flashlight (LF-25) |
| Mærke | Vespa |
| Dimensioner | 19.9D x 14.8B x 7.7H Centimeter |
| Varens vægt | 240 gram |
| Materiale | Plast |
| Lyskildetype | LED |
| Hvid lysstyrke | 300 lumen |
| Strømkilde | Battery Powered (Solar, Type-C) |
| Batteritype | 12V Lithium Ion (1 battery required) |
| Voltage | 240 volt |
| Wattage | 10 watt |
| Vandmodstandsniveau | Vandtæt |
| Pærefunktioner | Expandable/Multi-directional Lighting |
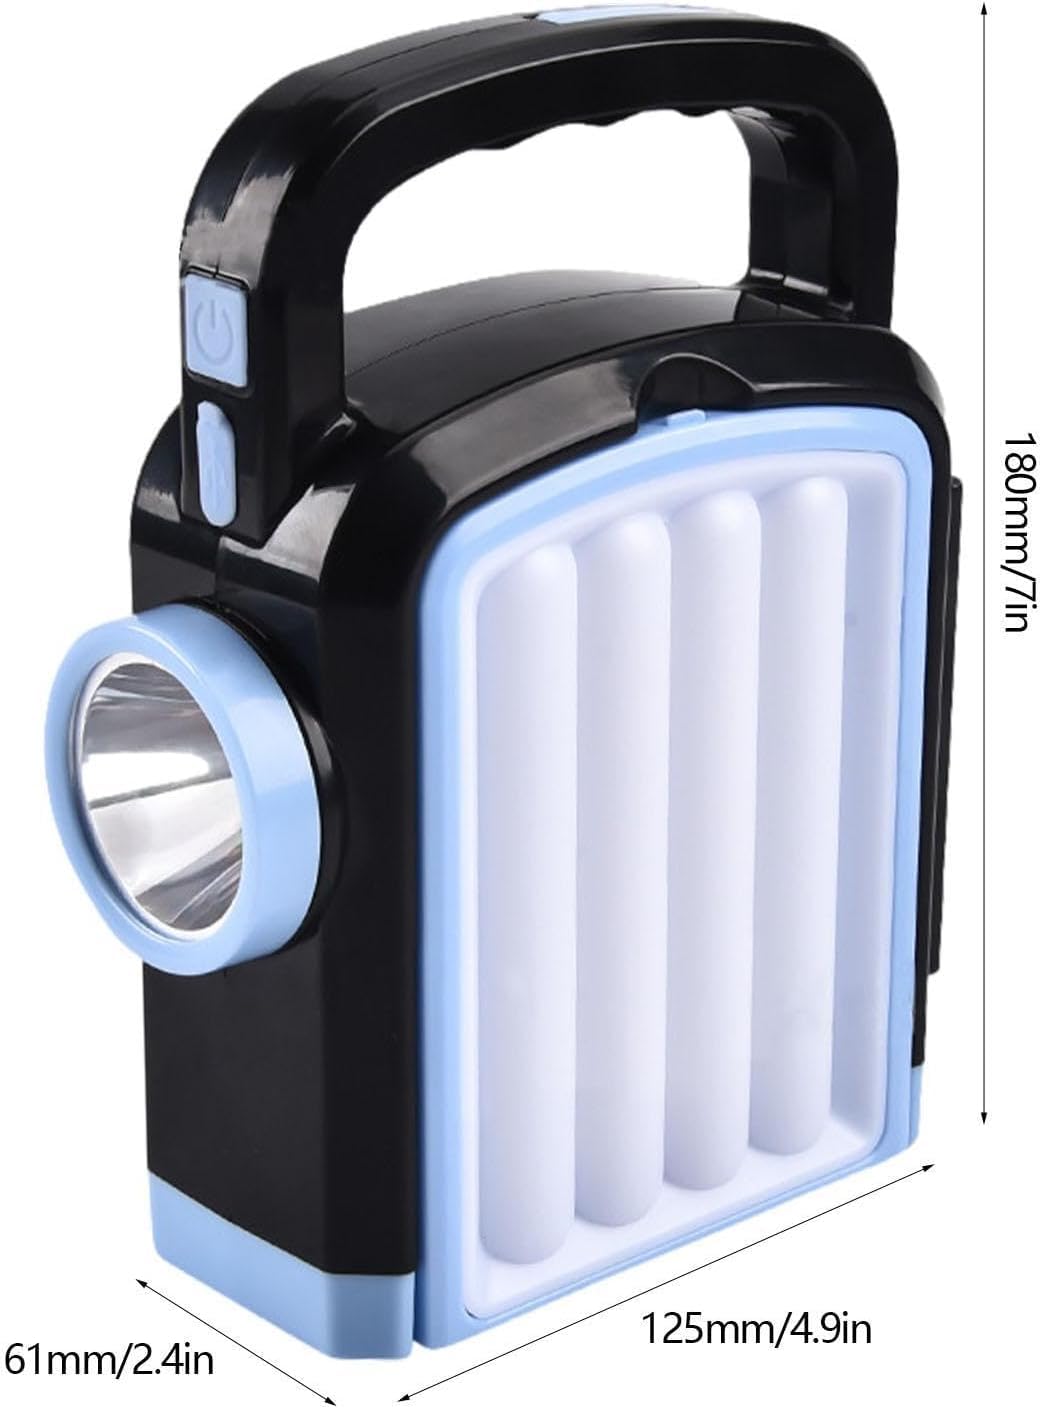
Image 3.1: Product dimensions showing height, width, and depth.
4. Opsætning
4.1 Indledende opladning
Before first use, fully charge the device using either the included Type-C charging cable or the integrated solar panel.
- Brug af Type-C-kabel: Connect the provided charging cable to the Type-C port on the device and to a compatible USB power adapter (not included). The charging indicator will illuminate.
- Brug af solpanel: Place the device with the solar panel facing direct sunlight. Ensure no obstructions block the panel. Solar charging efficiency depends on sunlight intensity.
5. Betjeningsvejledning
5.1 Tænd/sluk og lystilstande
The device features multiple lighting modes. Press the power button to cycle through the available modes:
- Spotlight-tilstand: Activates the front long-range spotlight.
- Camping Light (Floodlight) Mode: To activate, gently pull the side panels outwards to expand the device. This reveals the six-sided floodlight panels for a wider illumination area. Press the power button to cycle through different brightness levels (four-speed dimming) or to activate individual side panels (left, right, or all).
- Nødtilstand: A specific button or sequence of presses may activate a flashing or SOS signal. Refer to the device's physical buttons for specific emergency mode activation.

Image 5.1: Illustration of the device expanding from torch to camplystilstand.
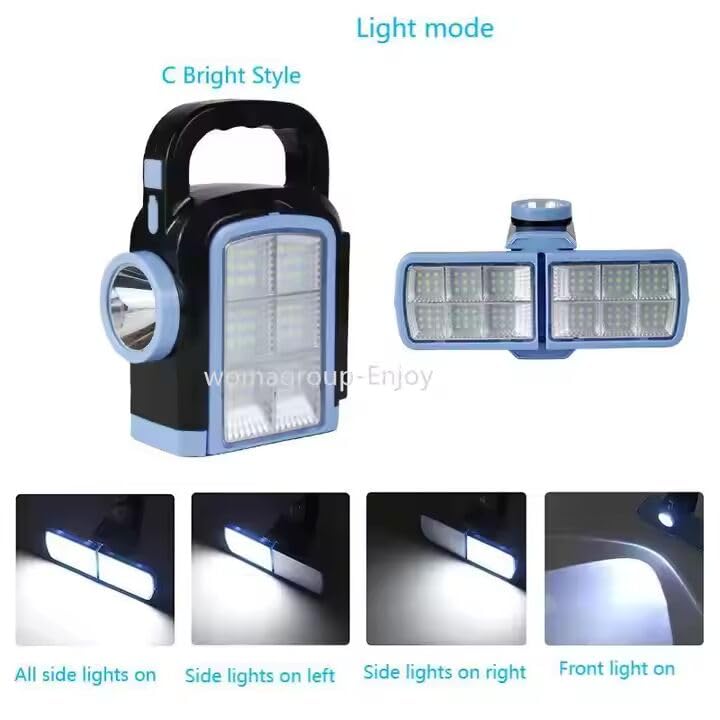
Image 5.2: Visual representation of different light modes, including front light and side lights.
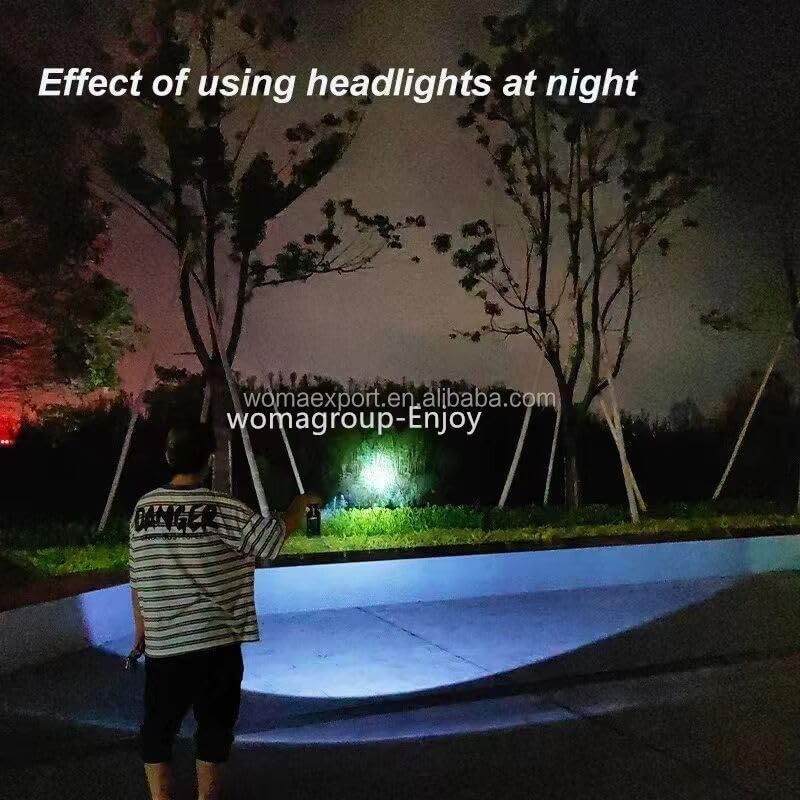
Image 5.3: Demonstrates the illumination range of the front spotlight at night.
5.2 Powerbankens funktionalitet
The device can be used to charge other electronic devices via its USB output port. Connect your device using a compatible USB cable (not included) to the torch's output port. This feature is designed for emergency charging and may deplete the torch's battery faster.
5.3 Portability and Hanging
The integrated handle allows for easy carrying. The device also features a portable hook, enabling it to be hung in various locations, such as inside a tent or from a tree branch, for overhead lighting.

Image 5.4: The camping light suspended from a tree branch for ambient lighting.
6. Vedligeholdelse
6.1 Rengøring
Tør enheden af med en blød, damp cloth. Do not use abrasive cleaners or solvents, as these can damage the plastic housing or electronic components.
6.2 Opbevaring
Store the device in a cool, dry place away from direct sunlight when not in use. For prolonged storage, ensure the battery is partially charged (around 50%) to maintain battery health.
6.3 Vandtæthed
The device is designed to be waterproof. However, avoid prolonged submersion in water. Ensure all ports are securely closed before exposure to moisture to prevent internal damage.
7. Fejlfinding
- Lyset tænder ikke: Ensure the device is charged. Connect it to a power source via Type-C cable or place it in direct sunlight for solar charging.
- Enheden oplader ikke: Check the Type-C cable and power adapter for proper connection and functionality. For solar charging, ensure the solar panel is clean and exposed to strong, direct sunlight.
- External device not charging from power bank: Ensure the torch has sufficient battery charge. Verify the USB cable connecting the external device is functional and correctly inserted into the output port.
8. Garanti og support
8.1 Garantioplysninger
This product may be eligible for a 1-year extended warranty by OneAssist. Please refer to your purchase documentation or contact the retailer for details on how to activate and utilize this warranty.
8.2 Kundesupport
For further assistance or inquiries, please contact the manufacturer or your point of purchase. Keep your purchase receipt and product model information (Type 5 Flashlight, LF-25) readily available.


