1. Introduktion
This manual provides essential information for the safe and efficient use of your DAYBETTER 120ft Solar String Lights. These outdoor lights are designed to provide warm white illumination for various outdoor settings, utilizing solar power for energy efficiency. Please read these instructions thoroughly before installation and operation.
2. Produktfunktioner
- Energy-Saving Solar Operation: Utilizes sunlight for power, eliminating electricity costs and the need for external wiring or outlets.
- All-Weather Waterproof Design: Constructed to endure various weather conditions including rain, snow, and humidity, ensuring year-round functionality.
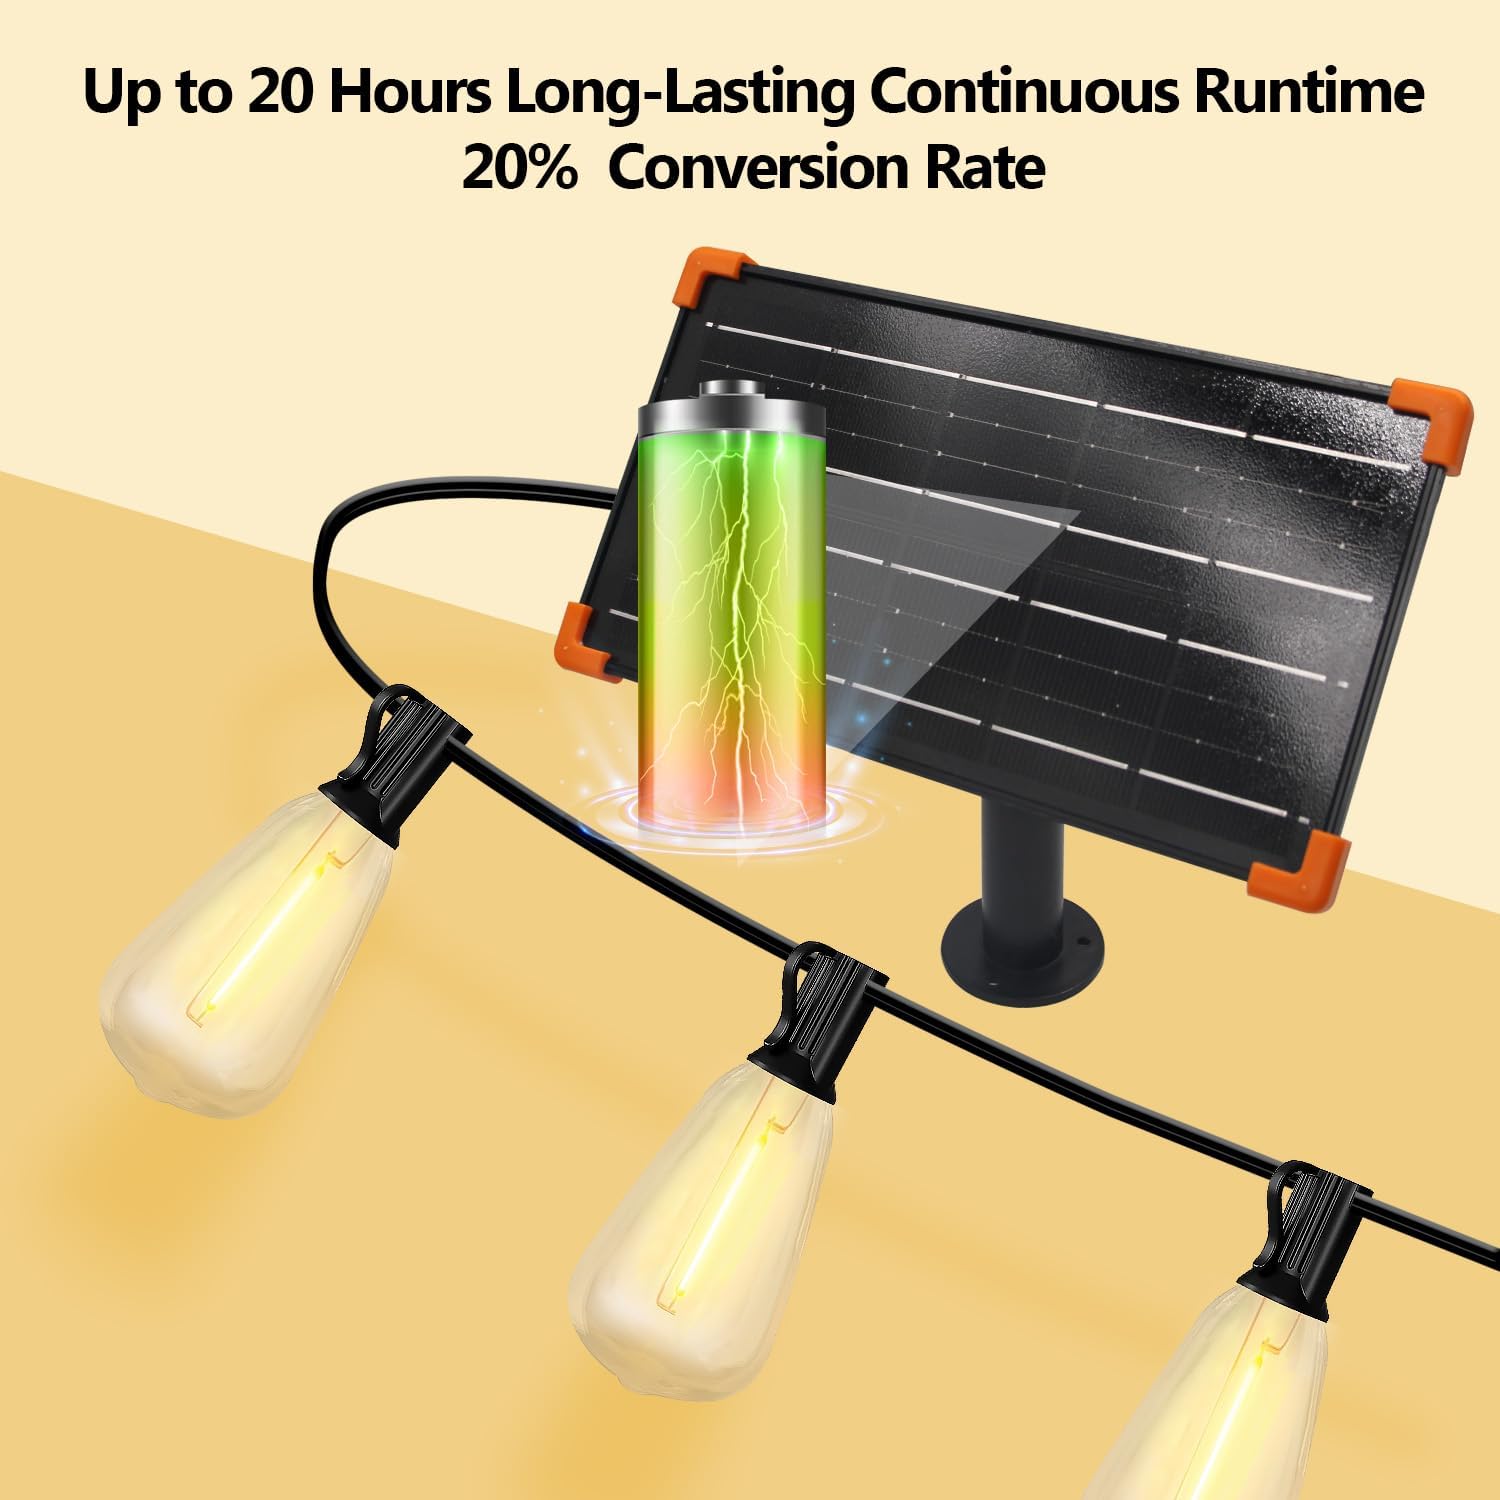
- Nem installation og alsidig brug: The 120ft length allows for flexible placement across fences, trees, pergolas, or pathways.
- Warm White Ambiance (2700K): Features 60 energy-efficient LED bulbs that emit a cozy glow, suitable for outdoor gatherings and relaxation.
- Long-Lasting Battery & Auto On/Off: The solar panel charges during the day, and the lights automatically activate at dusk and deactivate at dawn.
- Lav vedligeholdelse: Designed for minimal upkeep, contributing to a reduced carbon footprint.
- Complete Kit with Stakes & Hooks: Includes adjustable ground stakes and adhesive hooks for diverse mounting options on grass, walls, or decks.
3. Pakkens indhold
Bekræft at alle komponenter er til stede i pakken:
- 120ft LED Solar String Lights with 60 bulbs
- Solar Panel with integrated battery
- Fjernbetjening
- USB opladningskabel
- Ground Stake for solar panel
- Adhesive Hooks and Screws for mounting

4. Opsætning og installation
Følg disse trin for at opsætte dine solcelledrevne lyskæder:
- Udpak komponenter: Fjern forsigtigt alle varer fra emballagen.
- Placering af solpaneler: Choose a location for the solar panel that receives direct sunlight for at least 6-8 hours daily. This ensures optimal charging.
- Montering af solpanelet:
- Jordindsats: Attach the ground stake to the solar panel and firmly insert it into the ground.
- Wall-Mount/Clip: Use the provided screws or adhesive clips to secure the solar panel to a wall, fence, or other suitable surface. Ensure the panel is angled towards the sun.
- String Light Placement: Drape the 120ft string lights in your desired pattern across your garden, patio, or backyard. Use the integrated hooks on each bulb socket to secure the lights to wires, nails, or other fixtures.
- Connect Solar Panel to Lights: Connect the string light cable to the solar panel's output port. Ensure a secure connection.
- Indledende opkrævning: Allow the solar panel to charge for a full day (6-8 hours) in direct sunlight before first use.


5. Betjeningsvejledning
Your DAYBETTER Solar String Lights are designed for ease of use:
- Automatisk drift: After a full charge, the lights will automatically turn on at dusk and turn off at dawn.
- Fjernbetjeningsfunktioner: The included remote control allows for manual operation and customization. Ensure the remote has batteries and is pointed towards the solar panel receiver.
- TIL/FRA: Press to manually turn the lights on or off.
- Timer Settings (4H, 6H, 8H): Indstil lyset til at være tændt i 4, 6 eller 8 timer.
- Brightness Adjustment (25%, 50%, 75%, 100%): Juster lysintensiteten efter dine præferencer.
- Mode Selection (1-8): Choose from various lighting modes such as Steady On, Breath, or Flash.
- Speed Adjustment (Speed+, Speed-): For dynamic modes, adjust the speed of the lighting effect.
- USB Charging (Optional): In periods of low sunlight, the solar panel can be charged via the provided USB cable for 4 hours to ensure continuous operation.


6. Vedligeholdelse
To ensure the longevity and optimal performance of your solar string lights, consider the following maintenance tips:
- Rens solpanel: Tør regelmæssigt solpanelets overflade af med en blød, tør klud.amp klud til at fjerne støv, snavs eller affald. Et rent panel sikrer maksimal absorption af sollys og opladningseffektivitet.
- Undersøg forbindelser: Periodically check all connections between the solar panel and the string lights to ensure they are secure and free from corrosion.
- Udskiftning af pære: While LED bulbs are long-lasting, if a bulb needs replacement, ensure the power is off and replace it with a compatible LED bulb (E12 base, ST18 shape).
- Vinteropbevaring (valgfrit): In areas with harsh winters, you may choose to bring the solar panel and lights indoors for storage to protect them from extreme conditions, though they are designed to be all-weather.
7. Fejlfinding
If you encounter issues with your solar string lights, refer to the following common solutions:
| Problem | Mulig årsag | Løsning |
|---|---|---|
| Lysene tændes ikke om natten. | Utilstrækkelig opladning af solpanel. | Ensure the solar panel is placed in direct sunlight for 6-8 hours daily. Clean the solar panel surface. Use USB charging if sunlight is consistently low. |
| Lysene er svage eller flimrer. | Lav batteriopladning eller snavset solpanel. | Allow the solar panel to charge fully. Clean the solar panel. Check remote brightness settings. |
| Lights turn off too early. | Timer setting activated or insufficient charge. | Check remote control for active timer settings. Ensure adequate solar panel charging. |
| Fjernbetjening virker ikke. | Remote batteries depleted or obstruction. | Replace remote control batteries. Ensure no obstructions between remote and solar panel receiver. |
8. Specifikationer
| Feature | Detalje |
|---|---|
| Mærke | DAG BEDRE |
| Modelnummer | CST121B060-ASB0 |
| Længde | 120 fod |
| Antal lyskilder | 60 |
| Lys farve | Varm hvid (2700K) |
| Strømkilde | Solcelledrevet |
| Indendørs/Udendørs brug | Udendørs |
| Speciel funktion | Trådløs |
| Lyskildetype | LED |
| Materiale | Plast |
| Voltage | 24 volt |
| Pære form størrelse | ST18 |
| Pære base | E12 |
| Controller type | Fjernbetjening |
| Batterier | 2 lithium-ion-batterier (medfølger) |
| Varens vægt | 4.44 pund |
9. Garanti og support
For warranty information and customer support, please refer to the product packaging or contact DAYBETTER customer service directly. Keep your purchase receipt for any warranty claims.


