1. Introduktion
This user manual provides detailed instructions for the installation, operation, and maintenance of your BoyKeep D112-10 Light Bulb Security Camera. Please read this manual thoroughly before using the product to ensure proper functionality and safety.

Figure 1.1.1: BoyKeep D112-10 Light Bulb Security Camera (10-pack). This image displays the product as a bundle of ten light bulb-shaped security cameras.
2. Produktet er slutview
2.1. Pakkens indhold
The package for the BoyKeep D112-10 Light Bulb Security Camera (10-pack) includes:
- 10 x BoyKeep D112-10 Light Bulb Security Camera bodies
- Brugervejledning (dette dokument)
2.2. Nøglefunktioner
- 1080P High-Resolution Video: Giver klare og detaljerede billeder.
- Farve Night Vision: Forbedret synlighed under forhold med svagt lys.
- 24/7 Real-time Motion Alerts: Notifies your device upon motion detection.
- To-vejs snak: Indbygget mikrofon og højttaler til kommunikation.
- One-Touch Connection: Simplifies pairing with your device.
- Multi-enhed Viewing & Sharing: Monitor multiple cameras and share access.
- Cloud & Memory Card Storage: Flexible recording options (memory card not included).
- 360° panorering og 95° hældning: Wide area coverage with remote control.
- Nem installation: Designed for standard E27 light sockets.
2.3. Kamerakomponenter

Figure 2.3.1: Camera Component Diagram. This image illustrates the various parts of the BoyKeep D112-10 camera, including the E27 light socket base, enhanced WiFi module, microphone, 4 array LEDs, HD lens, 4 white LEDs, light sensor, memory card slot, and reset button. Dimensions are also shown: 6 cm (2.35 in) width and 15 cm (5.9 in) height.
3. Opsætning
3.1. Installation
The BoyKeep D112-10 camera is designed for easy installation into a standard E27 light bulb socket.
- Sluk: Ensure the power to the light socket is turned off before installation to prevent electrical shock.
- Skru ind: Carefully screw the camera into a standard E27 light socket until it is securely fastened.
- Tænd: Genopret strømmen til lysstikket. Kameraet vil tænde og starte sin opstartssekvens.
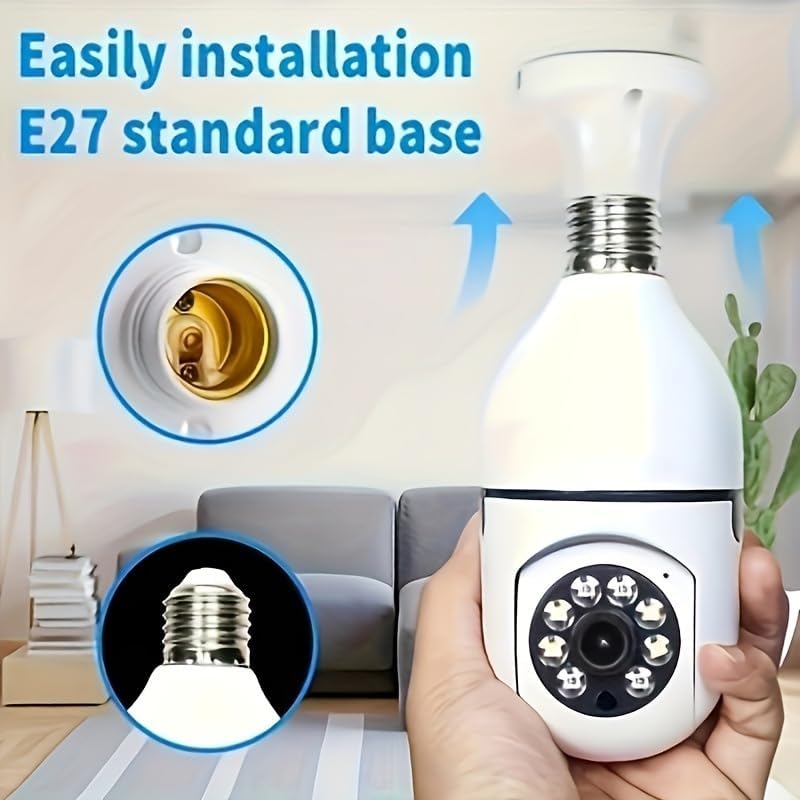
Figure 3.1.1: Easy Installation. This image demonstrates the simple process of screwing the camera into a standard E27 light bulb socket for quick setup.
3.2. Download og tilslutning af appen
To operate the camera, you need to download the dedicated mobile application.
- Download app: Søg efter the "BoyKeep" app (or specified app name in product packaging) on your smartphone's app store (Google Play Store for Android or Apple App Store for iOS).
- Registrer/Log ind: Åbn appen, og følg instruktionerne på skærmen for at registrere en ny konto eller logge ind, hvis du allerede har en.
- Tilføj enhed: In the app, select "Add Device" or the '+' icon. Choose the camera type (e.g., "Smart Camera" or "Light Bulb Camera").
- Opret forbindelse til Wi-Fi: Ensure your smartphone is connected to a 2.4GHz Wi-Fi network. The camera only supports 2.4GHz Wi-Fi. Follow the app's instructions to connect the camera to your Wi-Fi network. This usually involves scanning a QR code generated by the app with the camera, or entering Wi-Fi credentials.
- Færdiggørelse: Når kameraet er tilsluttet, vises det på din enhedsliste i appen.
Note: Ensure your Wi-Fi router supports 2.4GHz and that your phone is connected to the 2.4GHz band during setup. 5GHz networks are not supported by this device.
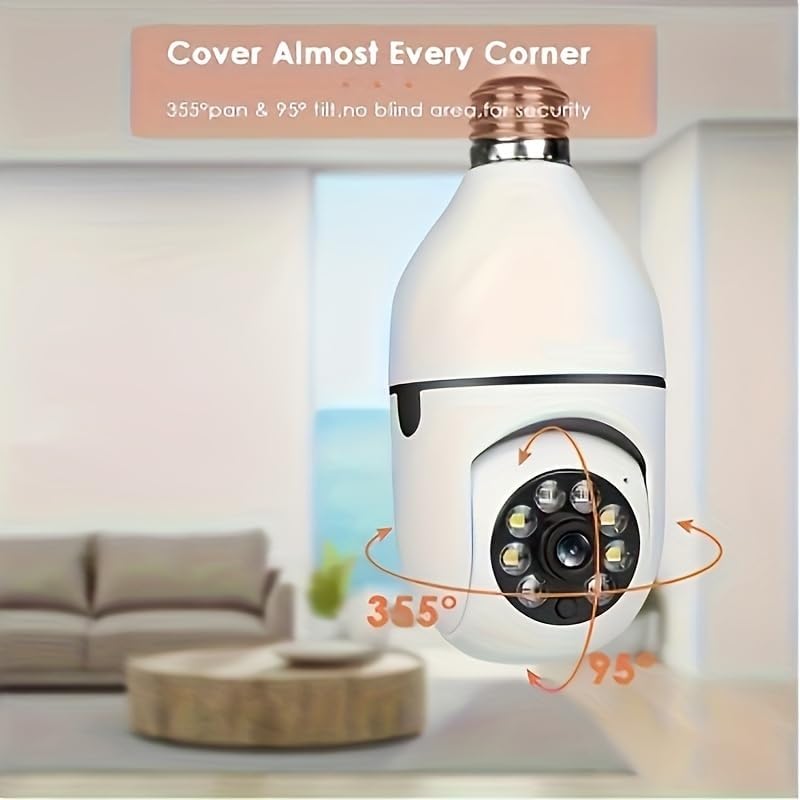
Figure 3.2.1: Wi-Fi Connection and Two-Way Talk. This diagram illustrates how the camera connects to a 2.4GHz Wi-Fi network and enables two-way communication between the camera and a smartphone or computer via the internet, allowing for interactions like speaking to a delivery person.
4. Betjeningsvejledning
4.1. Lev View og afspilning
- Levende View: Open the app and select the camera from your device list to view det levende feed.
- Afspilning: Få adgang til optaget footage by selecting the "Playback" option within the camera's interface in the app. You can navigate through the timeline to view specifikke begivenheder.
4.2. Panorerings- og vippekontrol
The camera offers 360° horizontal pan and 95° vertical tilt capabilities.
- Kontrollere: I live view interface of the app, use the directional controls (usually a joystick or arrow icons) to remotely adjust the camera's viewvinkel.
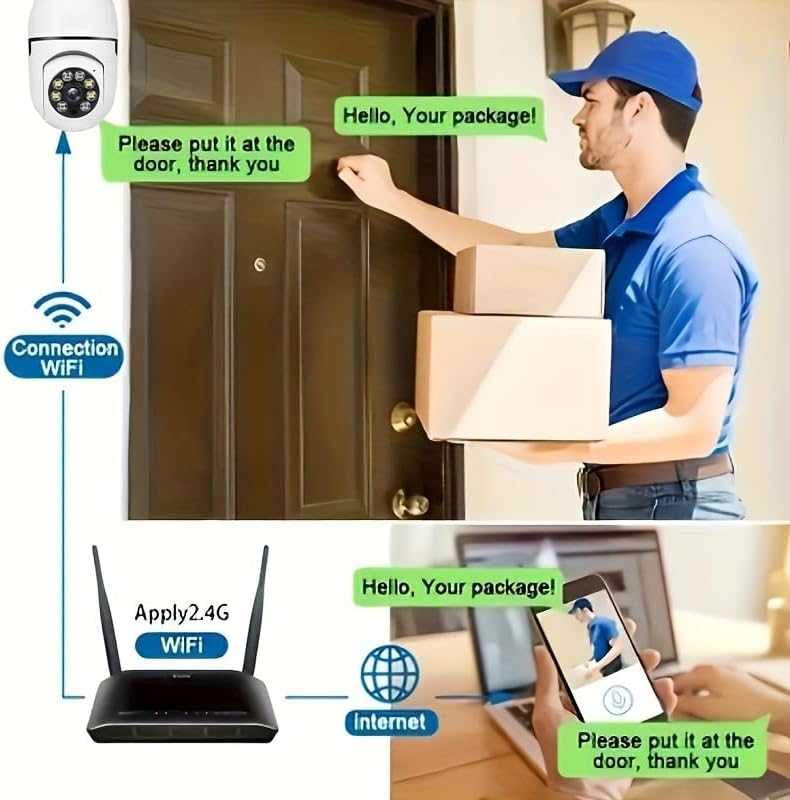
Figure 4.2.1: Pan and Tilt Coverage. This image demonstrates the camera's ability to cover almost every corner with its 355° pan and 95° tilt functions, eliminating blind spots for comprehensive security.
4.3. Bevægelsesdetektion og advarsler
- Aktiver/deaktiver: Navigate to the camera settings in the app to enable or disable motion detection.
- Følsomhed: Adjust the motion detection sensitivity level to minimize false alarms.
- Advarsler: When motion is detected, the camera will send push notifications to your smartphone. Recorded events will be stored in the cloud (if subscribed) or on the inserted memory card.
4.4. Tovejslyd
- Aktiver: I live view, tap the microphone icon to speak through the camera's speaker. Tap it again to mute.
- Lytte: The camera's microphone is active during live view, allowing you to hear audio from the camera's vicinity.
- Opkald med et enkelt tryk: If available, press the physical one-touch call button on the camera (if present) to initiate a call to your linked smartphone.
4.5. Nattesynstilstande
The camera supports both infrared and full-color night vision.
- Automatisk tilstand: The camera automatically switches between day and night vision based on ambient light.
- Infrarødt nattesyn: Giver klare sort-hvide billeder i fuldstændig mørke.
- Nattesyn i fuld farve: Utilizes built-in white LEDs to provide color images in low light, similar to daytime viewing. This mode can be activated manually or set to trigger upon motion detection.

Figure 4.5.1: Smart Dual Light LED Night Vision. This image compares the visual output of infrared night vision (top, black and white) and full-color night vision (bottom, color) provided by the camera's smart dual light LEDs, showcasing improved visibility in low-light conditions.
4.6. Opbevaringsmuligheder
- Memory Card (MicroSD): Insert a compatible MicroSD card (up to 128GB, Class 10 or higher recommended, not included) into the camera's memory card slot for local storage of recordings. The camera supports 24/7 continuous recording to the memory card.
- Cloud Storage: The camera offers cloud storage services (e.g., a 30-day trial may be included). Refer to the app for subscription details and management.
5. Vedligeholdelse
- Rensning: Brug en blød, tør klud til at rengøre kameralinsen og huset. Brug ikke flydende rengøringsmidler eller slibende materialer.
- Firmwareopdateringer: Regularly check the app for firmware updates. Keeping the firmware updated ensures optimal performance and security.
- Netværksstabilitet: Sørg for, at dit Wi-Fi-netværk er stabilt og stærkt på kameraets placering for at sikre uafbrudt drift.
- Miljøforhold: The camera is designed for indoor use. Avoid exposing it to extreme temperatures, direct sunlight, or high humidity.
6. Fejlfinding
| Problem | Mulig årsag | Løsning |
|---|---|---|
| Kameraet tænder ikke. | No power to the light socket; camera not screwed in properly. | Sørg for, at der er strøm i lysfatningen. Skru kameraet fast i fatningen igen. |
| Kan ikke oprette forbindelse til Wi-Fi. | Incorrect Wi-Fi password; connecting to 5GHz network; weak Wi-Fi signal. | Verify Wi-Fi password. Ensure you are connecting to a 2.4GHz network. Move camera closer to router or use a Wi-Fi extender. Reset camera and try again. |
| Bevægelsesalarmer ikke modtaget. | Motion detection disabled; app notifications turned off; low sensitivity. | Enable motion detection in app settings. Check phone's notification settings for the app. Increase motion detection sensitivity. |
| Dårlig videokvalitet. | Svagt Wi-Fi-signal; snavset linse. | Improve Wi-Fi signal strength. Clean the camera lens with a soft, dry cloth. |
| Tovejslyd virker ikke. | Microphone/speaker muted in app; network issues. | Tjek lydindstillingerne i appen. Sørg for en stabil netværksforbindelse. |
7. Specifikationer
| Feature | Detalje |
|---|---|
| Modelnavn | D112-10 |
| Video opløsning | 1080P |
| Forbindelse | 2.4 GHz Wi-Fi (IEEE 802.11b/g/n) |
| Strømkilde | Ledningsbaseret elektrisk (E27-fatning) |
| Pan/tilt rækkevidde | 355° vandret, 95° lodret |
| Nattesyn | Infrared & Full-Color Night Vision |
| Opbevaringsmuligheder | MicroSD-kort (op til 128 GB, medfølger ikke), Cloud-lagring |
| Lyd | Tovejssamtale (indbygget mikrofon og højttaler) |
| Indendørs/Udendørs brug | Indendørs |
| Dimensioner (kamerahus) | Approx. 6 cm (2.35 in) diameter, 15 cm (5.9 in) height |
| Inkluderede komponenter | Kamerahus |
8. Garantioplysninger
BoyKeep products are manufactured to the highest quality standards. This product comes with a standard manufacturer's warranty. Please refer to the product packaging or the official BoyKeep webwebstedet for specifikke garantivilkår og -betingelser, herunder detaljer om varighed og dækning.
9. Kundesupport
For technical support, troubleshooting assistance, or any inquiries regarding your BoyKeep D112-10 Light Bulb Security Camera, please contact our customer support team:
- Online support: Visit the official BoyKeep store on Amazon: BoyKeep-butik
- E-mail support: Refer to the contact information provided in your product packaging or on the BoyKeep webwebsted.
When contacting support, please have your product model number (D112-10) and purchase details ready.


