1. Introduktion
The Waveshare RP2350 MCU Board Plus is a low-cost, high-performance microcontroller development board. It is designed around the Raspberry Pi RP2350A dual-core and dual-architecture microcontroller chip, offering compatibility with most Raspberry Pi Pico add-on modules. This manual provides essential information for setting up, operating, and maintaining your RP2350 MCU Board Plus.

Billede 1: Top-down view of two RP2350 MCU Board Plus units, showcasing deres kompakte design og pinheadere.
2. Nøglefunktioner og specifikationer
The RP2350 MCU Board Plus incorporates advanced features for versatile development:
- Mikrocontroller: RP2350A chip by Raspberry Pi, featuring a dual-core Arm Cortex-M33 processor and a dual-core RISC-V processor, with a flexible clock running up to 150 MHz.
- Hukommelse: 520KB Static Random-Access Memory (SRAM) and 4MB of on-board Flash memory.
- Forbindelse: Type-C USB connector for modern compatibility and ease of use.
- Strømstyring: Onboard recharge/discharge header for mobile applications and an MP28164 DC-DC buck-boost chip with a maximum 2A load current.
- GPIO pins: 26 multi-function GPIO pins, configurable for various peripheral functions.
- Periferiudstyr: 2 × SPI, 2 × I2C, 2 × UART, 4 × 12-bit ADC, 16 × controllable PWM channels.
- Avancerede funktioner: Accurate on-chip clock and timer, temperature sensor, accelerated floating-point libraries, and 12 × Programmable I/O (PIO) state machines for custom peripheral support.
- Formfaktor: Castellated module design allows direct soldering to carrier boards.
- USB: USB 1.1 with device and host support.
- Strømtilstande: Low-power sleep and dormant modes.
- Programmering: Drag-and-drop programming using mass storage over USB.
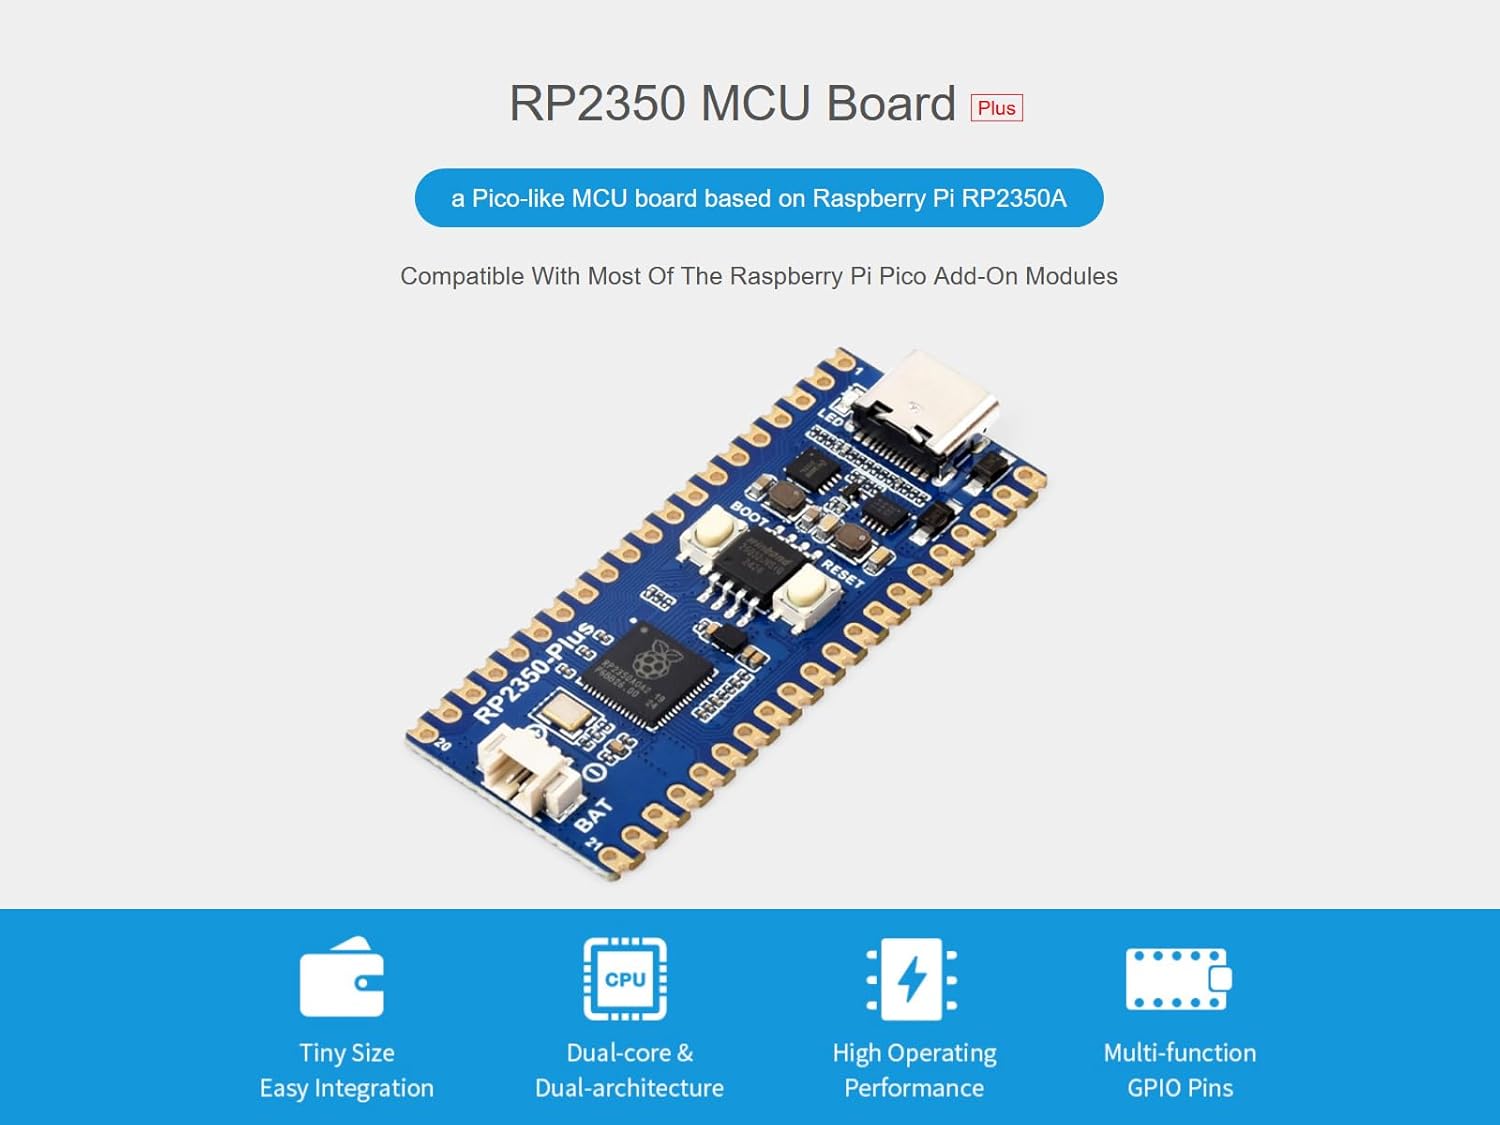
Image 2: The RP2350 MCU Board Plus with visual callouts for its compact size, dual-core architecture, high operating performance, and multi-function GPIO pins.

Billede 3: En detaljeret view of the RP2350A microcontroller chip, illustrating its dual-core and dual-architecture design for flexible clock speeds up to 150 MHz.
3. Pinout-diagram
The RP2350 MCU Board Plus features 26 multi-function GPIO pins. Refer to the diagram below for a detailed pinout configuration, which allows for flexible development and integration with various peripherals.

Image 4: Comprehensive pinout diagram for the RP2350 MCU Board Plus, indicating the function of each of the 26 multi-function GPIO pins, including SPI, I2C, UART, ADC, and PWM channels.
4. Board Components Overview
Familiarize yourself with the main components of the RP2350 MCU Board Plus using the labeled diagram below:

Image 5: An annotated diagram of the RP2350 MCU Board Plus, identifying key components such as the LED, USB Type-C connector, BOOT and RESET buttons, the RP2350A microcontroller, and the battery header for mobile applications.
- LED (not power indicator)
- USB Type-C stik
- ETA6096 (high efficiency Lithium battery recharge manager)
- MP28164 (high efficiency DC-DC buck-boost chip)
- BOOT button (press it when resetting to enter download mode)
- On-board flash memory (4MB: W25Q32JVSSIQ)
- RESET knap
- RP2350A (dual-core and dual-architecture design, up to 150 MHz operating frequency)
- Battery header (MX1.25 header, for 3.7V Lithium battery, allows recharging the battery and powering the board at the same time)
- Pinout (compatible with Raspberry Pi Pico 2)
- USB test points (connecting to USB interface)
- BOOT test point (connecting to BOOT button)
- DEBUG points
5. Softwareudvikling
The RP2350 MCU Board Plus supports various development environments and programming languages, including C/C++ and MicroPython. Waveshare provides comprehensive SDKs, development resources, and tutorials to assist users in getting started quickly.
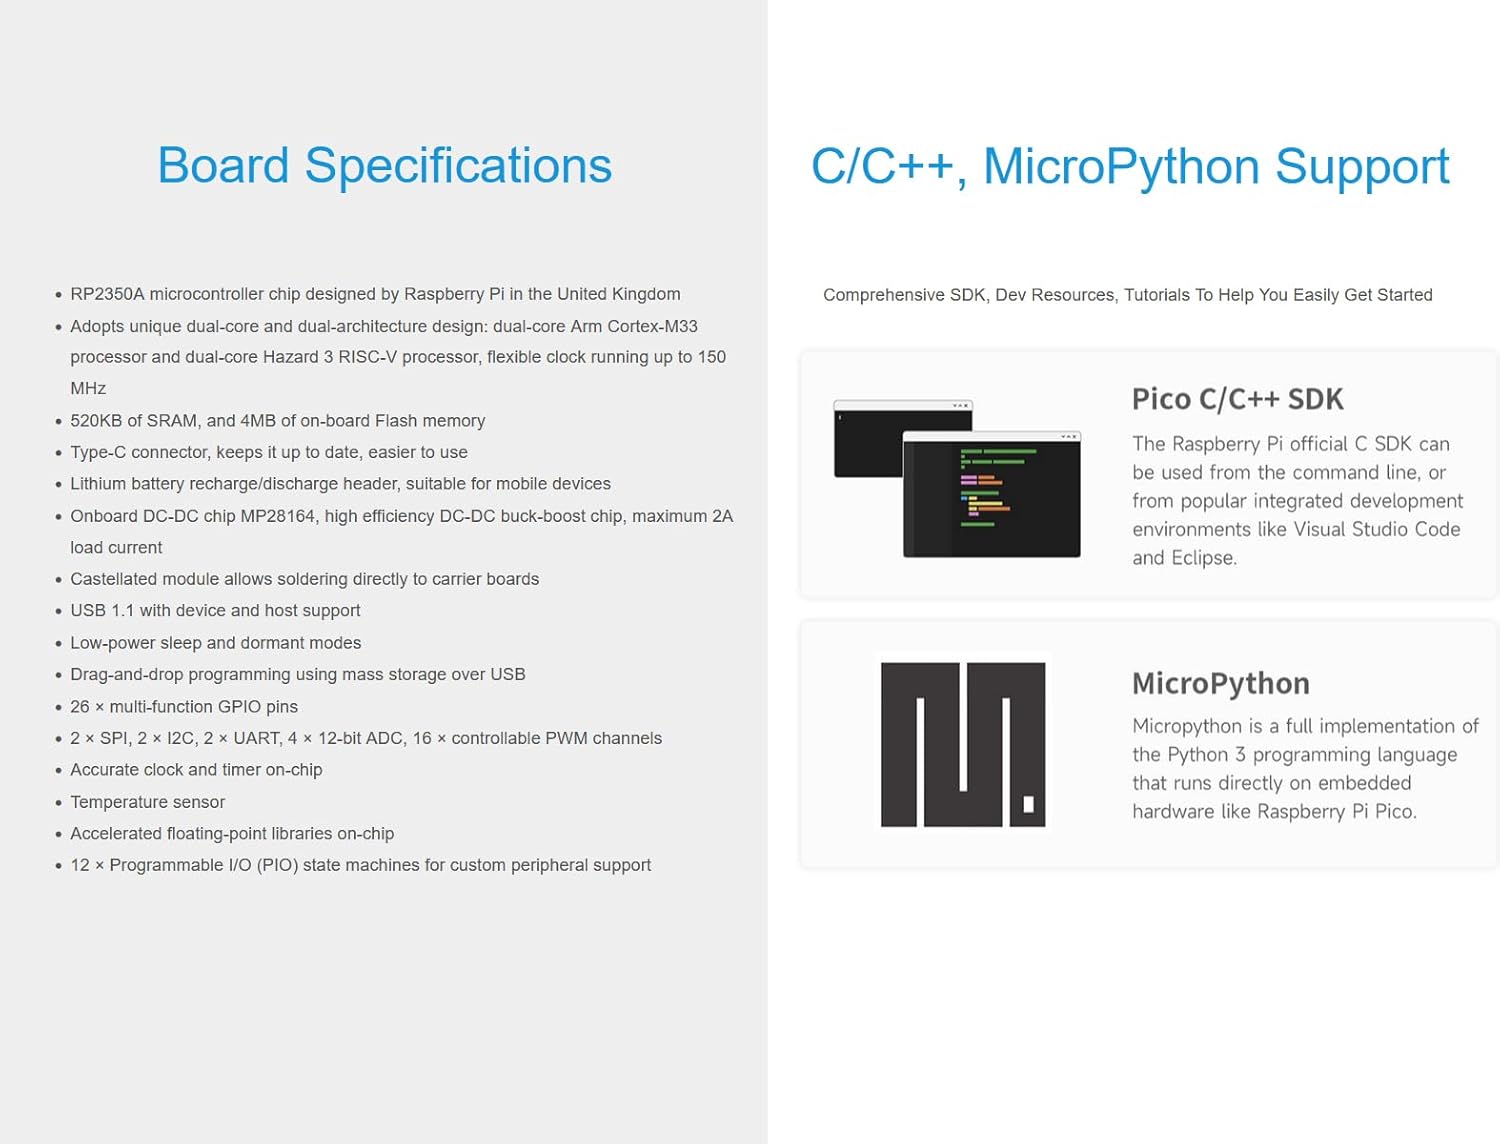
Image 6: Visual representation of the software development support for the RP2350 MCU Board Plus, highlighting compatibility with Pico C/C++ SDK and MicroPython.
Official Product Video: RP2350 Pi Zero Overview
Video 1: An official Waveshare video providing an overview of the RP2350 Pi Zero, demonstrating its features, architecture, storage, interfaces, and development environment support. This video is relevant for understanding the RP2350 series.
6. Fysiske dimensioner
The compact design of the RP2350 MCU Board Plus makes it suitable for integration into various projects. Below are the outline dimensions for reference (Unit: mm).

Image 7: Technical drawing illustrating the precise dimensions of the RP2350 MCU Board Plus, with measurements provided in millimeters for accurate project planning and integration.
7. Opsætning
To begin using your Waveshare RP2350 MCU Board Plus, follow these general setup steps:
- Tilslut til computer: Use a Type-C USB cable to connect the RP2350 MCU Board Plus to your computer.
- Installer drivere (hvis nødvendigt): Your operating system may automatically install necessary drivers. If not, refer to the official Waveshare documentation for driver installation instructions.
- Installer udviklingsmiljø: Download and install your preferred development environment (e.g., Thonny IDE for MicroPython, or a C/C++ IDE with the Pico SDK).
- Firmware-upload: For initial use or firmware updates, you may need to put the board into bootloader mode. Typically, this involves holding down the BOOT button while connecting the USB cable or pressing BOOT and then RESET. Follow the specific instructions in the Waveshare online resources for your chosen programming language.
- Første program: Load a simple "blink" program or a "hello world" example to verify the board's functionality.
8. Betjeningsvejledning
Once set up, the RP2350 MCU Board Plus can be operated for various applications:
- Programmering: Write your code in C/C++ or MicroPython using the installed IDE.
- Uploadkode: Compile your code and upload it to the board via the USB connection. The drag-and-drop mass storage programming method simplifies this process.
- GPIO-brug: Utilize the 26 multi-function GPIO pins to interface with sensors, actuators, displays, and other electronic components. Refer to the pinout diagram for specific pin functions.
- Powering External Devices: The onboard DC-DC chip and battery header allow for powering and managing external devices, making it suitable for mobile and embedded projects.
- Fejlretning: Use the provided debug points and your development environment's debugging tools to troubleshoot your programs.
9. Vedligeholdelse
To ensure the longevity and optimal performance of your RP2350 MCU Board Plus, consider the following maintenance guidelines:
- Håndteres med forsigtighed: Avoid dropping the board or subjecting it to excessive physical stress.
- Statisk udladning: Always handle the board in an anti-static environment to prevent damage from electrostatic discharge.
- Hold tør: Protect the board from moisture and humidity.
- Renhed: Hold printpladen fri for støv og snavs. Brug en blød, tør børste eller trykluft til rengøring.
- Strømforsyning: Use a stable and appropriate power supply. Avoid over-voltage or reverse polarity connections.
- Opbevaring: When not in use, store the board in its original packaging or an anti-static bag in a cool, dry place.
10. Fejlfinding
If you encounter issues with your RP2350 MCU Board Plus, try the following troubleshooting steps:
- Boardet tænder ikke:
- Kontroller USB-kabelforbindelsen og strømkilden.
- Ensure the USB port on your computer is functional.
- If using a battery, ensure it is charged and correctly connected to the battery header.
- Computer Not Recognizing Board:
- Prøv en anden USB-port eller et andet kabel.
- Ensure the board is in the correct mode (e.g., bootloader mode for firmware upload).
- Check device manager for driver issues and install/update drivers if needed.
- Code Not Uploading/Running:
- Verify your code for syntax errors.
- Sørg for, at det korrekte kort og den korrekte port er valgt i dit IDE.
- Try re-uploading the firmware.
- Consult online forums and the Waveshare documentation for common issues related to your specific development environment.
- Periferiudstyr virker ikke:
- Double-check wiring connections to the GPIO pins.
- Verify the pin assignments in your code match the hardware connections.
- Ensure the peripheral itself is functional and correctly configured.
11. Garanti og support
For warranty information, technical support, and additional resources, please visit the official Waveshare website or contact their customer service. Online development resources and technical support are provided to assist you with any problems.
Du kan finde mere information og support på Waveshare Store on Amazon.


