Produkt overview
The CIRCLE JOY Electric Wine Opener Set provides a convenient and elegant solution for opening, pouring, and preserving wine. This 5-in-1 set includes an electric wine opener, a foil cutter, a wine aerator pourer, a vacuum wine stopper, a charging base, and a USB-C cable.
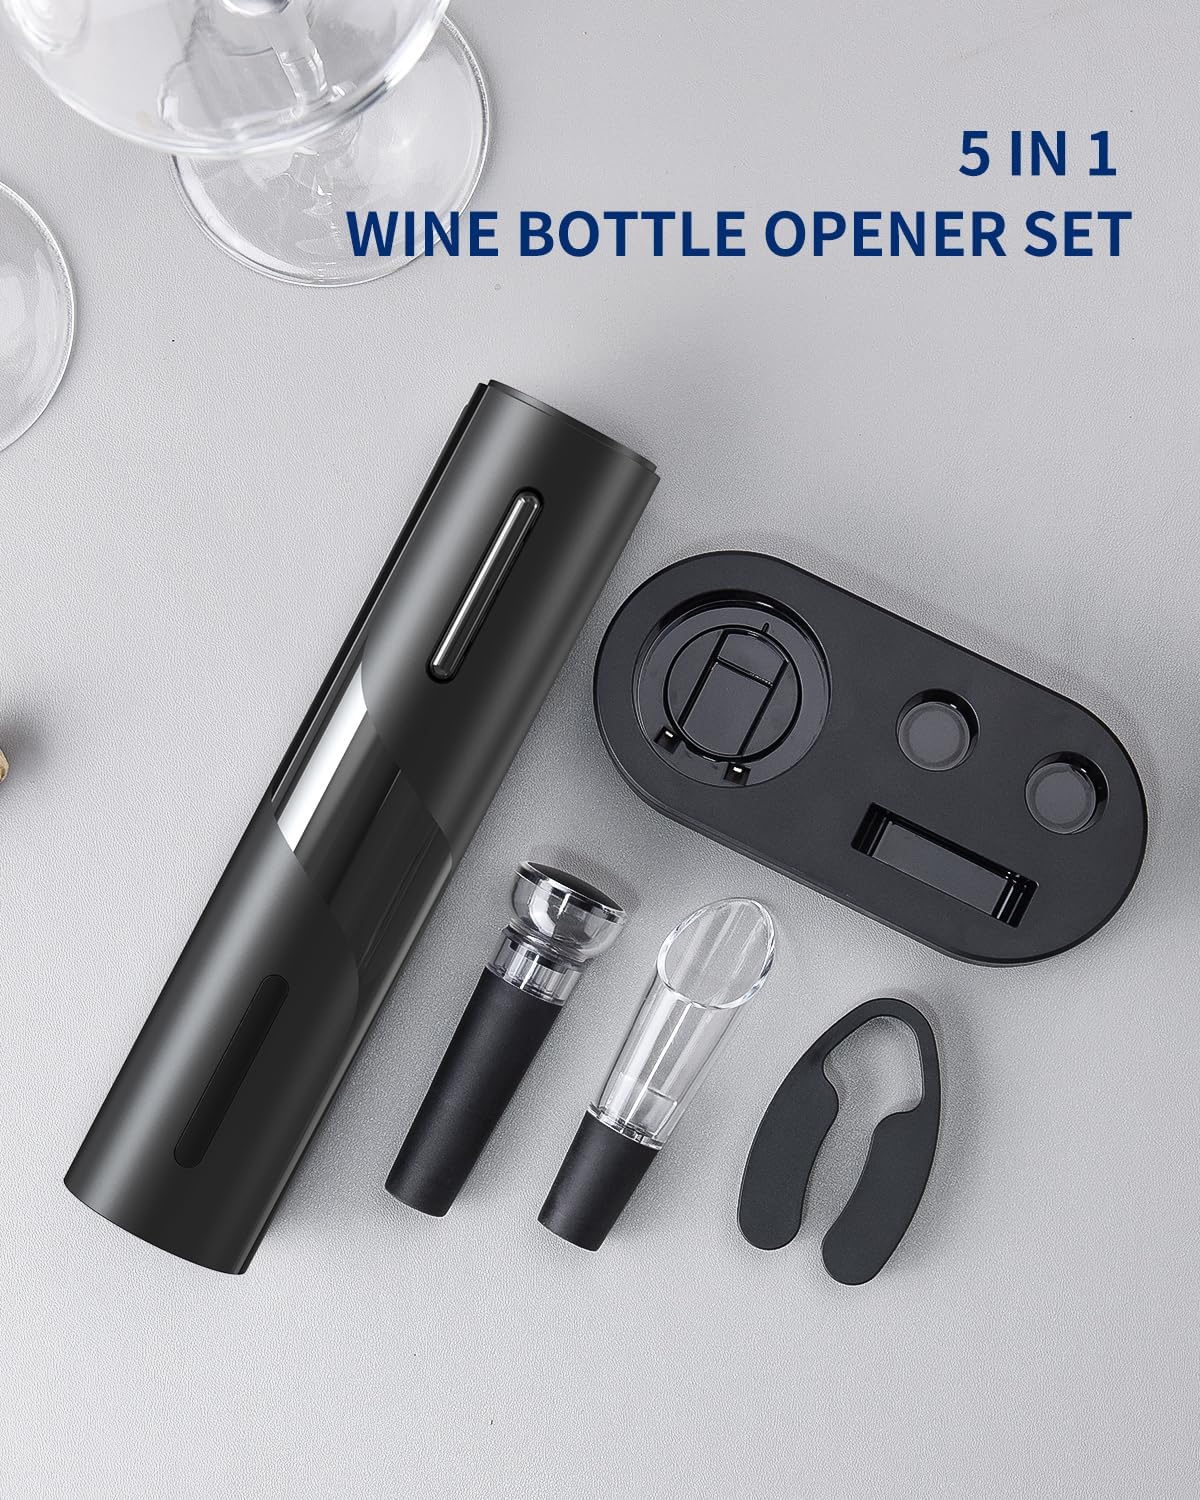
Image: The complete 5-in-1 CIRCLE JOY Electric Wine Opener Set, including the electric corkscrew, foil cutter, aerator pourer, vacuum stopper, and charging base.
Opsætning
1. Charging the Electric Wine Opener
- Place the electric wine opener onto the charging base.
- Connect the USB-C cable to the charging base and plug the other end into a suitable USB power adapter (not included).
- The indicator light on the opener will illuminate during charging. Ensure the opener is fully charged before first use for optimal performance.

Image: The electric wine opener positioned on its charging base, ready for charging. The base also holds the aerator and vacuum stopper.
Betjeningsvejledning
1. Brug af folieskæreren
- Place the foil cutter on top of the wine bottle, gripping the neck firmly.
- Twist the foil cutter around the bottle neck to cleanly remove the foil seal.
- Remove the foil cutter and discard the foil.
2. Using the Electric Wine Opener
- After removing the foil, place the electric wine opener vertically on top of the wine bottle, ensuring it is centered over the cork.
- Hold the bottle firmly with one hand and the opener with the other. Press and hold the lower button (usually marked with a down arrow). The corkscrew will automatically penetrate the cork and pull it out of the bottle.
- Once the cork is fully removed, lift the opener from the bottle. To release the cork from the opener, press and hold the upper button (usually marked with an up arrow). The cork will be ejected.

Image: Step-by-step guide for using the wine opener set, from foil removal to pouring and preserving.
3. Using the Wine Aerator Pourer
- Insert the aerator pourer firmly into the neck of the opened wine bottle.
- Pour wine slowly through the aerator into your glass. The aerator is designed to enhance the wine's flavor and aroma as it is poured.
4. Using the Vacuum Wine Stopper
- Place the vacuum wine stopper firmly into the neck of the wine bottle.
- Place the electric wine opener over the vacuum stopper. The opener will automatically detect the stopper.
- Press the button on the opener to activate the vacuum function. The opener will pump air out of the bottle, creating a vacuum seal to preserve the wine.
- The opener will stop automatically once the vacuum is achieved.
Opretholdelse
Cleaning the Aerator Pourer and Vacuum Stopper
- Rinse the aerator pourer and vacuum stopper with warm water after each use.
- For thorough cleaning, use a mild dish soap and a soft brush. Ensure all wine residue is removed.
- Allow components to air dry completely before storing.
Cleaning the Electric Wine Opener
- Wipe the exterior of the electric wine opener with a soft, damp klæde.
- Do not immerse the electric wine opener or charging base in water or any other liquid.
- Periodically check the corkscrew for any debris and clean gently if necessary.
Fejlfinding
| Problem | Mulig årsag | Løsning |
|---|---|---|
| Opener not working/low power | Batteri lavt eller ikke opladet. | Place the opener on the charging base and ensure it is connected to power. Allow sufficient time for charging. |
| Cork not removing smoothly | Opener not centered; corkscrew misaligned. | Ensure the opener is placed vertically and centered over the cork. Apply gentle, steady pressure. |
| Foil not cutting cleanly | Foil cutter not rotated sufficiently or blades dull. | Ensure full rotation of the foil cutter. If issues persist, inspect blades for damage. |
| Wine not pouring through aerator | Aerator clogged or not inserted correctly. | Remove and clean the aerator. Reinsert firmly into the bottle neck. |
| Vacuum stopper not sealing | Stopper not fully inserted or opener not properly engaged. | Ensure the stopper is pushed down completely. Place the opener firmly over the stopper and activate the vacuum function. |
Specifikationer
- Modelnummer: KP 1129
- Pakkedimensioner: 8.74 x 3.39 x 3.19 tommer
- Varens vægt: 15.2 ounce (0.43 kilo)
- Batterier: 1 lithium-ion batteri (medfølger)
- Materiale: Plast, rustfrit stål
- Farve: Sort
- Antal varer: 5 (Electric Wine Opener, Foil Cutter, Wine Aerator Pourer, Vacuum Wine Stopper, Charging Base)
Garanti og support
CIRCLE JOY offers a 12-Month Satisfaction Service for this product. If you have any questions, concerns, or require assistance, please contact CIRCLE JOY customer support for prompt resolution.


