1. Introduktion
Thank you for choosing the Aigo ICE400SE RGB CPU Air Cooler. This manual provides essential information for the proper installation, operation, and maintenance of your new CPU cooler. Please read this manual thoroughly before installation to ensure correct setup and optimal performance. Retain this manual for future reference.
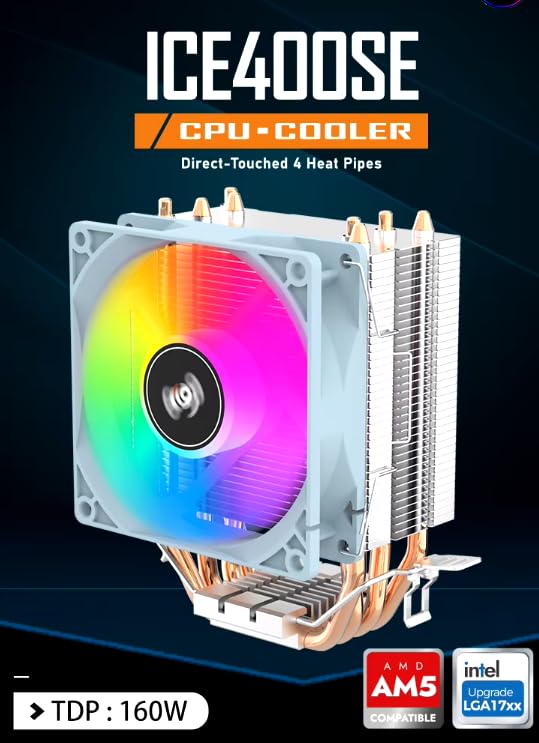
Billede 1.1: Overview of the Aigo ICE400SE CPU Cooler, showcasing its direct-touch heat pipes, 160W TDP rating, and compatibility with AMD AM5 and Intel LGA17xx sockets.
2. Sikkerhedsoplysninger
- Sørg for, at dit computersystem er slukket og taget stikket ud af stikkontakten, før du starter installationen.
- Handle components with care to avoid damage. Static electricity can harm electronic components; consider using an anti-static wrist strap.
- Hold små dele og emballagematerialer væk fra børn.
- Forsøg ikke at modificere køleren eller dens komponenter. Uautoriserede modifikationer kan ugyldiggøre din garanti og udgøre en sikkerhedsrisiko.
- Refer to your motherboard's manual for specific instructions regarding CPU cooler installation and fan header locations.
3. Pakkens indhold
Bekræft at alle komponenter er til stede i pakken:
- Aigo ICE400SE CPU Cooler (Heatsink and Fan Assembly)
- Intel Mounting Brackets and Hardware
- AMD Mounting Brackets and Hardware
- Thermal Paste (may be pre-applied or included in a tube)
- Brugervejledning (dette dokument)

Image 3.1: Illustration of the Aigo ICE400SE CPU cooler components, including the fan, heatsink, and various mounting hardware for different CPU sockets.
4. Specifikationer
| Feature | Detalje |
|---|---|
| Model | ICE400SE |
| Kompatibilitet | Intel LGA1156/1155/1151/1150/775/1700, AMD AM5/AM4/AM3+/AM3/AM2+/AM2 |
| TDP-understøttelse | Op til 160W |
| Varmerør | 4 Copper Heat Pipes (Direct Touch) |
| Blæserhastighed | Up to 1800 RPM (PWM Controlled) |
| Luftmængde kapacitet | 42 CFM |
| Fan type | 7-blade, RGB |
| Strømstik | 3-benet (PWM) |
| Afkølingsmetode | Luft |
| Materiale | Aluminum Heatsink, Copper Heat Pipes |
| Produktdimensioner | 9 x 9 x 13 cm |
| Vægt | 400 g |
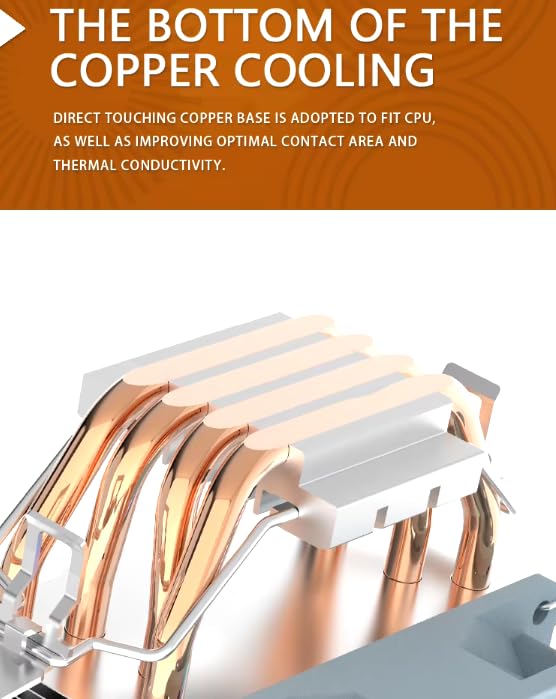
Billede 4.1: Detaljeret view of the cooler's base, showing the direct-touch copper heat pipes designed for efficient heat transfer from the CPU.
5. Opsætning og installation
Follow these steps carefully to install your Aigo ICE400SE CPU Air Cooler. The installation process may vary slightly depending on your CPU socket type (Intel or AMD).
5.1 Forberedelse
- Power off your computer and unplug the power cord from the wall outlet.
- Åbn computerens kabinet for at få adgang til bundkortet.
- If an old CPU cooler is installed, carefully remove it and clean any residual thermal paste from the CPU surface using isopropyl alcohol and a lint-free cloth.
- Identify your CPU socket type (Intel or AMD) and select the appropriate mounting hardware from the package.
5.2 Installing the Mounting Hardware
Refer to Image 3.1 for a visual guide to the mounting components.
For Intel Sockets (LGA1700, LGA115x, LGA775):
- Attach the Intel mounting brackets to the cooler's base using the provided screws. Ensure they are securely fastened.
- Position the cooler over the CPU, aligning the mounting holes on the brackets with the holes around the CPU socket on the motherboard.
- Fastgør køleren ved at stramme skruerne diagonalt, indtil de sidder godt fast. Spænd ikke for hårdt.
For AMD Sockets (AM5, AM4, AM3+, AM3, AM2+, AM2):
- Attach the AMD mounting brackets to the cooler's base using the provided screws. Ensure they are securely fastened.
- Hook one side of the cooler's mounting clip onto the retention module on the motherboard.
- Apply gentle pressure to the other side of the clip and hook it onto the opposite retention module. Ensure the cooler is firmly seated.
5.3 Påføring af termisk pasta
If thermal paste is not pre-applied to the cooler's base, apply a small pea-sized amount to the center of your CPU's integrated heat spreader (IHS). The pressure from the cooler will spread it evenly.
5.4 Montering af køleren
- Carefully place the cooler onto the CPU, ensuring the base makes full contact with the CPU's IHS.
- Secure the cooler using the appropriate method for your socket type as described in Section 5.2.
5.5 Connecting the Fan and RGB Cables
- Locate the 3-pin fan connector on the cooler's fan.
- Connect this 3-pin connector to an available 4-pin CPU_FAN header on your motherboard. The cooler's PWM functionality will still operate correctly on a 4-pin header.
- If your cooler includes a separate RGB cable (not explicitly detailed in product info, but common for RGB fans), connect it to a compatible RGB header on your motherboard (e.g., 12V GRB or 5V Digital RGB, depending on the cooler's specific RGB type). Refer to your motherboard manual for header locations.
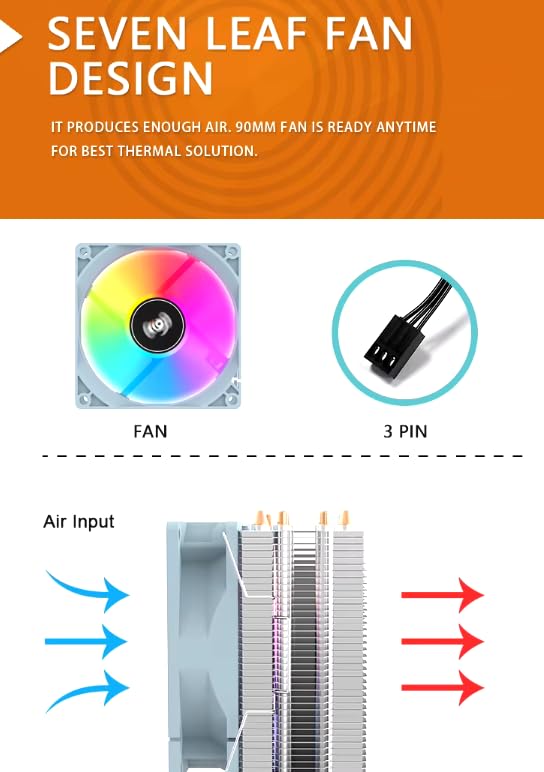
Image 5.1: Illustration of the fan's 3-pin power connector and the direction of airflow through the heatsink, crucial for proper installation and cooling.
6. Betjeningsvejledning
The Aigo ICE400SE CPU Air Cooler is designed for straightforward operation once installed.
6.1 PWM kontrol
The cooler features Pulse Width Modulation (PWM) control. This means the fan speed will automatically adjust based on your CPU's temperature, as detected by your motherboard. This ensures efficient cooling when needed and quieter operation during lighter loads. You can typically monitor and adjust fan curves through your motherboard's BIOS/UEFI settings or dedicated software.
6.2 RGB-belysning
The integrated RGB lighting provides an aesthetic enhancement. The lighting effects are typically controlled via your motherboard's RGB software (e.g., ASUS Aura Sync, MSI Mystic Light, Gigabyte RGB Fusion, ASRock Polychrome Sync) if connected to a compatible RGB header. If no separate RGB cable is present, the RGB lighting may operate in a default, fixed rainbow mode.
7. Vedligeholdelse
Regelmæssig vedligeholdelse er med til at sikre optimal ydeevne og levetid for din CPU-køler.
- Fjernelse af støv: Periodically (every 3-6 months, depending on environment) power off your computer and use compressed air to clean dust from the heatsink fins and fan blades. Hold the fan blades gently to prevent them from spinning rapidly during cleaning, which can damage the fan motor.
- Ventilator inspektion: Check the fan for any obstructions or unusual noises. Ensure the fan cable is securely connected.
- Termisk pasta: While not typically required frequently, if you notice a significant increase in CPU temperatures over time, consider reapplying thermal paste. This involves carefully removing the cooler, cleaning the old paste, and applying new paste.
8. Fejlfinding
If you encounter issues with your Aigo ICE400SE cooler, refer to the following common troubleshooting steps:
- Ventilatoren drejer ikke:
- Ensure the 3-pin fan cable is securely connected to the CPU_FAN header on your motherboard.
- Check your motherboard's BIOS/UEFI settings to ensure the CPU fan header is enabled and configured correctly.
- Verify that the fan blades are not obstructed by cables or other components.
- Høje CPU-temperaturer:
- Confirm that the cooler is properly seated on the CPU and the mounting hardware is securely tightened.
- Ensure adequate thermal paste was applied and spread evenly.
- Kontrollér for for meget støvophobning på kølepladens finner og ventilatorblade, og rengør om nødvendigt.
- Verify that the fan is spinning at an appropriate speed. Adjust fan curves in BIOS/UEFI if needed.
- Ensure proper airflow within your computer case.
- RGB-belysning virker ikke:
- If applicable, ensure the RGB cable is correctly connected to a compatible RGB header on your motherboard.
- Check your motherboard's RGB software for lighting control and ensure the cooler is detected.
- Verify that the RGB header on your motherboard is enabled in BIOS/UEFI.
9. Garanti og support
Aigo products are manufactured to high-quality standards. For warranty information, please refer to the warranty card included with your product or visit the official Aigo website. If you encounter any issues that cannot be resolved using this manual, please contact Aigo customer support or your retailer for assistance. Please have your product model (ICE400SE) and purchase details ready when contacting support.


