1. Introduktion
This manual provides comprehensive instructions for the installation, operation, and maintenance of your Nilight Fog Lights Assembly, Model FOG-B16. Designed for the 2014-2015 GMC Sierra 1500, these fog lights enhance visibility in adverse weather conditions and are built for durability and compliance with safety standards.
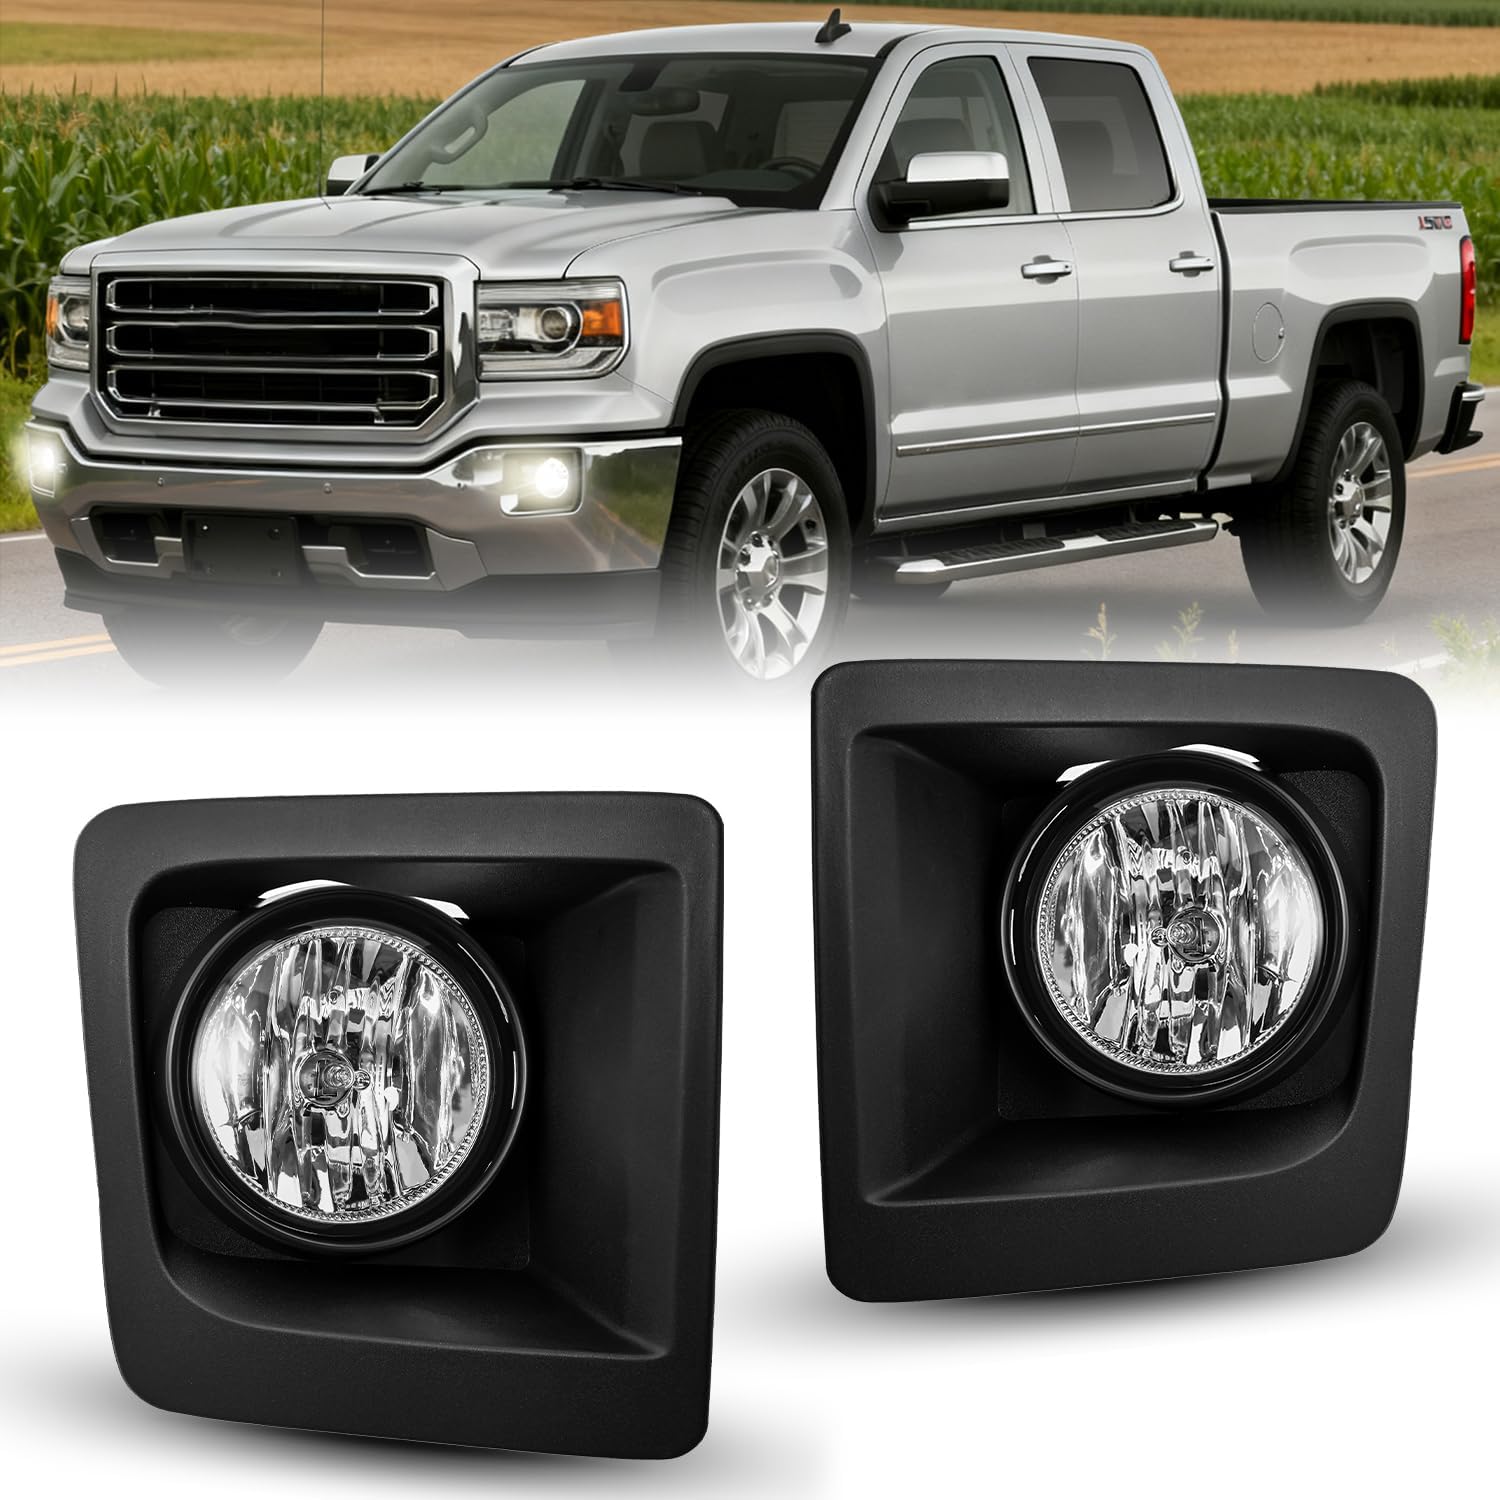
Image 1.1: Nilight Fog Lights Assembly for 2014-2015 GMC Sierra 1500.
2. Produktfunktioner
- Forbedret synlighed: Clear lens design provides superior light penetration for driving in rain, fog, snow, and dust.
- Holdbar konstruktion: Well-sealed housing prevents moisture and dust ingress. Features a superior PC lens with high transmittance, UV, and heat resistance. OEM-grade housing ensures longevity.
- DOT & SAE Compliant: Meets Department of Transportation (DOT) and Society of Automotive Engineers (SAE) standards for driving safety.
- Direct Fitment: Designed for direct bolt-on installation without modification for 2014-2015 GMC Sierra 1500 models.
3. Pakkens indhold
Pakken indeholder følgende varer:
- A pair of fog lights (driver's side and passenger's side).
- H3 halogen bulbs (20W or under compatible).
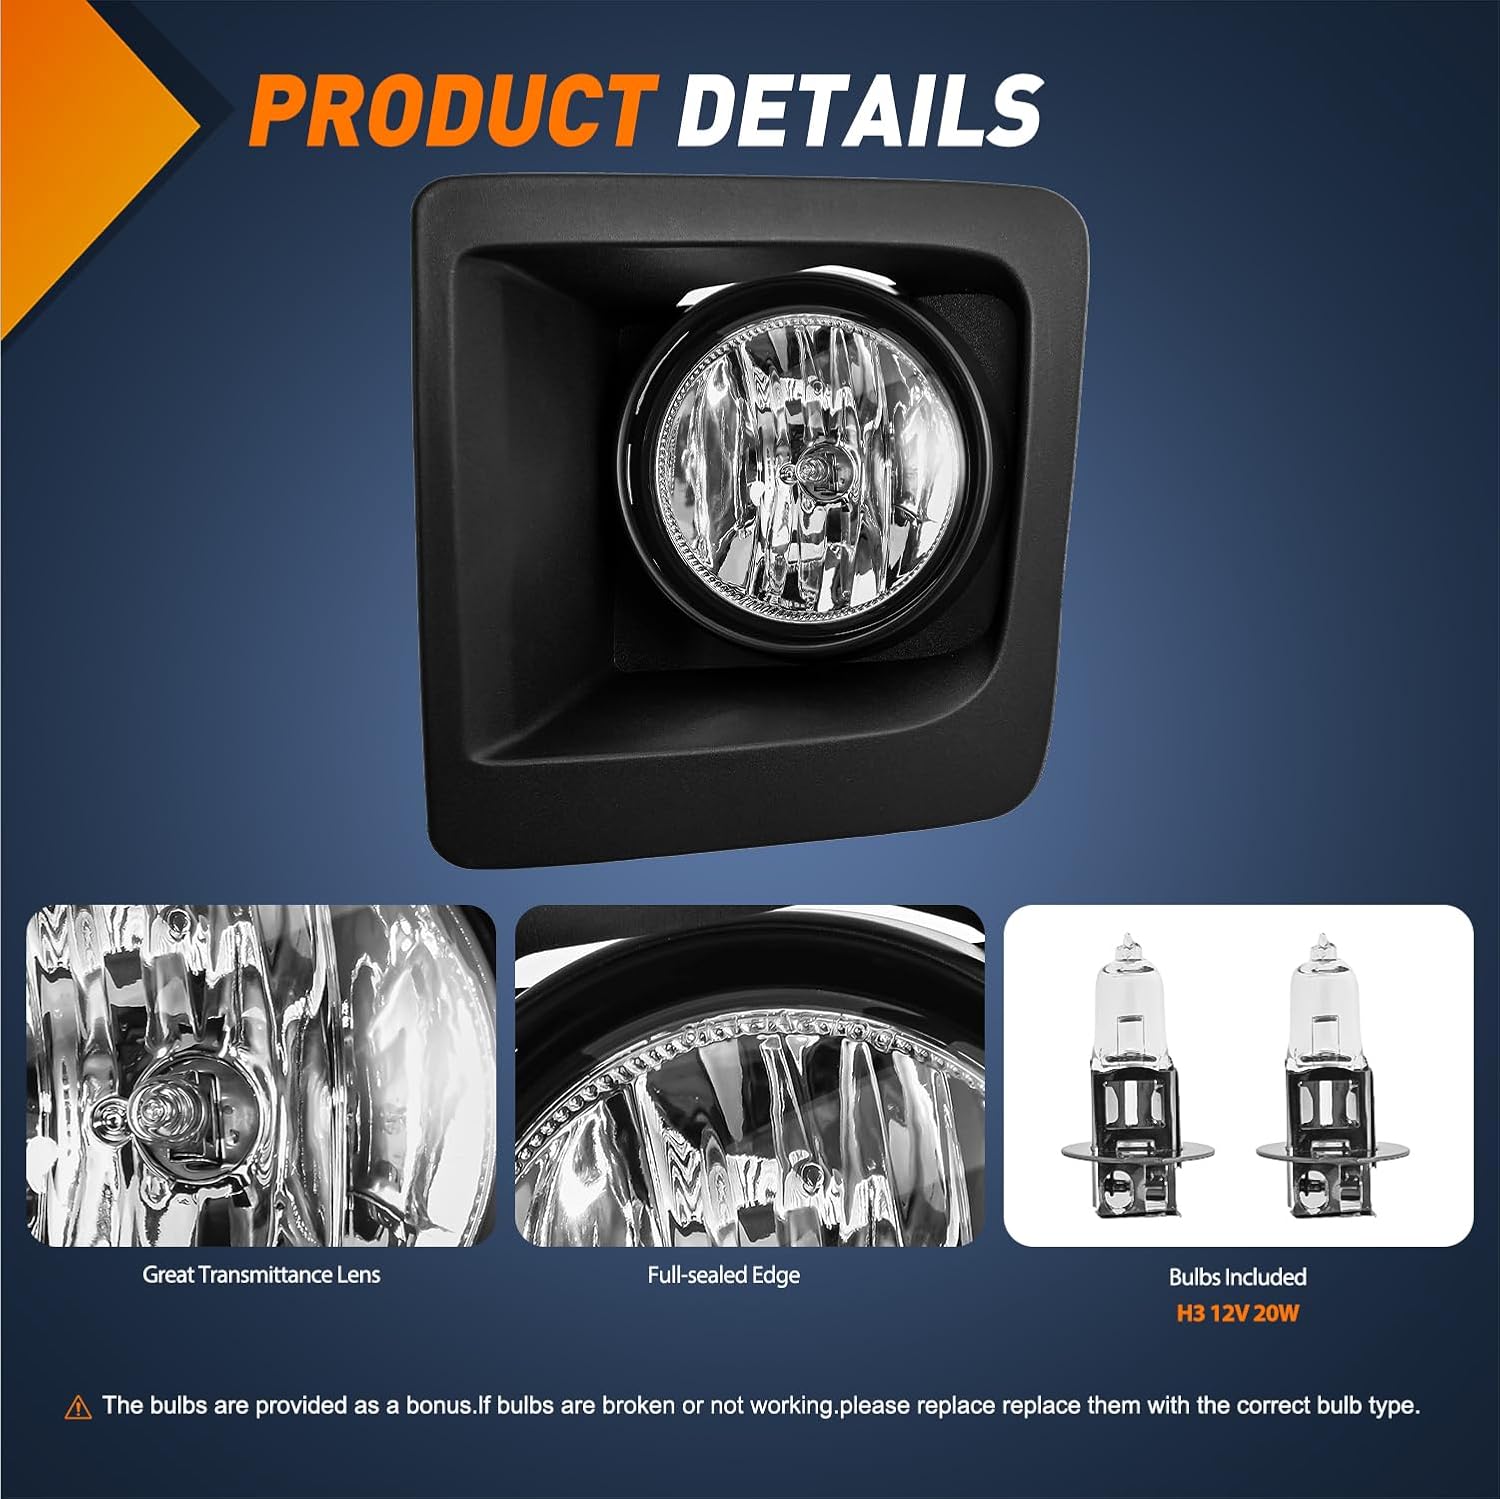
Image 3.1: Included fog lights with H3 halogen bulbs.
4. Specifikationer
| Attribut | Værdi |
|---|---|
| Mærke | Om natten |
| Model | FOG-B16 |
| Type køretøjstjeneste | Lastbil |
| Kompatibelt år | 2014-2015 |
| Speciel funktion | Vandtæt |
| Wattage | 20 watt |
| Linse farve | Klar |
| Linse materiale | Glas |
| Lyskildetype | Halogen |
| Varens vægt | 2.35 pund |
| Pakkedimensioner | 15.24 x 9.76 x 5.28 tommer |
5. Sikkerhedsoplysninger
- Frakobl altid køretøjets batteri, før du udfører elektrisk arbejde.
- Brug passende personlige værnemidler (PPE), såsom handsker og øjenbeskyttelse.
- Sørg for, at køretøjet er parkeret på en plan overflade, og at parkeringsbremsen er aktiveret.
- Professional installation is highly recommended to ensure proper function and safety.
- Only use H3 halogen bulbs (20W or under) with this assembly. Using higher wattage bulbs may cause damage.
6. Installationsvejledning
This section provides detailed steps for installing your Nilight Fog Lights Assembly. Refer to the accompanying video for visual guidance.
6.1. Forberedelse
- Open the vehicle's hood.
- Remove the plastic cover located under the hood by detaching the 12 clips. A tool can be used to easily pry them out.
- Remove the front grille by unscrewing the four screws on top. Carefully apply force to release clips from behind.
6.2. Bumper Removal
- Locate the two top screws and one bottom screw on each side of the bumper.
- Remove only the bottom screws on each side. It is recommended to leave the top screws partially screwed in to prevent the bumper from falling off completely.
- Underneath the truck, directly behind the fog lights, locate the additional support bar connected to the chassis. It has four screws. Remove these screws.
- Locate and disconnect the wire clip behind the bumper.
- With assistance, carefully remove the entire OEM front bumper.
6.3. Fog Light Replacement
- Place the bumper on a workbench.
- Remove the metal OEM protective plates by unscrewing the eight screws on each side.
- Carefully unclip the four points holding the wiring conduit.
- Remove the three small screws holding the old fog light in place.
- Carefully shimmy the old fog light out, supporting it from the other side to prevent it from falling.
- Install the new Nilight Fog Light Assembly. Align the top tab with the top of the fog light opening on the frame.
- Secure the three remaining points with screws.
- Gentag processen for den anden side.
6.4. Wiring and Reassembly
- Run the direct connectors from the wiring bundle to each side for the fog lights.
- Run both wires down into the compartment below the headlight.
- Run the longer part of the black wire to the other fog light, behind brackets, around the top, and through the bracket hole.
- Use zip ties to clean up and secure the wiring in the engine bay.
- Reinstall the OEM front bumper. Ensure it is well-aligned and re-secure the four top screws.
- Re-secure the support bars underneath the bumper. Each has two side screws on the left and one bottom screw on the right.
- Connect the dangling direct connectors to each new fog light.
- Connect the red and black wires with prepared connectors to the battery (black for ground, red for positive).
- Run the switch unit bundle into the interior of the truck. Use a tape measure to guide the wire through the door hinge area into the driver's side dash.
- Remove the OEM protective seals and side panel in the driver's side area to access the internal fuse box.
- Run the red power wire through the dash and hook it up to the fuse box through an accessory power source (a pigtail fuse extender may be needed).
- Connect the black ground wire to any exposed bolt on the chassis (e.g., above the fuse box).
- Connect the switch unit with the green connectors.
- Place the switch unit in a convenient location using its strong adhesive.
- Zip tie the wiring bundle and hide it behind the panel. Snap the side panel and protective strip back into place.
- Reattach the front grille and secure the top four points.
- Slide in and secure the last OEM protective piece with the remaining 12 clips.
- Ensure wiring is clean in the engine bay.
- Drop the hood.
Video 6.1: Detailed installation guide for Nilight Fog Lights Assembly on a 2014-2015 GMC Sierra 1500.
7. Betjeningsvejledning
Once installed, operate your Nilight Fog Lights using the independent switch unit placed in your vehicle's interior.
- Press the switch to turn the fog lights ON. The switch will illuminate to indicate activation.
- Press the switch again to turn the fog lights OFF.
8. Vedligeholdelse
- Rensning: Regularly clean the fog light lenses with a soft cloth and mild soap solution to maintain optimal light output. Avoid abrasive cleaners.
- Inspektion: Periodically check the wiring and connections for any signs of wear, corrosion, or damage. Ensure all mounting points are secure.
- Udskiftning af pære: If a halogen bulb burns out, replace it with an H3 halogen bulb (20W or under). Refer to the installation guide for accessing the fog light assembly.
9. Fejlfinding
| Problem | Mulig årsag | Løsning |
|---|---|---|
| Tågelygterne tændes ikke. | Loose wiring connection, blown fuse, faulty bulb, faulty switch. | Check all wiring connections. Inspect the fuse in the wiring harness and the vehicle's fuse box. Test the bulbs. Check the switch unit. |
| Fog lights flicker. | Loose connection, insufficient power, faulty relay. | Ensure all connections are tight. Verify proper grounding. Check the relay in the wiring harness. |
| Fugt inde i linsen. | Condensation (normal in some conditions), seal compromise. | Small amounts of condensation typically dissipate. If excessive or persistent, check for proper sealing and ensure breather holes are clear. |
10. Garanti og support
For warranty information and customer support, please refer to the official Nilight webwebstedet eller kontakt deres kundeservice direkte. Gem din købskvittering til eventuelle garantikrav.


