Indledning
Thank you for choosing the Yaheetech Kitchen Island with Storage. This manual provides detailed instructions for the assembly, operation, and maintenance of your new kitchen island. Please read this manual thoroughly before assembly and use to ensure proper function and safety. Keep this manual for future reference.
This versatile kitchen island features a spacious countertop, two storage shelves, integrated power outlets, and convenient holders for mugs, wine glasses, and S-shaped hooks. It is designed to enhance your kitchen's functionality and organization.
Sikkerhedsoplysninger
- Følg altid monteringsvejledningen nøje.
- Do not overload the shelves or countertop beyond the specified weight capacities.
- Sørg for, at alle forbindelser er sikre inden brug.
- Hold børn og kæledyr væk under montering.
- Use the power outlets only for small kitchen appliances within their rated capacity. Always turn off the OCP switch after use.
- If using the wheels, ensure the lockable casters are engaged when the island needs to remain stationary.
Reservedelsliste
Before beginning assembly, verify that all parts listed below are present and undamaged. If any parts are missing or damaged, please contact Yaheetech customer support.
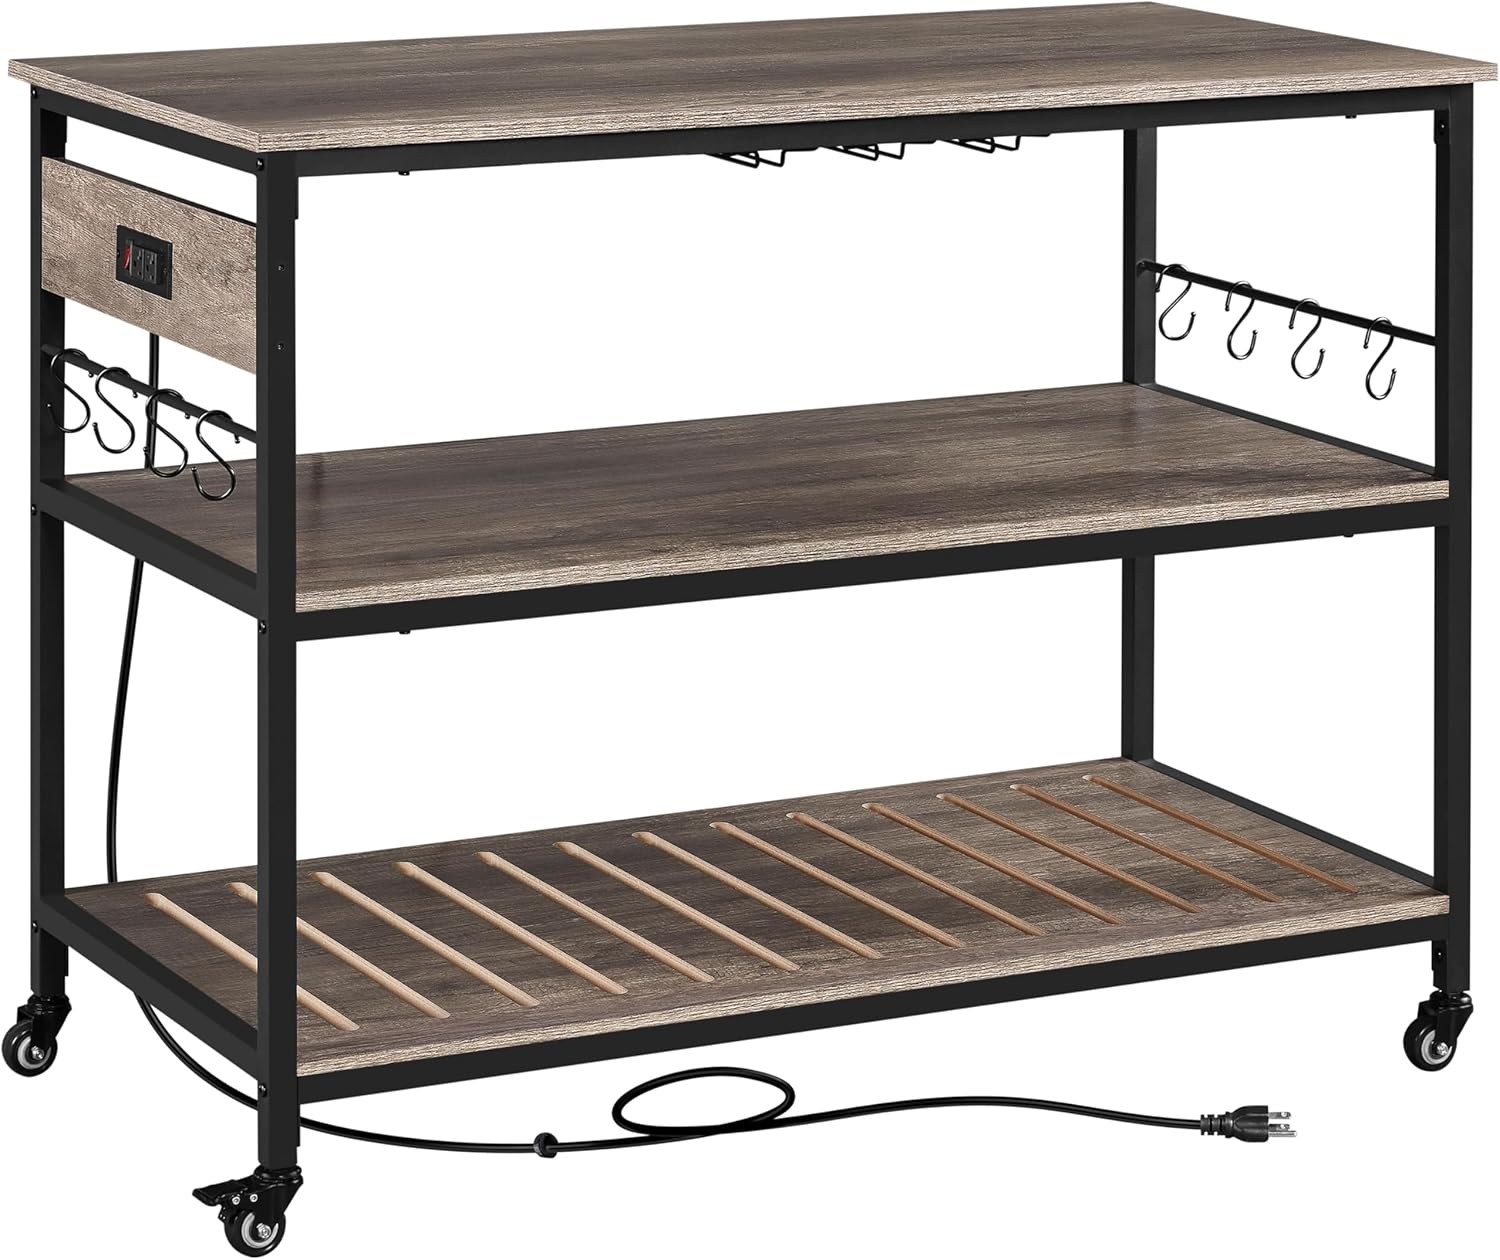
Figur 1: Overview of the Yaheetech Kitchen Island with its main components, including the countertop, shelves, frame, and power cord.
Komponenter:
- Countertop (1)
- Midterste hylde (1)
- Nederste hylde (1)
- Side Frames (2)
- Crossbars (various sizes)
- Power Outlet Unit with OCP Switch (1)
- Wine Glass Holders (3)
- Mug Holders (3)
- S-shaped Hooks (8)
- Casters (4, 2 with locks) OR Adjustable Footpads (4)
- Samlebeslag (skruer, bolte, unbrakonøgle)
Opsætning og montering
Follow these steps carefully to assemble your kitchen island. It is recommended to assemble the unit on a soft, clean surface to prevent scratches.
- Udpak og identificer dele: Carefully remove all components from the packaging. Lay them out and compare them with the Parts List to ensure everything is present.
- Attach Casters or Footpads: Decide whether you want a mobile island (casters) or a stationary one (footpads).
- For Mobility: Screw the four casters into the designated holes at the bottom of the side frames. Ensure the two lockable casters are on the same side for easier locking.
- For Stability: Screw the four adjustable footpads into the designated holes at the bottom of the side frames.

Figure 2: Detail of the 360-degree rotating caster wheel and its locking mechanism. Two of the four casters are lockable for stability.
- Saml rammen: Connect the side frames using the crossbars. Secure all connections with the provided hardware, but do not fully tighten screws until the entire frame is assembled.
- Installer hylder: Slide the middle and bottom shelves into their respective positions within the frame. Ensure they are properly aligned and secured.
- Attach Power Outlet Unit: Mount the power outlet unit to the designated area on the side frame, typically near the top. Ensure it is firmly attached.
- Placering af bordplade: Carefully place the countertop onto the top of the assembled frame. Secure it using the provided hardware.
- Install Holders and Hooks: Attach the wine glass holders, mug holders, and S-shaped hooks to their designated locations on the island.
- Endelig stramning: Once all components are in place, go back and fully tighten all screws and bolts to ensure the island is stable and secure.

Figure 3: Dimensional diagram of the kitchen island, illustrating its overall length, width, height, and shelf clearances.
Betjeningsvejledning
Brug af strømudtagene:
The kitchen island is equipped with two power outlets and an Over Current Protection (OCP) switch for your convenience and safety.
- Plug the island's power cord into a standard wall outlet.
- To activate the outlets, ensure the OCP switch is in the "ON" position.
- Plug your small kitchen appliances (e.g., microwave, coffee maker, toaster) into the integrated outlets.
- After using the appliances, always switch the OCP to the "OFF" position to ensure safety and conserve energy.

Figur 4: Detaljeret view of the two power outlets and the red Over Current Protection (OCP) switch, designed for safe appliance use.
Brug af opbevaringsfunktioner:
- Bordplade: Use the spacious 47.5" L x 24" W countertop for food preparation, serving, or placing larger appliances.
- Hylder: The two lower shelves provide ample space for kitchen essentials, cookware, or decorative items.
- Wine Glass Holders: Hang your wine glasses upside down on the integrated holders for easy access and dust protection.
- Mug Holders: Utilize the mug holders to keep your coffee mugs organized and within reach.
- S-shaped Hooks: Attach the S-shaped hooks to the side bars to hang utensils, towels, or other small items.

Figure 5: The kitchen island fully utilized, demonstrating its large storage capacity for appliances, bottles, and hanging items.
Mobilitet og stabilitet:
- If equipped with casters, the island can be easily moved around your kitchen or living space.
- To secure the island in place, push down the levers on the two lockable casters until they click into the "ON" position.
- To move the island, release the locks by pushing the levers to the "OFF" position.
- If using footpads, adjust them as needed to ensure the island is level and stable on uneven floors.
Opretholdelse
Proper care and maintenance will extend the life of your Yaheetech Kitchen Island.
- Rensning: Tør overflader af med adamp cloth. For stubborn stains, use a mild soap solution and dry immediately. Avoid harsh chemicals or abrasive cleaners.
- Spild: Clean up spills immediately to prevent damage to the wood finish.
- Hardware: Kontrollér regelmæssigt alle skruer og bolte for at sikre, at de forbliver stramme. Efterspænd efter behov.
- Strømledning: Undersøg strømkablet regelmæssigt for tegn på skader. Hvis det er beskadiget, skal du stoppe med at bruge det og kontakte kundesupport.
Fejlfinding
If you encounter any issues with your kitchen island, refer to the following common problems and solutions:
| Problem | Mulig årsag | Løsning |
|---|---|---|
| Island is wobbly/unstable. | Løst beslag; ujævnt gulv; hjul ikke låst. | Ensure all screws and bolts are tightened. If using footpads, adjust them to level the island. If using casters, ensure both lockable casters are engaged. |
| Power outlets not working. | OCP switch is off; island not plugged in; power outage. | Ensure the OCP switch is in the "ON" position. Verify the island's power cord is securely plugged into a working wall outlet. Check your home's circuit breaker. |
| Difficulty moving the island. | Casters are locked; debris in wheels. | Ensure both lockable casters are in the "OFF" position. Check wheels for any obstructions and clear them. |
If the problem persists after trying these solutions, please contact Yaheetech customer support for further assistance.
Specifikationer
| Feature | Detalje |
|---|---|
| Model | B0DHXD13FH |
| Farve | Taupe Wood Countertop |
| Materialer | MDF, metal |
| Assembled Dimensions (on wheels) | 47.5 cm L × 24 cm B × 36.5 cm H |
| Countertop Dimensions | 47.5 cm L × 24 cm B |
| Maximum Weight Capacity (Countertop) | 88 lb (40 kg) |
| Maximum Weight Capacity (Each Shelf) | 88 lb (40 kg) |
| Maximum Weight Capacity (Each Hook) | 11 lb (5 kg) |
| Stikkontakter | 2 AC Outlets with OCP Switch |
| Strømkabellængde | 6.5 fod |
| Montering påkrævet | Ja |
Garanti og support
Yaheetech products are designed for quality and durability. For information regarding warranty coverage, please refer to the warranty card included with your purchase or visit the official Yaheetech webwebsted.
For technical support, missing parts, or any questions regarding your Yaheetech Kitchen Island, please contact our customer service team:
- Webwebsted: www.yaheetech.com
- E-mail: Der henvises til webwebsted for kontakt-e-mail.
- Telefon: Der henvises til webhjemmeside for kontakttelefonnummer.
Please have your model number (B0DHXD13FH) and purchase date ready when contacting support.


