1. Introduktion
Thank you for choosing the SUNVIVI 20-Quart Electric Roaster Oven. This versatile appliance is designed to simplify your cooking experience, offering a range of functions from roasting and baking to slow cooking, defrosting, and keeping food warm. Its generous capacity and thoughtful features make it an ideal addition to any kitchen, especially for preparing meals for gatherings and holidays. Please read this manual thoroughly before first use to ensure safe and optimal performance.
2. Vigtige sikkerhedsinstruktioner
- Læs alle instruktioner før brug af apparatet.
- Do not touch hot surfaces. Always use oven mitts or pot holders when handling hot components.
- To protect against electrical shock, do not immerse the cord, plugs, or the roaster oven body in water or other liquid.
- Tæt opsyn er nødvendigt, når et apparat bruges af eller i nærheden af børn.
- Træk stikket ud af stikkontakten, når det ikke er i brug, og før rengøring. Lad det køle af, før du sætter dele på eller af.
- Betjen ikke noget apparat med en beskadiget ledning eller stik, eller efter at apparatet ikke fungerer korrekt eller er blevet beskadiget på nogen måde.
- Brug af tilbehør, der ikke er anbefalet af apparatets producent, kan forårsage skader.
- Må ikke bruges udendørs.
- Lad ikke ledningen hænge ud over kanten af bordet eller bordpladen eller røre ved varme overflader.
- Må ikke placeres på eller i nærheden af en varm gas- eller elektrisk brænder eller i en opvarmet ovn.
- Der skal udvises ekstrem forsigtighed ved flytning af et apparat, der indeholder varm olie eller andre varme væsker.
- Sæt altid stikket i apparatet først, og sæt derefter ledningen i stikkontakten. For at afbryde forbindelsen skal du slukke for en vilkårlig knap og derefter tage stikket ud af stikkontakten.
- Brug ikke apparatet til andet end tiltænkt husholdningsbrug.
- Always ensure the lid is properly seated to maintain cooking temperature and prevent heat loss.
3. Produktet er slutview
The SUNVIVI 20-Quart Electric Roaster Oven is designed for convenience and efficiency. Familiarize yourself with its components:

- Roaster Oven Body: The main unit housing the heating element and control knob.
- Aftagelig bradepande: A durable enamel-on-steel pan for direct cooking, ensuring even heat distribution and easy cleaning.
- Stegerist: A liftable rack designed to hold food above the pan, allowing for even roasting and easy removal of large items like turkeys.
- Selvbærende låg: Features a unique design that continuously circulates moisture, reducing the need for manual basting and keeping food juicy.
- Temperaturkontrolknap: Allows selection of temperatures from 150°F to 450°F, including 'Keep Warm' and 'Defrost' settings.
- Cool-Touch håndtag: Located on the lid and body for safe handling during and after cooking.

4. Opsætning og første brug
4.1 Udpakning og første rengøring
- Fjern forsigtigt al emballage og reklamemærkater fra stegeovnen.
- Wash the removable roasting pan, roasting rack, and lid in hot, soapy water. Rinse thoroughly and dry completely.
- Wipe the exterior of the roaster oven body with a soft, damp cloth. Do not immerse the roaster oven body in water.
- Sørg for, at alle dele er helt tørre inden montering.
4.2 Montering
- Place the clean, dry removable roasting pan into the roaster oven body.
- Insert the roasting rack into the removable pan.
- Place the self-basting lid securely on top of the roaster oven.
4.3 Seasoning (Before First Use)
To eliminate any manufacturing odors and prepare the non-stick surface, it is recommended to season the roaster oven before first use:
- Ensure the roasting pan and rack are clean and dry.
- Plug the roaster oven into a standard electrical outlet.
- Turn the temperature control knob to 400°F (204°C).
- Allow the empty roaster oven to heat for approximately 30 minutes. Some smoke or odor may be present; this is normal.
- Turn the control knob to 'Off' and unplug the appliance.
- Allow the roaster oven to cool completely.
- Wash and dry the removable pan, rack, and lid again. The roaster is now ready for use.
5. Betjeningsvejledning
5.1 Temperaturkontrol
The roaster oven features a full-range temperature control from 150°F to 450°F (65°C to 232°C).
- Drej knappen med uret for at øge temperaturen.
- The indicator light will illuminate when the heating element is active and will turn off once the set temperature is reached. It will cycle on and off during cooking to maintain the temperature.
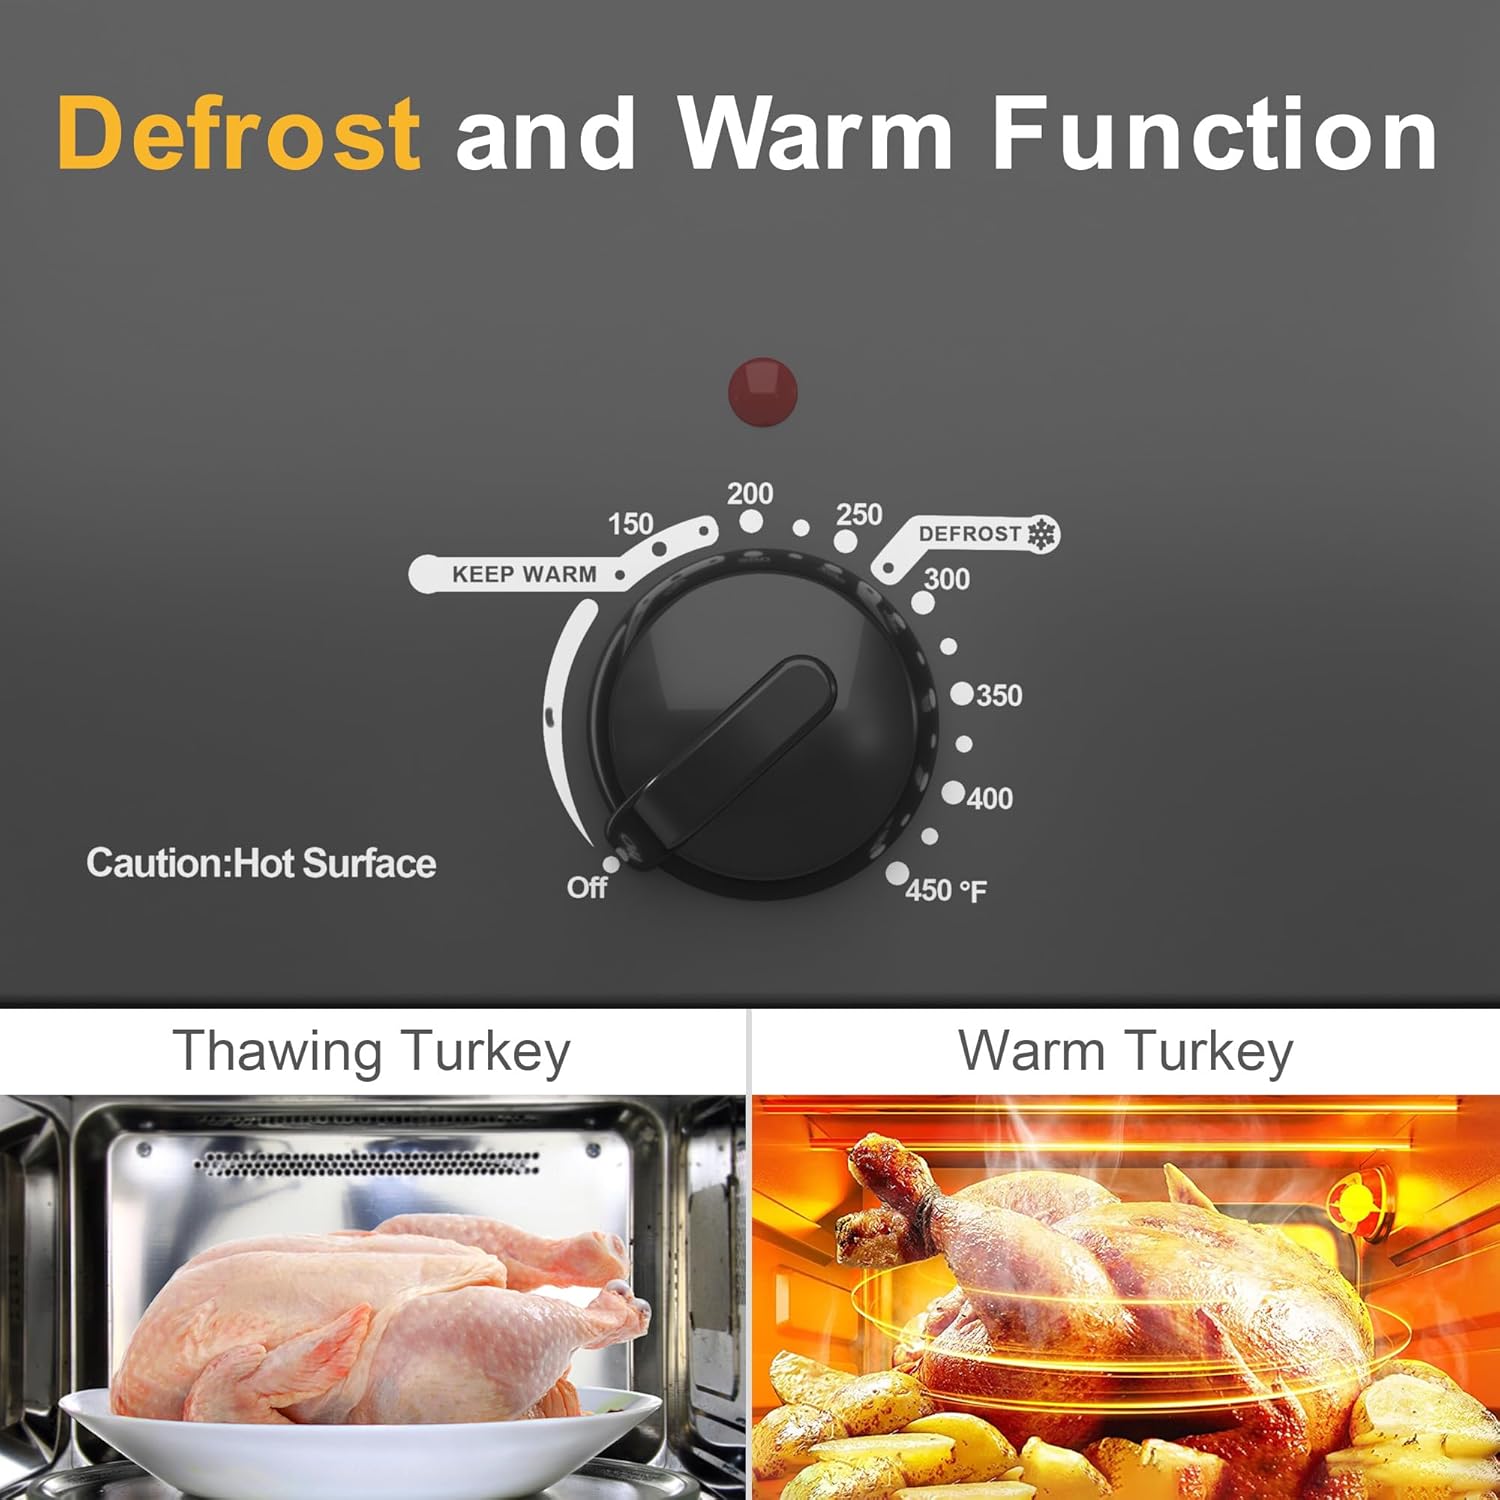
5.2 Afrimningsfunktion
The unique 'Defrost' setting allows you to thaw frozen items, such as a turkey, directly in the roaster oven before roasting. This can significantly reduce preparation time.
- Place the frozen item on the roasting rack within the removable pan.
- Set the control knob to 'Defrost'.
- Follow specific defrosting guidelines for your food item, then adjust to the desired roasting temperature.
5.3 Hold varm funktion
After cooking, the 'Keep Warm' setting maintains your food at an ideal serving temperature without overcooking.
- Once cooking is complete, turn the control knob to 'Keep Warm'.
- This setting is perfect for holding food until serving time, especially during large meals or buffets.
5.4 Using the Self-Basting Lid
The self-basting lid is designed to continuously circulate moisture within the roaster, ensuring your food remains juicy and flavorful.

- Ensure the lid is properly seated on the roaster oven during cooking to maximize the self-basting effect.
- The lid's design reduces the need for frequent opening, which helps maintain consistent cooking temperatures.
5.5 Using the Roasting Rack
The liftable roasting rack is crucial for achieving even cooking and easy food removal.

- Place large items like turkeys or roasts directly on the rack.
- The rack allows drippings to collect in the pan below, which can be used for gravies or sauces.
- Use the rack's handles to safely lift cooked food out of the hot pan, preserving crispy skin.
6. Madlavningsguide og tips
The SUNVIVI Roaster Oven is highly versatile. Here are some general guidelines and tips:
6.1 Roasting Meats (e.g., Turkey, Chicken, Ham)
- For best results, preheat the roaster oven to the desired temperature before placing the meat inside.
- Place the meat on the roasting rack. For turkeys, you can add vegetables like carrots, celery, and onions to the bottom of the pan for added flavor and moisture.
- The self-basting lid will help keep the meat moist. Monitor internal temperature with a meat thermometer for doneness.

6.2 Bagning
- The roaster oven can be used to bake casseroles, breads, and desserts.
- Adjust baking times and temperatures as you would for a conventional oven, but monitor closely as roaster ovens can sometimes cook faster.
6.3 Slow Cooking
- Use lower temperature settings (e.g., 150-250°F) for slow cooking stews, chili, or pot roasts.
- The tight-fitting lid helps retain moisture for tender, slow-cooked dishes.
6.4 General Cooking Tips
- Avoid opening the lid frequently to maintain consistent temperature and moisture.
- For optimal heat circulation, do not overfill the roaster oven.
- Always use oven mitts when handling the hot lid or removable pan.

7. Product Demonstrations
Watch these videos for visual demonstrations of the SUNVIVI 20-Quart Electric Roaster Oven's features and capabilities.
Video 1: En overview of the SUNVIVI Electric Roaster Oven, highlighting its design and primary functions.
Video 2: Demonstration of preparing a large quantity of food, such as dog food, showcasing the roaster's capacity and ease of use for bulk cooking.
8. Vedligeholdelse og rengøring
Proper maintenance ensures the longevity and optimal performance of your roaster oven. The removable parts make cleaning simple.
8.1 Rengøringsinstruktioner
- Tag altid stikket ud af stikkontakten til stegeovnen, og lad den køle helt af, inden den rengøres.
- Fjern låget, stegeristen og den aftagelige bradepande.
- Wash the lid, roasting rack, and removable pan in hot, soapy water. The enamel-on-steel pan is non-stick for easy food release and cleaning.
- Vigtig: Do not scrub the removable pan with a steel wool ball, as this can damage the coating and lead to rust. Use a soft sponge or cloth.
- Rinse all removable parts thoroughly and dry them completely before storing or reassembling. Always dry the water after cleaning.
- Wipe the exterior of the roaster oven body with a soft, damp cloth. Do not immerse the roaster oven body in water or any other liquid.

8.2 Opbevaring
Store the clean and dry roaster oven in a cool, dry place. Ensure all components are assembled or stored together to prevent loss.
9. Fejlfinding
If you encounter any issues with your SUNVIVI 20-Quart Electric Roaster Oven, please refer to the following common troubleshooting tips:
- Apparatet tænder ikke: Ensure the power cord is securely plugged into a working electrical outlet. Check if the temperature control knob is set to a temperature above 'Off'.
- Maden tilberedes ikke jævnt: Ensure the roaster is not overfilled. Verify that the lid is properly sealed. For large items, ensure they are centered on the roasting rack.
- Excessive smoke or odor during first use: This is normal during the initial seasoning process. If it persists after seasoning, ensure all packaging materials have been removed and the unit is clean.
- Lid is difficult to remove or replace: Ensure the roaster oven has cooled down. Sometimes, condensation can create a slight vacuum. Gently wiggle the lid to release.
For issues not covered here, please contact SUNVIVI customer support.
10. Specifikationer
| Feature | Specifikation |
|---|---|
| Mærke | SUNVIVI |
| Modelnavn | ZER001GR |
| Kapacitet | 20 Quarts |
| Farve | Grå |
| Produktdimensioner | 23" D x 12.9" B x 14.9" H |
| Materiale | Rustfrit stål |
| Kontroltype | Knop kontrol |
| Temperaturområde | 150-450°F |
| Særlige funktioner | Self-Basting Lid, Defrost Function, Warming Function |
| Varens vægt | 14.77 pund |
11. Garanti og support
SUNVIVI is committed to providing high-quality products and excellent customer service.
11.1 Garantioplysninger
- This product comes with a 1-5 year warranty, depending on the specific terms of purchase.
- A 365-day free replacement policy is also offered for eligible issues.
- Gem venligst dit købsbevis for garantikrav.
11.2 Kundesupport
For any questions, concerns, or warranty claims, please contact SUNVIVI customer support through the retailer's platform or the official brand website. Our team is ready to assist you.


