1. Introduktion
This manual provides comprehensive instructions for the installation, operation, and maintenance of your Antec CX700 ATX Mid Tower Gaming Case. Designed for PC enthusiasts, this case features a sleek, modern design with a tempered glass side panel and pre-installed ARGB fans to enhance visual appeal and ensure optimal airflow. Please read this manual thoroughly before beginning assembly to ensure proper setup and safe operation.
2. Specifikationer
| Feature | Detalje |
|---|---|
| Mærke | Antec |
| Modelnummer | CX700 |
| Sagstype | Mid Tower |
| Bundkort kompatibilitet | ATX |
| Farve | Sort |
| Materiale | Legeret stål, plast |
| Varens vægt | 5.5 kilo (12.1 pund) |
| Afkølingsmetode | Luft |
| Pre-installed ARGB Fans | 3 (Front-mounted) |
| Ventilatorstøtte (maks.) | Front: 3x120mm, Top: 3x120mm, Rear: 1x120mm, Bottom: 3x120mm |
| USB 3.0 porte | 2 |
| USB Type-C-porte | 1 |
| Lydporte | Headphone, Microphone |
| GPU Clearance (Max) | 410 mm (16.14 tommer) |
| HDD-understøttelse | 3.5 tommer |
| SSD-understøttelse | 2.5 tommer |
| PSU Length (Max) | 225 mm |
3. Pakkens indhold
- Antec CX700 ATX Mid Tower Gaming Case
- Pre-installed ARGB Fans (3 fans, typically front-mounted as per product title)
- Accessory Box (Screws, cable ties, user manual)
- Sidepanel af hærdet glas
4. Opsætningsvejledning
4.1 Udpakning og inspektion
Carefully remove the case from its packaging. Inspect for any signs of damage during transit. The tempered glass panel is fragile; handle with care.
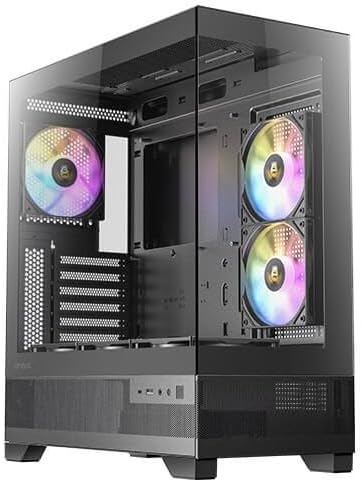
Figur 1: Forside og side view of the Antec CX700 case, showcasing the tempered glass panel and pre-installed fans.
4.2 Afmontering af sidepaneler
To access the interior for component installation, remove the tempered glass side panel and the solid rear side panel.
- Locate the thumbscrews on the rear of the case securing the tempered glass panel.
- Carefully unscrew these thumbscrews.
- Gently pull the tempered glass panel away from the chassis. Lay it flat on a soft, clean surface to prevent scratches or damage.
- Repeat the process for the solid rear side panel if necessary for cable management access.

Figur 2: Bagside view of the Antec CX700 case, showing the rear fan and expansion slots. The side panel is removed for internal access.
4.3 Installation af bundkort
Install your ATX motherboard into the designated area. Ensure all standoffs are correctly aligned and secured.
4.4 Komponentinstallation
Install your CPU, RAM, GPU (up to 410mm length), storage drives (3.5" HDD, 2.5" SSD), and power supply unit (PSU, up to 225mm length) according to their respective manuals and the case's layout.

Figur 3: Øverst view of the Antec CX700 case, highlighting the pre-installed fans and internal layout for component placement.
4.5 Kabelstyring
Udnyt kabelføringsudskæringerne og fastgørelsespunkterne bag bundkortbakken til at håndtere kabler effektivt. Dette forbedrer luftgennemstrømningen og æstetikken.
4.6 Front Panel I/O Connections
Connect the front panel I/O cables (USB 3.0, USB Type-C, HD Audio, Power, Reset, LED) to the corresponding headers on your motherboard.
- Power knap: Starter systemstrømmen.
- Nulstil knap: Genstarter systemet.
- USB 3.0-porte (x2): Til højhastigheds dataoverførsel.
- USB Type-C Port (x1): For modern device connectivity.
- Hovedtelefonstik: Lydudgang.
- Mikrofonstik: Lydindgang.
5. Betjeningsvejledning
Once all components are installed and connected, replace the side panels. Connect your peripherals, monitor, and power cable. Press the power button on the top panel to start your system. The pre-installed ARGB fans will illuminate, providing customizable lighting effects.
6. Vedligeholdelse
Regelmæssig vedligeholdelse sikrer optimal ydeevne og levetid for dit pc-kabinet og komponenter.
- Støvfiltre: The case includes magnetic dust filters (e.g., on the top panel) that can be easily removed and cleaned with water or a soft brush. Clean these regularly to maintain airflow and prevent dust buildup inside the case.
- Indvendig rengøring: Periodically open the side panels and use compressed air to remove dust from internal components and fans. Ensure the system is powered off and unplugged before cleaning.
- Hærdet glas: Clean the tempered glass panel with a microfiber cloth and a non-abrasive glass cleaner. Avoid harsh chemicals.
7. Fejlfinding
Hvis du støder på problemer, kan du se følgende almindelige fejlfindingstrin:
- Systemet tænder ikke:
- Sørg for, at strømforsyningen er korrekt tilsluttet stikkontakten, og at PSU-kontakten er i 'ON'-positionen.
- Kontroller, at alle strømkabler (24-bens ATX, 8-bens CPU, PCIe til GPU) er korrekt tilsluttet til bundkortet og komponenterne.
- Kontroller, at kablet til tænd/sluk-knappen på frontpanelet er korrekt tilsluttet til bundkortets frontpanelheader.
- Ventilatorer drejer ikke / ARGB lyser ikke:
- Confirm that the fan power cables and ARGB cables are correctly connected to the motherboard or a dedicated ARGB controller.
- Refer to your motherboard manual for proper ARGB header connections and software control.
- Ingen skærmoutput:
- Ensure your monitor cable is connected to the graphics card (GPU) output, not the motherboard's integrated graphics ports (unless using integrated graphics).
- Sæt grafikkortet tilbage i dets PCIe-slot.
8. Garanti og support
The Antec CX700 ATX Mid Tower Gaming Case comes with a standard manufacturer's warranty. For specific warranty terms, duration, and to register your product, please visit the official Antec webwebstedet eller kontakt deres kundesupport. Gem dit købsbevis til garantikrav.
For further technical assistance or support, please refer to the Antec support resources available online.


