1. Introduktion
This manual provides detailed instructions for the safe installation, operation, and maintenance of your PHORUS 48-inch Modern White Ceiling Fan with Lights and Remote/APP Control. Please read all instructions carefully before beginning installation and retain this manual for future reference.
2. Sikkerhedsoplysninger
- Ensure the power is disconnected at the circuit breaker before installation or servicing.
- Al ledningsføring skal være i overensstemmelse med nationale og lokale el-forskrifter. Hvis du ikke er bekendt med ledningsføring, skal du kontakte en kvalificeret elektriker.
- Ventilatoren skal monteres med mindst 2.1 meters afstand fra gulvet til bladets bagkant.
- Monteringsstrukturen skal kunne bære ventilatorens vægt (ca. 13.4 pund).
- Bøj ikke knivholderne under installation eller rengøring.
- Denne ventilator er designet til indendørs brug.
3. Pakkens indhold
Kontroller, at alle komponenter er til stede, før installationen påbegyndes:
- Ventilator motor samling
- Hængende bræt
- 5 Fan Blades
- LED Lampskygge
- Fjernbetjening (med 2 AAA-batterier)
- Skruer og monteringshardware
- Instruktionsmanual

4. Specifikationer
| Feature | Specifikation |
|---|---|
| Mærke | FORUS |
| Modelnavn | #8907 |
| Størrelse | 48 tommer |
| Farve | Hvid |
| Materiale | Akryl, plast |
| Motortype | DC Motor (30W) |
| Lyskilde | LED (28W) |
| Lyse farver | 3 (White, Warm, Neutral) |
| Dæmpningsområde | Stepless (10%-100%) |
| Vindhastigheder | 6 |
| Kontrolmetode | Fjernbetjening, APP-kontrol |
| Særlige funktioner | Reversible Function, 2-Hour Timer, Memory Function |
| Lydniveau | Under 35 dB |
| Produktdimensioner | 48 cm L x 48 cm B x 10.83 cm H |
| Varens vægt | 13.4 pund |
5. Opsætning og installation
5.1 Tjekliste før installation
- Ensure the power supply is turned off at the main circuit breaker.
- Confirm you have all necessary tools (screwdriver, drill, wire strippers, etc.).
- Verify that the ceiling junction box is securely mounted and capable of supporting the fan.
5.2 Trin-for-trin installation
- Attach Blades to Motor Assembly: Secure each of the five fan blades to the motor assembly using the provided screws. Ensure the 'THIS SIDE UP' marking on the blade attachment is facing upwards.
- Install LED Light Board: Carefully place the LED light board into the designated area on the motor assembly and secure it with screws. Connect the LED wires.
- Attach LED Lampskygge: Placer LED lampshade over the light board and twist it clockwise until it is securely fastened.
- Mount Hanging Board: Secure the hanging board to your ceiling junction box using appropriate screws. Ensure it is firmly attached.
- Tilslut ledninger: Connect the fan's electrical wires to your household wiring. The typical connections are: Black (Live) to Black (Live), White (Neutral) to White (Neutral), and Yellow/Green (Ground) to Green (Ground). Use the provided wire connectors.
- Secure Fan to Hanging Board: Lift the fan assembly and attach it to the hanging board, ensuring all wires are tucked safely inside the canopy. Secure the fan with the provided screws.
6. Betjeningsvejledning
6.1 Fjernbetjeningsfunktioner
The included remote control allows for convenient operation of your ceiling fan:
- Tænd/sluk: Tryk på tænd/sluk-knappen for at tænde eller slukke for ventilatoren og lyset.
- Blæserhastighed: Select from 6 wind speeds (1-6) to adjust airflow.
- Lys til/fra: Control the light independently from the fan.
- Farvetemperatur: Cycle through 3 light colors: White (6000K), Neutral (4500K), and Warm (3000K).
- Dæmpning: Adjust light brightness from 10% to 100%.
- Vendbar funktion: Press the F/R key to change the blade rotation direction for summer (downdraft) or winter (updraft) modes. The fan will stop briefly before reversing.
- Timer: Indstil en 2-timers timer til automatisk nedlukning.
- Nattilstand: Activates a low-speed fan and dim light setting.

6.2 Remote Code Pairing
If the remote control is not responding, it may need to be paired:
- Sluk for hovedstrømforsyningen til ventilatoren i et minut.
- Turn on the main power supply and simultaneously long-press the 'Code Key' button on the remote control for 3-5 seconds.
- The fan light will blink 2-3 times, indicating successful code matching. The remote can now be operated normally.
6.3 APP kontrol
Control your fan using the 'Fan Lamp Pro' mobile application:
- Download APP: Scan the QR code provided in the product images or search for "Fan Lamp Pro" in your app store.
- Tilslut via Bluetooth: Sørg for, at din telefons Bluetooth er aktiveret.
- Par enhed: Open the app, add a new device, and follow the on-screen instructions to connect to your fan. The fan light will blink twice upon successful connection.
- Funktioner: The app allows control over fan speeds, light colors, dimming, reverse function, and timer settings, similar to the remote control.
6.4 Fan Speed and Airflow
- Niveau 1-2: Low Comfortable Wind, suitable for sleep.
- Niveau 3-4: Medium Natural Wind, suitable for daily life.
- Niveau 5-6: High Cooling Wind, suitable for hot weather.

6.5 Lysindstillinger
- The LED light source supports stepless dimming and memory function, retaining your last brightness and color temperature setting.
- Vælg mellem 3 farvetemperaturer: 3000K (varmt lys), 4500K (naturligt lys) og 6000K (hvidt lys).

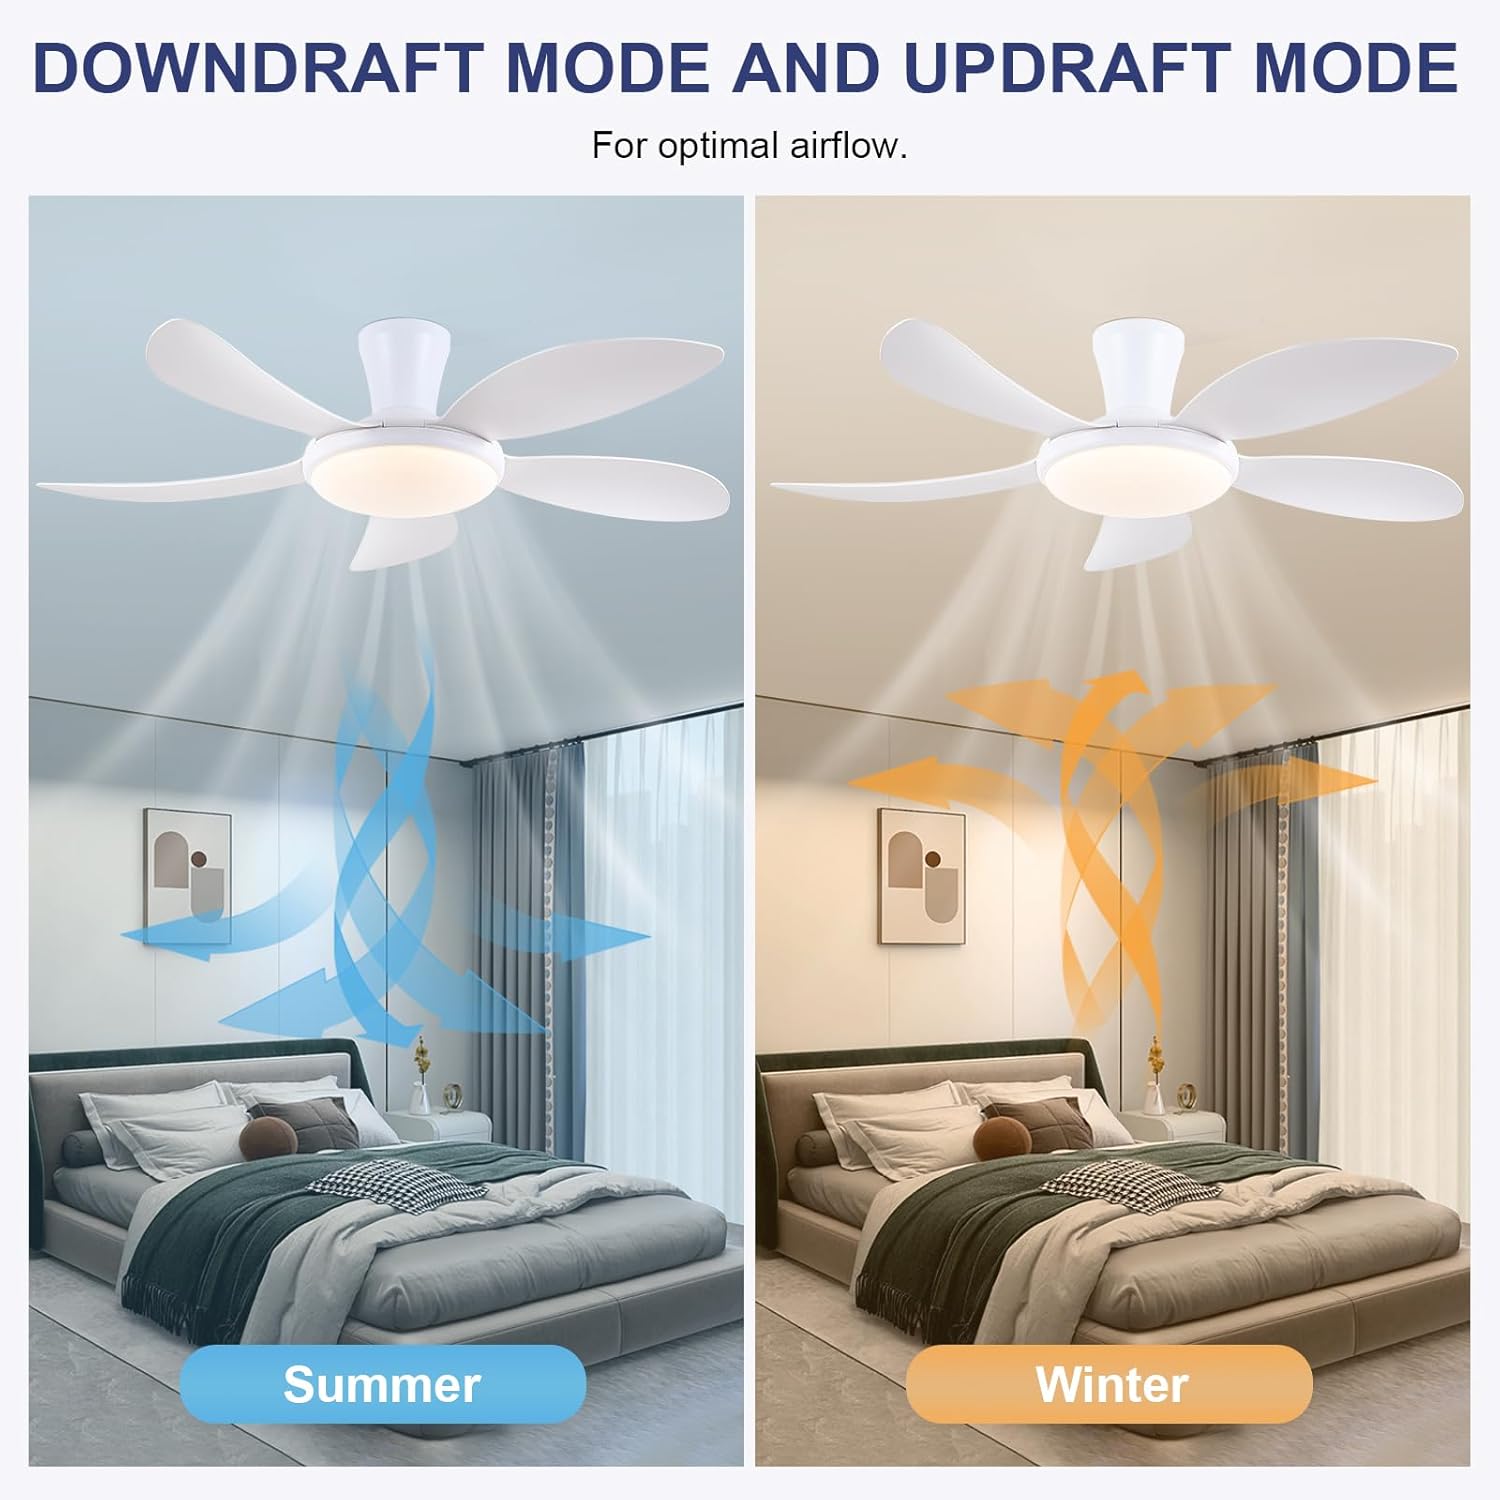
6.6 Reversibel funktion
The reversible DC motor allows you to change the direction of the fan seasonally:
- Sommertilstand (nedtræk): Blades rotate counter-clockwise, pushing cool air downwards.
- Vintertilstand (opadgående træk): Bladene roterer med uret, trækker kølig luft op og cirkulerer varm luft nedad.
7. Vedligeholdelse
- Rensning: For at rengøre ventilatoren skal du tørre den af med en blød klud.amp klæde. Brug ikke slibende rengøringsmidler eller opløsningsmidler.
- Klingepleje: The ABS blades are designed to be easy to clean and resistant to deformation.
- Regelmæssig kontrol: Periodically check all connections and screws to ensure they are secure.
8. Fejlfinding
Hvis du støder på problemer med din ventilator, kan du se følgende almindelige problemer og løsninger:
- Ventilator virker ikke: Check power supply, ensure all wiring connections are secure, and verify remote control pairing.
- Lys virker ikke: Check power supply, ensure light wires are connected, and verify remote control pairing.
- Ventilator larmer: Ensure all screws are tightened, especially on the blades and mounting bracket. Check for any obstructions.
- Fjernbetjening virker ikke: Replace batteries, ensure line of sight to the fan, and re-pair the remote control as per section 6.2.
- Problemer med APP-forbindelse: Ensure Bluetooth is on, the app is updated, and try re-pairing the device.
9. Garanti og support
PHORUS provides a one-year quality warranty for this product. For any damage or quality problems, free replacement service is offered. If you have any questions or require assistance, please contact PHORUS customer service. You will receive a satisfactory answer within 24 hours.
For additional support and resources, please visit the official PHORUS webwebstedet eller se de kontaktoplysninger, der blev oplyst ved dit køb.


