1. Introduktion og overview
Thank you for choosing the GSEICE Commercial Ice Maker Machine. This manual provides essential information for the safe and efficient operation, maintenance, and troubleshooting of your new ice maker. Please read it thoroughly before installation and use.
This commercial-grade ice maker is designed for high efficiency, capable of producing up to 150 lbs of ice per day with a 70 lbs storage bin. It features a versatile 2-way water inlet system (tap water or bottled water) and a built-in self-priming drain pump for convenient wastewater management. The intuitive LCD control panel allows for easy operation and monitoring of ice production and machine status. The unit is ETL and NSF certified, ensuring safety and sanitation for commercial applications.
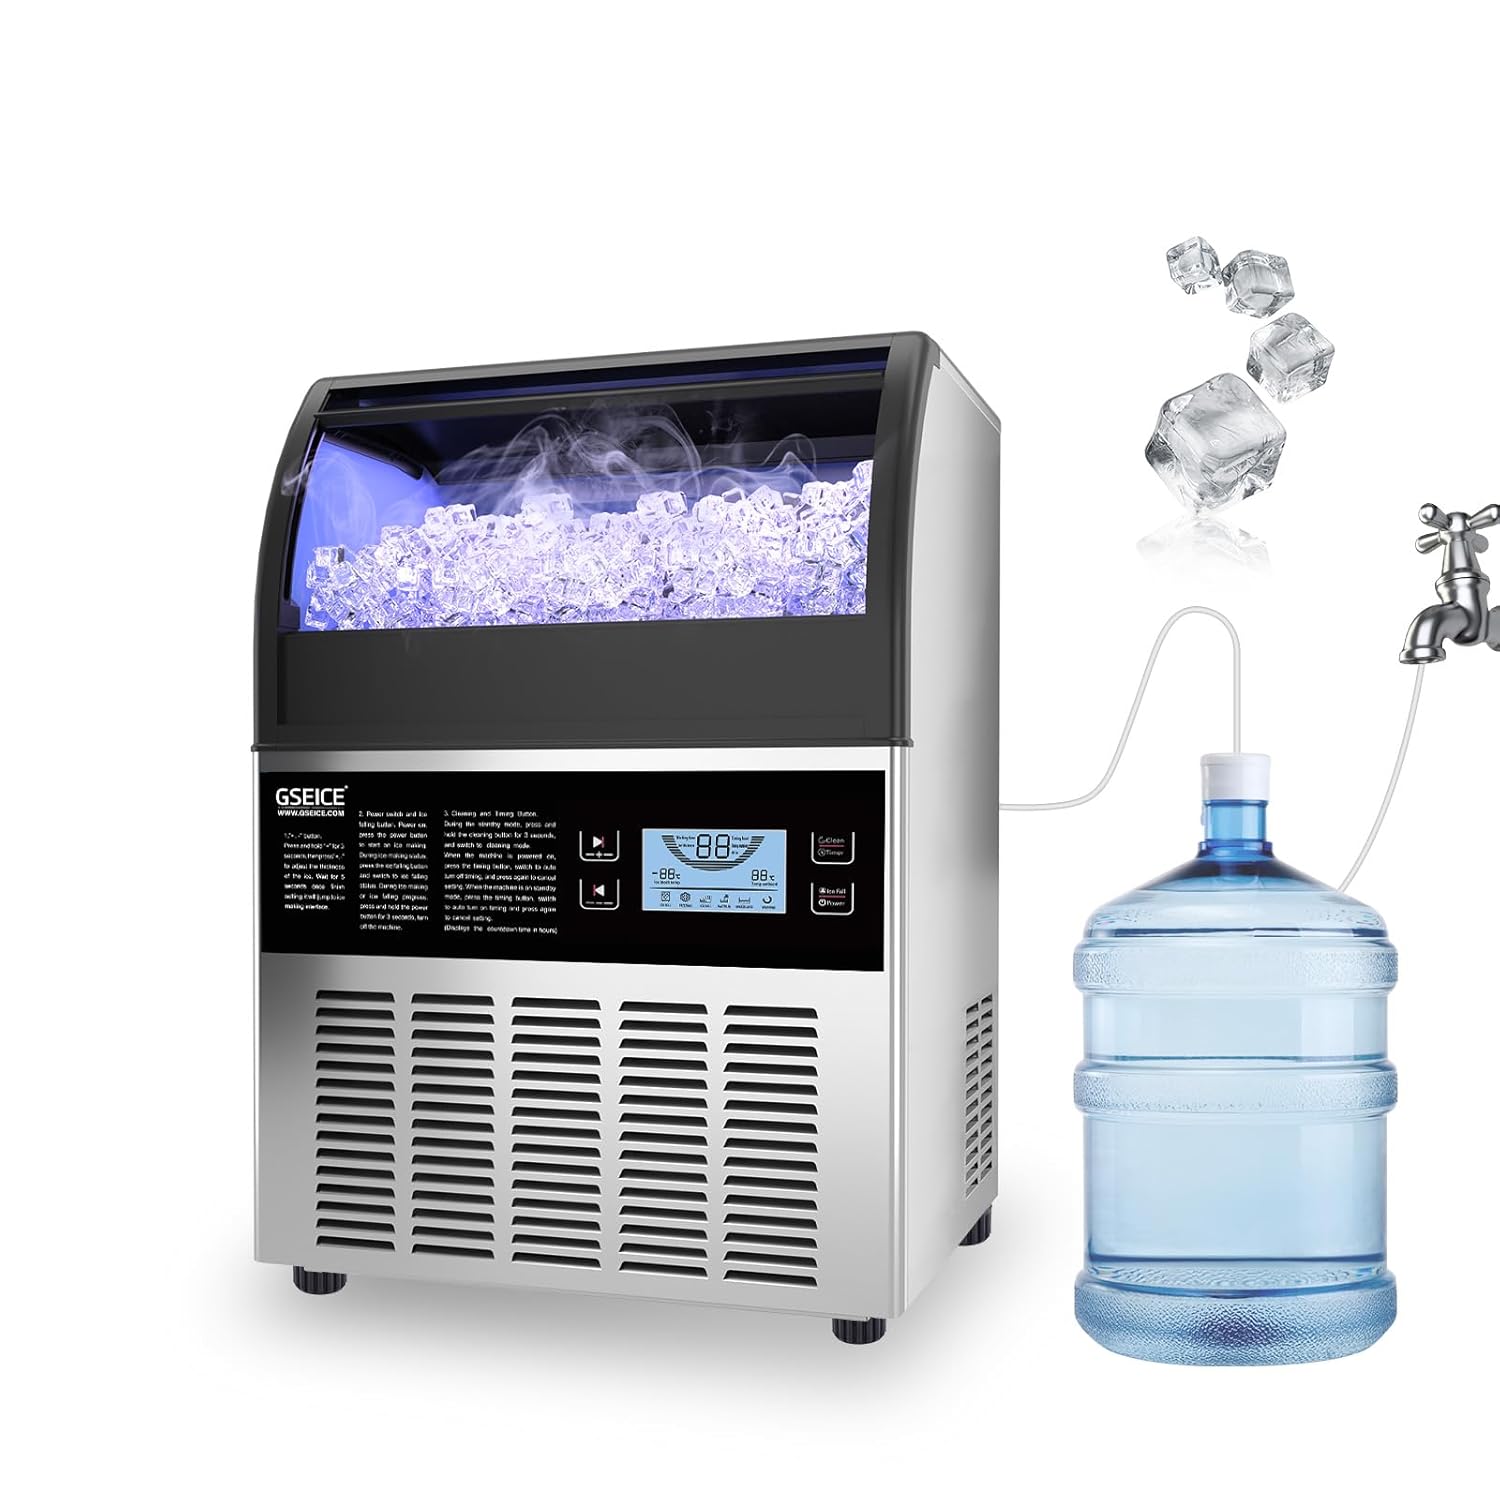
Figure 1.1: GSEICE Commercial Ice Maker Machine with bottled water supply setup.
2. Sikkerhedsoplysninger
Følg altid grundlæggende sikkerhedsforanstaltninger, når du bruger elektriske apparater, for at mindske risikoen for brand, elektrisk stød og personskade.
- Sørg for, at strømforsyningen matcher voltage krav angivet på produktetiketten.
- Betjen ikke maskinen med en beskadiget ledning eller stik.
- Keep hands and foreign objects out of the ice bin and ice-making area during operation.
- Tag stikket ud af maskinen før rengøring, vedligeholdelse eller hvis den ikke skal bruges i en længere periode.
- Nedsænk ikke apparatet, ledningen eller stikket i vand eller andre væsker.
- Ensure proper ventilation around the unit. Maintain recommended clearance from walls and other objects.
- This appliance is intended for commercial and household use as described in this manual.
3. Pakkens indhold
Kontroller, at alle varer er inkluderet i pakken:
- GSEICE 150LBS Commercial Ice Maker Machine
- Vandfilter
- Vandforsyningsslange
- Drain Water Pipe
- Is Scoop
- Brugervejledning (dette dokument)

Figur 3.1: Medfølgende tilbehør og produktmål.
4. Opsætning
4.1 Udpakning og første placering
- Tag forsigtigt ismaskinen ud af emballagen.
- Place the unit on a flat, stable surface. Ensure it is kept upright for at least 24 hours before plugging it in to allow refrigerants to settle.
- Maintain a recommended clearance of at least 6 inches around the unit for proper ventilation. The unit can be used freestanding or built-in under a counter.
4.2 Elektrisk tilslutning
This unit comes with a NEMA 5-15P plug. Connect it to a properly grounded electrical outlet that meets the specified voltage og nuværende krav.
4.3 Vandtilslutning
The ice maker supports two water intake modes: tap water and gallon bottled water. It includes a built-in drain pump to manage wastewater.
- Tilslutning af postevand: Connect the provided 1/4" water supply hose to a potable water source. Ensure the connection is secure to prevent leaks.
- Bottled Water Connection: Insert the bottled water inlet line into a standard gallon bottled water container. The self-priming pump will boost water flow from the bottle.
- Dræning: Connect the drain water pipe to a suitable drain. The built-in drain pump will automatically remove wastewater, reducing residue.

Figure 4.1: Rear connections for power, water supply, and drainage.
5. Betjeningsvejledning
5.1 Kontrolpanel overview
The ice maker is equipped with an intuitive LCD control panel for easy operation. The panel displays environmental temperature, ice core temperature, and various status indicators.
- +/- knapper: Press and hold for 3 seconds to adjust ice thickness. A short press adjusts other settings.
- Clean/Timer Button: In standby mode, press to set the turn-on time. Press and hold for 3 seconds to enter self-cleaning mode. During power-on, press to set the turn-off time.
- Ice Fall/Power Button: Press 'Power' to start ice making. During ice making, press to initiate ice falling.
- Indikatorer: Ice Full Warning, Water Lack Warning, Water In Open, Freezing, Washing.
Note: When the machine is in self-priming pump mode (for bottled water supply), press and hold the "Clean and Timer" and "+" buttons together for 3 seconds to enter the self-priming mode.

Figur 5.1: Detaljeret view of the LCD Control Panel.
5.2 Justering af istykkelse
You can adjust the thickness of the ice cubes to suit your needs:
- Press and hold the "+" or "-" buttons for 3 seconds.
- Use the "+" button to increase ice thickness (longer freezing time).
- Use the "-" button to decrease ice thickness (shorter freezing time).

Figure 5.2: Ice thickness adjustment options.
5.3 Officiel produktvideo
Video 5.1: This video demonstrates the GSEICE 2-Way Water Inlet Commercial Ice Maker, showcasing its features, operation, and water supply options. It provides a visual guide to the machine's functionality.
6. Vedligeholdelse
Regular cleaning and maintenance are crucial for the longevity and optimal performance of your ice maker. It is recommended to clean the machine regularly based on usage frequency.
6.1 Daglig rengøring
- It is suggested to drain water once a day by pulling out the small hose on the right side of the water tank. This helps prevent mineral buildup.
- Tør det udvendige af med en blød, damp klæde.
6.2 Selvrensende tilstand
The machine features a self-cleaning function:
- In standby mode, press and hold the 'Clean/Timer' button for 3 seconds to activate the self-cleaning cycle.
- Follow any on-screen prompts or indicators during the cleaning process.

Figure 6.1: Automatic cleaning feature in action.
7. Fejlfinding
If you encounter issues with your ice maker, please refer to the following common problems and solutions before contacting customer support.
| Problem | Mulig årsag | Løsning | ||||||||
|---|---|---|---|---|---|---|---|---|---|---|
| Ismaskinen producerer ikke is. | No water supply; Water tank empty; Power issue; Ambient temperature too high. | Check water connections and supply; Refill bottled water; Ensure unit is plugged in; Operate in recommended temperature range (41-100.4°F / 5-38°C). | ||||||||
| Ice cubes are too thin/thick. | Istykkelsen er forkert indstillet. | Juster istykkelsen ved hjælp af +/- knapperne på kontrolpanelet. | ||||||||
Relaterede dokumenter - GSE-Y150
|


