Indledning
Welcome to the user manual for your NEXPOW NP2 and X7 Car Battery Jump Starter. This comprehensive guide provides essential information for the safe operation, proper maintenance, and effective troubleshooting of your device. Please read this manual thoroughly before using the product to ensure optimal performance and safety.
Vigtige sikkerhedsoplysninger
Overhold altid følgende sikkerhedsforanstaltninger for at forhindre personskade eller beskadigelse af enheden og køretøjet:
- Læs alle instruktioner omhyggeligt før brug.
- Brug øjenbeskyttelse, når du arbejder med batterier.
- Kortslut ikke batteriklemmenamps.
- Hold enheden væk fra børn.
- Do not expose the device to rain, water, or extreme temperatures.
- Sørg for ordentlig ventilation under brug.
- Forsøg ikke at sætte gang i et frosset batteri.
- If the device becomes excessively hot, discontinue use immediately.
Pakkens indhold
Bekræft, at alle nedenstående varer er inkluderet i din pakke:
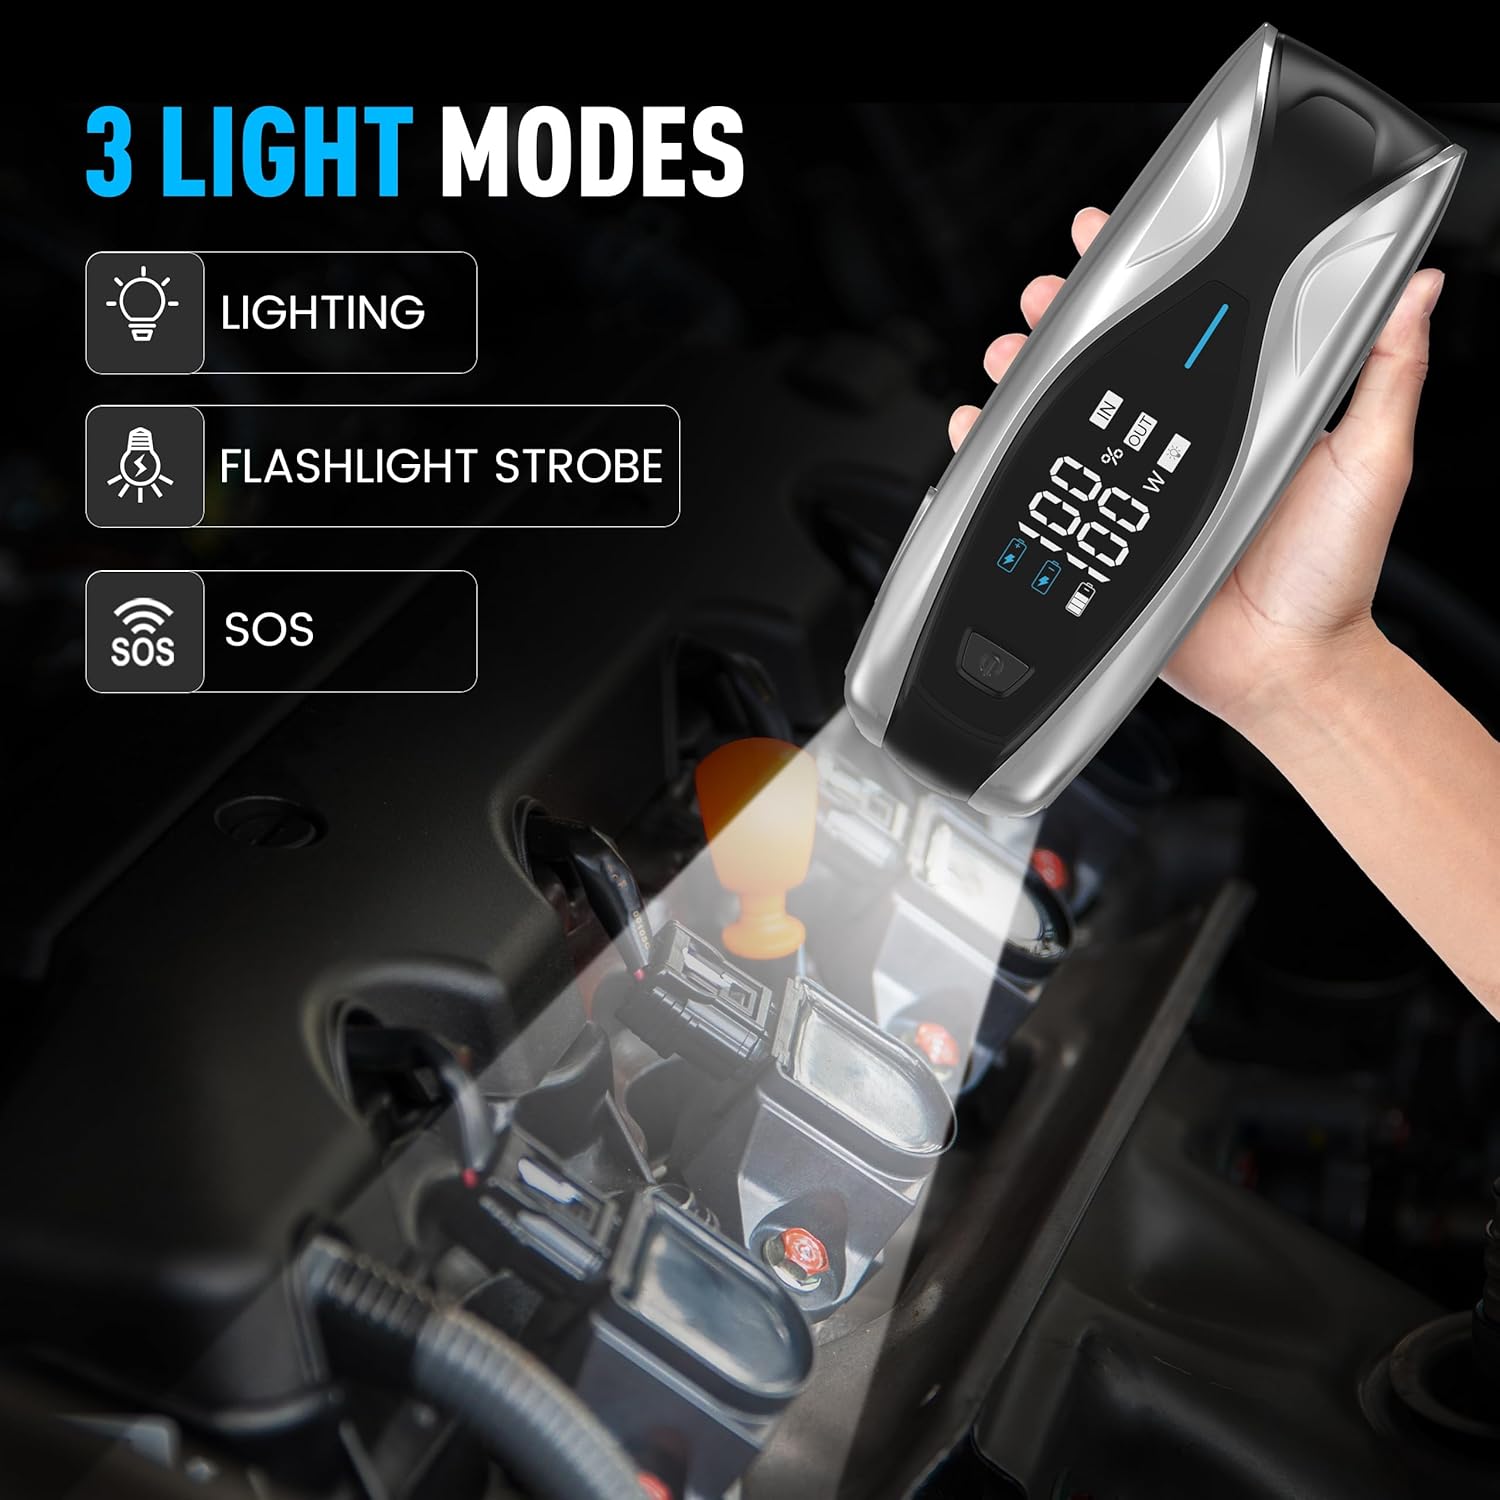
Image: Contents of the NEXPOW X7 Jump Starter package, including the main unit, cables, and accessories.
- X7 Jump Starter Unit
- USB-C til USB-C kabel
- Batteri Clamps with Starter Cable
- Cigarettænderkonverter
- Brugermanual
- Zipper Carry Case
Produkt overview
The NEXPOW NP2 and X7 are versatile devices designed to provide reliable power for various automotive and portable charging needs.

Image: The NEXPOW X7 and NP2 jump starters, highlighting their distinct designs and functionalities.
NEXPOW X7 Jump Starter Features
- Upgraded System Protections: Features 8 types of protection, including spark-proof, reverse polarity, low/high temperature, and overload protection for safe operation.
- 3.2-Inch LED Display: Clearly shows remaining battery capacity, charging status, and other vital information.
- 60W PD Two-Way Quick Charging: Equipped with a PD60W Type-C IN/OUT port for rapid recharging of the unit and fast charging of compatible devices.
- Flere udgange: Includes 1x USB-A Output and 1x DC Output for charging various electronic devices.
- Integreret LED-lommelygte: Offers Lighting, Strobe, and SOS modes for emergency situations.
NEXPOW NP2 Jump Starter with Air Compressor Features
- 150 PSI luftkompressor: Integrated air compressor capable of inflating tires from 0 to 20 PSI in minutes, with an automatic stop function.
- LCD-skærm: Provides clear readings of remaining power and output mode.
- Intelligent Protection Systems: Ensures safe and reliable operation during jump starting and inflation.
- Additional Nozzles: Includes 3 extra nozzles for inflating sports balls, air mattresses, and other inflatables.
Opladning af enheden
Before first use, fully charge your NEXPOW jump starter. Regular charging ensures the device is ready when needed.

Image: The NEXPOW X7 unit being charged via its Type-C port, with the display indicating charging progress.
- Connect the provided USB-C to USB-C cable to the Type-C IN/OUT port on the jump starter.
- Connect the other end of the cable to a compatible USB wall adapter (not included) or a car charger. For optimal charging speed, use a PD60W compatible charger.
- The LED display will indicate the charging status and battery level. The device is fully charged when the display shows 100%.
- A full charge from 0% to 80% can take approximately 1 hour with a 60W Quick Charge power source.
Betjeningsvejledning
Jump Starting a Vehicle (X7)
The NEXPOW X7 can jump start 12V vehicles with up to 12L Gas and 10L Diesel engines.

Image: The NEXPOW X7 jump starter connected to a car battery, illustrating the setup for jump starting.
- Sørg for, at jumpstarteren er tilstrækkeligt opladet (mindst 50%).
- Tilslut den røde (+) clamp til den positive pol på køretøjets batteri.
- Tilslut den sorte (-) clamp til den negative pol på køretøjets batteri.
- Sørg for at clamps are securely attached and the indicator light on the smart cable is green.
- Start køretøjets motor.
- Når køretøjet starter, skal den sorte (-) kobling straks frakobles.amp, derefter den røde (+) clamp fra batteriet.
Using the Air Compressor (NP2)
The NEXPOW NP2 features an integrated 150 PSI air compressor for inflating tires and other items.

Image: The NEXPOW NP2 jump starter actively inflating a car tire, demonstrating its air compressor function.
- Connect the air hose to the air compressor port on the NP2 unit.
- Attach the nozzle to the tire valve or inflatable item.
- Power on the NP2 and use the controls to set the desired pressure (PSI, BAR, KPA).
- Tryk på startknappen for at starte oppumpningen. Kompressoren stopper automatisk, når det forudindstillede tryk er nået.
- Disconnect the nozzle and store the hose.
Using as a Portable Power Bank (X7 & NP2)
Both NEXPOW units can serve as portable power banks to charge your electronic devices.
Image: The NEXPOW X7 unit demonstrating its capability to charge multiple portable electronic devices.
- USB-A-output: Connect your device's USB charging cable to the USB-A port for standard charging.
- Type-C IN/OUT (PD60W): Use this port with a compatible USB-C cable for fast charging of laptops, tablets, and smartphones.
- DC-udgang: Connect compatible 12V devices to the DC output port.
Using the LED Flashlight (X7)
The NEXPOW X7 includes a multi-mode LED flashlight for various lighting needs.

Image: The NEXPOW X7 unit showcasing its three distinct LED flashlight modes for different situations.
- Press and hold the flashlight button to turn on the standard lighting mode.
- Press the button again to cycle through the Flashlight Strobe mode.
- Press the button a third time to activate the SOS signal mode.
- Press and hold the button again to turn off the flashlight.
Opretholdelse
Proper maintenance will extend the lifespan of your NEXPOW jump starter:
- Rensning: Tør enheden af med en tør, blød klud. Brug ikke skrappe kemikalier eller slibende rengøringsmidler.
- Opbevaring: Store the device in a cool, dry place, away from direct sunlight and moisture. Use the provided zipper carry case for protection.
- Genopladning: For optimal battery health, recharge the jump starter every 3-6 months, even if not in use. This prevents deep discharge and prolongs battery life.
- Temperatur: Avoid storing or operating the device in extreme temperatures outside the recommended range (-4°F to 104°F).
Fejlfinding
If you encounter issues with your NEXPOW jump starter, refer to the table below for common problems and solutions:
| Problem | Mulig årsag | Løsning |
|---|---|---|
| Enheden tændes ikke | Lavt batteri; Enhedsfejl | Charge the device fully; Contact support if issue persists. |
| Car won't jump start | Insufficient charge; Incorrect connection; Vehicle battery too damaged | Ensure device is fully charged; Check clamp connections (red to +, black to -); Consult a mechanic if battery is severely damaged. |
| Air compressor not inflating (NP2) | Hose not securely connected; Pressure not set; Device low on power | Ensure hose is tightly connected; Set desired pressure before starting; Charge the device. |
| Enheden bliver varm under brug | Normal operation under heavy load; Overload | Allow device to cool down; Ensure not exceeding specified limits for jump starting or charging. |
Specifikationer
Key technical specifications for the NEXPOW NP2 and X7 models:
| Feature | NEXPOW X7 | NEXPOW NP2 |
|---|---|---|
| Spidsstrøm | 3000A | 3000A |
| Motorkompatibilitet (benzin) | Op til 12L | Op til 8L |
| Motorkompatibilitet (diesel) | Op til 10L | Op til 8L |
| Type-C input/output | PD60W | PD18W |
| USB-A-output | 5V/3A, 9V/2A, 12V/1.5A | 18W |
| DC-udgang | 12-16.8V/10A | 150W Maks |
| Luftkompressor | Ingen | 150 PSI |
| Driftstemperatur | -4°F til 104°F (-20°C til 40°C) | -4°F til 104°F (-20°C til 40°C) |
Garanti og support
NEXPOW products are designed for reliability and performance. For warranty information, technical support, or any inquiries regarding your device, please refer to the warranty card included in your package or visit the official NEXPOW store on Amazon:


