1. Vigtige sikkerhedsinstruktioner
Please read all safety instructions carefully before using this projector. Keep this manual for future reference.
- Strømkilde: Brug kun den angivne strømadapter. Sørg for, at lydstyrkentage matcher projektorens krav.
- Ventilation: Bloker ikke ventilationsåbningerne. Sørg for tilstrækkelig luftgennemstrømning omkring projektoren for at forhindre overophedning.
- Vand og fugt: Do not expose the projector to rain, moisture, or any liquids.
- Rensning: Tag stikket ud af projektoren før rengøring. Brug en blød, tør klud. Brug ikke flydende rengøringsmidler eller rengøringsmidler på sprayform.
- Varme: Keep the projector away from heat sources such as radiators, heat registers, stoves, or other apparatus that produce heat.
- Service: Forsøg ikke selv at servicere dette produkt. Overlad al service til kvalificeret servicepersonale.
- Øjenbeskyttelse: Se ikke direkte ind i projektorlinsen, når lamp er tændt.
2. Pakkens indhold
Bekræft at alle varer er til stede i din pakke:
- Optex Compact WiFi Projector
- Fjernbetjening
- Strømadapter
- Brugervejledning (dette dokument)
3. Produktet er slutview
3.1 Forside og top View
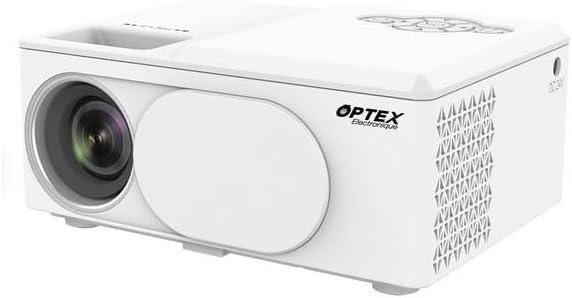
This image displays the Optex Compact WiFi Projector from a three-quarter front and top perspective. Visible components include the projection lens on the front left, a protective lens cover, and the main body of the projector. The top surface shows a recessed area for focus adjustment and a control panel with navigation buttons.
3.2 Kontrolpanel og porte

This image highlights two key areas of the projector. On the left, a close-up of the top control panel shows a circular array of navigation buttons (up, down, left, right, OK), power button, and return button, allowing for direct interaction with the projector's menu. On the right, a close-up of the side panel reveals the various input/output ports: DC 21V power input, IR receiver, two USB ports, an HDMI port, and a Type-C port, enabling diverse connectivity options.
4. Opsætningsvejledning
4.1 Placering
- Placer projektoren på en stabil, flad overflade.
- Ensure the projector is positioned at an appropriate distance from the projection surface (wall or screen) to achieve the desired image size.
- For optimal image quality, project in a dark environment.
4.2 Strømtilslutning
- Connect the power adapter to the 'DC 21V' port on the side of the projector.
- Sæt den anden ende af strømadapteren i en stikkontakt.
- Strømindikatorlampen på projektoren vil lyse.
5. Betjeningsvejledning
5.1 Tænd/sluk
- Tænd: Tryk på tænd/sluk-knappen på projektoren eller fjernbetjeningen.
- Sluk: Tryk på tænd/sluk-knappen igen. Bekræft nedlukningen, hvis du bliver bedt om det.
5.2 Fokusjustering
- Rotate the focus ring located near the lens until the projected image appears clear and sharp.
5.3 Valg af indgangskilde
- Press the 'Source' button on the remote control or navigate through the projector's menu to select the desired input source (e.g., HDMI, USB, WiFi).
- HDMI: Connect an HDMI cable from your device (laptop, game console) to the projector's HDMI port.
- USB: Insert a USB drive into a USB port to play media files.
5.4 WiFi Connection and Screen Mirroring
- Navigate to the 'Settings' or 'WiFi' menu on the projector.
- Vælg dit WiFi-netværk, og indtast adgangskoden.
- Once connected, select the 'Screen Mirroring' or 'Wireless Display' option.
- On your smartphone or tablet, enable screen mirroring (e.g., Miracast, AirPlay, Smart View) and select the projector from the list of available devices.
6. Vedligeholdelse
6.1 Rengøring af linsen
- Brug en blød, fnugfri klud, der er specielt designet til optiske linser.
- Gently wipe the lens to remove dust or smudges. Do not use abrasive cleaners.
6.2 Rengøring af projektorhuset
- Tør projektorens yderside af med en blød, tør klud.
- Brug ikke skrappe kemikalier eller opløsningsmidler.
6.3 Opbevaring
- When not in use, store the projector in a cool, dry place.
- Cover the lens with its protective cap to prevent dust accumulation.
7. Fejlfinding
Hvis du støder på problemer, kan du se følgende almindelige problemer og løsninger:
- Ingen strøm: Sørg for, at strømadapteren er korrekt tilsluttet til både projektoren og stikkontakten. Prøv en anden stikkontakt.
- Intet billede: Kontrollér valget af inputkilde. Sørg for, at den tilsluttede enhed er tændt og sender et signal. Kontroller, at alle kabler er korrekt tilsluttet.
- Sløret billede: Adjust the focus ring on the projector lens. Ensure the projection surface is flat and the projector is at an optimal distance.
- Ingen lyd: Check the volume settings on both the projector and the connected source device. Ensure external speakers are properly connected if used.
- Fjernbetjeningen virker ikke: Kontrollér batterierne i fjernbetjeningen. Sørg for, at der ikke er nogen forhindringer mellem fjernbetjeningen og projektorens IR-modtager.
8. Tekniske specifikationer
| Feature | Specifikation |
|---|---|
| Mærke | Optex |
| Displayteknologi | LED |
| Indfødt opløsning | 800 x 400 |
| Maksimal skærmopløsning | 1920 x 1080 (Fuld HD) |
| Lysstyrke | 2100 lumen |
| Forbindelsesteknologi | HDMI, USB, WiFi |
| Hardware-interface | HDMI, USB, Type-C |
| Controller type | Fjernbetjening |
| Strømforbrug | 43 watt |
| Formfaktor | Transportabel |
| Monteringstype | Bordmontering |
9. Garanti og kundesupport
This product comes with a standard manufacturer's warranty. For specific warranty terms and conditions, please refer to the documentation provided with your purchase or contact your retailer.
For technical support or customer service inquiries, please contact the Optex customer support team through their official webwebstedet eller kontaktoplysningerne i din købsdokumentation.


