1. Introduktion
This manual provides detailed instructions for the safe installation, operation, and maintenance of your TWIG Farmhouse Chandelier 6-Light fixture. Designed for dining rooms and kitchen islands, this fixture combines vintage solid wood, matte black metal, and clear cylinder glass shades to create a warm and elegant lighting atmosphere. Please read this manual thoroughly before beginning installation or use.
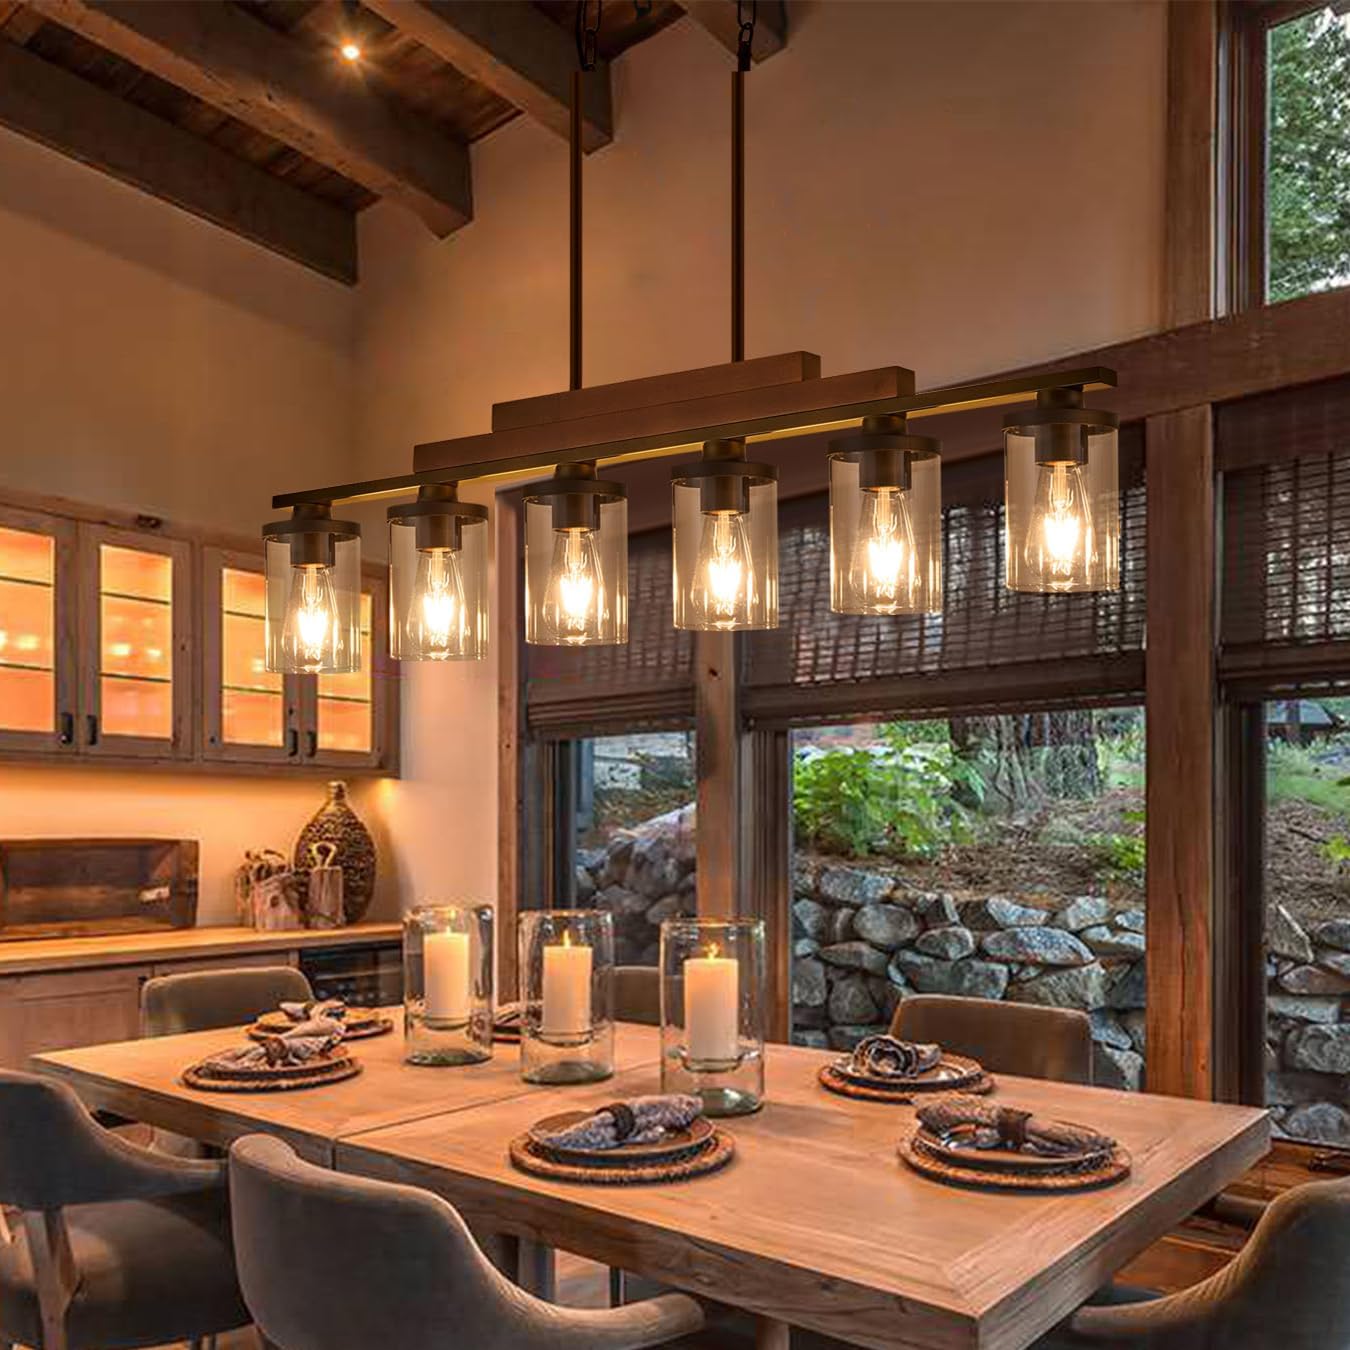
Image 1.1: The TWIG Farmhouse Chandelier 6-Light fixture installed above a dining table, showcasing its rustic design with wood accents and clear glass shades.
2. Sikkerhedsoplysninger
- ADVARSEL: Risiko for elektrisk stød. Afbryd strømmen ved afbryderen eller sikringsboksen før installation eller service.
- All electrical connections must be in accordance with local codes, ordinances, or the National Electric Code (NEC). Consult a qualified electrician if you are unfamiliar with proper electrical wiring installations.
- Overskrid ikke det anbefalede wattage for bulbs (E26 base, maximum 60W, 40W recommended).
- Håndter glaskomponenter forsigtigt for at forhindre brud.
- Sørg for, at armaturet er sikkert monteret på et strukturelt element i loftet.
- Keep flammable materials away from light bulbs.
- The product is handmade and may have a slight odor upon unboxing due to environmental protective coatings. It is recommended to ventilate the product in an open area for a period before installation.
3. Pakkens indhold
Carefully unpack all components and inspect for any damage. Retain all packaging materials until you are satisfied with the product. The fixture is 95% pre-assembled for ease of installation.
- Chandelier main body (pre-assembled with wood beam, metal frame, and glass shades)
- Adjustable suspension rods (various lengths)
- Ceiling canopy with mounting hardware
- Ledningsstik
- Brugsanvisning
- Bemærk: Pærer er ikke inkluderet.
4. Specifikationer
| Mærke | KVIST |
| Modelnummer | 2024072304 |
| Dimensions (L x W x Max H) | 42 cm L x 5 cm B x 46 cm H |
| Justerbart højdeområde | Minimum 23", Maximum 45.7" (as per diagram) |
| Materiale | Glas, metal, træ |
| Farve | Matte Black (Metal), Clear (Glass), Wood (Antique Painted) |
| Antal lys | 6 |
| Pære base | E26 |
| Max Wattage pr. pære | 60W (40W recommended) |
| Voltage | 120 volt |
| Installationstype | Semi Flush Mount |
| Indendørs/Udendørs brug | Indendørs |

Image 4.1: Detailed dimensions of the chandelier and its adjustable suspension rods, indicating a maximum height of 45.7 inches and a minimum of 23 inches.
5. Opsætning og installation
The fixture is 95% assembled. Only a simple assembly and electrical installation are required.
- Trin 1: Forbered dig til installation
- Sluk for strømmen ved afbryderen eller sikringsboksen.
- Sørg for, at monteringsfladen er strukturelt solid til at bære armaturets vægt.
- Trin 2: Fastgør monteringsbeslaget
- Fastgør monteringsbeslaget til samledåsen i loftet med de medfølgende skruer.
- Step 3: Adjust Suspension Rods
- Determine the desired hanging height. The fixture's height can be adjusted from 23 inches to 45.7 inches using the provided rods.
- Attach the appropriate length of suspension rods to the chandelier body and the ceiling canopy.
- Trin 4: Elektrisk tilslutning
- Connect the fixture's wires to the house wiring:
- Connect the black wire (live) from the fixture to the black wire from the junction box.
- Connect the white wire (neutral) from the fixture to the white wire from the junction box.
- Connect the ground wire from the fixture to the ground wire from the junction box (or to the green ground screw on the mounting bracket).
- Secure connections with wire connectors.
- Connect the fixture's wires to the house wiring:
- Trin 5: Monter armaturet
- Carefully lift the chandelier and attach the ceiling canopy to the mounting bracket, securing it with the decorative nuts.
- Trin 6: Installer pærer
- Screw E26 base bulbs (not included) into each socket. Do not exceed 60W per bulb; 40W is recommended.

Image 5.1: Installation diagram for the TWIG Farmhouse Chandelier, detailing steps from preparing the electrical box to mounting the fixture.
6. Betjeningsvejledning
Once installed and bulbs are in place, restore power at the circuit breaker. The chandelier operates via a standard wall switch (toggle switch type). If connected to a dimmer switch, ensure the bulbs are compatible with dimming functionality.
- Pære type: Supports any E26 screw bulbs. Filament, LED, incandescent, and halogen bulbs are compatible.
- Anbefalet Wattage: 40W per bulb for optimal performance and longevity. Maximum 60W.
7. Vedligeholdelse
- Rensning: Disconnect power before cleaning. Use a soft, dry cloth to wipe the metal and wood components. For glass shades, a slightly damp cloth can be used, followed by a dry cloth to prevent water spots. Do not use abrasive cleaners or solvents.
- Udskiftning af pære: Ensure power is off before replacing bulbs. Allow bulbs to cool completely before handling. Screw in new E26 base bulbs, ensuring they do not exceed 60W.
- Udskiftning af glasskærm: In case of damage, replacement glass shades (3.94" diameter, 5.51" height) can be purchased separately.
8. Fejlfinding
| Problem | Mulig årsag | Løsning |
|---|---|---|
| Lyset tændes ikke. |
|
|
| Flimrende lys. |
|
|
| Fixture smells after installation. |
|
|
9. Kundesupport
For any questions, concerns, or assistance with your TWIG Farmhouse Chandelier, please contact our customer support team. We are committed to providing timely responses and solutions.
- Kontakte: Please refer to the contact information provided with your purchase or visit the official TWIG webwebsted.
- Svartid: Vi bestræber os på at besvare alle henvendelser inden for 24 timer.


