1. Produktet er slutview
The Navitel R385 is a 2K GPS Front Dash Cam designed to record your journeys with high-quality video. It features a 140-degree wide viewing angle, G-Sensor for emergency recording, Loop Recording, and a GPS Informer function to alert you to road hazards.
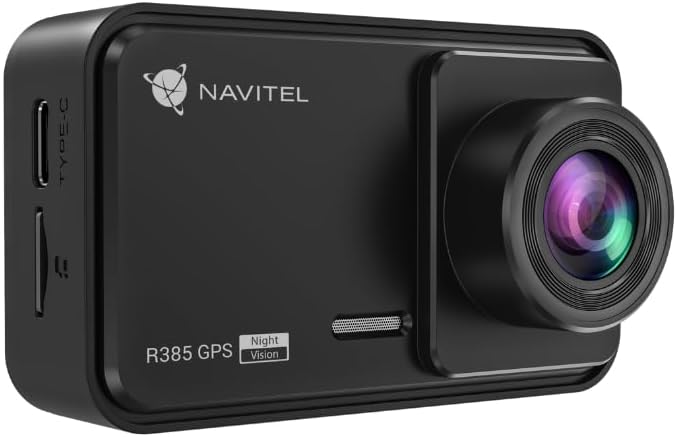
Figur 1.1: Front view of the Navitel R385 Dash Cam. This image displays the compact design of the dash cam, featuring the lens on the right side and the 'R385 GPS' branding on the front.
2. Pakkens indhold
Sørg for, at alle dele er til stede, før du fortsætter installationen:
- Navitel R385 Dash Cam
- Forrudemontering
- Bil oplader
- Brugermanual
3. Opsætning og installation
3.1 Indsættelse af et MicroSD-kort
The Navitel R385 supports microSD cards up to 256GB. A microSD card is required for recording and is not included with the device.
- Locate the microSD card slot on the side of the dash cam.
- Insert the microSD card with the contacts facing the front of the camera until it clicks into place.
- For at fjerne det skal du forsigtigt skubbe kortet, indtil det springer ud.
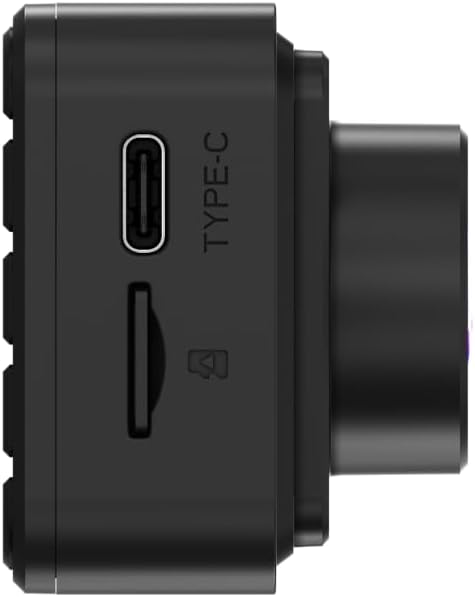
Figur 3.1: Side view of the Navitel R385 showing the Type-C power port and the microSD card slot. This image highlights the connectivity options for power and storage.
3.2 Montering af dashcam'et
The dash cam is designed for windshield mounting.
- Clean the chosen area on your windshield thoroughly to ensure a strong suction.
- Attach the windshield mount to the dash cam.
- Press the suction cup firmly against the windshield and engage the locking mechanism (if applicable) to secure it.
- Juster kameravinklen for at sikre et klart billede view af vejen forude, så du undgår at blokere din kørsel view.

Figur 3.2: The Navitel R385 Dash Cam attached to its windshield suction cup mount. This image demonstrates how the device connects to the mount for in-vehicle placement.
3.3 Strømtilslutning
Connect the dash cam to your vehicle's power supply using the provided car charger.
- Sæt bilopladeren i bilens 12V-stikkontakt (cigarettænder).
- Connect the other end of the charger cable to the Type-C port on the dash cam.
- The dash cam will typically power on automatically when the vehicle's ignition is turned on.
4. Betjeningsvejledning
4.1 Grundlæggende betjening
Once powered on, the dash cam will typically begin recording automatically. The 2-inch IPS display will show the live view and recording status.
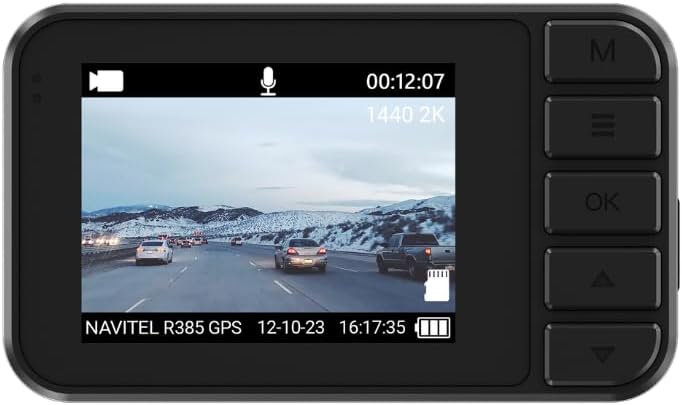
Figur 4.1: The 2-inch IPS display of the Navitel R385 showing a live recording view. The screen displays video footage, current time, date, and recording resolution (1440 2K).
4.2 Loop-optagelse
The Navitel R385 utilizes cyclic recording. When the microSD card reaches its capacity, the oldest unlocked files vil automatisk blive overskrevet af nye optagelser. Dette sikrer kontinuerlig optagelse uden manuel indgriben.
4.3 G-Sensor (Shock Sensor)
The built-in G-Sensor detects sudden movements, impacts, or rapid acceleration/deceleration. In such events, the current video segment is automatically locked and saved to a secure folder on the microSD card, preventing it from being overwritten by loop recording. The sensitivity of the G-Sensor can usually be adjusted in the device settings.
4.4 Parkeringstilstand
The R385 GPS can detect vibrations and initiate recording even when the vehicle is parked and the engine is off. This feature provides surveillance when you are away from your vehicle. Ensure the dash cam has a continuous power supply for this function to operate effectively.
4.5 GPS Informer
The integrated GPS Informer function provides alerts for upcoming speed enforcement cameras, bus lanes, and other potential road hazards. When approaching a detected hazard, the device will emit an audible warning and display relevant information on the 2-inch screen. The GPS module also allows the device to display the vehicle's current speed.
5. Vedligeholdelse
5.1 Rengøring af enheden
- Brug en blød, tør klud til at rengøre dashcam-huset og skærmen.
- Brug en specialklud til rengøring af linser for at undgå ridser.
- Brug ikke hårde kemikalier eller slibende rengøringsmidler.
5.2 Vedligeholdelse af microSD-kort
- Regularly format the microSD card (e.g., once a month) within the dash cam's settings to maintain optimal performance and prevent data corruption.
- Use high-quality, reputable brand microSD cards designed for dash cam use (Class 10 or higher, U3 recommended).
6. Fejlfinding
6.1 Enheden tænder ikke
- Ensure the car charger is properly connected to both the dash cam and the vehicle's 12V power outlet.
- Check if the vehicle's 12V power outlet is functioning (e.g., by testing with another device).
- Prøv en anden biloplader, hvis en tilgængelig.
6.2 Recording Issues (e.g., stops recording, corrupted files)
- Format the microSD card using the dash cam's menu.
- Ensure you are using a high-quality microSD card (Class 10, U3 recommended).
- Replace the microSD card if issues persist, as cards can wear out over time.
6.3 GPS Informer Not Working / Inaccurate Speed
- Sørg for, at dashcam'et har en klar view of the sky to receive GPS signals. Avoid mounting it behind tinted areas or large obstructions.
- Allow sufficient time for the GPS to acquire a signal after powering on, especially in new locations.
7. Specifikationer
| Model | R385 |
| Video opløsning | 2560x1440p (2K) @ 30 FPS |
| Sensor | GC4653 |
| Viewi vinkel | 140 grader |
| Linsetype | 6-Layer Glass Lens |
| Vise | 2-Inch IPS Display |
| Opbevaring | MicroSD card up to 256GB (not included) |
| Funktioner | G-Sensor, Loop Recording, Parking Mode, GPS Informer |
| Monteringstype | Forrudemontering |
| Produktdimensioner | 2.76" D x 3.54" B x 5.51" H |
| Farve | Sort |
| Fabrikant | Navitel |
8. Garanti og support
For warranty information and technical support, please refer to the documentation provided with your purchase or visit the official Navitel webwebsted. Gem din købsbevis til garantikrav.


