1. Introduktion
This manual provides essential instructions for the safe installation, operation, and maintenance of your Cangaroo Draco i-Size Car Seat. Please read this manual thoroughly before using the product and keep it for future reference. Proper installation and use are crucial for your child's safety.
The Cangaroo Draco i-Size Car Seat is designed for children from 40 to 150 cm in height (approximately from birth up to 12 years old, or 0-36 kg). It features an Isofix system, Top Tether, and a 360° rotatable base for ease of use and enhanced safety.
2. Sikkerhedsoplysninger
ADVARSEL: Manglende overholdelse af disse instruktioner kan resultere i alvorlig personskade eller død.
- Always secure your child in the car seat using the 5-point harness (for children up to 105 cm) or the vehicle's 3-point seat belt (for children 100-150 cm).
- Ensure the car seat is correctly installed in the vehicle using the Isofix connectors and Top Tether (where applicable) before each journey.
- Efterlad aldrig dit barn uden opsyn i autostolen.
- Brug ikke autostolen, hvis den har været involveret i en ulykke, selvom der ikke er synlige skader. Indvendige skader kan kompromittere dens sikkerhed.
- Refer to your vehicle's owner's manual for information on child restraint system installation points.
- Do not modify the car seat or use accessories not approved by the manufacturer.
3. Komponenter overview
Familiarize yourself with the main components of your Cangaroo Draco i-Size Car Seat.

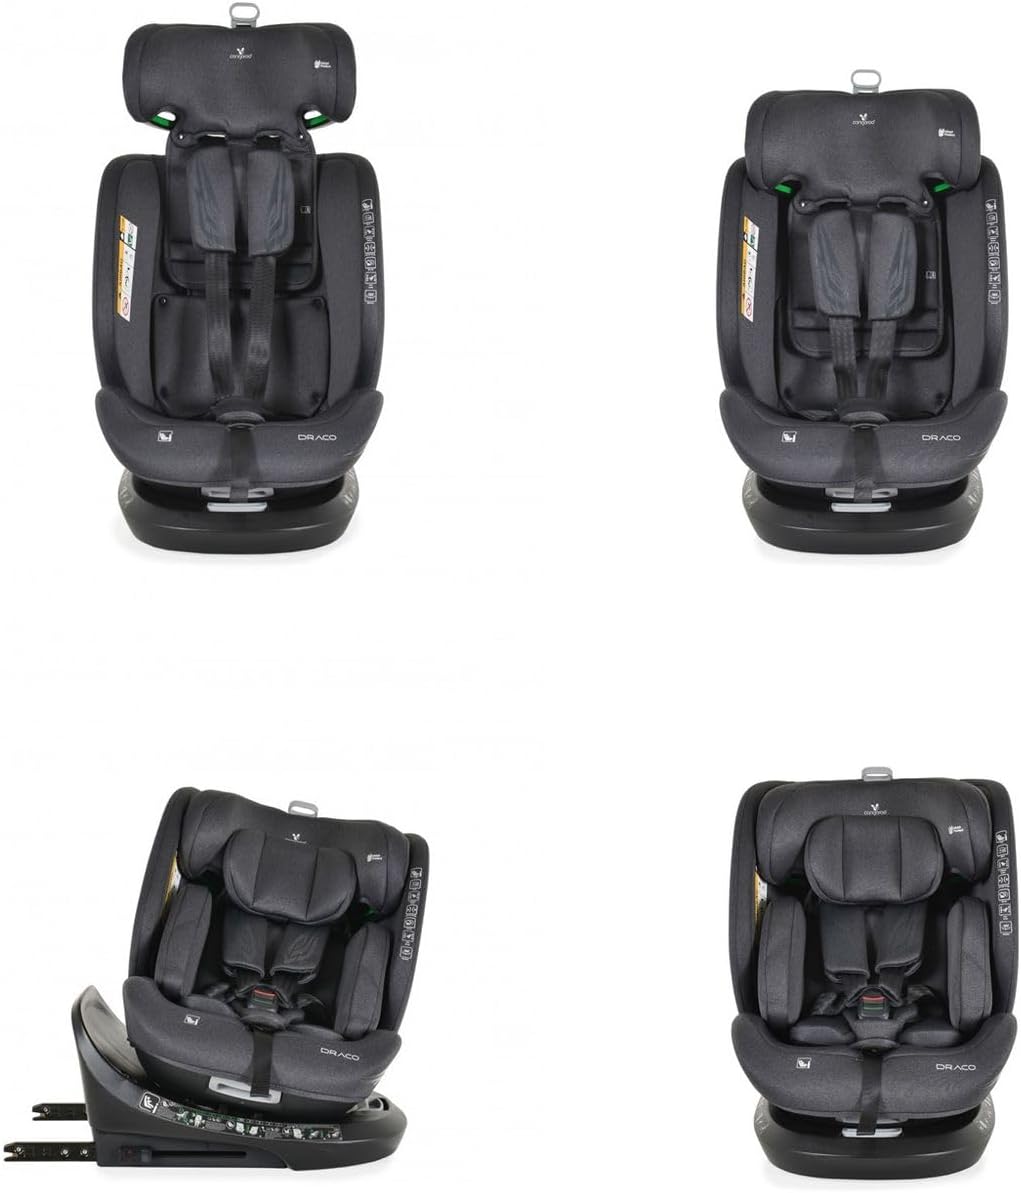
Figur 3.1: Front view of the Cangaroo Draco i-Size Car Seat, showing the main structure, 5-point harness, and green padded infant insert.

Figur 3.2: Close-up of the car seat's headrest and 5-point harness system, highlighting the adjustable components.

Figur 3.3: Two yellow ISOFIX guide inserts, used to facilitate connection of the car seat's ISOFIX arms to the vehicle's ISOFIX anchor points.
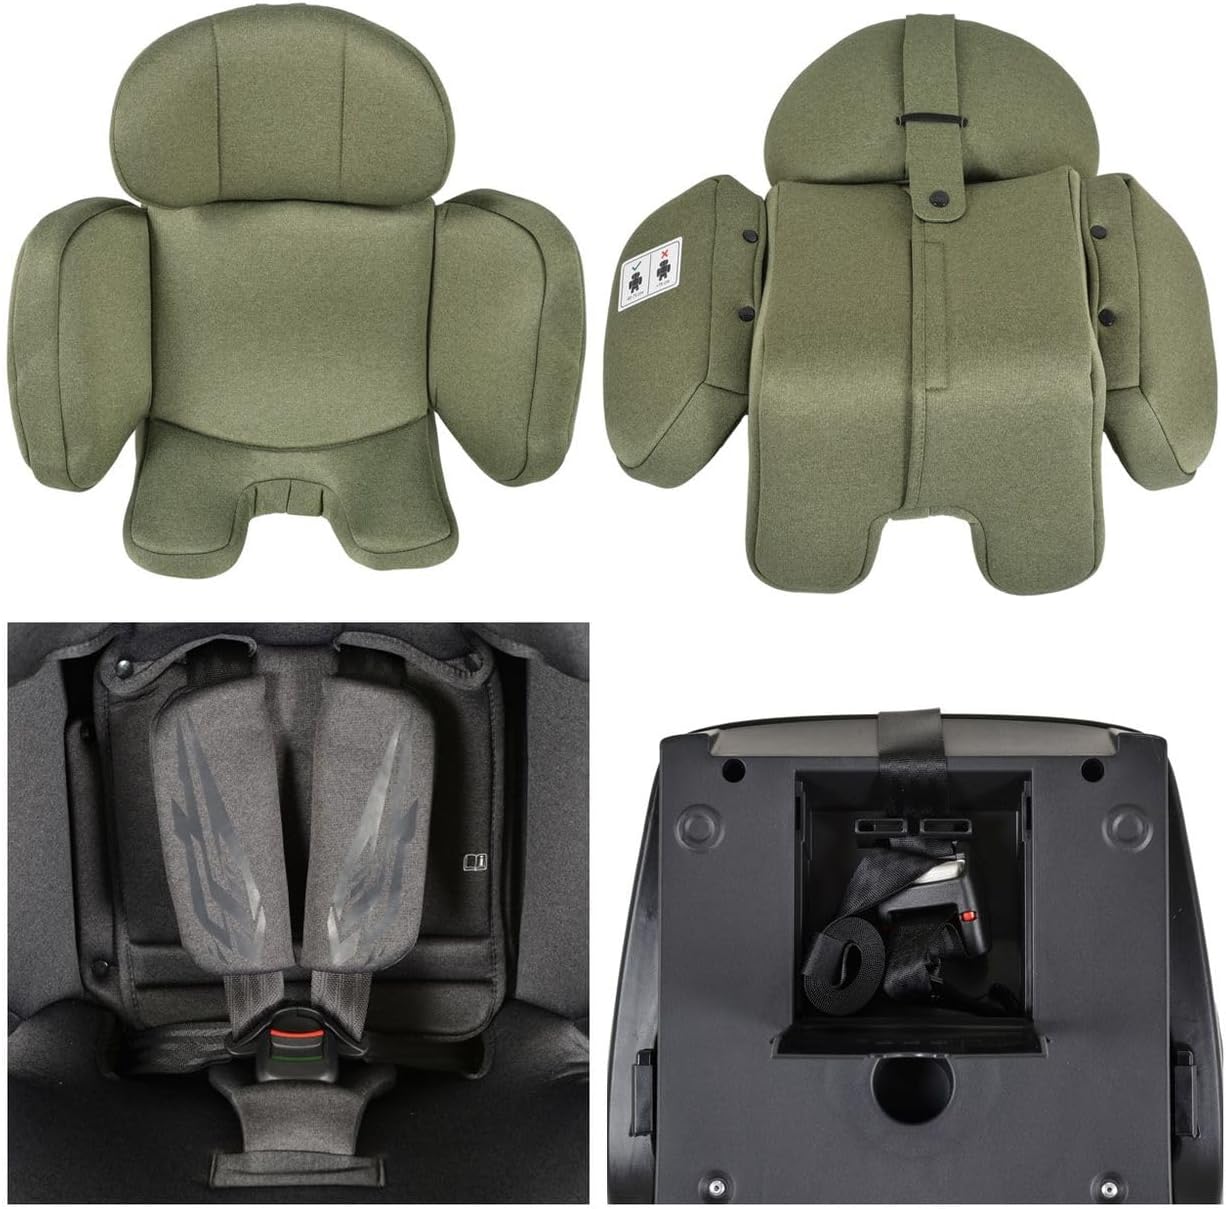
Figur 3.4: Top left shows the soft infant insert. Top right shows the reverse of the infant insert. Bottom left shows the 5-point harness with anti-slip pads. Bottom right shows the storage compartment for the Top Tether strap.
4. Opsætning og installation
The Cangaroo Draco i-Size car seat can be installed using the Isofix system and Top Tether. It supports both rear-facing and forward-facing orientations.
4.1. Rear-Facing Installation (40-105 cm)
- Position the car seat on the desired vehicle seat.
- Extend the Isofix connectors from the car seat base. You may use the yellow Isofix guides (Figure 3.3) to locate your vehicle's Isofix anchor points.
- Push the Isofix connectors firmly into the vehicle's Isofix anchor points until you hear a "click" and the indicators turn green.
- Tryk bilsædet godt mod bilsædets ryglæn for at sikre, at det sidder godt fast.
- Unroll the Top Tether strap from its storage compartment (Figure 3.4).
- Attach the Top Tether hook to the designated Top Tether anchor point in your vehicle (refer to your vehicle's manual for location).
- Tighten the Top Tether strap until the indicator on the strap turns green and there is no slack.
- Ensure the car seat is stable and does not move excessively.

Figur 4.1: Car seat showing the extended Isofix connectors and the Top Tether strap, ready for installation.
4.2. Forward-Facing Installation (76-150 cm)
For children 76-105 cm, use Isofix and Top Tether with the 5-point harness. For children 100-150 cm, use Isofix (optional) and the vehicle's 3-point seat belt, removing the 5-point harness.
- Follow steps 1-8 from the Rear-Facing Installation section to secure the car seat with Isofix and Top Tether.
- For children 100-150 cm: Store the 5-point harness components as instructed in the manual (refer to Figure 3.4 for Top Tether storage, harness storage will be similar). The child will then be secured using the vehicle's 3-point seat belt.
- Route the vehicle's 3-point seat belt through the designated guides on the car seat and buckle it. Ensure the lap belt is low across the child's hips and the shoulder belt rests across the center of the child's shoulder and chest.
4.3. 360° Rotation Feature
The car seat can rotate 360° on its base to facilitate placing and removing your child. Locate the rotation release lever (usually at the front or side of the base). Press the lever and rotate the seat to the desired position. Ensure the seat locks securely into place before driving.
5. Betjeningsvejledning
5.1. Sikring af dit barn
For 5-point harness (40-105 cm):
- Placer dit barn i sædet.
- Bring the shoulder straps over your child's shoulders and connect the buckle tongues into the central buckle until they click.
- Tighten the harness straps by pulling the adjustment strap at the front of the seat until the harness is snug against your child's body, with no slack. Ensure you can only fit one finger between the harness and your child's collarbone.
- Adjust the headrest so the shoulder straps are at or just below your child's shoulders for rear-facing, and at or just above for forward-facing.
For vehicle's 3-point seat belt (100-150 cm):
- Ensure the 5-point harness is removed and stored.
- Placer dit barn i sædet.
- Route the vehicle's 3-point seat belt through the red guides on the car seat. The lap belt should be low across the child's hips, and the shoulder belt should rest across the center of the child's shoulder and chest.
- Buckle the vehicle's seat belt and remove any slack.
5.2. Headrest and Recline Adjustment
The headrest and backrest can be adjusted to multiple positions to ensure optimal comfort and safety for your child.
- Nakkestøttejustering: Locate the headrest adjustment lever (usually at the top of the headrest). Squeeze the lever and slide the headrest up or down to the desired height. Release the lever to lock it in place.
- Justering af lænelæn: The seat offers 5 recline positions. Locate the recline adjustment handle (usually at the front or side of the base). Pull the handle and adjust the seat to one of the available recline positions. Ensure it locks securely.
Figur 5.1: Forskellige views illustrating the adjustable headrest and different recline positions of the car seat.
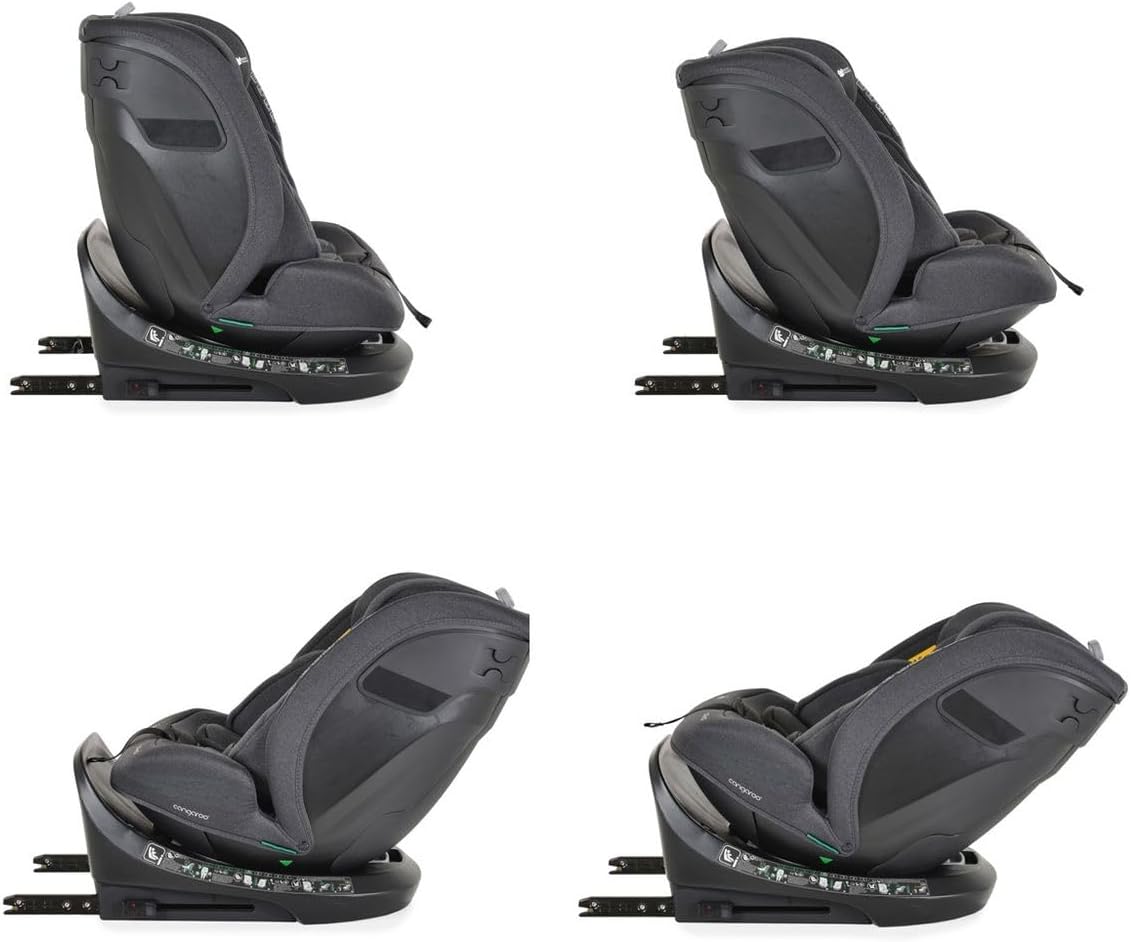
Figur 5.2: Side profile images demonstrating the range of recline positions available for the car seat.
6. Vedligeholdelse
Regelmæssig vedligeholdelse sikrer din autostols levetid og hygiejne.
- Rengøring af låget: The seat cover is removable and washable. Refer to the care label on the cover for specific washing instructions (typically machine wash cold on a gentle cycle). Do not bleach or tumble dry.
- Cleaning the Harness: Tør selestropperne af med enamp cloth and mild soap. Do not immerse the buckle or harness straps in water, as this may weaken them.
- Rengøring af plastikdele: Tør plastikdele af med adamp klud og mild sæbe.
- Opbevaring: When not in use, store the car seat in a clean, dry place away from direct sunlight.
7. Fejlfinding
Hvis du støder på problemer med din autostol, kan du bruge følgende almindelige løsninger:
- Autostolen føles løs efter montering: Ensure Isofix connectors are fully engaged (green indicators visible) and the Top Tether is tightly secured. Push the car seat firmly into the vehicle seat.
- Selen er svær at stramme/løsne: Check for twists in the harness straps. Ensure no fabric is obstructing the harness adjustment mechanism.
- Sæderotationen er stiv: Ensure the rotation release lever is fully engaged. Check for any obstructions around the base.
- Cannot adjust headrest/recline: Ensure the adjustment lever/handle is fully engaged and no fabric is caught in the mechanism.
If problems persist, contact Cangaroo customer support or your retailer for assistance.
8. Specifikationer
| Feature | Detalje |
|---|---|
| Modelnummer | 110929 |
| Mærke | Kænguru |
| Børns højdeinterval | 40 - 150 cm |
| Barnets vægtinterval | Op til 36 kg |
| Anbefalet alder | Fra fødsel til cirka 12 år |
| Installationsmetode | ISOFIX og Top Tether |
| Rotationsfunktion | 360° drejelig base |
| Selesystem | 5-point adjustable harness (with anti-slip pads) |
| Tilbagelænede positioner | 5 justerbare positioner |
| Nakkestøtte | Multi-position adjustable with soft memory foam cushion |
| Dækmateriale | 100% Polyester (removable and washable) |
| Produktmål (L x B x H) | 48 x 45 x 59 cm |
| Produktets vægt | 12.7 kg |
9. Garanti og support
For warranty information and customer support, please refer to the documentation provided with your purchase or contact Cangaroo directly through their official webwebstedet eller din forhandler. Gem din købsbevis til garantikrav.


