1. Introduktion
The Keychron M6 is a versatile wireless gaming optical mouse designed for optimal performance and comfort. It features tri-mode connectivity (2.4 GHz, Bluetooth 5.1, and USB wired), a high-precision PixArt 3395 sensor, and an ergonomic lightweight design. This manual provides detailed instructions for setting up, operating, maintaining, and troubleshooting your Keychron M6 mouse.

Image 1.1: Keychron M6 Wireless Gaming Optical Mouse with its included USB-C and USB-A receivers, showcasing dens kompakte og ergonomiske design.
2. Pakkens indhold
Bekræft at alle varer er til stede i din Keychron M6-pakke:
- 1x Keychron M6 Wireless Mouse
- 1x Type-C til Type-C kabel
- 1x Type-A til Type-C adapter
- 1x forlængeradapter til modtager
- 1x Type-C 2.4 GHz-modtager
- 1x Type-A 2.4 GHz modtager
- 1x brugermanual

Image 2.1: Visual representation of the Keychron M6 mouse and its complete set of accessories, including various cables and receivers.
3. Opsætning
3.1 Opladning af musen
The Keychron M6 mouse is equipped with a built-in Lithium Polymer battery. Connect the mouse to a USB power source using the provided Type-C cable to charge. A full charge provides up to 80 hours of continuous use.
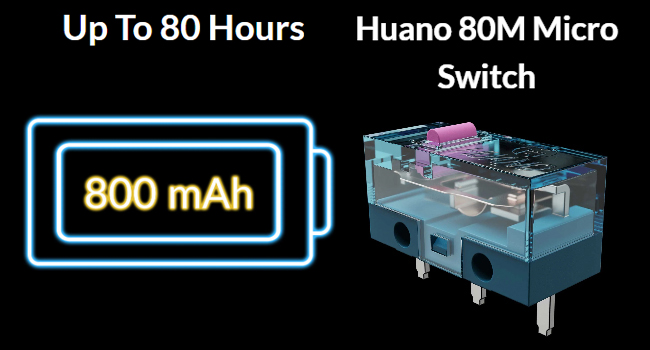
Image 3.1: Illustration highlighting the Keychron M6's battery life of up to 80 hours and its 800 mAh battery capacity.
3.2 Tilslutning af musen
Keychron M6 understøtter tre forbindelsestilstande: 2.4 GHz trådløs, Bluetooth 5.1 og USB-kablet.
2.4 GHz trådløs forbindelse
- Locate the 2.4 GHz receiver (either Type-C or Type-A) from the package.
- Sæt modtageren i en ledig USB-port på din computer.
- Switch the mode selector on the bottom of the mouse to 'G' (Gaming/2.4G mode).
- Musen vil automatisk oprette forbindelse til modtageren.
Bluetooth 5.1 forbindelse
- Switch the mode selector on the bottom of the mouse to 'B' (Bluetooth mode).
- Åbn Bluetooth-indstillingerne på din computer, og søg efter nye enheder.
- Vælg 'Keychron M6' fra listen over tilgængelige enheder, der skal parres.
USB kablet forbindelse
- Connect the Type-C end of the provided cable to the mouse and the other end to your computer's USB port.
- Musen fungerer i kablet tilstand og oplades samtidigt.

Image 3.2: The included 2.4 GHz receivers (Type-C and Type-A) and a table detailing report rate light indicators, polling rates, and available modes.
4. Betjeningsvejledning
4.1 DPI-justering
The Keychron M6 features a PixArt 3395 sensor with up to 26,000 DPI. You can adjust the DPI settings directly on the mouse using the dedicated DPI button located on the bottom. Press the DPI button to cycle through preset DPI levels.
4.2 Justering af afstemningsfrekvens
The polling rate can be adjusted to optimize responsiveness. Press the Report Rate button on the bottom of the mouse to switch between 125 Hz (White LED), 500 Hz (Blue LED), and 1000 Hz (Red LED) in 2.4 GHz / Wired mode.

Image 4.1: The underside of the Keychron M6 mouse, showing the DPI and Report Rate adjustment buttons, allowing for hardware-level configuration without software.
4.3 Scrolling Functions
The M6 mouse includes both a main scroll wheel and a thumb wheel, offering multiple ways to navigate.
- Hovedscrollhjul: Provides vertical scrolling and can also be tilted for horizontal scrolling.
- Tommelfingerhjul: Located on the side, this wheel offers additional scrolling functionality, typically for horizontal navigation or custom macros.
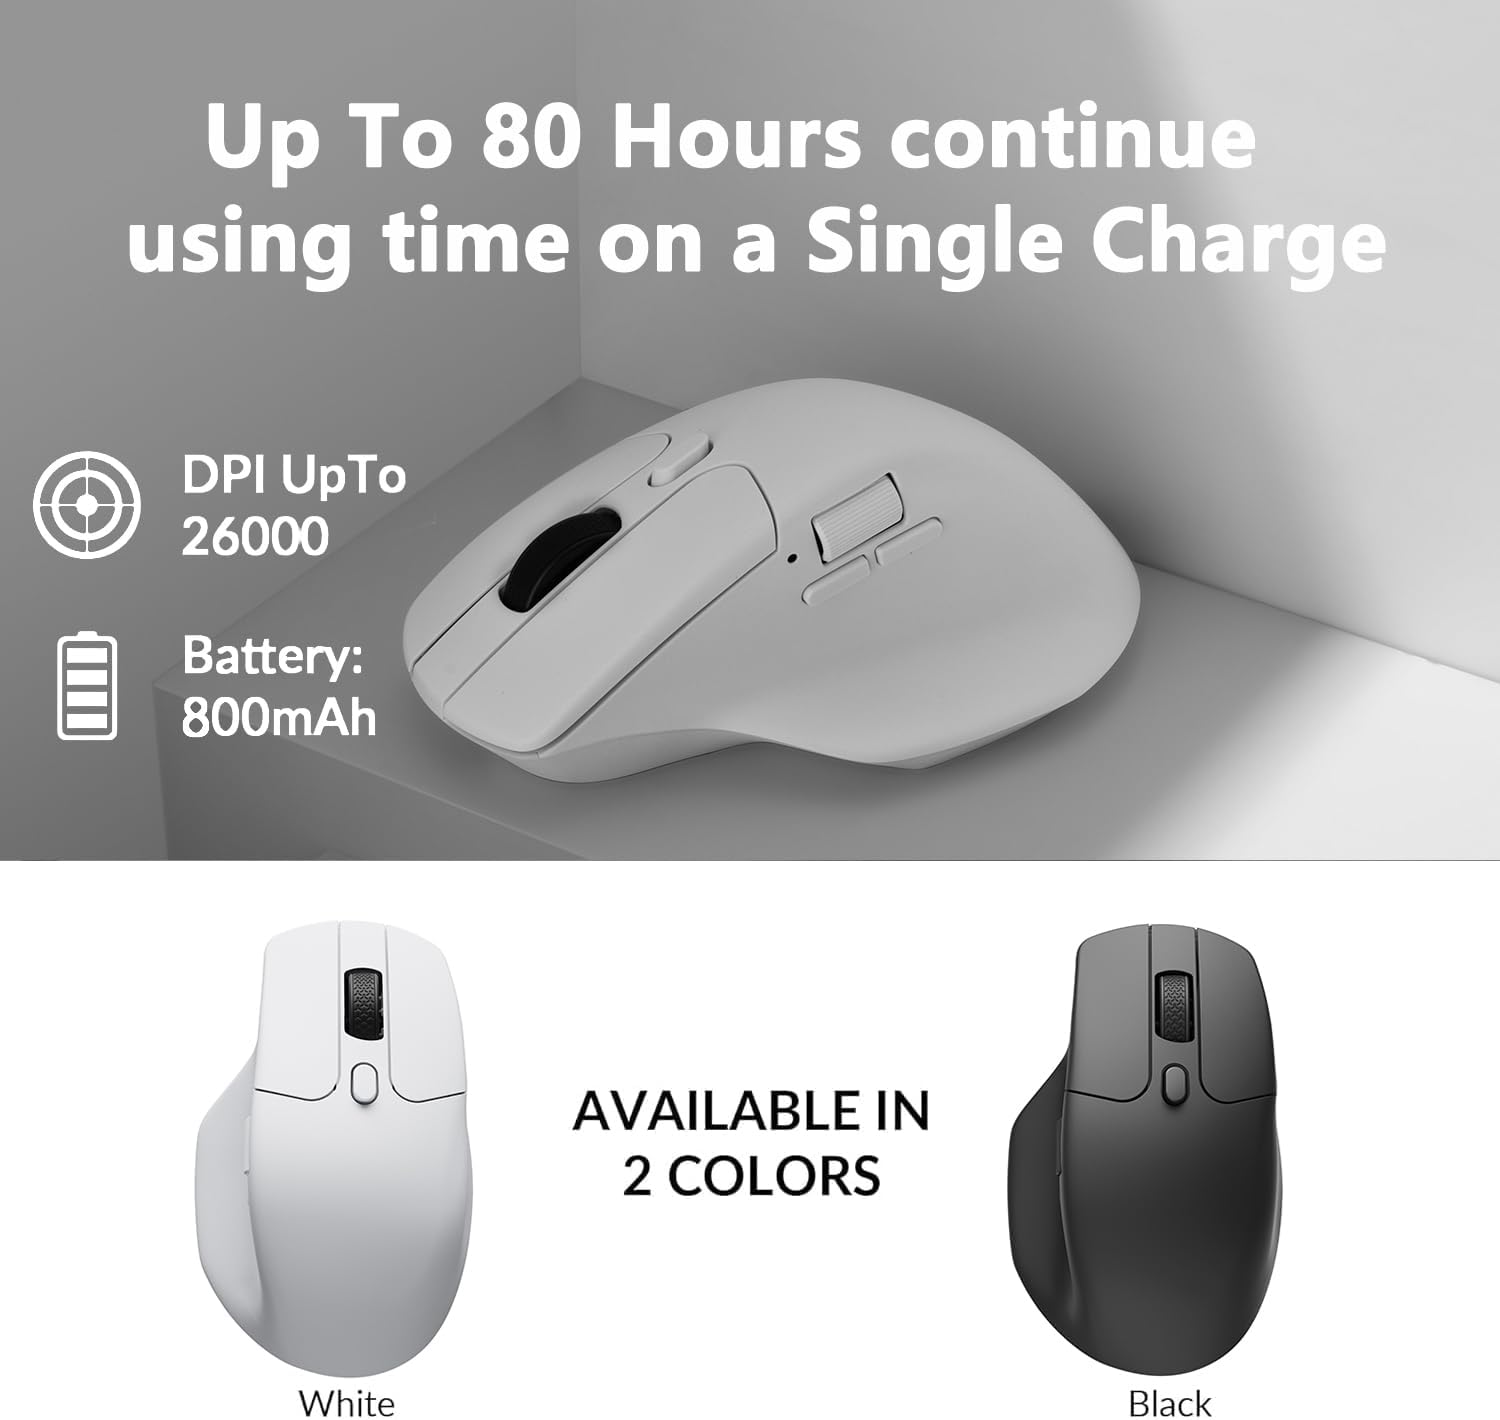
Image 4.2: The Keychron M6 mouse, illustrating the multi-directional functionality of the main scroll wheel for both vertical and horizontal scrolling.
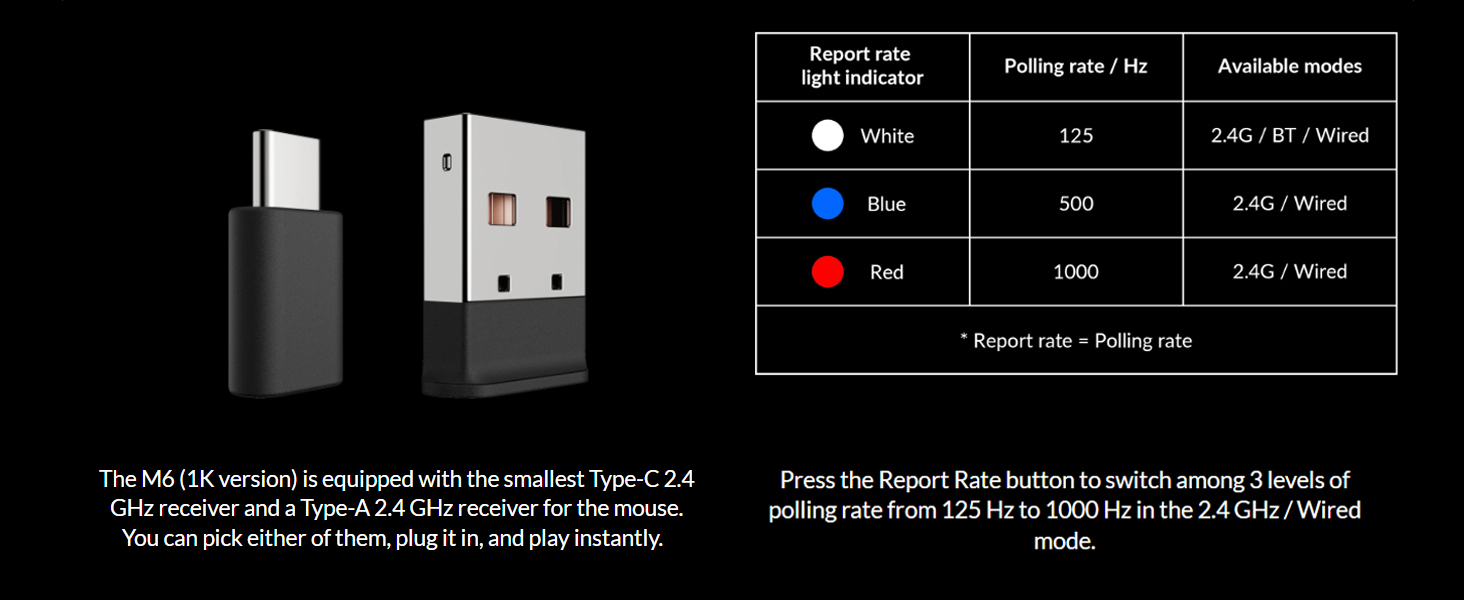
Image 4.3: A close-up of the Keychron M6 mouse, showing the thumb wheel and its directional movement for enhanced navigation.
5. Keychron Engine Software
The Keychron Engine software provides extensive customization options for your M6 mouse. This software allows you to:
- Rediger tastetildelinger og indstil genveje.
- Customize RGB lighting effects (if applicable).
- Opret og tildel dedikerede makroer.
- Adjust professional settings such as Lift-Off Distance (LOD), polling rate, and DPI.
Besøg den officielle Keychron website to download the latest version of the Keychron Engine software.

Image 5.1: The Keychron Engine software interface, demonstrating the various personalization options available for the M6 wireless mouse.
6. Vedligeholdelse
6.1 Rengøring
To maintain optimal performance and appearance, regularly clean your mouse. Use a soft, dry, lint-free cloth to wipe the surface. For stubborn dirt, slightly dampRengør kluden med vand. Undgå at bruge skrappe kemikalier eller slibende materialer.
6.2 Pleje af batterier
To prolong battery life, avoid fully discharging the mouse frequently. Charge the mouse when the battery indicator shows low power. Store the mouse in a cool, dry place when not in use for extended periods.
7. Fejlfinding
7.1 Forbindelsesproblemer
- 2.4 GHz: Ensure the USB receiver is securely plugged in and the mouse is in 'G' mode. Try a different USB port.
- Bluetooth: Ensure the mouse is in 'B' mode and discoverable. Remove previous pairings on your device and re-pair.
- wired: Check the USB-C cable connection to both the mouse and the computer.
7.2 Unresponsive Mouse
- Kontroller batteriniveauet og oplad om nødvendigt.
- Ensure the optical sensor on the bottom is clean and unobstructed.
- Prøv at genstarte din computer.
7.3 Software registrerer ikke mus
- Ensure the mouse is connected via USB wired mode when using the Keychron Engine software for initial setup or firmware updates.
- Verify that you have the latest version of the Keychron Engine software installed.
8. Specifikationer
| Feature | Specifikation |
|---|---|
| Modelnummer | M6-A3-Mus |
| Forbindelse | 2.4 GHz trådløs, Bluetooth 5.1, USB-kablet |
| Sensor | PixArt 3395 optisk sensor |
| DPI | Op til 26,000 DPI |
| IPS | Op til 650 IPS |
| Afstemningsfrekvens | 125 Hz, 500 Hz, 1000 Hz |
| Varens vægt | 78 g (2.75 ounce) |
| Batteri | 800 mAh Lithium Polymer (Up to 80 hours) |
| Produktdimensioner | 4.8 x 2.95 x 1.97 tommer (122.5 x 75.4 x 50.0 mm) |
| Micro Switch | Huano 80M Micro Switch |

Image 8.1: Technical drawing illustrating the precise dimensions of the Keychron M6 mouse.
9. Garanti og support
Keychron products are designed for durability and performance. For warranty information, please refer to the warranty card included in your product packaging or visit the official Keychron website. If you encounter any issues or require technical assistance, please contact Keychron customer support through their official webwebstedet eller kontaktoplysningerne i din produktdokumentation.


