1. Introduktion
This manual provides essential information for setting up, operating, maintaining, and troubleshooting your HP Pro Mini 400 G9 MFF Mini PC. Please read this manual thoroughly before using your device to ensure proper functionality and longevity.
2. Hvad er der i æsken
Kontroller, at alle varer er til stede i emballagen:
- HP Pro Mini 400 G9 MFF Mini PC
- Strømadapter (90W)
- HP Wired Desktop 320K tastatur
- HP 125 kablet mus
- Vertical Stand (optional, may vary by region)
- Dokumentation (hurtigstartguide, garantioplysninger)
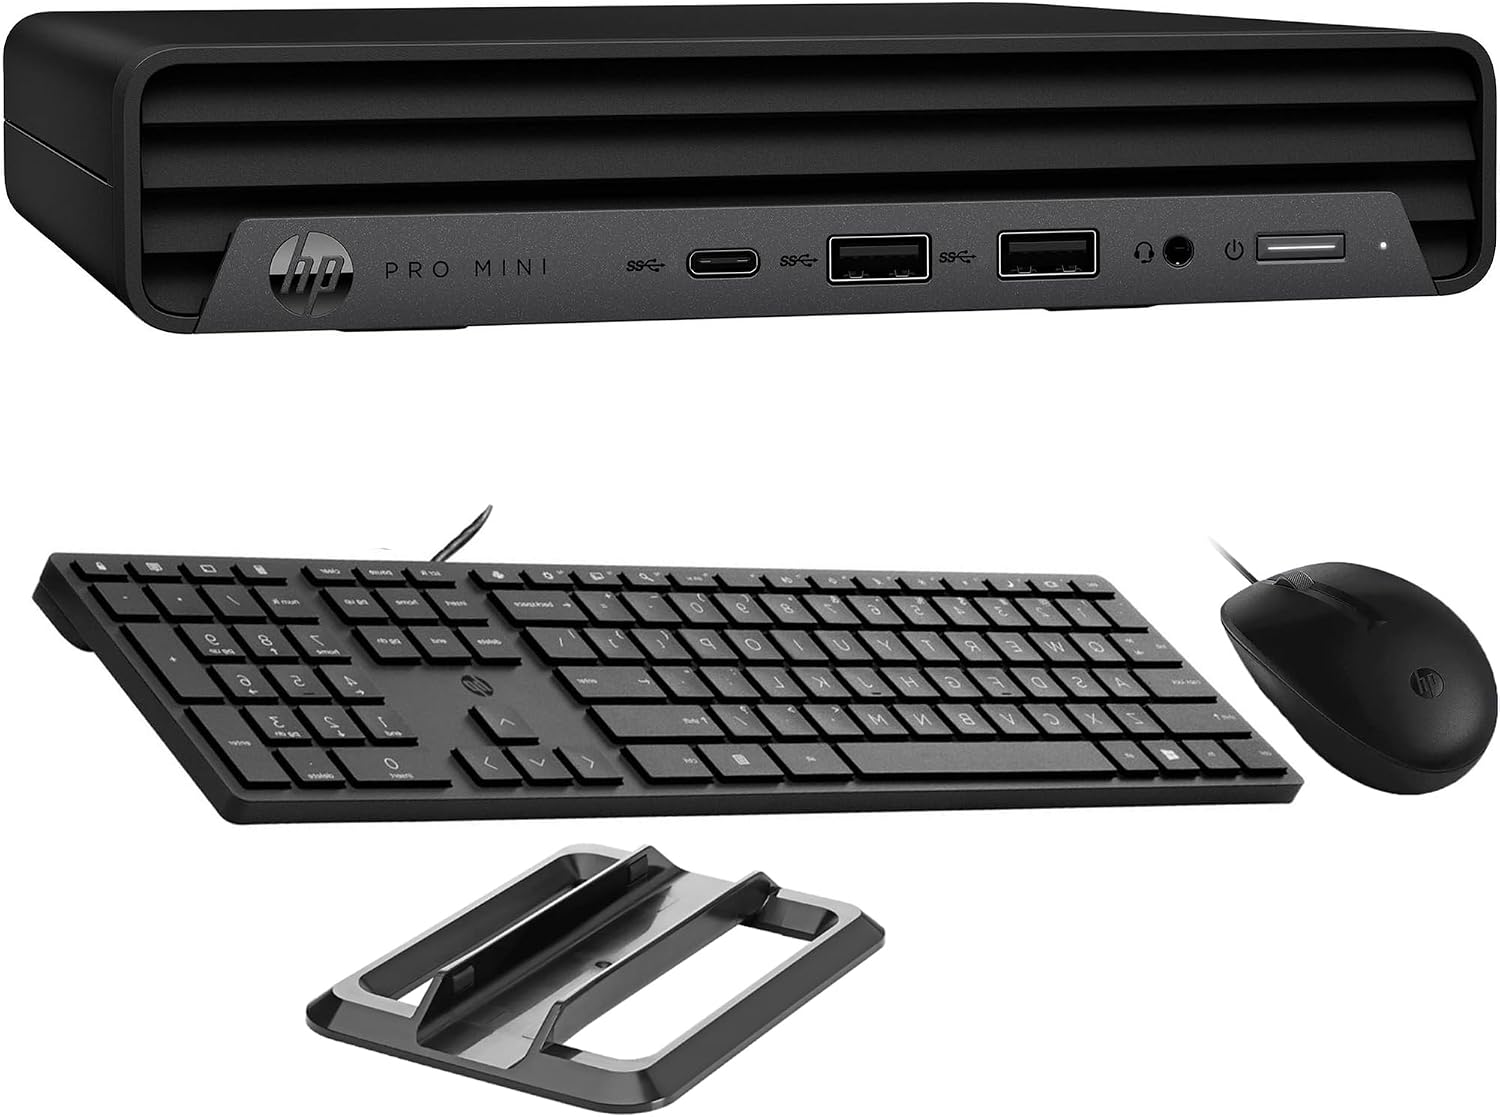
Image: HP Pro Mini 400 G9 Mini PC shown with its wired keyboard, wired mouse, and a vertical stand.
3. Fysisk overview
3.1 Frontpanel
The front panel provides easily accessible ports for common peripherals and power control.
- Power knap: For at tænde eller slukke pc'en.
- Kombinationsstik til hovedtelefoner/mikrofon: Til lydindgang og -udgang.
- SuperSpeed USB Type-A 10Gbps (Charging): For high-speed data transfer and charging devices.
- SuperSpeed USB Type-A 10Gbps: Til højhastigheds dataoverførsel.
- SuperSpeed USB Type-C 20Gbps: For ultra-high-speed data transfer and display output.

Billede: Forside view of the HP Pro Mini 400 G9, highlighting the power button, USB Type-A ports, USB Type-C port, and headphone/microphone combo jack.
3.2 Bagpanel
The rear panel contains ports for display, network, and additional USB devices.
- Strømforbindelse: Tilsluttes den eksterne strømadapter.
- RJ-45 (Ethernet) Port: Til kabelbaseret netværksforbindelse.
- SuperSpeed USB Type-A 10Gbps: Til højhastigheds dataoverførsel.
- SuperSpeed USB Type-A 5Gbps (x2): For standard data transfer.
- DisplayPort 1.4 (x2): Til tilslutning af eksterne skærme.
- HDMI 2.1: Til tilslutning af eksterne skærme.

Billede: Bagside view of the HP Pro Mini 400 G9, detailing the power connector, RJ-45 Ethernet port, various USB Type-A ports, two DisplayPort 1.4 ports, and one HDMI 2.1 port.
3.3 Portdiagram
A comprehensive diagram illustrating all available ports on the HP Pro Mini 400 G9.
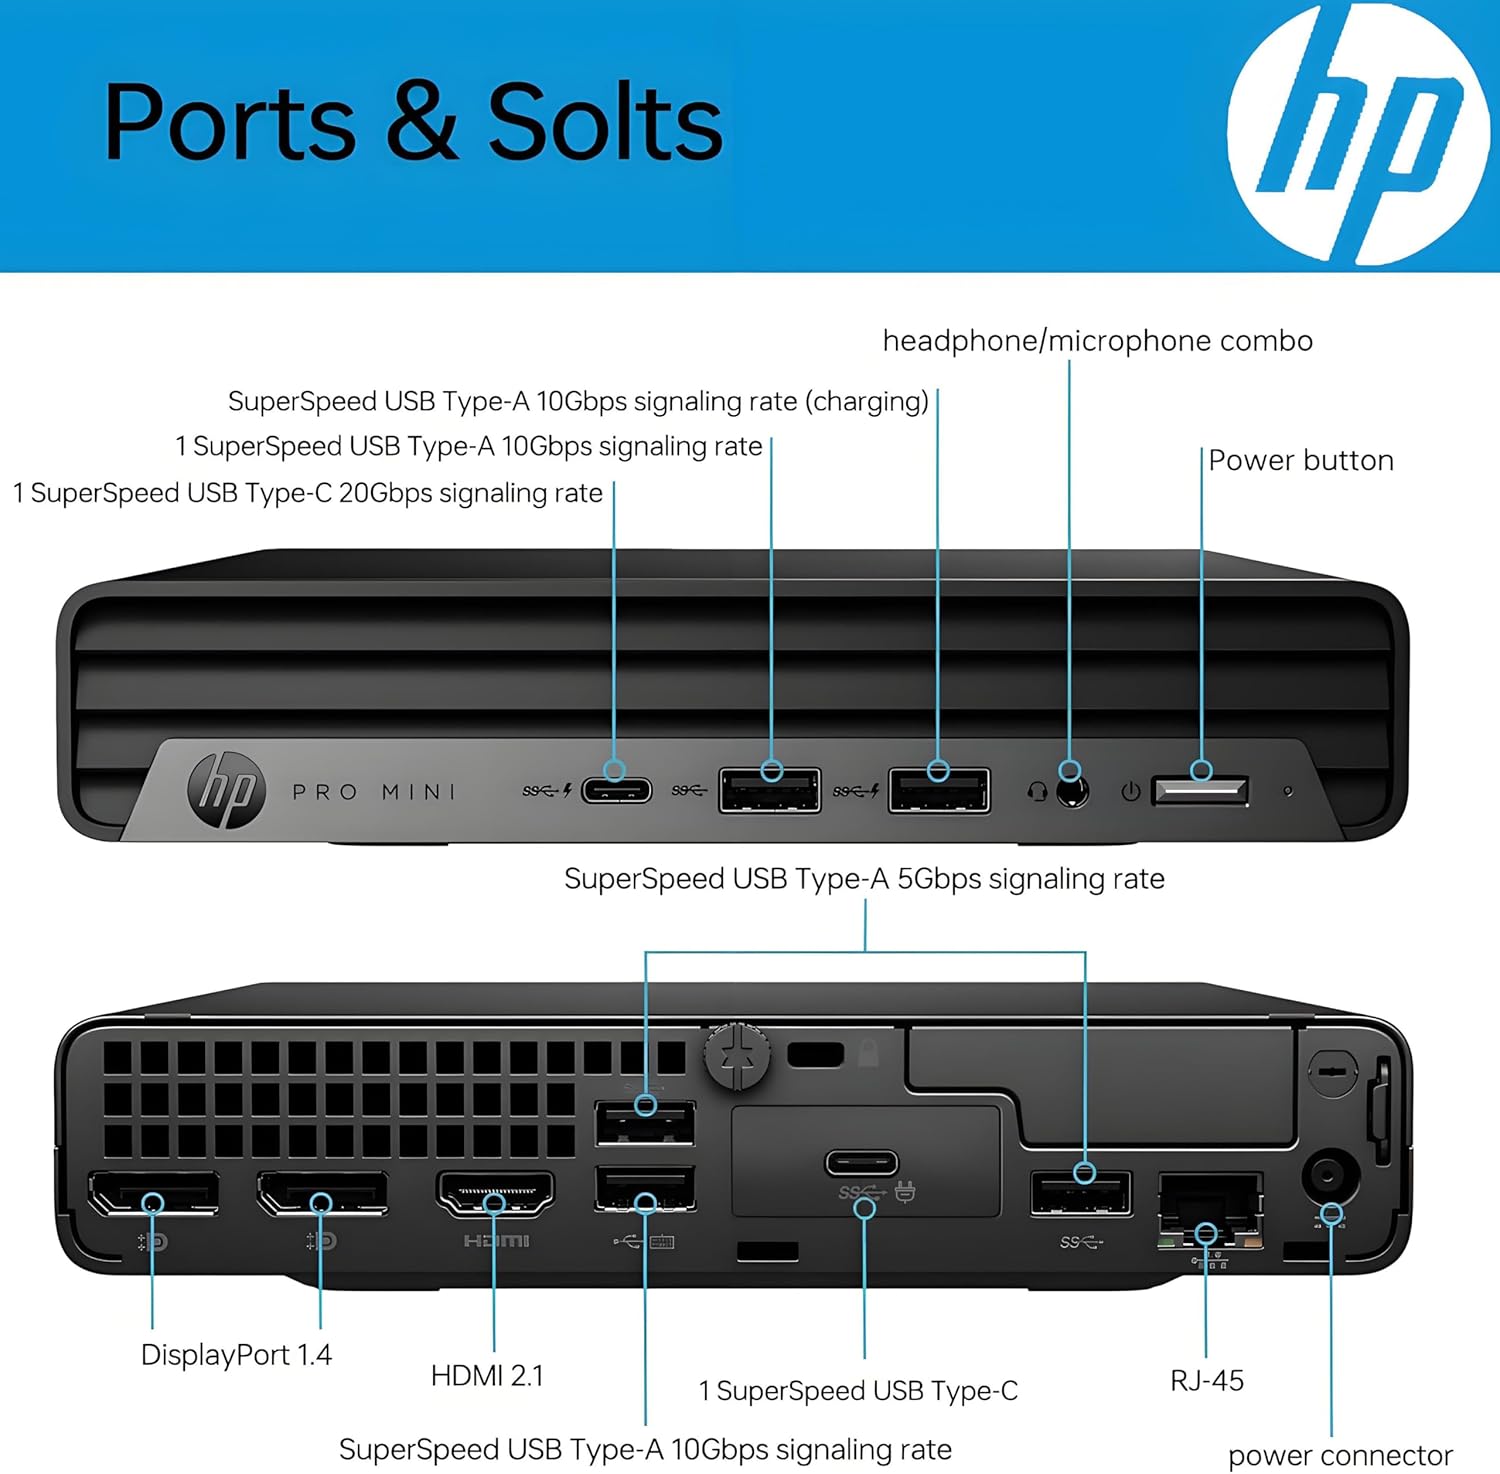
Image: Detailed diagram labeling each port on both the front and rear panels of the HP Pro Mini 400 G9 for easy identification.
3.4 Dimensioner og vægt
The HP Pro Mini 400 G9 is designed for a compact footprint.
- Dimensioner (B x D x H): 6.97 x 6.89 x 1.34 tommer (17.7 x 17.5 x 3.4 cm)
- Vægt: Cirka 3.13 lbs (1.42 kg)

Image: The HP Pro Mini 400 G9 with its physical dimensions (width, depth, height) and weight clearly indicated.
4. Indledende opsætning
Follow these steps to set up your HP Pro Mini 400 G9:
- Pak pc'en ud: Tag forsigtigt mini-pc'en og alt tilbehør ud af emballagen.
- Tilslut ydre enheder:
- Connect the wired keyboard and mouse to any available USB Type-A ports on the front or rear panel.
- Tilslut din(e) skærm(e) til DisplayPort- eller HDMI-portene på bagpanelet.
- Opret forbindelse til netværk (valgfrit):
- For a wired connection, connect an Ethernet cable from your router/modem to the RJ-45 port on the rear panel.
- For wireless (Wi-Fi), the PC will prompt you to connect during Windows setup.
- Tilslut strøm: Connect the power adapter cable to the power connector on the rear panel of the PC, then plug the power adapter into a wall outlet.
- Første boot: Press the power button on the front panel. The PC will start, and you will be guided through the Windows 11 Pro initial setup process.
5. Betjeningsvejledning
5.1 Tænd/sluk
- For at tænde: Tryk på tænd/sluk-knappen på frontpanelet.
- For at lukke ned: Klik på Start-knappen i Windows, og vælg derefter Strøm > Luk ned.
- For at genstarte: Klik på Start-knappen i Windows, og vælg derefter Tænd/sluk > Genstart.
- At sove: Klik på Start-knappen i Windows, og vælg derefter Strøm > Slumretilstand.
5.2 Forbindelse til et trådløst netværk (Wi-Fi)
- Klik på Wi-Fi-ikonet i proceslinjen (nederste højre hjørne af skærmen).
- Vælg dit ønskede Wi-Fi-netværk fra listen.
- Klik på 'Opret forbindelse', og indtast netværkssikkerhedsnøglen (adgangskoden), hvis du bliver bedt om det.
5.3 Using USB and Display Ports
- USB-porte: Connect USB devices such as external hard drives, flash drives, printers, or other peripherals. The USB Type-C port supports data transfer and can also be used for display output with an appropriate adapter (sold separately).
- Display Ports (HDMI, DisplayPort): Connect up to three external monitors simultaneously for extended desktop or mirrored display configurations.
6. Vedligeholdelse
Regular maintenance helps ensure optimal performance and extends the life of your Mini PC.
- Rensning: Use a soft, dry cloth to clean the exterior of the PC. For dust accumulation in vents, use compressed air. Ensure the PC is powered off and unplugged before cleaning.
- Softwareopdateringer: Regularly check for and install Windows updates and HP driver updates to maintain system security and performance.
- Data backup: Sikkerhedskopier regelmæssigt vigtige data til et eksternt drev eller cloud-lagring for at forhindre datatab.
- Ventilation: Ensure the PC's vents are not obstructed to allow for proper airflow and prevent overheating.
7. Fejlfinding
Dette afsnit omhandler almindelige problemer, du kan støde på.
| Problem | Mulig løsning |
|---|---|
| PC'en tænder ikke | Ensure the power adapter is securely connected to both the PC and a working power outlet. Test the outlet with another device. |
| Ingen visning på skærmen | Check that the monitor is powered on and the video cable (HDMI/DisplayPort) is securely connected to both the PC and the monitor. Try a different video port or cable if available. |
| Ingen internetforbindelse | For wired connection, check the Ethernet cable and router/modem status. For Wi-Fi, ensure Wi-Fi is enabled and you are connected to the correct network with the correct password. Restart your router/modem. |
| Tastatur eller mus reagerer ikke | Ensure the USB cables for the keyboard and mouse are securely plugged into the PC. Try different USB ports. |
| Systemet er langsomt eller reagerer ikke | Close unnecessary applications. Check Task Manager for high resource usage. Ensure Windows and drivers are up to date. Restart the PC. |
8. Tekniske specifikationer
Key technical specifications for the HP Pro Mini 400 G9 MFF Mini PC (configuration may vary).
| Feature | Specifikation |
|---|---|
| Operativsystem | Windows 11 Pro |
| Processor | Intel 6-Core i5-12500T (up to 4.20 GHz) |
| Grafik | Integreret Intel UHD Graphics 770 |
| VÆDDER | 8 GB DDR4 RAM (kan udvides) |
| Opbevaring | 256GB PCIe NVMe TLC SSD (M.2) |
| Trådløs forbindelse | Intel AX201 Wi-Fi 6 (2x2) and Bluetooth 5.2 combo |
| Forreste porte | 1x Headphone/Microphone combo, 1x SuperSpeed USB Type-A 10Gbps (charging), 1x SuperSpeed USB Type-A 10Gbps, 1x SuperSpeed USB Type-C 20Gbps |
| Bageste porte | 1x Power connector, 1x RJ-45, 1x SuperSpeed USB Type-A 10Gbps, 2x SuperSpeed USB Type-A 5Gbps, 2x DisplayPort 1.4, 1x HDMI 2.1 |
| Strømforsyning | 90 W external power adapter |
| Dimensioner (B x D x H) | 6.97 x 6.89 x 1.34 tommer (17.7 x 17.5 x 3.4 cm) |
| Vægt | Ca. 3.13 lbs (1.42 kg) |
9. Garanti og support
Your HP Pro Mini 400 G9 MFF Mini PC comes with a standard limited warranty. Please refer to the warranty documentation included in your product packaging for specific terms and conditions.
For teknisk support, download af drivere og yderligere produktoplysninger, besøg venligst den officielle HP-supportside. webwebsted:
You may also find helpful resources and community forums on the HP webwebsted.