1. Introduktion
This manual provides detailed instructions for the Transformers Legacy United Deluxe Class Star Raider Filch action figure. This figure features a dual conversion capability, transforming between a robot mode and a bird mode. Please read these instructions carefully to ensure proper assembly, transformation, and enjoyment of your figure.
2. Sikkerhedsoplysninger
WARNING: Small parts. Not suitable for children under 3 years due to choking hazard.
Always handle the figure with care. Avoid excessive force during transformation to prevent damage to joints or plastic components.
3. Pakkens indhold
- One (1) Transformers Legacy United Deluxe Class Star Raider Filch action figure
- Two (2) attachable wing accessories
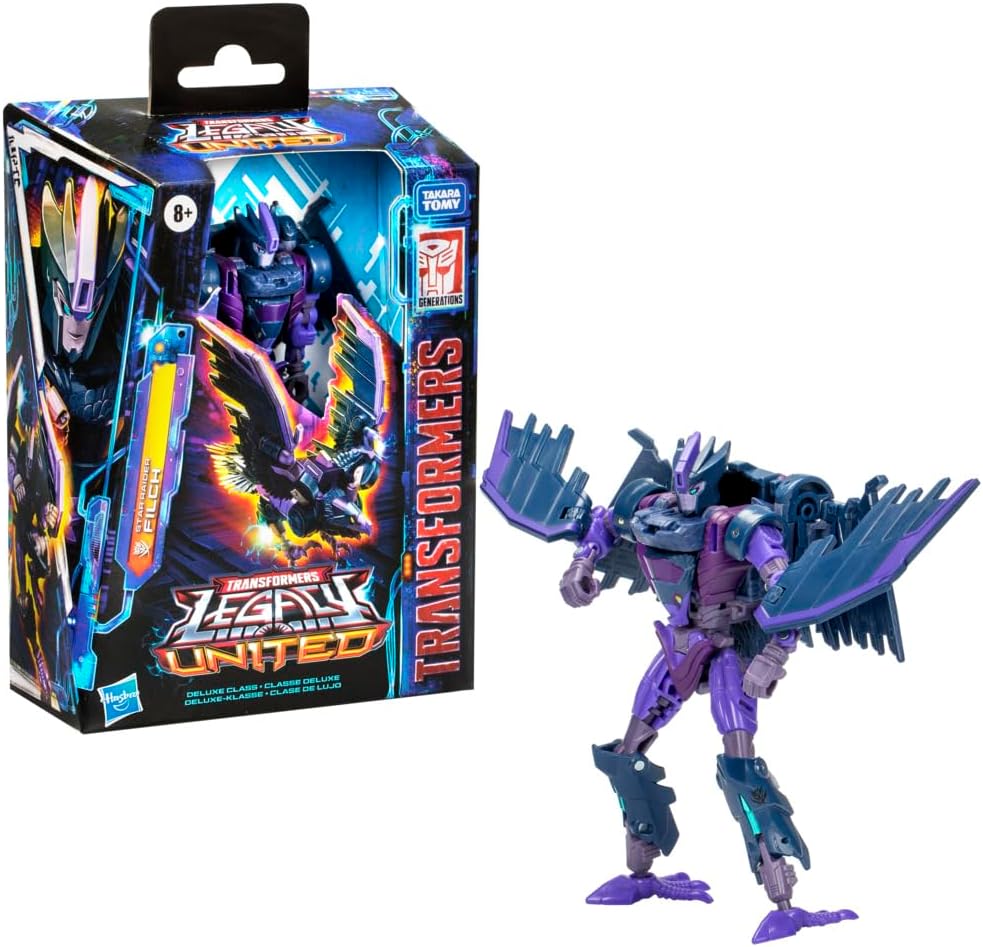
Image 3.1: Star Raider Filch figure and its packaging.
4. Opsætning
Upon unboxing, your Star Raider Filch figure will typically be in robot mode. The two wing accessories are separate and need to be attached.
- Tag forsigtigt figuren og tilbehøret ud af emballagen.
- Identify the attachment points on the figure's back or shoulders for the wing accessories.
- Gently push each wing accessory into its designated slot until it clicks securely into place. Ensure they are firmly attached but do not force them.
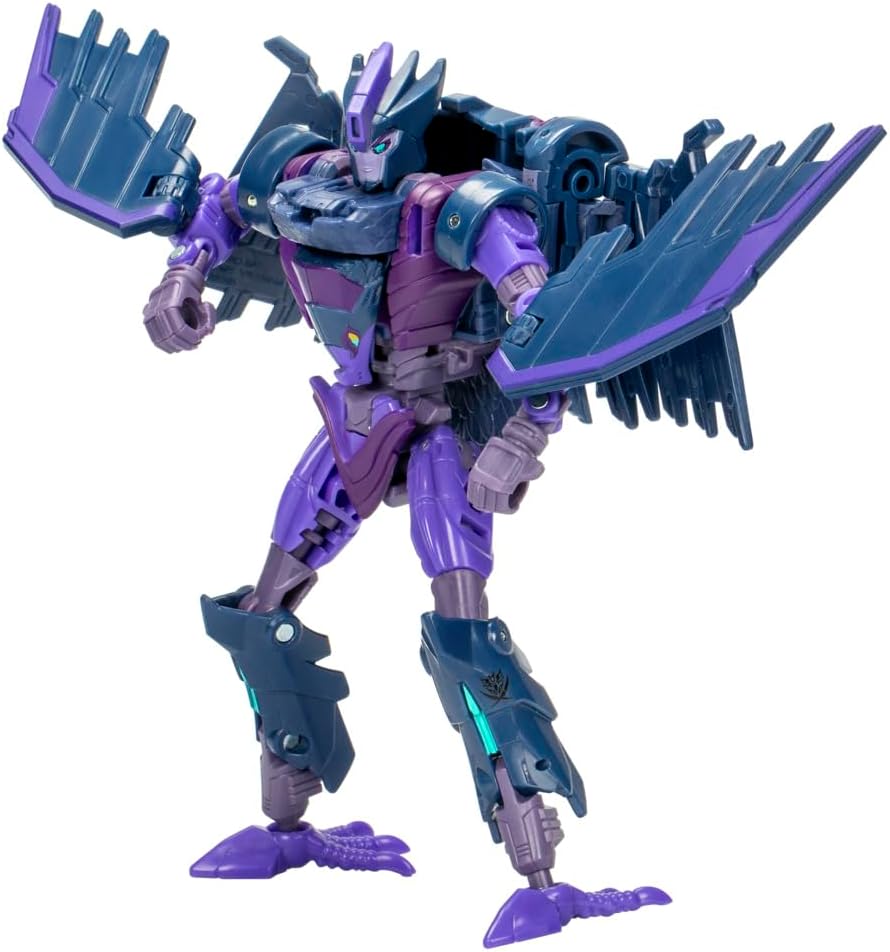
Billede 4.1: Forside view of Star Raider Filch in robot mode with wings attached.

Billede 4.2: Bagside view of Star Raider Filch in robot mode, showing wing attachment points.
5. Operating: Transformation Instructions
The Star Raider Filch figure converts between robot and bird modes in 21 steps. Follow these general guidelines for transformation. Specific steps may vary slightly, but the overall process involves folding, rotating, and repositioning parts.
5.1. Robot Mode to Bird Mode
- Forbered figuren: Ensure the figure is standing upright in robot mode.
- Fold arme: Carefully fold the robot's arms inward or backward, tucking them against the body.
- Reposition Head: Rotate or fold the robot head to conceal it, often into the chest or back cavity.
- Adjust Torso: Manipulate the torso sections to begin forming the bird's body. This may involve rotating the waist or folding panels.
- Transform Legs: Reconfigure the robot's legs to form the bird's talons or lower body. This typically involves bending at the knees and rotating the feet.
- Deploy Wings: Unfold or extend the wing components. If the wings were attached, ensure they are properly aligned and extended.
- Endelige justeringer: Secure all panels and ensure the bird mode is compact and stable.

Image 5.1: Star Raider Filch in robot mode, showing articulation and poseability.

Image 5.2: Star Raider Filch fully transformed into bird mode.
5.2. Bird Mode to Robot Mode
To convert from bird mode back to robot mode, reverse the steps outlined above. Carefully unfold and reposition each component until the robot form is achieved.
- Retract Wings: Fold or collapse the wing components back into their robot mode configuration.
- Transform Legs: Reconfigure the bird's talons/lower body back into the robot's legs.
- Adjust Torso: Manipulate the bird's body sections to form the robot's torso.
- Reveal Head: Rotate or unfold the robot head from its concealed position.
- Extend Arms: Unfold the robot's arms from their tucked position.
- Endelige justeringer: Ensure all panels are aligned and locked into place for a stable robot mode.
5.3. Posing and Play
The Star Raider Filch figure features highly articulated head, arms, and legs, allowing for dynamic action poses in robot mode. In bird mode, the wings and talons can also be adjusted for various display options.
6. Vedligeholdelse
6.1. Rensning
To clean your figure, gently wipe it with a soft, dry cloth. For stubborn dirt, a slightly damp cloth can be used, followed by immediate drying. Avoid using harsh chemicals, abrasive cleaners, or excessive water, as these can damage the paint or plastic.
6.2. Opbevaring
Store the figure in a cool, dry place away from direct sunlight and extreme temperatures. Prolonged exposure to sunlight can cause discoloration. Keep the figure away from dust and moisture to maintain its condition.
7. Fejlfinding
- Stive led: If a joint feels stiff, gently move it back and forth a few times. Do not force it. Applying a very small amount of silicone-based lubricant (not petroleum-based) can sometimes help, but use with extreme caution and test on an inconspicuous area first.
- Vanskeligheder ved at transformere: Review the transformation steps carefully. Ensure all previous steps are completed correctly before proceeding. Sometimes, a specific panel or joint needs to be aligned precisely for the next step to work.
- Løse dele: If a part becomes loose, check if it is designed to be detachable or if it can be re-secured. Avoid using adhesives unless specifically instructed, as this can hinder future transformations or damage the plastic.
8. Specifikationer
- Produktdimensioner: 3.94 x 1.97 x 0.5 tommer
- Varens vægt: 5 ounce
- Varemodelnummer: G0234
- Producentens anbefalede alder: 8 år og opefter
- Mærke: Transformers (Hasbro)
- Konverteringstrin: 21 steps (Robot to Bird)
9. Garanti og support
Specific warranty information for this product is not provided in this manual. For details regarding warranty, returns, or further product support, please refer to the manufacturer's official webwebstedet eller kontakt deres kundeservice direkte. Gem din købsbevis til eventuelle garantikrav.


