1. Introduktion
Thank you for choosing the Dripex Foldable Playpen. This manual provides essential information for the safe assembly, operation, and maintenance of your playpen. Designed to offer a secure and spacious environment for your child, this playpen allows parents to manage household tasks while keeping their child within a safe, visible area. Please read all instructions carefully before assembly and use.
2. Sikkerhedsoplysninger
- Always ensure all panels are securely locked before placing a child inside the playpen.
- Do not leave children unattended in the playpen. Constant supervision is required.
- The zipper doors are designed to open only from the outside to prevent children from exiting unsupervised.
- Ensure the playpen is placed on a flat, stable surface. Non-slip suction cups are provided for stability.
- Hold kravlegården væk fra åben ild, varmeapparater og andre varmekilder.
- Regularly inspect the playpen for any signs of wear, damage, or loose parts. Discontinue use if any damage is found.
- The material used in this playpen has been certified by CPSC and SGS for safety.
- This playpen is designed for children who cannot climb out or reach a height of 27 inches.
3. Produktkomponenter
Før montering skal du kontrollere, at alle følgende komponenter er til stede:
- Vertical Tubes: 16 pieces
- Cloth Cover with Upper Rod and Door: 2 pieces
- Cloth Cover with Upper Rod: 6 pieces
- Lower Rod: 8 pieces
- Handle Rings: 5 pieces (for child to pull up)

4. Monteringsvejledning
Follow these steps to assemble your Dripex Foldable Playpen:
- Forbered komponenter: Unpack all components and lay them out. Identify the vertical tubes, cloth covers (with and without doors), and lower rods.
- Connect Rods to Panels: Insert the vertical tubes into the designated sleeves of the cloth covers. Ensure the ends of the upper and lower rods are strictly aligned as shown in the diagram below.

- Connect Panels and Lock: Join the assembled panels together. For each connection point, ensure the panel is in the 'lock' state before connecting. To lock, slide the mechanism until it clicks into place. To unlock, press the button and slide.


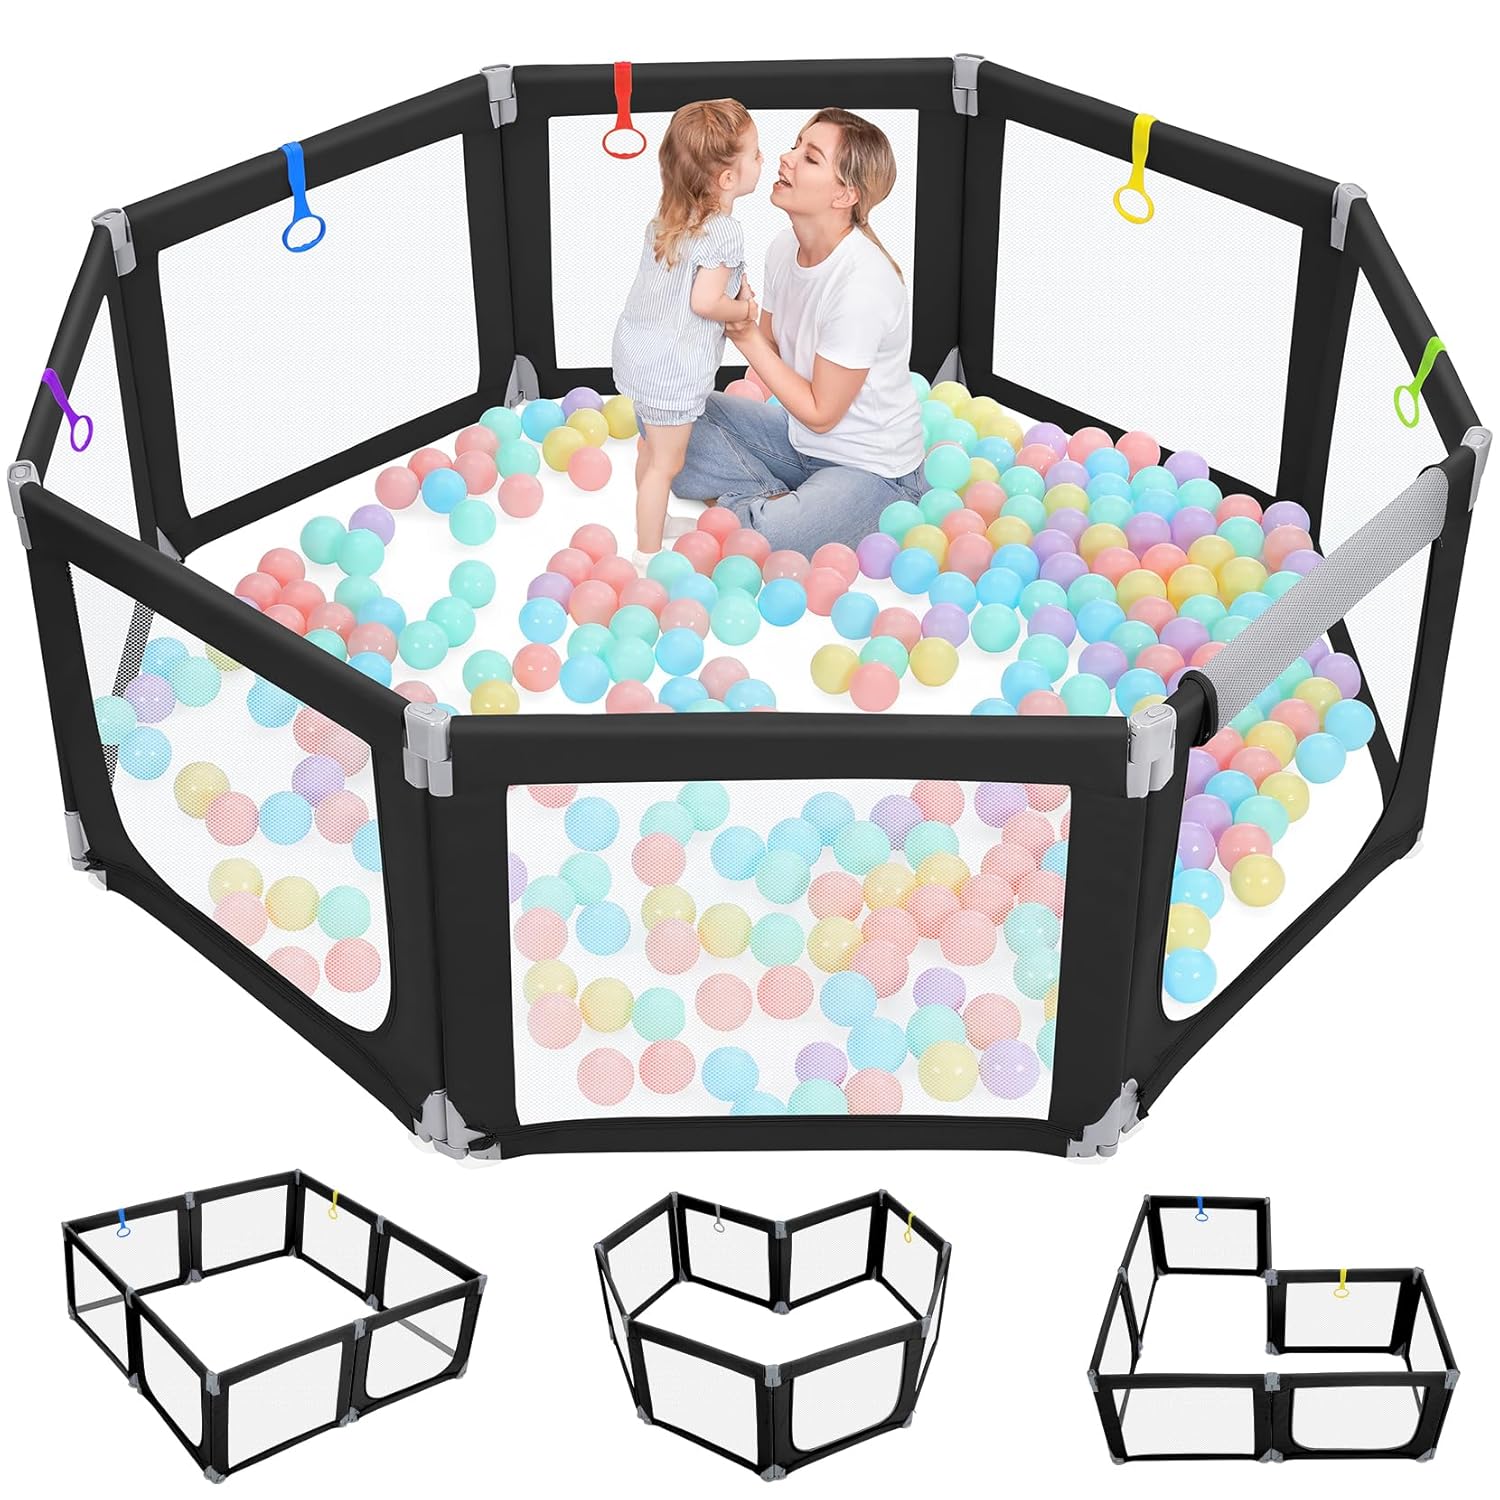
- Ønsket form: Arrange the connected panels into your desired configuration (e.g., square, octagon, rectangle, L-shape). Ensure all connections are secure.
5. Betjeningsvejledning
5.1 Adjusting Shape
The playpen's modular design allows for flexible configuration to suit your space. You can arrange the 8 panels into various shapes such as a square, L-shape, octagon, or rectangle. Simply unlock the necessary panels, reposition them, and then relock to secure the new shape.

5.2 Using the Zipper Gate
The playpen features an innovative hangable zipper door. This design allows the mesh to be folded out of the way, preventing tripping hazards and protecting the zipper from damage. The zipper can only be opened from the outside, ensuring your child remains safely inside.

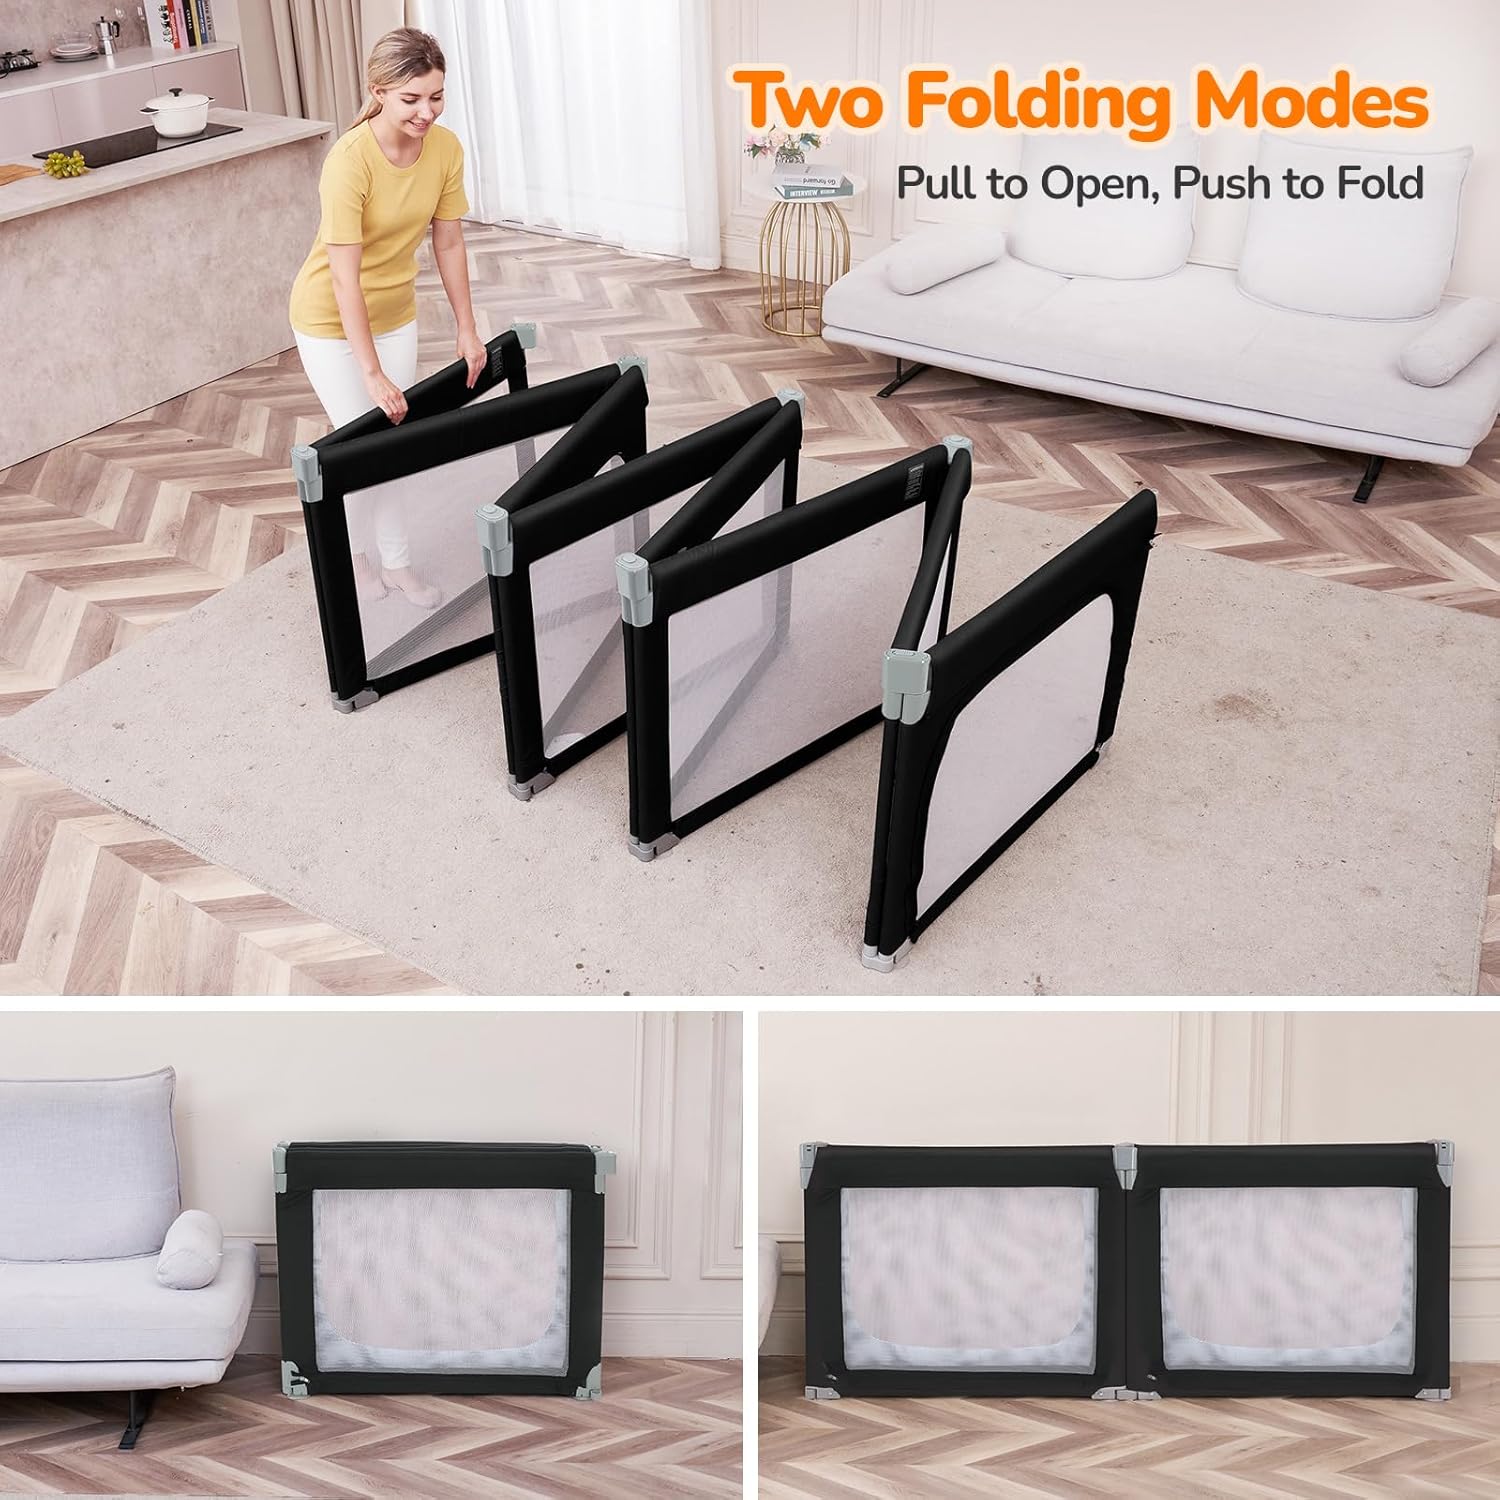
5.3 Foldning og opbevaring
The playpen is designed for easy folding and compact storage. To fold, unlock the panels as needed and collapse them. The playpen can be folded against a wall or stored in a car without removing all accessories.

5.4 Demontering
To fully disassemble the playpen, follow these steps:
- Push the stretchable circle at the bottom of each connection point.
- Disconnect the bottom tube combination.
- Ensure the panel is in the 'unlock' state before attempting to separate the rods.

6. Vedligeholdelse
- Rensning: The 300D Oxford fabric and mesh can be cleaned with a damp cloth and mild soap. Allow to air dry completely before folding or storing. Do not use harsh chemicals or abrasive cleaners.
- Opbevaring: When not in use, fold the playpen compactly and store it in a dry, cool place away from direct sunlight.
- Inspektion: Periodically check all connections, fabric, and mesh for tears, loose stitching, or damage. Ensure the non-slip suction cups are intact and functioning correctly.
7. Fejlfinding
- Playpen is unstable: Ensure all panel connections are securely locked. Verify that the non-slip suction cups are firmly pressed against a clean, flat surface.
- Difficulty assembling panels: Double-check that the ends of the upper and lower rods are correctly aligned as per the assembly instructions. Ensure the locking mechanism is in the 'unlock' position when connecting, then slide to 'lock'.
- Zipper not functioning smoothly: Ensure the fabric around the zipper is not caught. Avoid forcing the zipper; gently guide it.
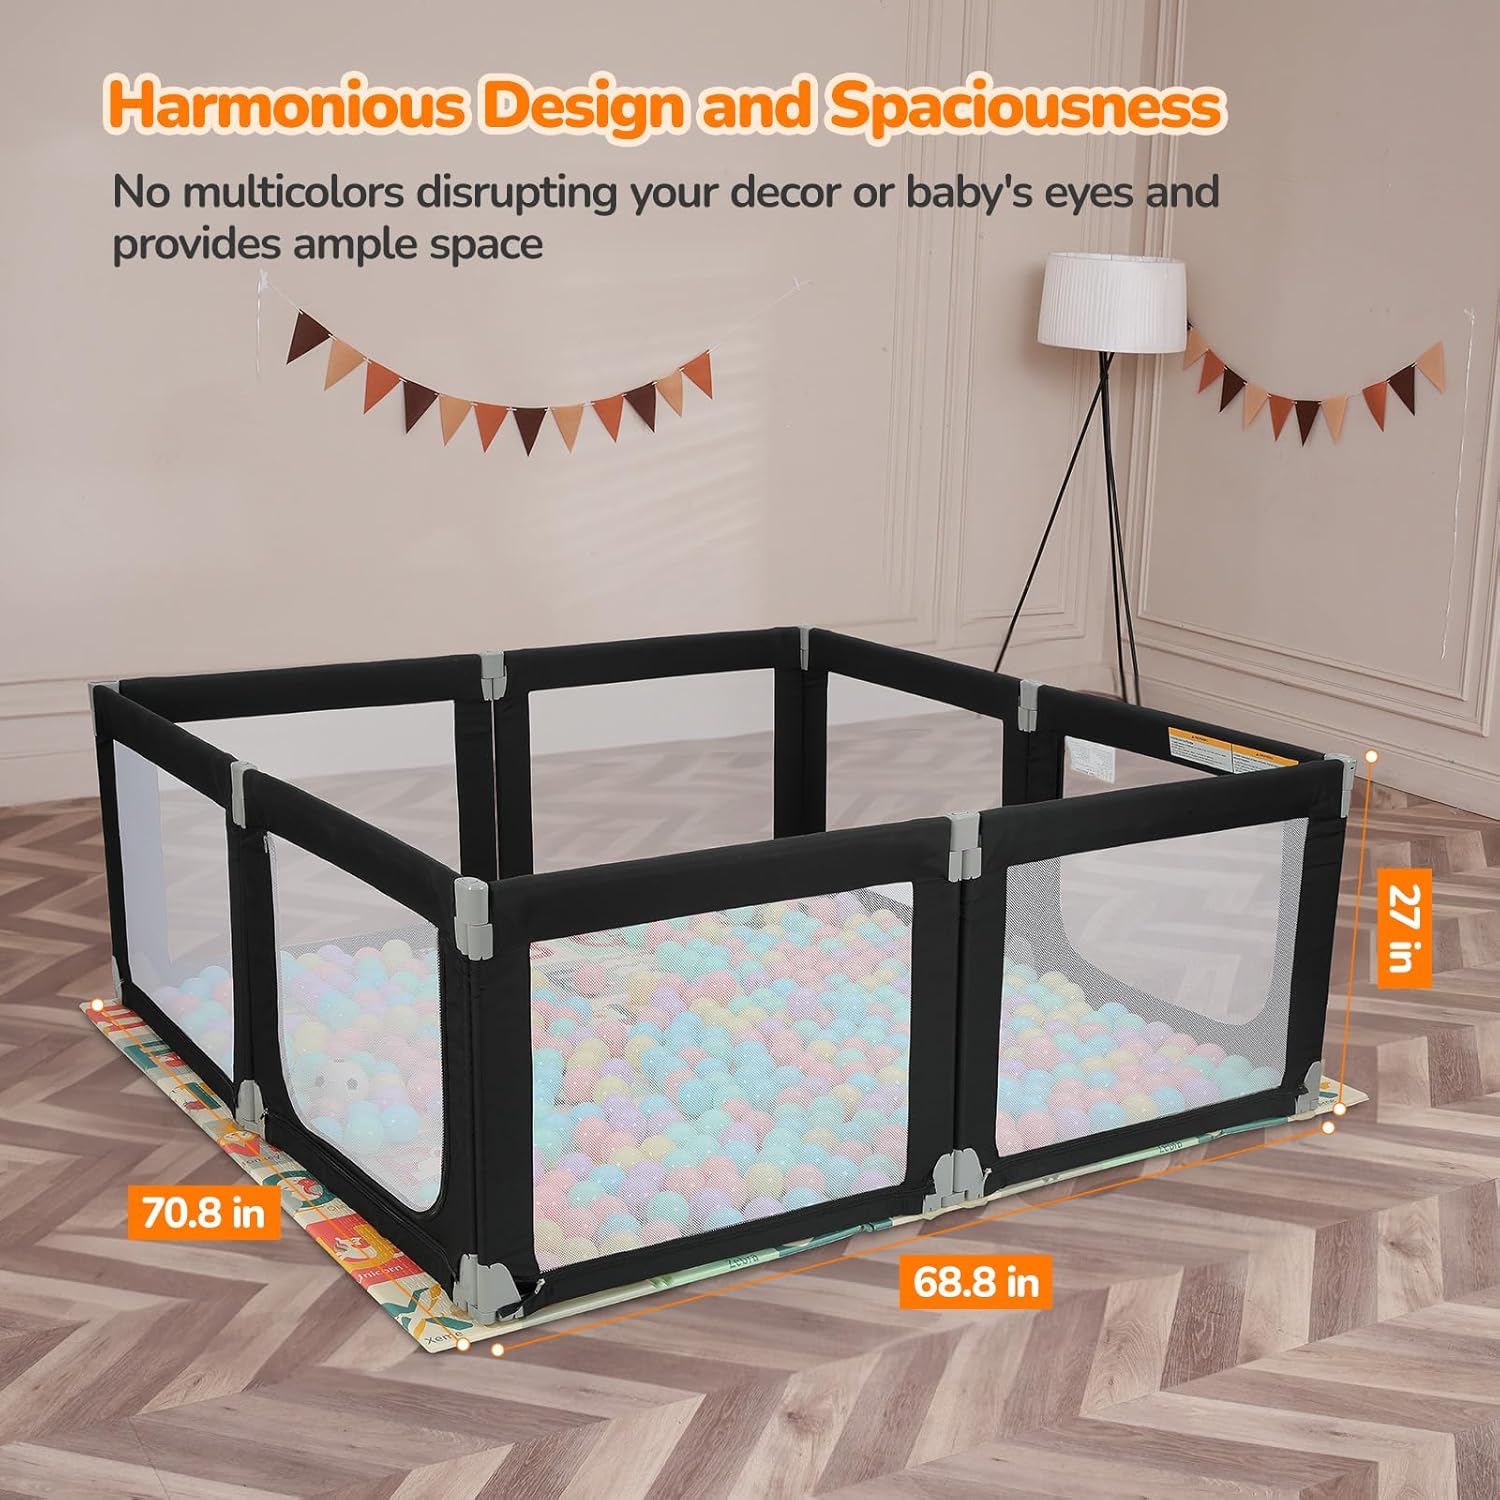
8. Specifikationer
| Feature | Detalje |
|---|---|
| Modelnummer | BP180 |
| Produktmål (L x B x H) | 71 x 69 x 27 tommer |
| Etageareal | Approximately 34-35 Square Feet |
| Varens vægt | 25 pund |
| Maksimal vægtanbefaling | 44 pund |
| Materiale Type | Legeret stål (ramme) |
| Materiale sammensætning | 300D Oxford Cloth (Fabric) |
| Farve | Sort |


9. Kontakt support
For further assistance, questions, or concerns, please contact Dripex customer support through the retailer's platform or visit the official Dripex webwebsted.


