1. Introduktion
This manual provides comprehensive instructions for the Stemedu ESP32-2432S028R 2.8-inch TFT LCD Display module. This development board integrates a low-power dual-core 32-bit CPU with Bluetooth and WiFi capabilities, making it suitable for a wide range of embedded applications, including IoT projects, sensor experiments, and mobile control systems.
1.1. Hvad er der i æsken
- 1 x ESP32-2432S028R 2.8-inch TFT LCD Display Module
- 1 x Touch Pen (color may vary)
- 1 x Micro USB-kabel
- 1 x Jumper Wire Set

Image 1.1: The package contents include the ESP32-2432S028R module, a touch pen, a Micro USB cable, and jumper wires.
2. Nøglefunktioner
- Low-power dual-core 32-bit CPU, with integrated Bluetooth and WIFI dual-core processor.
- Equipped with 520 KB SRAM and 32Mbit SPI Flash.
- Features an ILI9341 drive chip for the TFT LCD display.
- Supports various interfaces including UART, SPI, I2C, and PWM (up to 2Mbps).
- Includes a TF card slot, supporting up to 4GB storage.
- Compatible with popular development environments such as Arduino IDE, Micropython, Mixly, and ESP IDE.
3. Tekniske specifikationer
| Specifikation | Værdi |
|---|---|
| Processor | Dual-core 32-bit CPU (240 MHz) |
| VÆDDER | 520 KB SRAM |
| Flash-hukommelse | 32Mbit SPI Flash |
| Trådløs forbindelse | Bluetooth, WiFi |
| Skærmstørrelse | 2.8 tommer |
| Skærmopløsning | 240 x 320 pixels |
| Skærm driver | ILI9341 |
| Tryk på Type | Resistiv berøring |
| Understøttede grænseflader | UART, SPI, I2C, PWM (2Mbps) |
| Ekstern opbevaring | TF card slot (max 4GB) |
| Operativsystem | FreeRTOS with LwIP |
| Strømindgang | Micro USB |
| Dimensioner | Cirka 4.76 x 3.15 x 1.18 tommer |
| Vægt | Cirka 3.52 ounce |

Billede 3.1: Top-down view of the ESP32-2432S028R board, highlighting key components and interfaces like the ESP-WROOM-32 module, TF card slot, and USB ports.
4. Setup and Initial Power-On
To begin using your ESP32-2432S028R module, connect it to a power source using the provided Micro USB cable. The module can be powered directly from a computer's USB port or a compatible USB power adapter.
Video 4.1: Demonstration of powering on the ESP32-2432S028R module via Micro USB and initial display functionality, including touch interaction with various UI elements like buttons, charts, and selectors.
Upon successful power-on, the display will illuminate, and a default interface or boot screen will appear. The resistive touchscreen allows for interaction using the included touch pen or a suitable stylus.
5. Basic Operation and Touch Interface
The 2.8-inch TFT LCD features a resistive touch screen, enabling user interaction with on-screen elements. Use the provided touch pen for precise input. The display supports various graphical user interface (GUI) elements, which can be programmed and customized.

Image 5.1: The touchscreen interface showing examples of interactive elements such as buttons, keyboards, sliders, and dialog boxes.
The video in Section 4.1 also demonstrates the responsiveness of the touch interface, showcasing navigation through different control types, visual displays, and selectors like calendars and dropdown menus.
6. Programmering og udvikling
The ESP32-2432S028R is designed for flexible development and supports multiple programming environments. This allows users to develop custom applications and interfaces for the module.
6.1. Supported Development Environments
- Arduino IDE: A popular open-source electronics platform for writing code and uploading it to the board.
- Mikropyton: A lean and efficient implementation of the Python 3 programming language optimized to run on microcontrollers.
- Blandet: A graphical programming environment based on Blockly, suitable for beginners.
- ESP IDE: Espressif's official Integrated Development Environment for ESP32 series chips.
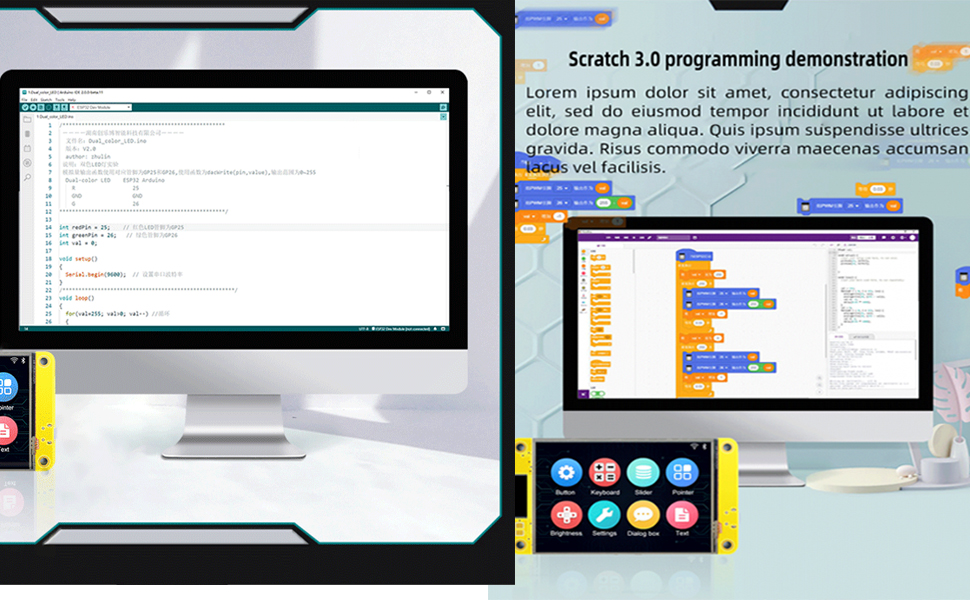
Billede 6.1: Eks.ample of a graphical programming interface, such as Scratch 3.0, being used to program the ESP32 module.
6.2. Uploading Code to the Board
Code can be uploaded to the ESP32-2432S028R board using either the Arduino IDE or the Espressif Download Tool. Ensure the correct drivers are installed for your operating system to recognize the board's serial port.

Image 6.2: Visual guide demonstrating the two primary methods for uploading firmware: via Arduino IDE and using the Espressif Download Tool, including driver installation notes.
For detailed programming guides and sample code, refer to the official documentation provided by Stemedu or the respective development environment communities.
7. Fejlfinding
- Skærmen tænder ikke: Ensure the Micro USB cable is securely connected to both the module and a working power source. Try a different USB cable or power adapter.
- Ingen berøringsrespons: Verify that the display is properly initialized in your code. For resistive touchscreens, ensure the touch pen is making firm contact.
- Uploadfejl: Check that the correct COM port is selected in your IDE/tool and that the necessary drivers (e.g., CH340 driver) are installed. Ensure the board is in bootloader mode if required by your upload method.
- Problemer med WiFi/Bluetooth-forbindelse: Confirm that your code correctly initializes and configures the WiFi or Bluetooth module. Check for proper antenna connection if applicable.
8. Pleje og vedligeholdelse
- Håndtering: Hold modulet i kanterne for at undgå at berøre følsomme elektroniske komponenter.
- Rensning: Use a soft, dry, lint-free cloth to clean the display surface. Avoid abrasive cleaners or solvents.
- Opbevaring: Opbevar modulet et køligt, tørt sted, væk fra direkte sollys og ekstreme temperaturer.
- Beskyttelse: Protect the display from scratches and impacts. Avoid applying excessive pressure to the screen.
9. Garantioplysninger
Specific warranty details for the Stemedu ESP32-2432S028R module are typically provided at the point of purchase or on the manufacturer's official website. Please retain your proof of purchase for any warranty claims. For general warranty inquiries, contact Stemedu customer support.
10. Kundesupport
For technical assistance, troubleshooting, or further information regarding your ESP32-2432S028R module, please visit the official Stemedu website or contact their customer support team. Online resources, forums, and community support may also be available for ESP32 development boards.
Stemedu Official Store: Besøg butik


