1. Introduktion
The ABSINA Mobile Wallbox 11 kW 16A is a versatile and portable charging solution for electric vehicles. Designed for both home and travel use, it offers convenient and safe charging with integrated app control and RFID activation. This manual provides detailed instructions for setting up, operating, maintaining, and troubleshooting your device.

Figure 1: ABSINA Mobile Wallbox 11 kW 16A. This image shows the compact design of the wallbox with its CEE plug and Type 2 charging connector.
2. Sikkerhedsinstruktioner
Læs alle sikkerhedsinstruktioner omhyggeligt, inden du bruger enheden. Manglende overholdelse af disse instruktioner kan resultere i elektrisk stød, brand eller alvorlig personskade.
- Ensure the power supply meets the specified requirements (3 phases 415 V 50/60 Hz).
- Brug ikke enheden, hvis kablet eller stikket er beskadiget.
- Do not attempt to open or repair the device yourself. Contact qualified personnel for service.
- Keep the device away from water and extreme temperatures. The device is IP65 rated, but avoid submersion.
- Sørg altid for korrekt jordforbindelse.
- The integrated Type A+DC6 mA residual current circuit breaker provides enhanced safety. Do not bypass or modify it.
- Before installation, contact your local grid operator to register the wallbox as required.

Figure 2: Maximum Safety Features. The image highlights the Type A 30mA AC residual current protection and Type B 6mA DC fault current protection for enhanced user safety.
3. Pakkens indhold
Bekræft at alle varer er til stede i pakken:
- ABSINA Mobile Wallbox 11 kW 16 A (three-phase)
- 3 x RFID Chips
- 3 x RFID-kort
- Vægmonteringsbeslag
- Mounting Material (screws, anchors)
- Brugervejledning (dette dokument)
4. Opsætning og installation
The ABSINA Mobile Wallbox is designed for "Plug and Play" use, requiring no complex installation. However, for permanent mounting, a wall bracket is included.
4.1 Initial Setup (Plug and Play)
- Tilslut til strøm: Insert the CEE plug of the Wallbox into a compatible 3-phase 415 V 50/60 Hz CEE socket.
- Tænd: The Wallbox will power on automatically. If the indicator light blinks red, press the emergency stop button once to reset.
- Klar til brug: The Wallbox is now ready for charging, which can be activated via RFID or the app.

Figure 3: Plug & Play Functionality. This image illustrates the simple connection of the CEE plug to a power outlet, emphasizing ease of use without complex electrical installation.
4.2 Vægmontering (valgfrit)
For a more permanent setup, use the provided wall mount bracket and hardware.
- Vælg placering: Select a suitable wall location near a compatible CEE socket, ensuring adequate ventilation and protection from direct weather exposure (though the unit is IP65 rated).
- Markér borepunkter: Use the wall mount bracket to mark the drilling points on the wall.
- Bore huller: Drill holes at the marked points and insert the provided anchors.
- Sikkert beslag: Attach the wall mount bracket to the wall using the screws.
- Mount Wallbox: Carefully slide the Wallbox onto the mounted bracket until it clicks securely into place.

Figure 4: Easy Operation. The image shows the Wallbox mounted on a wall, connected to a vehicle, demonstrating its simple "Connect. Charge." principle.
5. Betjeningsvejledning
5.1 Charging Your Electric Vehicle
- Connect Vehicle: Plug the Type 2 charging cable from the Wallbox into your electric vehicle's charging port.
- Aktivér opladning:
- Using RFID: Hold one of the provided RFID chips or cards over the RFID reader area on the Wallbox. The Wallbox will activate, and charging will begin.
- Brug af appen: Open the ABSINA app (or compatible smart home app like Tuya Smart) on your smartphone. Select the Wallbox and initiate charging from the app interface.
- Skærmopladning: The app provides real-time data including charging voltage (V), current (A), power (kW), charged energy (kWh), and charging time.
- Stop opladning:
- Using RFID: Hold the RFID chip/card over the reader again to stop charging.
- Brug af appen: Stop charging directly from the app.
- Disconnect Vehicle: Once charging is complete or stopped, unplug the Type 2 cable from your vehicle.

Figure 5: Misuse Protection. The image shows a hand activating the Wallbox with an RFID chip, illustrating the secure activation method.
5.2 App-kontrolfunktioner
The dedicated app (or compatible smart home app) provides advanced control and monitoring capabilities:
- Adjust Charging Current: Set the charging current from 8 A to 16 A in 1 A increments to manage charging speed.
- Set Charging Mode: Choose preferred charging modes.
- Planlæg opladning: Utilize the charging delay function to start charging at a later time.
- Monitor Real-time Data: View live charging statistics.
- Fjernstart/-stop: Control charging sessions from your smartphone.
Note: While the app displays charging data, this data is typically not stored permanently on the device once the charging cable is disconnected. For historical charging data, refer to your vehicle's own app if available.
6. Vedligeholdelse
To ensure the longevity and optimal performance of your ABSINA Mobile Wallbox, follow these maintenance guidelines:
- Rensning: Wipe the exterior of the Wallbox with a soft, damp cloth. Do not use abrasive cleaners or solvents. Ensure the device is unplugged before cleaning.
- Kabelinspektion: Regularly inspect the charging cable and CEE plug for any signs of damage, fraying, or wear. If damage is found, discontinue use immediately and contact support.
- Vedligeholdelse af stik: Keep the Type 2 connector clean and free of debris. Ensure the protective cap is in place when not in use.
- Opbevaring: When not in use, especially during travel, store the Wallbox in a dry, cool place, protected from direct sunlight and extreme temperatures.
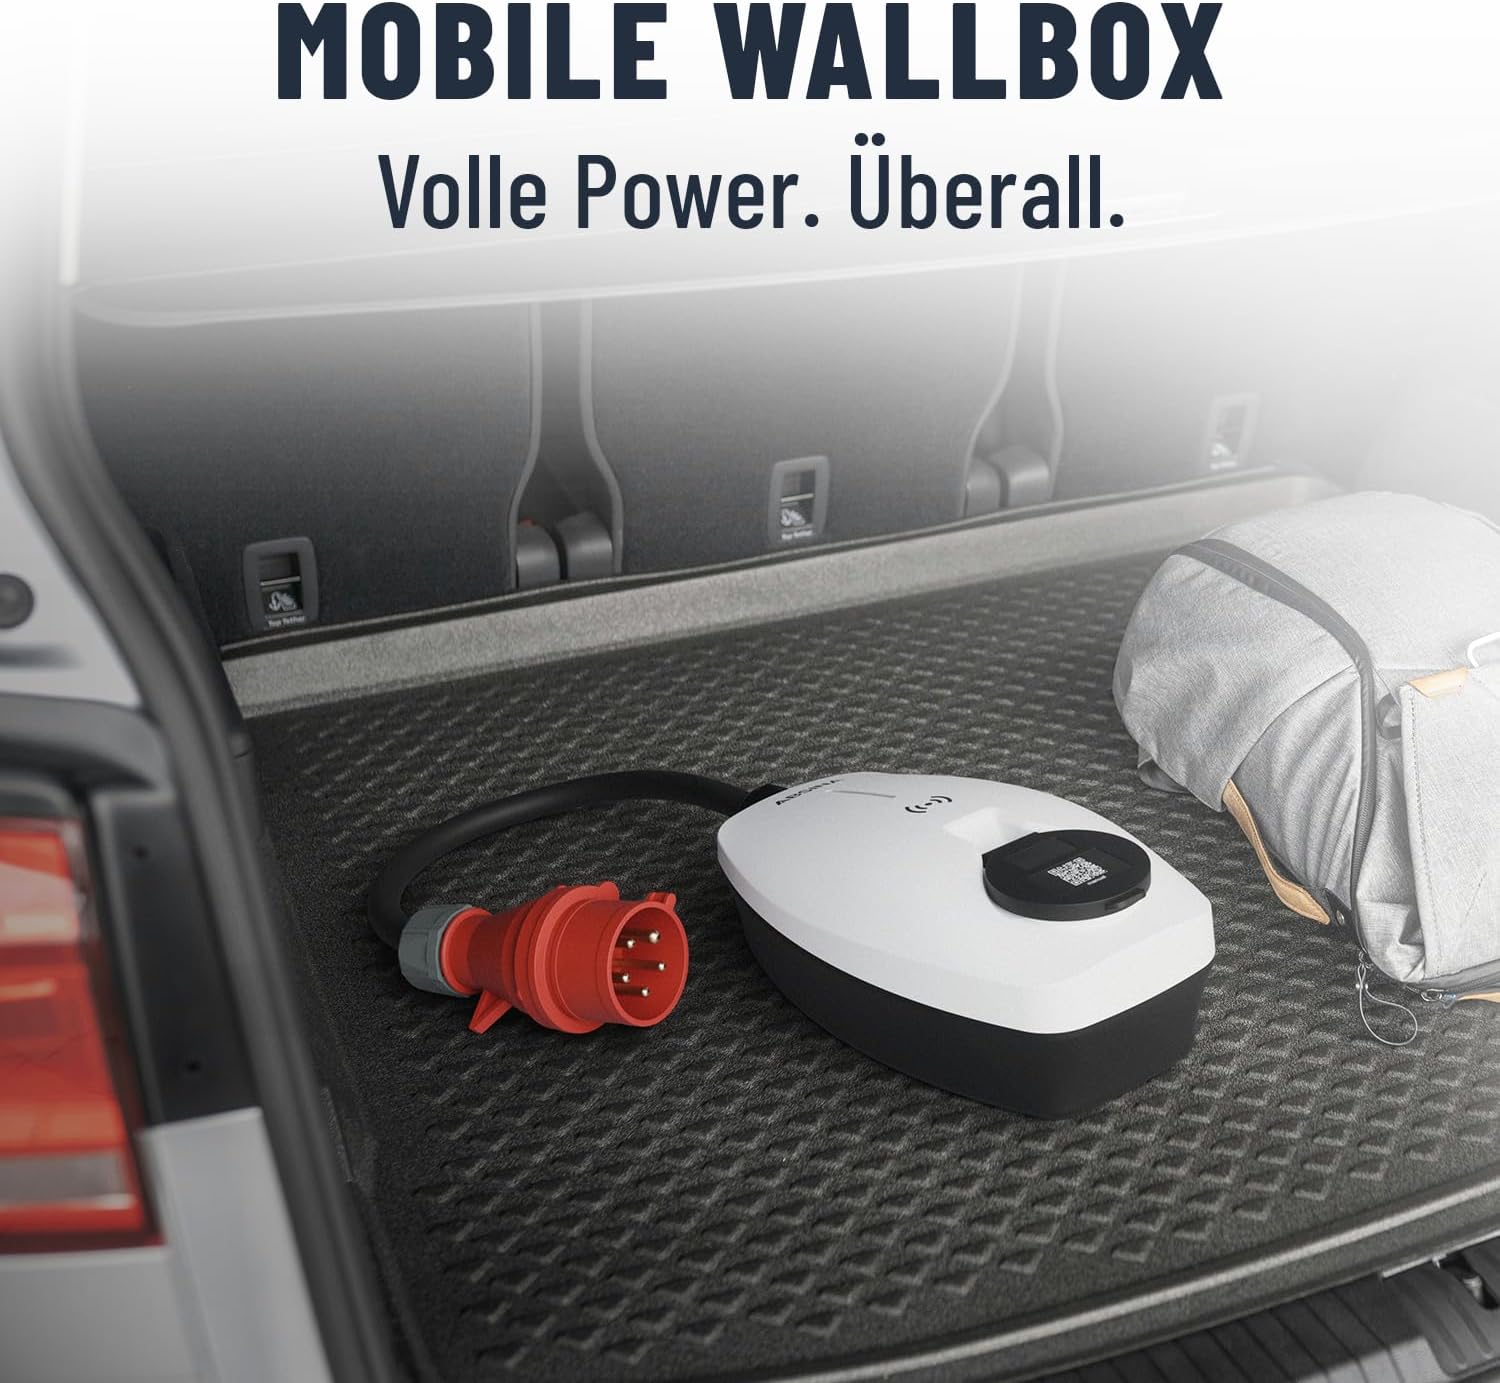
Figure 6: Mobile Wallbox for Travel. This image shows the Wallbox conveniently stored in a car trunk, highlighting its portability and ease of transport.
7. Fejlfinding
If you encounter issues with your ABSINA Mobile Wallbox, refer to the following common problems and solutions:
| Problem | Mulig årsag | Løsning |
|---|---|---|
| Wallbox does not power on. | No power from CEE socket; CEE plug not fully inserted; internal fault. | Check CEE socket power supply; ensure plug is fully inserted; try a different CEE socket if available. |
| Opladning starter ikke. | RFID not read correctly; app connection issue; vehicle not ready to charge; emergency stop engaged. | Ensure RFID chip/card is held correctly; check app connection and Wallbox status; ensure vehicle is ready to accept charge; press emergency stop button once to reset. |
| Opladningen stopper uventet. | Overload protection activated; vehicle charging complete; power interruption. | Check for error codes on Wallbox/app; verify vehicle charging status; check CEE socket power. |
| App not connecting to Wallbox. | Wi-Fi signal weak; incorrect app settings; Wallbox not in pairing mode. | Ensure strong Wi-Fi signal at Wallbox location; restart app and Wallbox; refer to app's pairing instructions. |
If the problem persists after attempting these solutions, please contact ABSINA customer support.
8. Specifikationer
| Feature | Detalje |
|---|---|
| Mærke | ABSINA |
| Modelnummer | 301018 |
| Opladningseffekt | 11 kW |
| Ladestrøm | Adjustable 8 A to 16 A |
| Faser | 3-faset |
| Input bindtage | 415 V AC |
| Frekvens | 50/60 Hz |
| Connector Type | Type 2 (output), CEE 16A (input) |
| Beskyttelsesklasse | IP65 (Vandtæt) |
| Sikkerhedsfunktioner | Integrated Type A+DC6 mA RCD, Overvoltage, Undervoltage, Overload, Temperature, Short-circuit protection |
| Brandbarhedsvurdering | UL 94V-0 |
| Varens vægt | 2.25 kilo |
| Produktmål (L x B x H) | 25.7 x 15.3 x 9.5 cm |
| Standby forbrug | < 3 W |
9. Garanti og support
ABSINA products are designed for reliability and performance. For warranty information and technical support, please refer to the official ABSINA webhjemmeside eller kontakt deres kundeservice direkte.
The manufacturer, ABSINA GmbH, is based in Germany and is committed to providing competent support.
Kontaktoplysninger: Please visit the official ABSINA website for the most up-to-date contact details for customer support and warranty claims.


