1. Introduktion
The INKBIRDPLUS Indoor CO2 Meter is an advanced air quality monitor designed to accurately measure carbon dioxide (CO2) concentration, temperature, and humidity in various indoor environments. This device provides real-time data and features an alarm function to alert users to elevated CO2 levels, ensuring a healthier living or working space. It is suitable for use in homes, offices, grow tents, wine cellars, and cars.

Image: The INKBIRDPLUS Indoor CO2 Meter shown alongside its USB-C charging cable.
2. Nøglefunktioner
- Multi-Parameter Monitoring: Simultaneously displays CO2 concentration, temperature, and humidity.
- Advarselsalarmer: Features 3 stages of CO2 concentration (Normal, Warning, Dangerous) with a customizable alarm function.
- Premium Sensor: Utilizes a highly sensitive NDIR CO2 sensor for quick and accurate readings.
- Convenient Calibration: Supports easy manual calibration to maintain measurement accuracy.
- USB-opladning: Built-in 2400mAh Lithium battery, rechargeable via USB-C.
- Stor baggrundsbelyst LCD-skærm: Klart og letlæseligt display.
- Bred anvendelse: Portable design with a hanging hole, suitable for various indoor environments.
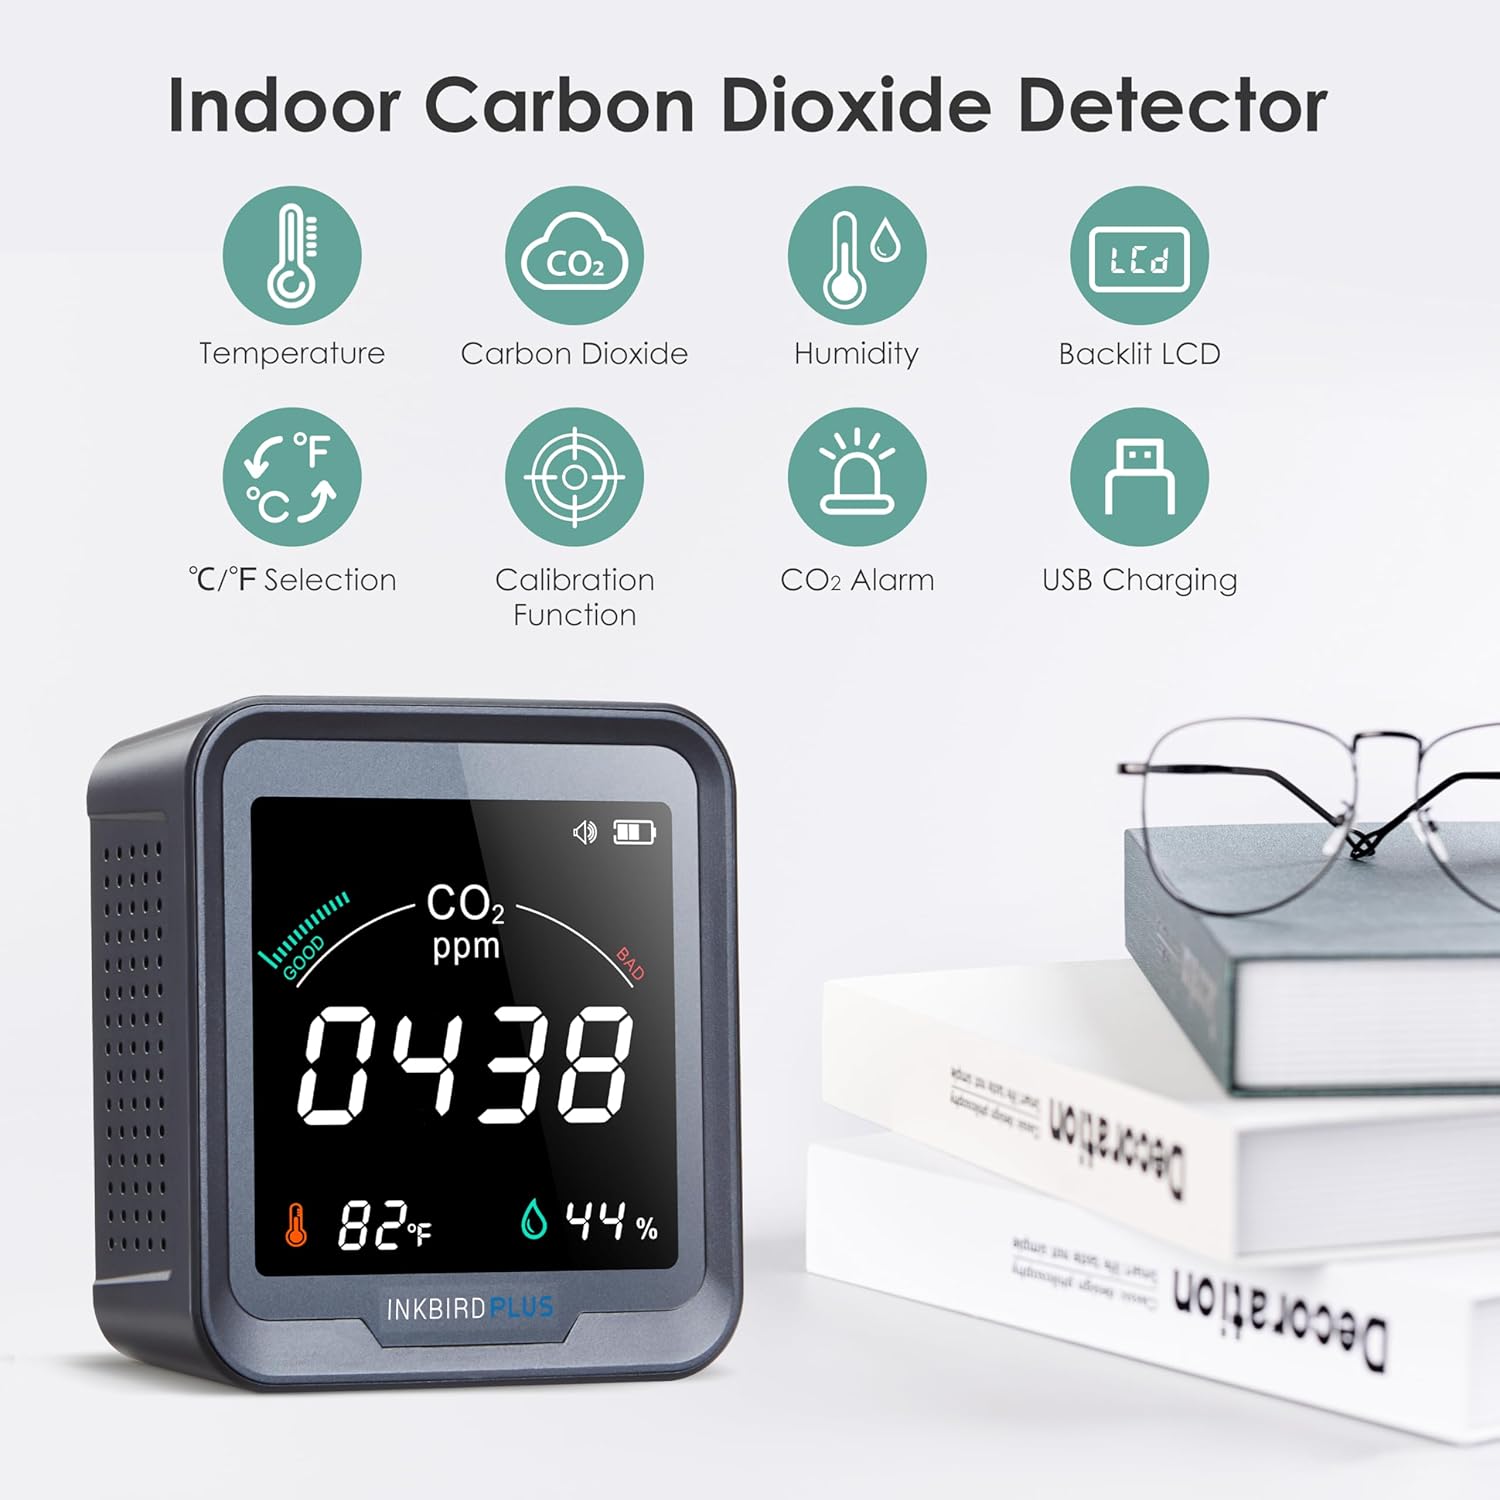
Image: Visual representation of the meter's key features including temperature, CO2, humidity, backlit LCD, C/F selection, calibration, CO2 alarm, and USB charging.
3. Pakkens indhold
- 1 x INKBIRDPLUS Air Quality Detector
- 1 x brugermanual
- 1 x Type-C ladekabel
4. Produktet er slutview

Billede: Forside og bagside views of the INKBIRDPLUS CO2 Meter, highlighting display elements and button functions.
Forreste display:
- Indikator for batterilevetid: Viser det aktuelle batteriniveau.
- CO2 Alarm Indicator: Illuminates when CO2 levels exceed set thresholds.
- CO2 Concentration (ppm): Main numerical display for carbon dioxide levels.
- Temperatur: Viser den aktuelle omgivende temperatur.
- Fugtighed: Displays current relative humidity.
Bagpanel:
- DOWN Button / Backlight ON/OFF: Used for navigation and controlling display backlight.
- Power knap: Tænder/slukker for enheden.
- Hængende hul: Til vægmontering.
- UP Button / Alarm ON/OFF: Used for navigation and toggling the alarm.
5. Opsætning
5.1 Indledende opladning
Before first use, fully charge the device using the provided Type-C charging cable and a 5V-1A USB adapter (not included). The built-in 2400mAh Lithium battery provides portable operation, but for continuous monitoring, it is recommended to keep the device connected to power due to the multiple sensors.
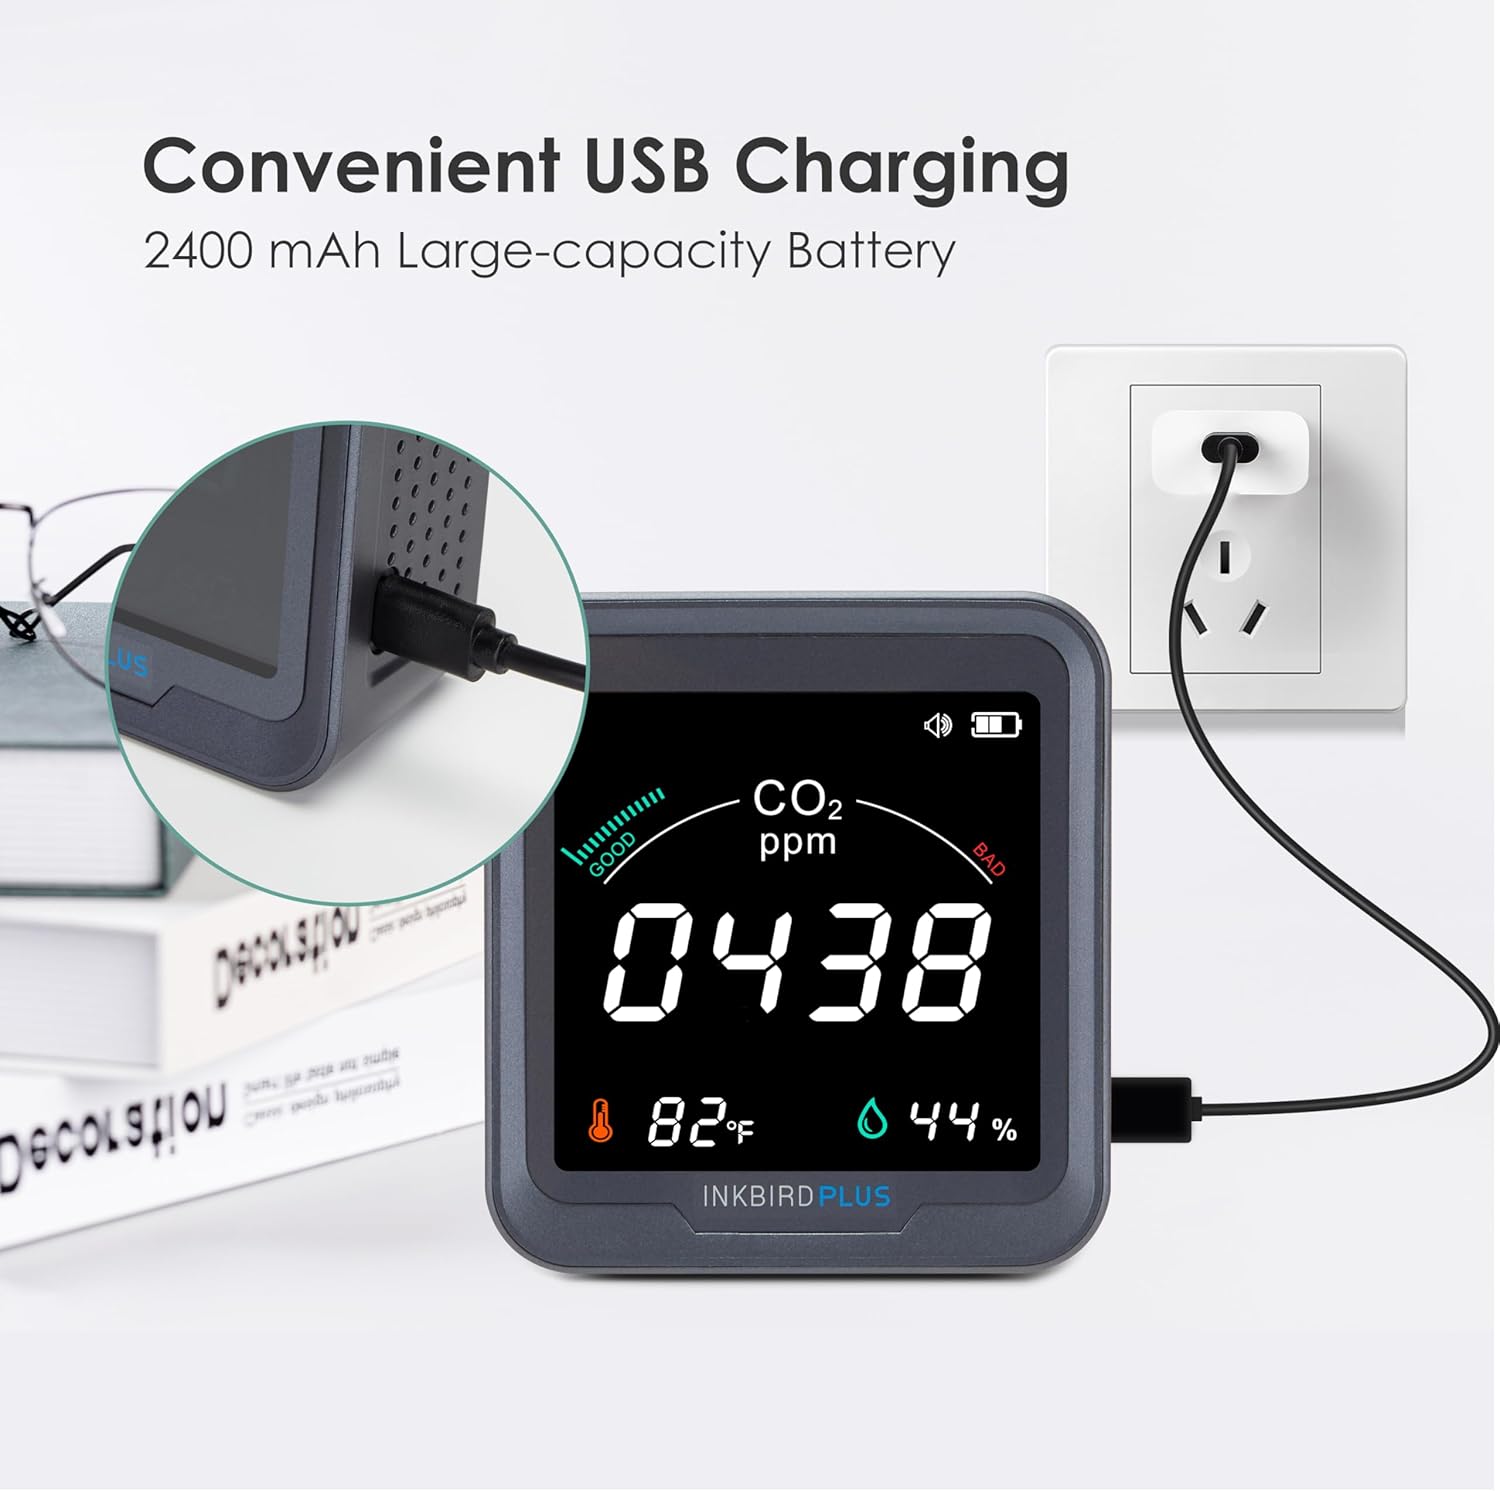
Image: The CO2 meter being charged via its USB-C port, connected to a wall adapter.
5.2 Tænd/sluk
Tryk og hold på Power knap on the back of the device to turn it ON or OFF.
5.3 Placering
Place the CO2 meter in the area you wish to monitor. For accurate readings, avoid placing it directly in front of air vents, windows, or in drafty locations. The device can be placed on a flat surface or mounted on a wall using the integrated hanging hole.
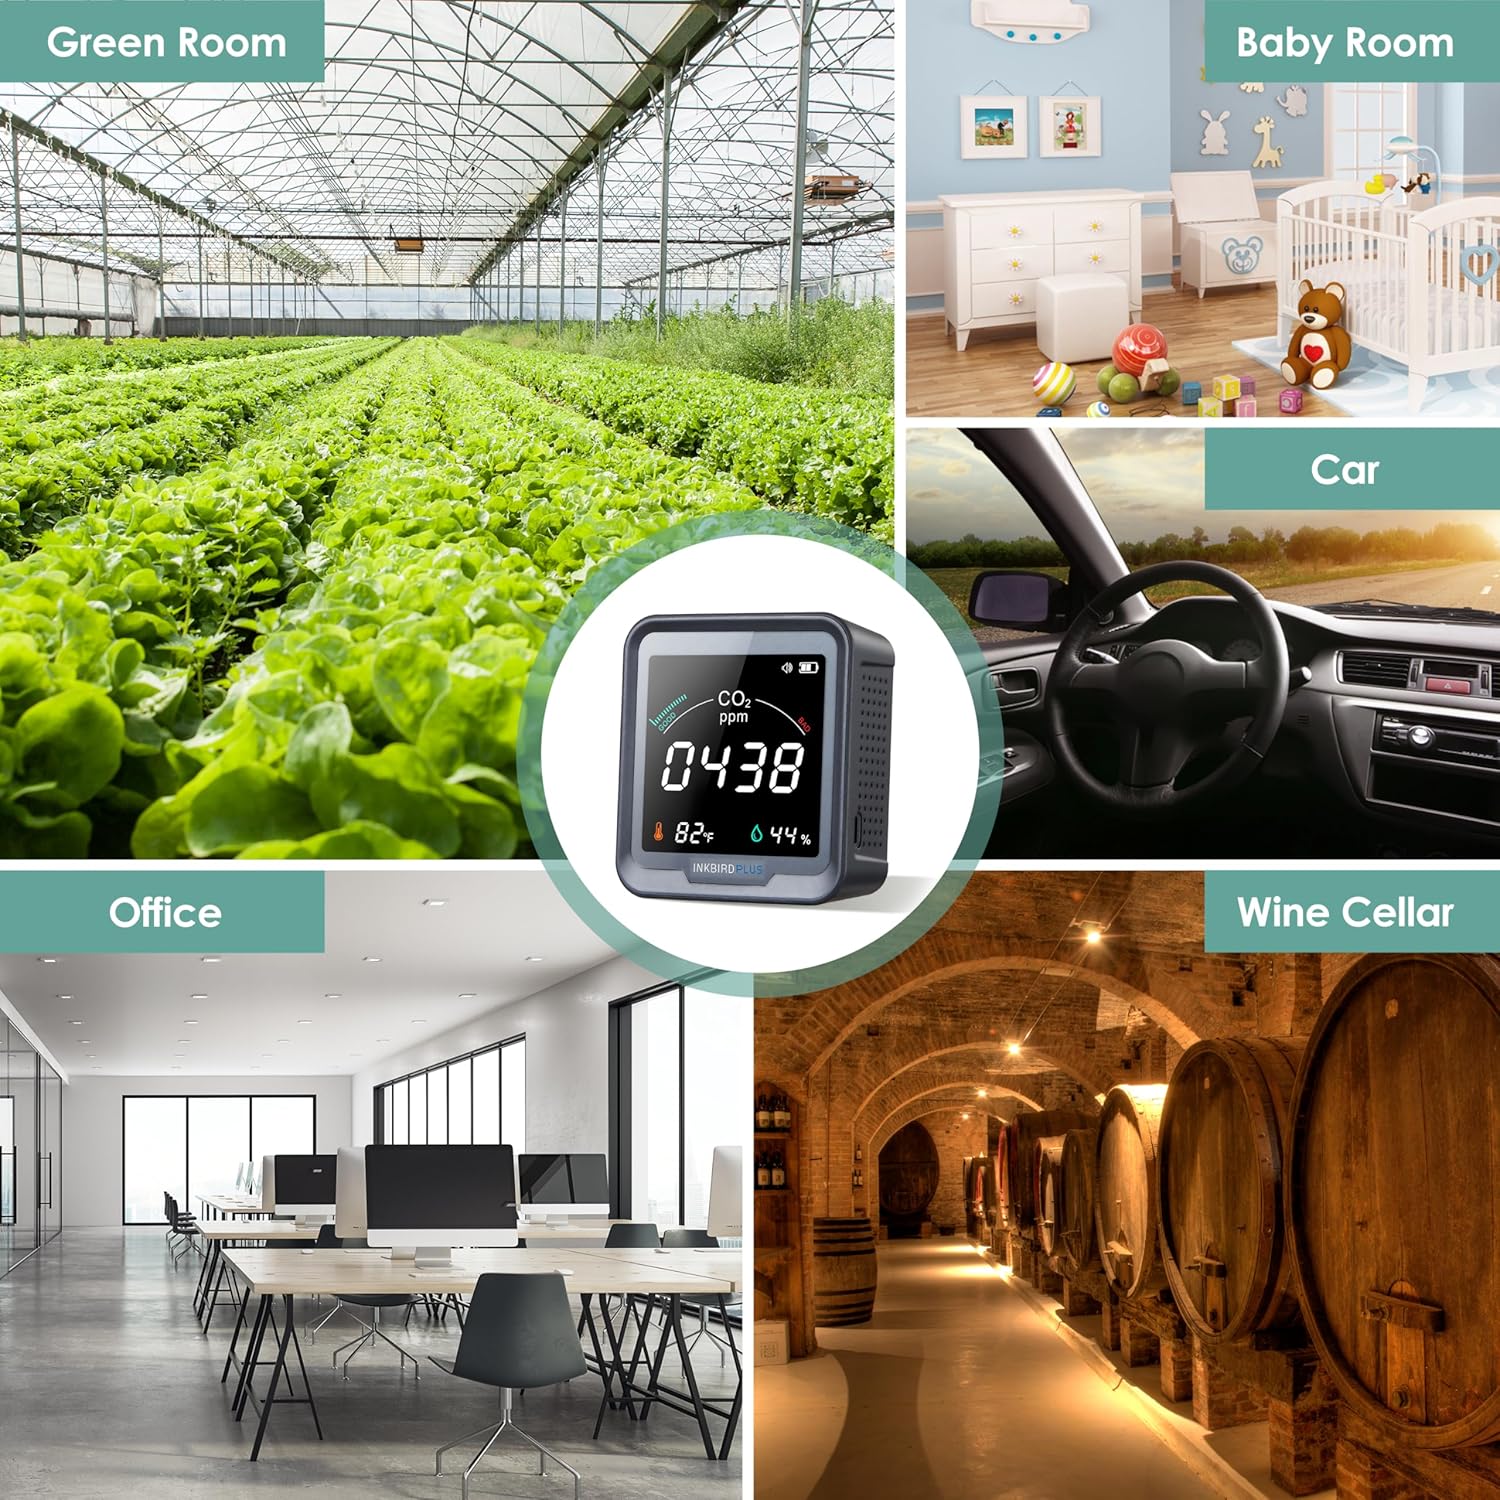
Billede: Eksamples of suitable environments for the CO2 meter, including a green room, baby room, car, office, and wine cellar.
6. Betjening
6.1 Aflæsning af displayet
Once powered on, the large LCD will display the current CO2 concentration in parts per million (ppm), temperature in degrees Fahrenheit or Celsius, and relative humidity percentage.
6.2 CO2 Concentration Levels
The device categorizes CO2 levels into three stages, indicated by visual cues on the display and potentially an alarm:
- Normal: 400-700 ppm (Good air quality)
- Advarsel: 700-1500 ppm (Moderate air quality, ventilation recommended)
- Farlig: 1500-5000 ppm (Poor air quality, immediate ventilation required)

Image: The CO2 meter display illustrating the three stages of CO2 concentration: Normal (400-700 ppm), Warning (700-1500 ppm), and Dangerous (1500-5000 ppm).
6.3 Alarmfunktion
The CO2 detector is equipped with an audible alarm that activates when the detected CO2 concentration exceeds a preset value. You can customize this alarm threshold.
- Setting Alarm Value: Double-press the power button to enter the alarm setting mode. Use the UP and DOWN buttons to adjust the desired CO2 threshold.
- Toggling Alarm ON/OFF: Press the UP button on the back panel to enable or disable the audible alarm.

Image: Instructions on how to double-press the button to enter the setting for the alarming CO2 value.
6.4 Kalibrering
To ensure the accuracy of measurements, the CO2 meter supports a calibration function. It is recommended to calibrate the device in an open, fresh air environment, especially when using it for the first time.
- Manuel kalibrering:
- Sluk enheden.
- Take the device to an open outdoor environment with fresh air.
- Simultaneously press and hold all three buttons (UP, Power, DOWN) on the back of the device.
- The display will show a 200-second countdown. Keep the device still and do not breathe near it during this period.
- Calibration will complete automatically after the countdown.
- Automatisk kalibrering: The automatic calibration function is off by default. If turned on, the first self-calibration occurs 24 hours after power-on, and subsequent self-calibrations occur every 7 days. If the device is turned off and on again, the timer for self-calibration will reset.

Image: A hand demonstrating pressing the three buttons simultaneously for convenient calibration.
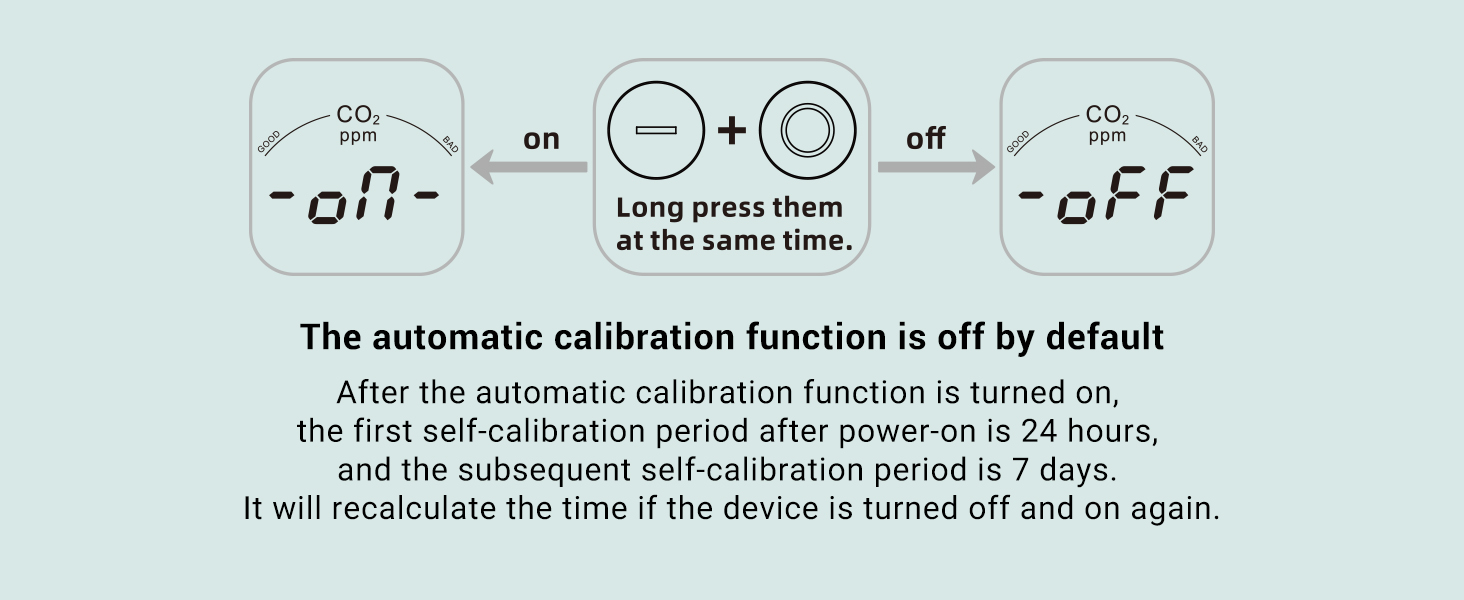
Image: Diagram illustrating how to toggle the automatic calibration function on or off by long-pressing the '+' and 'O' buttons simultaneously.
6.5 Backlight Control
Tryk på NED button on the back panel to toggle the display backlight ON or OFF.
7. Vedligeholdelse
- Hold enheden ren ved at tørre den af med en blød, tør klud.
- Brug ikke slibende rengøringsmidler eller opløsningsmidler.
- Ensure the ventilation holes on the device are not obstructed to allow for proper air circulation and accurate readings.
- Opbevar enheden et køligt og tørt sted, når den ikke er i brug i længere perioder.
8. Fejlfinding
| Problem | Mulig årsag | Løsning |
|---|---|---|
| Inaccurate CO2/Temp/Humidity readings | Device needs calibration; placed in a drafty area; sensor obstruction. | Perform manual calibration in fresh air. Relocate the device to a stable environment. Ensure ventilation holes are clear. |
| Batteriet aflades hurtigt | Multiple sensors consume power; continuous use without charging. | For continuous monitoring, keep the device connected to a 5V-1A USB power adapter. |
| Enheden tænder ikke | Lavt batteri; defekt opladningskabel/adapter. | Charge the device for at least 30 minutes. Try a different USB-C cable and adapter. |
| Alarmen lyder ikke | Alarm function is disabled; CO2 level below threshold. | Press the UP button to enable the alarm. Check if the CO2 concentration has reached the set alarm threshold. |
9. Specifikationer
| Parameter | Værdi |
|---|---|
| Modelnummer | PTH-9C-US-2 |
| CO2-måleområde | 400 - 5000 ppm |
| CO2 Measurement Accuracy | ±(50ppm + 5%) |
| Temperaturområde | -10 ° C ~ 40 ° C (14 ° F ~ 104 ° F) |
| Temperatur nøjagtighed | ±2°C (±3.6°F) |
| Fugtighedsområde | 20 ~ 80 % RH |
| Fugtighedsnøjagtighed | ±5 % relativ fugtighed |
| Strømkilde | Battery Powered (Built-in Lithium Battery 2400mAh) |
| Indgangsparameter | DC 5V - 1A |
| Varens vægt | 10.8 ounce |
| Produktdimensioner | 3.86 x 3.54 x 1.57 tommer |
| Alarmtype | Hørbar |
10. Garanti og support
Specific warranty details are not provided in this manual. For warranty claims, technical support, or any inquiries regarding your INKBIRDPLUS Indoor CO2 Meter, please refer to the product packaging or contact INKBIRDPLUS customer service directly through their official webwebstedet eller forhandleren, hvor produktet blev købt.


