1. Introduktion
Tak for købetasing the Globe Heath Zenith Wireless Door Chime Kit, Model 18000151. This kit provides a convenient and reliable solution for your home's doorbell needs, offering easy installation and wireless operation. Please read this manual thoroughly before installation and use to ensure proper function and longevity of your product.
2. Pakkens indhold
Bekræft at alle komponenter er til stede i din pakke:
- Wireless Door Chime Receiver Unit (1)
- Wireless Push Button Transmitter (1)
- Mounting Hardware (Screws, Anchors, Double-sided Adhesive Tape)
- Brugervejledning (dette dokument)
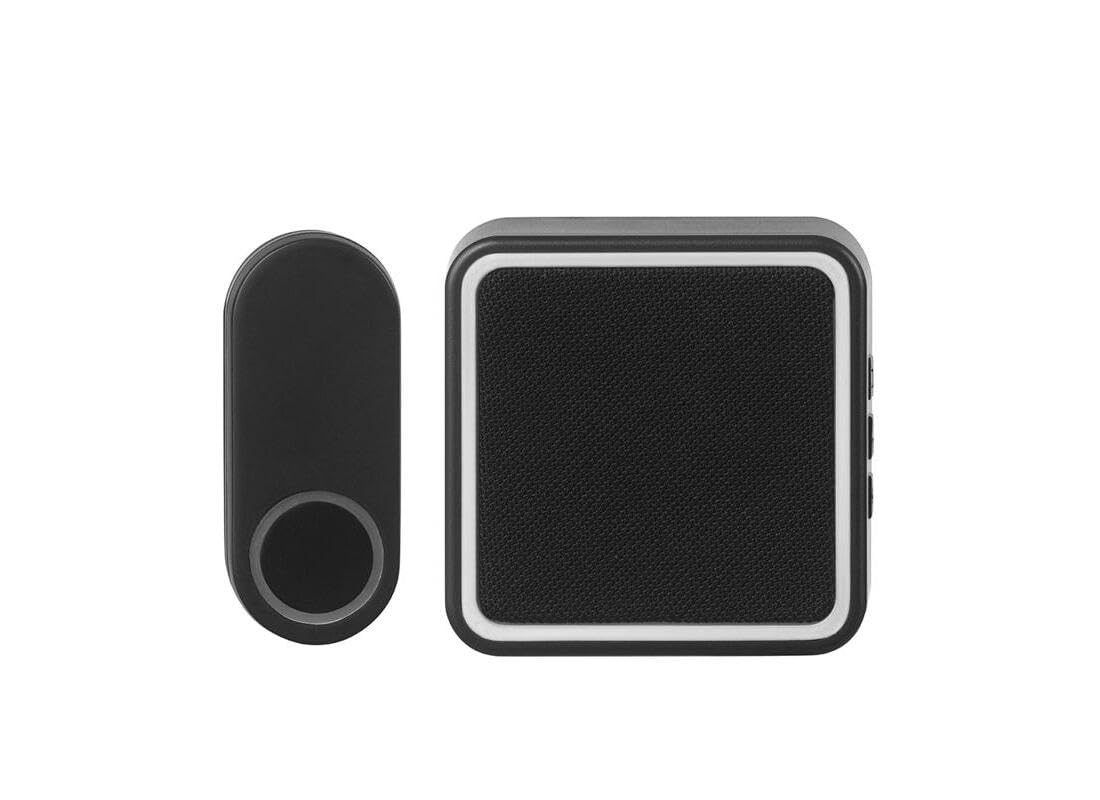
Billede 1: Overview of the Globe Heath Zenith Wireless Door Chime Kit, featuring the main chime unit and the push button.
3. Sikkerhedsoplysninger
Overhold venligst følgende sikkerhedsforanstaltninger for at forhindre personskade eller beskadigelse af produktet:
- Do not expose the units to extreme temperatures, direct sunlight, or moisture.
- Do not attempt to open or repair the units yourself. Refer all servicing to qualified personnel.
- Opbevar batterier utilgængeligt for børn. Bortskaf brugte batterier korrekt i henhold til lokale regler.
- Ensure the mounting surface for the push button is clean and dry before installation.
4. Opsætning og installation
4.1. Installing the Push Button Transmitter
- Vælg placering: Choose a suitable location near your door, ensuring it is easily accessible to visitors and protected from direct heavy rain if possible.
- Forbered overflade: Clean the mounting surface thoroughly to remove any dust or debris.
- Installer batteri: Åbn trykknappen casing (refer to diagram in section 4.3) and insert the required battery (typically a 12V A23 battery, not always included). Ensure correct polarity.
- Monteringsmuligheder:
- Klæbende montering: Peel the backing from the double-sided adhesive tape and firmly press the push button onto the desired surface for at least 30 seconds.
- Skrue montering: Use the provided screws and anchors to securely attach the push button to the wall. Mark the screw holes, drill pilot holes if necessary, and then fasten the unit.
4.2. Installing the Chime Receiver Unit
- Strømkilde: The chime receiver unit is typically battery-operated (e.g., AA batteries, not always included) or plugs into a standard wall outlet.
- Batteridrevet: Open the battery compartment on the back of the chime unit and insert the required batteries, observing correct polarity.
- Plug-in: Simply plug the chime unit into an available wall outlet in a central location within your home.
- Placering: Place or mount the chime unit in a location where it can be easily heard throughout your home. Avoid placing it near large metal objects or other electronic devices that may interfere with the wireless signal.
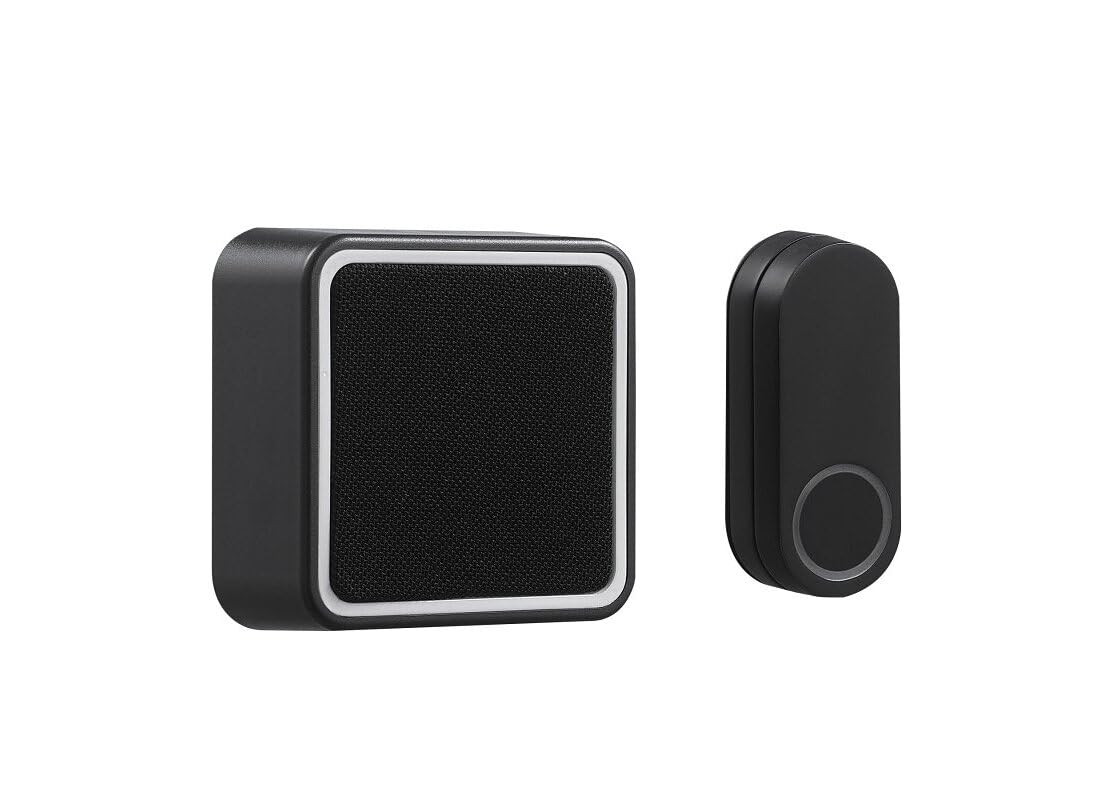
Billede 2: Vinklet view of the chime unit and push button, illustrating their relative sizes and design.
4.3. Pairing (If Applicable)
Most wireless door chime kits come pre-paired. If your units do not communicate, or if you wish to add additional push buttons/chimes, follow these general pairing instructions:
- Gå ind i parringstilstand: On the chime receiver unit, locate the 'Pairing' or 'Code' button. Press and hold this button for approximately 3-5 seconds until an indicator light flashes or a short tone is heard.
- Aktivér senderen: Within 10-20 seconds of the chime entering pairing mode, press the push button on the transmitter. The chime unit should sound, indicating successful pairing.
- Prøve: Press the push button again to confirm the chime sounds. If not, repeat the pairing process.
5. Betjeningsvejledning
5.1. Grundlæggende betjening
Once installed and paired, the system operates automatically. When a visitor presses the push button, the transmitter sends a wireless signal to the chime receiver, which then sounds the selected melody.
5.2. Changing Chime Melody (If Available)
If your chime unit supports multiple melodies, there will typically be a 'Melody' or 'Tune' button on the receiver. Press this button repeatedly to cycle through available melodies until you find your preferred one. The chime will play a preview af hver melodi, når du vælger den.
5.3. Adjusting Volume (If Available)
Some chime units feature a volume control button or switch. Locate the 'Volume' button (often depicted with speaker icons) and press it to cycle through different volume levels (e.g., High, Medium, Low, Mute).
6. Vedligeholdelse
6.1. Udskiftning af batteri
Replace batteries in both the push button transmitter and the chime receiver (if battery-operated) when the chime sounds weak, inconsistently, or stops working entirely. Refer to the battery type specified in the setup section or on the unit itself.
- Trykknap: Åbn forsigtigt c'enasing, remove the old battery, insert a new one with correct polarity, and close the casing sikkert.
- Chime Receiver: Open the battery compartment, replace old batteries with new ones, ensuring correct polarity, and close the compartment.
Vigtig: Always dispose of used batteries responsibly according to local environmental regulations.
6.2. Rensning
Wipe the exterior of both units with a soft, dry cloth. Do not use abrasive cleaners, solvents, or immerse the units in water.
7. Fejlfinding
| Problem | Mulig årsag | Løsning |
|---|---|---|
| Der lyder ingen lyd, når der trykkes på knappen. |
|
|
| Klokken lyder periodisk. |
|
|
| Chime volume is too low/high. | Lydstyrkeindstillingen skal justeres. | Adjust volume using the volume button on the chime receiver (Section 5.3). |
8. Specifikationer
- Modelnavn: OUTDOOR_RECREATION_PRODUCT (Internal designation, refer to Part Number for specific model)
- Varenummer: 18000151
- Mærke: GLOBUS
- Materiale: Plast
- Varens vægt: 6.4 ounce (ca. 181 gram)
- Pakkevægt: 236 gram
- Emnepakkemål (L x B x H): 3.94 x 3.94 x 3.07 tommer
- ASIN: B0CVBKKP4S
- Fabrikant: Globe Electric
9. Garanti og support
This product comes with a manufacturer's warranty. For specific details regarding warranty coverage, duration, and terms, please refer to the warranty information included with your purchase or visit the official Globe Electric website. For technical support, troubleshooting assistance beyond this manual, or to inquire about replacement parts, please contact Globe Electric customer service directly.
You can typically find contact information on the product packaging or on the manufacturer's official webwebsted: www.globe-electric.com (eksamplinket, verificér det faktiske webwebsted).


