Indledning
Thank you for choosing the Keenso 3-Channel HD Night Vision Car Dash Cam. This manual provides detailed instructions for the installation, operation, maintenance, and troubleshooting of your new dash cam. Please read this manual thoroughly before use to ensure proper functionality and to maximize your driving safety and recording experience.
Pakkens indhold
Før du fortsætter med installationen, skal du kontrollere, at alle komponenter er til stede i pakken:
- Keenso 3-Channel Dash Cam Unit
- Sugekop monteringsbeslag
- Power Adapter (Car Charger)
- Rear Camera (if applicable, based on 3-channel description)
- Memory Card (pre-installed or separate)
- Brugervejledning (dette dokument)

Image: The main dash cam unit shown alongside a separate rear camera and the suction cup mount.
Opsætning og installation
Follow these steps to properly install your Keenso dash cam in your vehicle:
- Forbered forruden: Clean the area on your windshield where you intend to mount the dash cam. Ensure it is free from dust and grease for optimal suction.
- Fastgør sugekopmonteringen: Securely attach the suction cup mount to the windshield. Choose a location that does not obstruct your view af vejen.
- Monter Dash Cam: Slide the dash cam unit onto the mounting bracket until it clicks into place. Adjust the camera angle to ensure a clear view af vejen forude.
- Indsæt hukommelseskort: If not already inserted, gently insert the provided memory card into the designated slot on the dash cam. Ensure it is inserted correctly.
- Tilslut strøm: Connect the power adapter (car charger) to the dash cam's power input port and then plug the other end into your vehicle's cigarette lighter socket. Route the cable neatly along the windshield edge and dashboard to avoid interference with driving.
- Installer bakkamera (valgfrit): If using the rear camera, connect its cable to the main dash cam unit. Route the cable to the rear of the vehicle and mount the rear camera on the rear windshield or license plate area, ensuring a clear view.

Image: An illustration demonstrating typical cable routing for a multi-channel dash cam within a vehicle, indicating paths for front and rear cameras.
Betjeningsvejledning
Tænd/sluk
- The dash cam will automatically power on and begin recording when your vehicle's ignition is turned on (and power is supplied to the cigarette lighter socket).
- Den slukker automatisk, når tændingen slukkes.
- To manually power on/off, press and hold the power button located on the device.
Real-time Display and Recording
The 3.0-inch touch screen provides a convenient real-time display of the recording. You can monitor the footage from all three channels (front, interior, rear) directly on the screen.
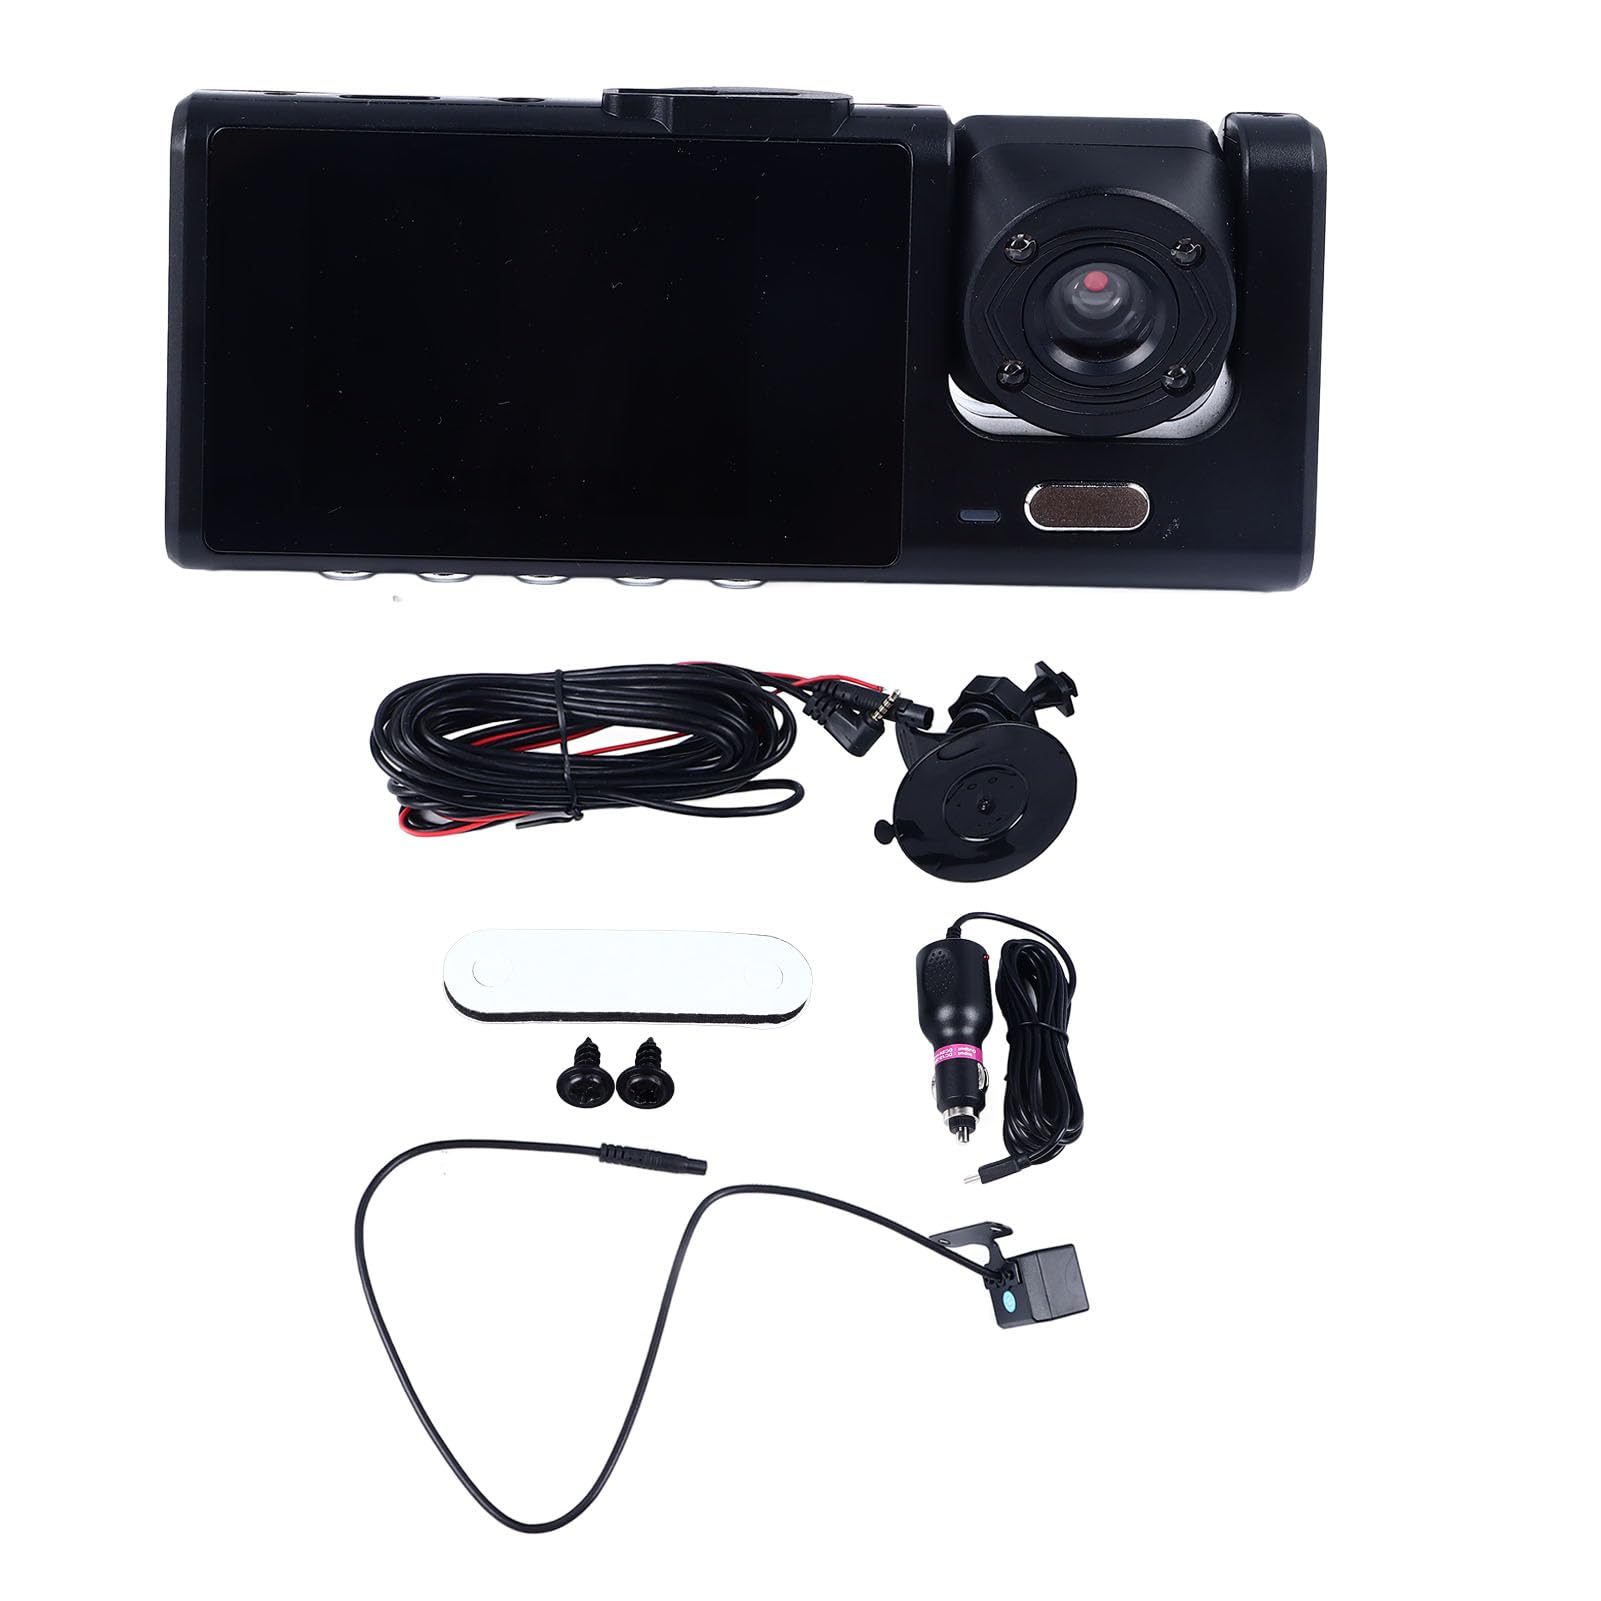
Image: The dash cam is mounted on the windshield, with its screen actively displaying live video footage, offering immediate visual feedback to the driver.
Parkeringsovervågning
This dash cam features a parking monitoring function to safeguard your vehicle when left unattended. When enabled, the dash cam will automatically detect impacts or motion around your parked vehicle and begin recording, providing security and evidence in case of incidents.
- To activate parking monitoring, ensure the feature is enabled in the dash cam's settings menu.
- The dash cam typically requires a continuous power supply (e.g., hardwire kit, not included) for extended parking monitoring. Refer to the settings for specific options.

Image: A person gestures towards the dash cam, highlighting its parking monitoring capability designed to protect the vehicle when parked.
HD Night Vision
Equipped with three lenses, this dash cam offers exceptional image quality even in low-light conditions. It records high-definition video, ensuring clear and detailed images, even at night.
Menu navigation og indstillinger
Use the 3.0-inch touch screen to navigate through the menu and adjust settings such as:
- Optagelsesopløsning
- Loop-optagelsesvarighed
- G-sensor følsomhed
- Parking monitor settings
- Dato og tid
- Sprog
- Formater hukommelseskort
Refer to the on-screen prompts and icons for detailed navigation.
Opretholdelse
- Rene linser: Regularly clean the camera lenses with a soft, lint-free cloth to ensure clear recording quality.
- Formater hukommelseskort: It is recommended to format the memory card every 2-4 weeks to prevent data corruption and ensure optimal recording performance. This can usually be done through the dash cam's settings menu.
- Check Mount: Periodically check that the suction cup mount is securely attached to the windshield.
- Softwareopdateringer: Check the official Keenso webwebstedet for tilgængelige firmwareopdateringer for at forbedre ydeevnen og tilføje nye funktioner.
Fejlfinding
| Problem | Mulig årsag | Løsning |
|---|---|---|
| Dashcam'et tænder ikke. | Ingen strømforsyning; defekt strømadapter; løs forbindelse. | Check car charger connection and vehicle's cigarette lighter socket. Ensure the vehicle's ignition is on. Try a different power source if available. |
| Optagelsen stopper uventet. | Memory card full; memory card error; faulty memory card. | Format the memory card. Replace the memory card if the issue persists. Ensure loop recording is enabled. |
| Dårlig videokvalitet. | Snavset objektiv; beskyttelsesfilm stadig på objektivet; forkerte opløsningsindstillinger. | Rengør kameralinserne. Fjern eventuel beskyttelsesfilm. Kontroller indstillingerne for videoopløsning i menuen. |
| Dashcam fryser eller går ned. | Softwarefejl; problem med hukommelseskort. | Press the reset button (if available) or power cycle the device. Format or replace the memory card. |
Produktspecifikationer
| Modelnavn | Keensodg8m4xzkq0 |
| Materiale | Plast |
| Batteri | 320 mAh 5V Lithium Battery |
| Input bindtage | 12-30V |
| Skærmstørrelse | 3.0 tommer |
| Skærmopløsning | 800 x 480P |
| Frontkameravinkel | 170° |
| Max Front Camera Resolution | 1680 x 960 30fps |
| Max Interior Camera Resolution | 640 x 480 25fps |
| Videoformat | AVI |
| Billedformat | JPG |
| Kontrolmetode | Røre |
| Produktdimensioner | 16L x 12B x 7H cm |
Garanti og support
For warranty information and technical support, please refer to the official Keenso webwebstedet eller kontakt din forhandler. Gem din købskvittering som købsbevis i tilfælde af garantikrav.
Online support: Visit the Keenso Store on Amazon