1. Introduktion
This manual provides essential information for the safe operation, maintenance, and troubleshooting of your Gotrax G4 Electric Scooter and the accompanying cup holder. Please read this manual thoroughly before using the product to ensure proper function and to prevent damage or injury. Keep this manual for future reference.
2. Sikkerhedsretningslinjer
Operating an electric scooter carries inherent risks. Adherence to these safety guidelines is crucial for your safety and the safety of others.
- Brug altid hjelm og passende sikkerhedsudstyr (knæbeskyttere, albuebeskyttere) når du kører.
- Sørg for, at alle komponenter er forsvarligt fastgjort og i god stand før hver tur.
- Do not ride in wet conditions, heavy rain, or on slippery surfaces.
- Overhold alle lokale færdselslove og regler.
- Avoid riding at night without proper lighting. The G4 is equipped with a headlight and tail light for improved visibility.
- Udfør ikke stunts eller pludselige manøvrer.
- Hold en sikker afstand til fodgængere og andre køretøjer.
- Scooteren er kun beregnet til én person. Der må ikke medbringes passagerer.
- Overskrid ikke den maksimale vægtkapacitet.
- Kontroller regelmæssigt dæktryk og bremsefunktion.
3. Produktet er slutview
3.1 Gotrax G4 Electric Scooter Components
Familiarize yourself with the main parts of your Gotrax G4 Electric Scooter.

Figure 3.1: Gotrax G4 Electric Scooter, showcasing its overall design and 10-inch pneumatic tires.

Figure 3.2: A rider on the Gotrax G4 Electric Scooter, highlighting its comfortable riding experience and powerful motor.
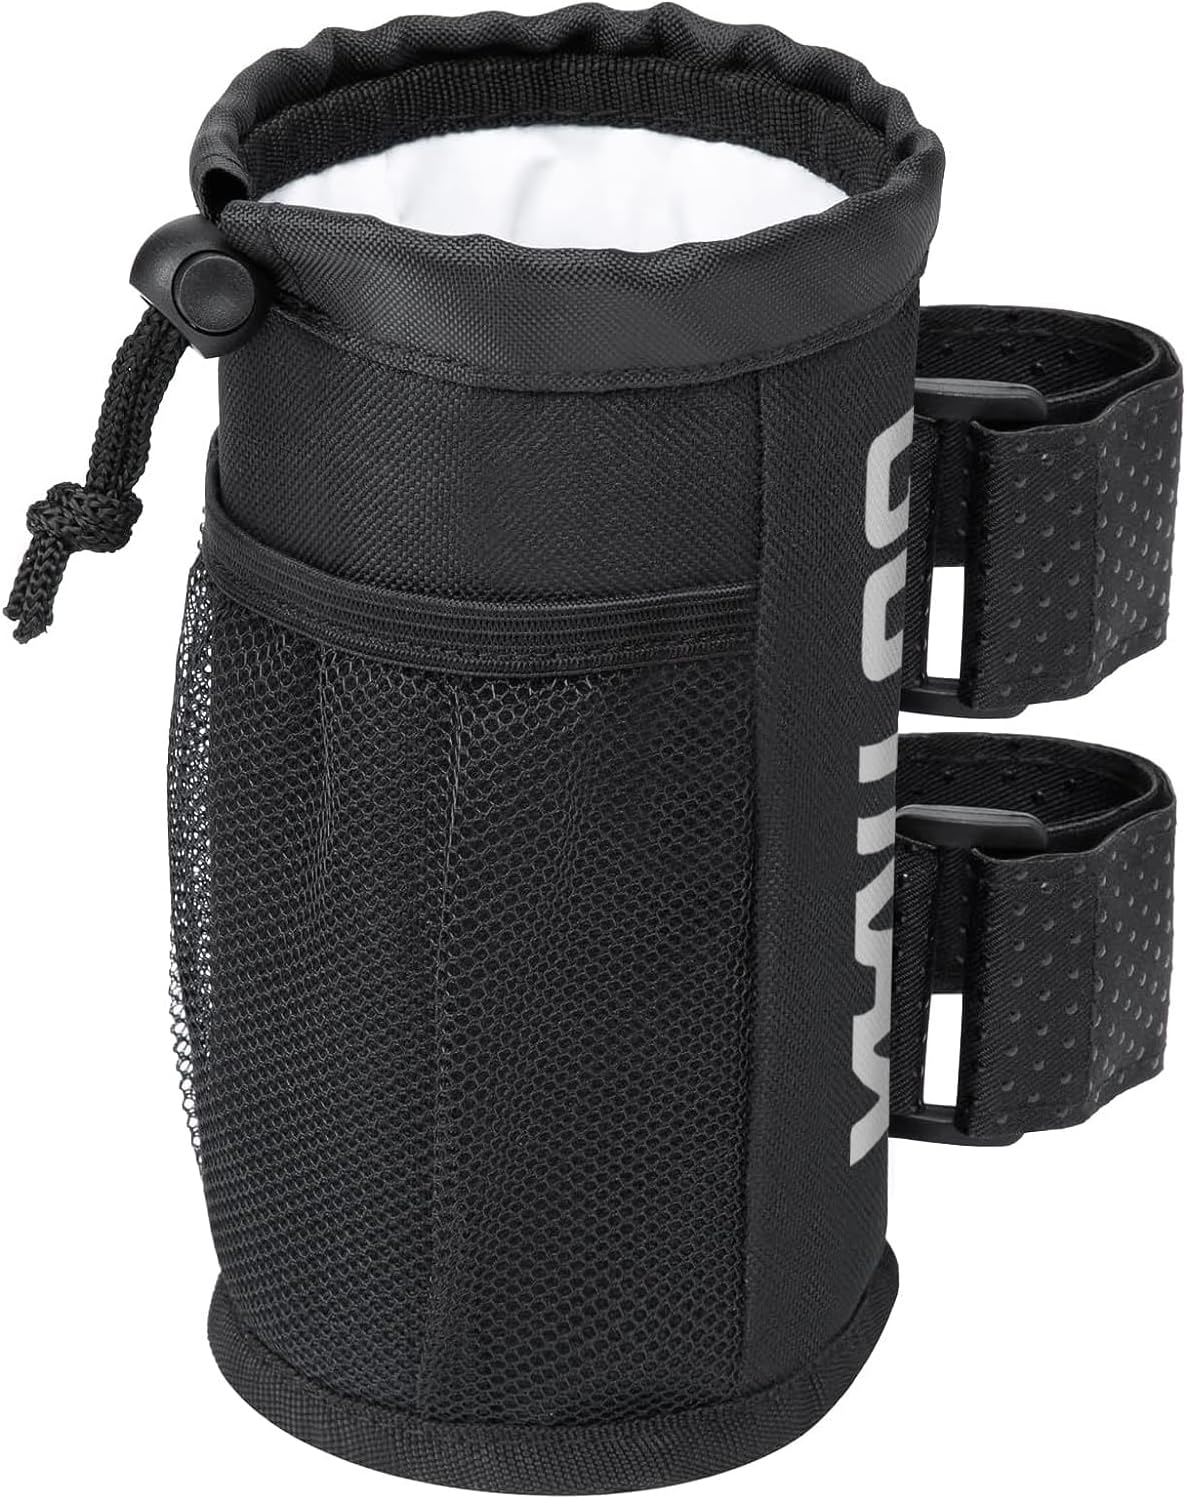
Figure 3.3: The Gotrax G4 Electric Scooter parked, emphasizing its durable all-aluminum alloy body and lightweight design.

Figure 3.4: A rider standing with the Gotrax G4 Electric Scooter on a bridge, illustrating its suitability for urban commuting.

Figure 3.5: Close-up of the Gotrax G4's smart display, showing mileage, battery capacity, and speed indicators.

Figure 3.6: Detail of the Gotrax G4's front wheel and wide deck, highlighting the pneumatic tire and spacious foot area.

Figure 3.7: Diagram illustrating the powerful 500W motor integrated into the Gotrax G4's rear wheel.

Figure 3.8: A user engaging the electric code lock and cable lock on the Gotrax G4 for enhanced security.

Figure 3.9: The Gotrax G4's integrated headlight and red tail light, crucial for visibility during night riding and braking.
3.2 Gotrax Cup Holder Components
Understand the features of your Gotrax cup holder.

Figure 3.10: The Gotrax cup holder, designed for secure attachment to scooter handlebars or frames.

Figure 3.11: The Gotrax cup holder attached to a scooter pole, demonstrating its secure strap system.

Figure 3.12: Diagram highlighting key features of the cup holder, including drawstring closure, mesh pocket, reinforcement stitching, waterproof fabric, and adjustable Velcro straps.
4. Opsætning
4.1 Scooter Assembly
Follow these steps to assemble your Gotrax G4 Electric Scooter:
- Fjern forsigtigt alle komponenter fra emballagen.
- Unfold the scooter frame and ensure the locking mechanism is securely engaged.
- Attach the handlebars to the stem, ensuring all cables are properly routed and not pinched. Tighten all screws firmly.
- Check tire pressure. The recommended pressure is typically indicated on the tire sidewall.
- Fully charge the battery before first use. Refer to the charging instructions in the Operating section.
4.2 Montering af kopholder
Install the cup holder using the following instructions:
- Identify a suitable location on your scooter's handlebar or frame (e.g., the vertical pole).
- Wrap the two sticky straps around the chosen pole.
- Securely fasten the Velcro straps to ensure the cup holder is tight and stable, preventing movement during rides.
- Ensure the cup holder does not interfere with steering or braking.
5. Betjeningsvejledning
5.1 Charging the Scooter
To charge your Gotrax G4 Electric Scooter:
- Find ladeporten på scooteren.
- Tilslut opladeren til scooterens opladningsport, og sæt derefter opladeren i en almindelig stikkontakt.
- The charging indicator light on the charger will change color (e.g., red to green) when charging is complete.
- Do not overcharge the battery. Disconnect the charger once fully charged.
- Charging time may vary. Refer to specifications for typical charging duration.
5.2 Starting and Riding
Follow these steps to operate your scooter:
- Tænd: Press and hold the power button on the smart display until the display illuminates.
- Kickstart: Placer den ene fod på dækket, og brug den anden fod til at skubbe fra jorden for at få indledende momentum.
- Fremskynde: Når motoren er i bevægelse, skal du forsigtigt trykke på gashåndtaget for at aktivere den.
- Hastighedstilstande: The G4 features multiple speed modes (e.g., 15.5 MPH and 20 MPH). Refer to the display controls to switch between modes.
- Bremsning: Use the hand brake lever to slow down and stop. The red tail light will flash during braking for increased safety.
- Forlygte: Activate the headlight for improved visibility, especially in low-light conditions.
- Fartpilot: The scooter may feature cruise control. Consult the display instructions for activation and deactivation.
- Sluk: Tryk på tænd/sluk-knappen, og hold den nede, indtil skærmen slukker.
5.3 Using the Electric Code Lock & Cable Lock
The G4 is equipped with an electronic code lock and a physical cable lock for enhanced security:
- Electronic Code Lock: Set your personal code through the scooter's smart display settings. This prevents unauthorized power-on.
- Kabellås: Use the integrated cable lock to secure your scooter to a fixed object, such as a bike rack.
- Always use both locks for maximum anti-theft protection.
6. Vedligeholdelse
Regelmæssig vedligeholdelse sikrer din scooters lange levetid og sikre drift.
- Rensning: Tør scooteren af med reklameamp klud. Brug ikke højtryksvand, og nedsænk ikke scooteren i vand.
- Dæk: Regularly check tire pressure and inspect for wear or damage. Replace pneumatic tires as needed.
- Bremser: Test brake functionality before each ride. Adjust or replace brake components if they feel loose or ineffective.
- Batteripleje: Store the scooter in a cool, dry place. If storing for extended periods, charge the battery to approximately 50-70% every 2-3 months to prevent deep discharge.
- Fastgørelsesmidler: Kontrollér regelmæssigt alle skruer og bolte for at sikre, at de er spændte.
- Kopholder: Clean the cup holder with a damp cloth. Ensure straps remain secure.
7. Fejlfinding
Dette afsnit omhandler almindelige problemer, du kan støde på.
| Problem | Mulig årsag | Løsning |
|---|---|---|
| Scooteren tænder ikke. | Low battery; Electronic code lock engaged; Loose connections. | Charge the battery; Enter correct code; Check all cable connections. |
| Reduceret rækkevidde eller hastighed. | Low tire pressure; Overloaded scooter; Battery degradation; Riding uphill. | Inflate tires to recommended pressure; Reduce load; Battery may need replacement over time; This is normal on inclines. |
| Bremserne føles svage. | Brake pads worn; Brake cable loose. | Inspect and replace brake pads; Adjust brake cable tension. |
| Usædvanlige lyde under drift. | Løse komponenter; Affald i hjul/motor. | Inspect and tighten all fasteners; Clear any obstructions from wheels and motor area. |
| Cup holder is not stable. | Straps not tight enough; Incorrect mounting location. | Re-tighten Velcro straps; Ensure mounting on a cylindrical bar no larger than 2.6" diameter. |
If the issue persists after attempting these solutions, please contact Gotrax customer support.
8. Specifikationer
Key technical specifications for the Gotrax G4 Electric Scooter:
- Modelnavn: G4
- Motoreffekt: 500W (Rated)
- Maks. Rækkevidde: Op til 25 km (under optimale forhold)
- Max hastighed: Up to 20 MPH (with 2 gear speeds: 15.5 MPH / 20 MPH)
- Dæk: 10 tommer pneumatiske dæk
- Rammemateriale: Aluminium eller stållegering
- Hjul materiale: Gummi
- Dækbredde: 6.7 tommer
- Sikkerhedsfunktioner: Electric Code Lock & Cable Lock
- Vise: Smart Display (shows mileage, battery capacity, speed, headlight status)
- Belysning: Front Headlight, Red Tail Light (flashes when braking)
- Affjedring: Forhjulsophæng
- Styrtype: Fast
- Scooter vægt: Cirka 37.31 lbs
- Anbefalede anvendelser: Urban commuting, recreational riding
- Kompatibilitet med kopholdere: Compatible with all Gotrax Electric Scooter/Bike models (except EBE4 and ENDURA), and other brands with a roll bar no larger than 2.6" diameter.
- Cup Holder Features: Mesh pocket, sticky straps for stability, easy installation, waterproof Oxford fabric.
9. Garanti og support
The Gotrax G4 Electric Scooter comes with a Begrænset garanti. For specific terms and conditions, please refer to the warranty card included with your product or visit the official Gotrax website. For technical support, troubleshooting assistance beyond this manual, or warranty claims, please contact Gotrax customer service through their official channels.
Gotrax Official Webwebsted: www.gotrax.com


