1. Introduktion
This manual provides detailed instructions for the setup, operation, and maintenance of your Pisichen 16-inch 1920x1200P Touch Panel Portable Monitor. Please read this manual thoroughly before using the product to ensure proper functionality and to prevent damage.

Image 1.1: The Pisichen 16-inch Portable Monitor, showcasing dens livlige skærm og slanke design.
2. Sikkerhedsoplysninger
- Udsæt ikke skærmen for regn eller fugt for at undgå elektrisk stød eller brandfare.
- Åbn ikke skærmen casing. Overlad al service til kvalificeret personale.
- Undgå at placere skærmen i direkte sollys eller i nærheden af varmekilder.
- Use only the power adapter and cables provided or approved by the manufacturer.
- Clean the screen with a soft, lint-free cloth. Do not use liquid cleaners or aerosol sprays directly on the screen.
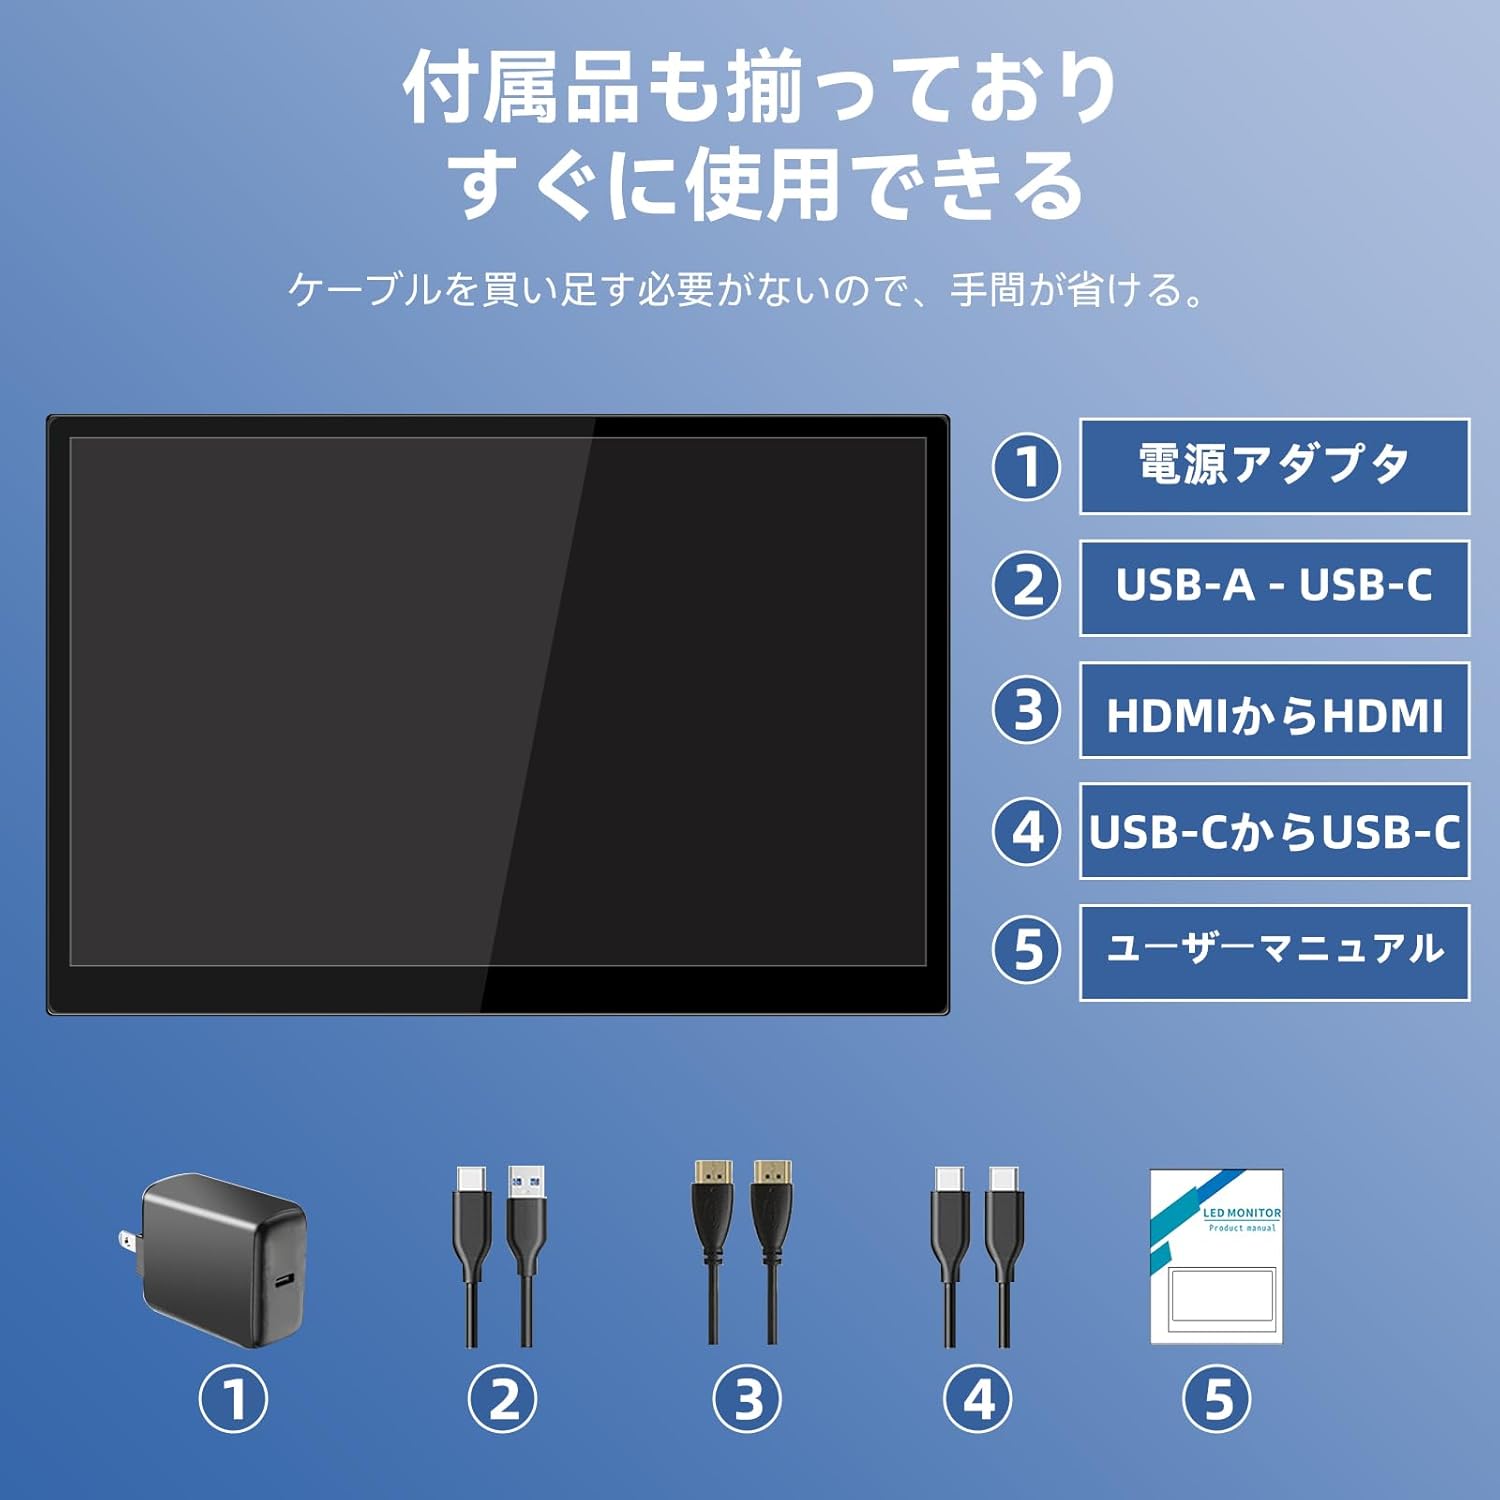
3. Pakkens indhold
Tjek venligst pakken for følgende varer:
- Pisichen 16-inch Portable Monitor
- Strømadapter
- USB-A til USB-C kabel
- HDMI til HDMI kabel
- USB-C til USB-C kabel
- Brugervejledning (dette dokument)

Image 3.1: All items included in the product package, ready for immediate use.
4. Produktet er slutview
The monitor features multiple ports for versatile connectivity and control buttons for easy navigation of settings.
4.1. Porte og knapper
Billede 4.1: Detaljeret view of the monitor's interfaces, including audio port, USB-C ports, HDMI port, brightness controls, menu/OK button, volume/down button, and USB-A port.
- 3.5 mm lydport: Til tilslutning af hovedtelefoner eller eksterne højttalere.
- USB-C Port 1 (Full-function): Supports power, video, and touch signal transmission.
- USB-C Port 2 (Full-function): Supports power, video, and touch signal transmission.
- HDMI-port: For video signal input from devices.
- Brightness Up / Power Button: Short press to increase brightness, long press to power on/off.
- Menu / OK Button: Press to open OSD menu, press again to confirm selection.
- Volume Down / Back Button: Short press to decrease volume, long press to go back in OSD menu.
- USB-A-port (OTG): Til tilslutning af mus eller tastatur.
5. Opsætning
Follow these steps to connect your portable monitor to various devices.
5.1. Single Cable Connection (USB-C)
For devices with a full-function USB-C port (supporting DisplayPort Alternate Mode and power delivery), a single USB-C to USB-C cable can transmit video, audio, touch signals, and power.
- Connect one end of the USB-C to USB-C cable to a full-function USB-C port on your device (e.g., laptop, smartphone).
- Connect the other end to either USB-C Port 1 or USB-C Port 2 on the monitor.
- The monitor should automatically power on and display the content. Touch functionality will also be active.
5.2. Dual Cable Connection (HDMI + USB-C for Power/Touch)
For devices with an HDMI output, or if your USB-C port does not support power delivery, you will need two cables.
- Connect one end of the HDMI to HDMI cable to your device's HDMI output.
- Connect the other end to the HDMI Port on the monitor.
- Connect the power adapter to one of the monitor's USB-C ports (Port 1 or Port 2) for power.
- For touch functionality, connect the USB-A end of the USB-A to USB-C cable to your device's USB-A port, and the USB-C end to the other available USB-C port on the monitor.

Image 5.1: Illustration of different connection methods: single USB-C cable for power, video, and touch, and dual cable setup using HDMI for video and USB-C for power and touch.
6. Betjeningsvejledning
6.1. Tænd/sluk
Long press the Brightness Up / Power Button (5) for approximately 3 seconds to power the monitor on or off.
6.2. On-Screen Display (OSD) menu
Press the Menu / OK Button (6) to access the OSD menu. Use the Brightness Up / Power Button (5) and Volume Down / Back Button (7) to navigate through options. Press the Menu / OK Button (6) to confirm selections. Long press the Volume Down / Back Button (7) to exit the menu.
6.3. Touch Functionality
The monitor supports 10-point capacitive multi-touch. Ensure a USB connection (via full-function USB-C or USB-A to USB-C cable) is established for touch input to work. The touch screen allows for intuitive interaction, including swiping, writing, and annotating.
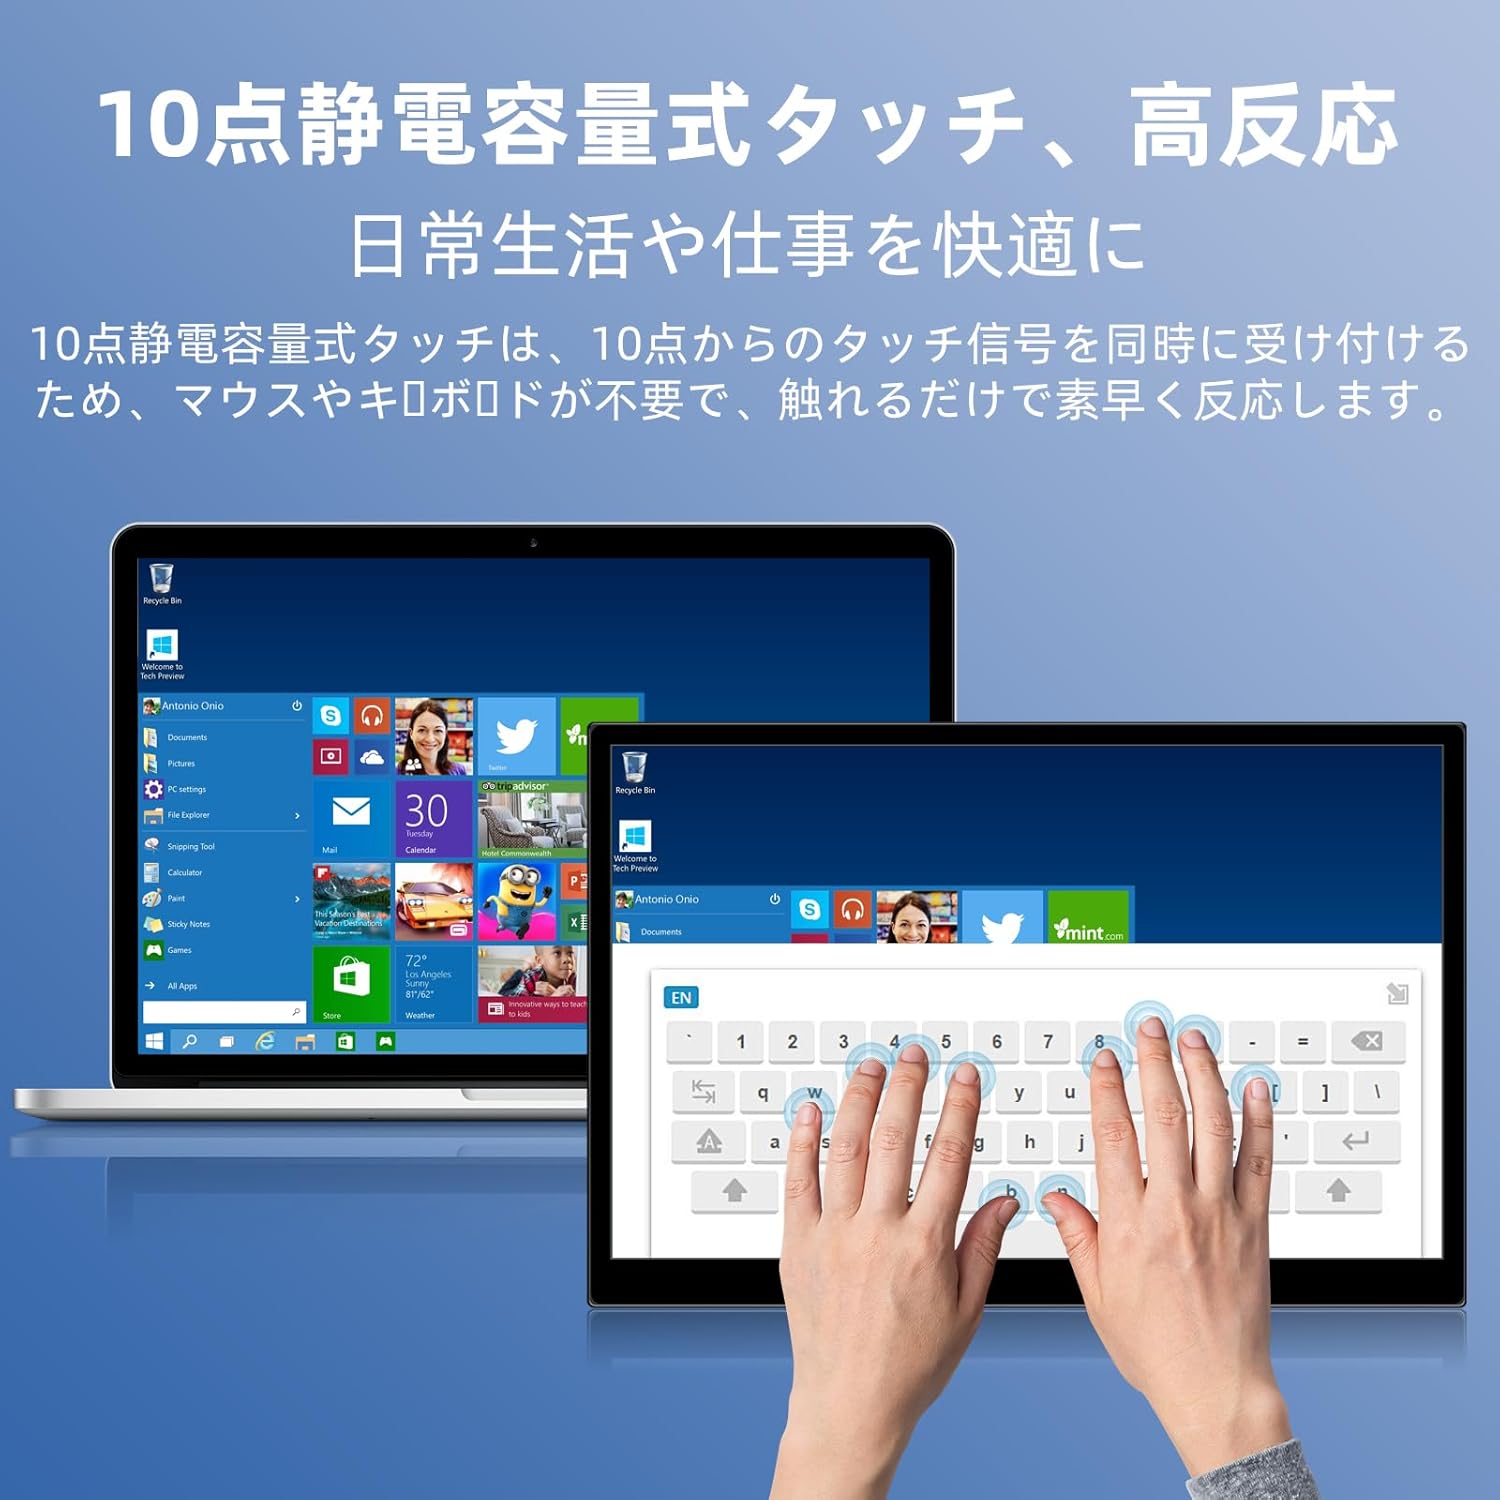
Image 6.1: A user demonstrating the responsive 10-point capacitive touch functionality on the portable monitor, enabling smooth interaction with on-screen content.
6.4. Visningstilstande
The monitor supports various display modes when connected to a computer:
- Duplikattilstand: Mirrors the content of your primary screen.
- Udvid tilstand: Udvider dit skrivebord og giver mere skærmplads til multitasking.
- Anden skærmtilstand: Bruger kun den bærbare skærm som display.
6.5. Screen Orientation
The monitor supports both landscape and portrait orientations. You can adjust the display settings on your connected device (e.g., Windows Display Settings, macOS Display Preferences) to change the orientation as needed for different tasks like document viewing or design work.
6.6. HDR Technology
The monitor features HDR (High Dynamic Range) mode, which provides deeper and more realistic colors for an enhanced visual experience. This setting can typically be toggled within the OSD menu or your device's display settings.

Billede 6.2: Eks.amples of the monitor's versatility, showing its use for entertainment, mobile productivity, and as an extended display for a home office.
7. Vedligeholdelse
- Rengøring af skærmen: Tør forsigtigt skærmen af med en blød, tør og fnugfri klud. Ved genstridige mærker, tør letampRengør kluden med vand eller et skærmrensemiddel (påfør det på kluden, ikke direkte på skærmen).
- Rengøring af Casing: Brug en blød, tør klud til at tørre skærmen afasing. Undgå slibende rengøringsmidler.
- Opbevaring: When not in use for extended periods, store the monitor in a cool, dry place, preferably in its original packaging or a protective sleeve.
- Kabelstyring: Undgå at bøje eller vride kabler for meget for at forhindre skader.
8. Fejlfinding
| Problem | Mulig årsag | Løsning |
|---|---|---|
| No display / "No Signal" message | Incorrect cable connection, insufficient power, incorrect input source. | Ensure cables are securely connected. Verify the device's USB-C port supports video output. Connect the power adapter if using HDMI or if USB-C power is insufficient. Check OSD menu for correct input source. |
| Touch-funktionen virker ikke | No USB connection for touch, driver issue (rare). | Ensure the USB-C cable is full-function or that the USB-A to USB-C cable is connected for touch data. Restart the monitor and connected device. |
| Skærmen flimrer | Unstable power, faulty cable, refresh rate mismatch. | Use the provided power adapter. Try a different cable. Adjust the refresh rate in your device's display settings. |
| Image is distorted or stretched | Incorrect aspect ratio settings. | Adjust the aspect ratio in the OSD menu or your device's display settings to match the monitor's native resolution (1920x1200). |

Image 8.1: Demonstrating the importance of correct aspect ratio settings to avoid image distortion.
9. Specifikationer
| Feature | Specifikation |
|---|---|
| Mærke | Pisichen |
| Modelnummer | 16QTHCM-1200P |
| Skærmstørrelse | 16 tommer |
| Opløsning | 1920 x 1200 pixels (FHD) |
| Paneltype | IPS |
| Viewi vinkel | 178° |
| Opdateringshastighed | 60 Hz |
| Kontrastforhold | 1000:1 |
| Lysstyrke | 300 cd/m² |
| Farveskala | 100 % sRGB |
| Farvedybde | 16.7 millioner farver |
| Touchskærm | 10-point Capacitive Touch |
| Forbindelse | 2x Full-function USB-C 3.1, 1x HDMI, 1x USB-A (OTG), 1x 3.5mm Audio Jack |
| HDR-understøttelse | Ja |
| VESA Mount kompatibel | Ja |
| Produktmål (B x H x D) | 350 x 230 x 10 mm |
| Vægt | 1.62 kg |
10. Garanti og support
For warranty information and technical support, please refer to the warranty card included in your product package or contact Pisichen customer service through their official website or the retailer where the product was purchased. Please have your model number (16QTHCM-1200P) and purchase details ready when contacting support.


