
1. Introduktion
Thank you for choosing the ieGeek ZY-C1 5MP Outdoor Solar Security Camera. This manual provides essential information for the proper installation, operation, and maintenance of your new security camera. Please read it thoroughly before use and retain it for future reference.
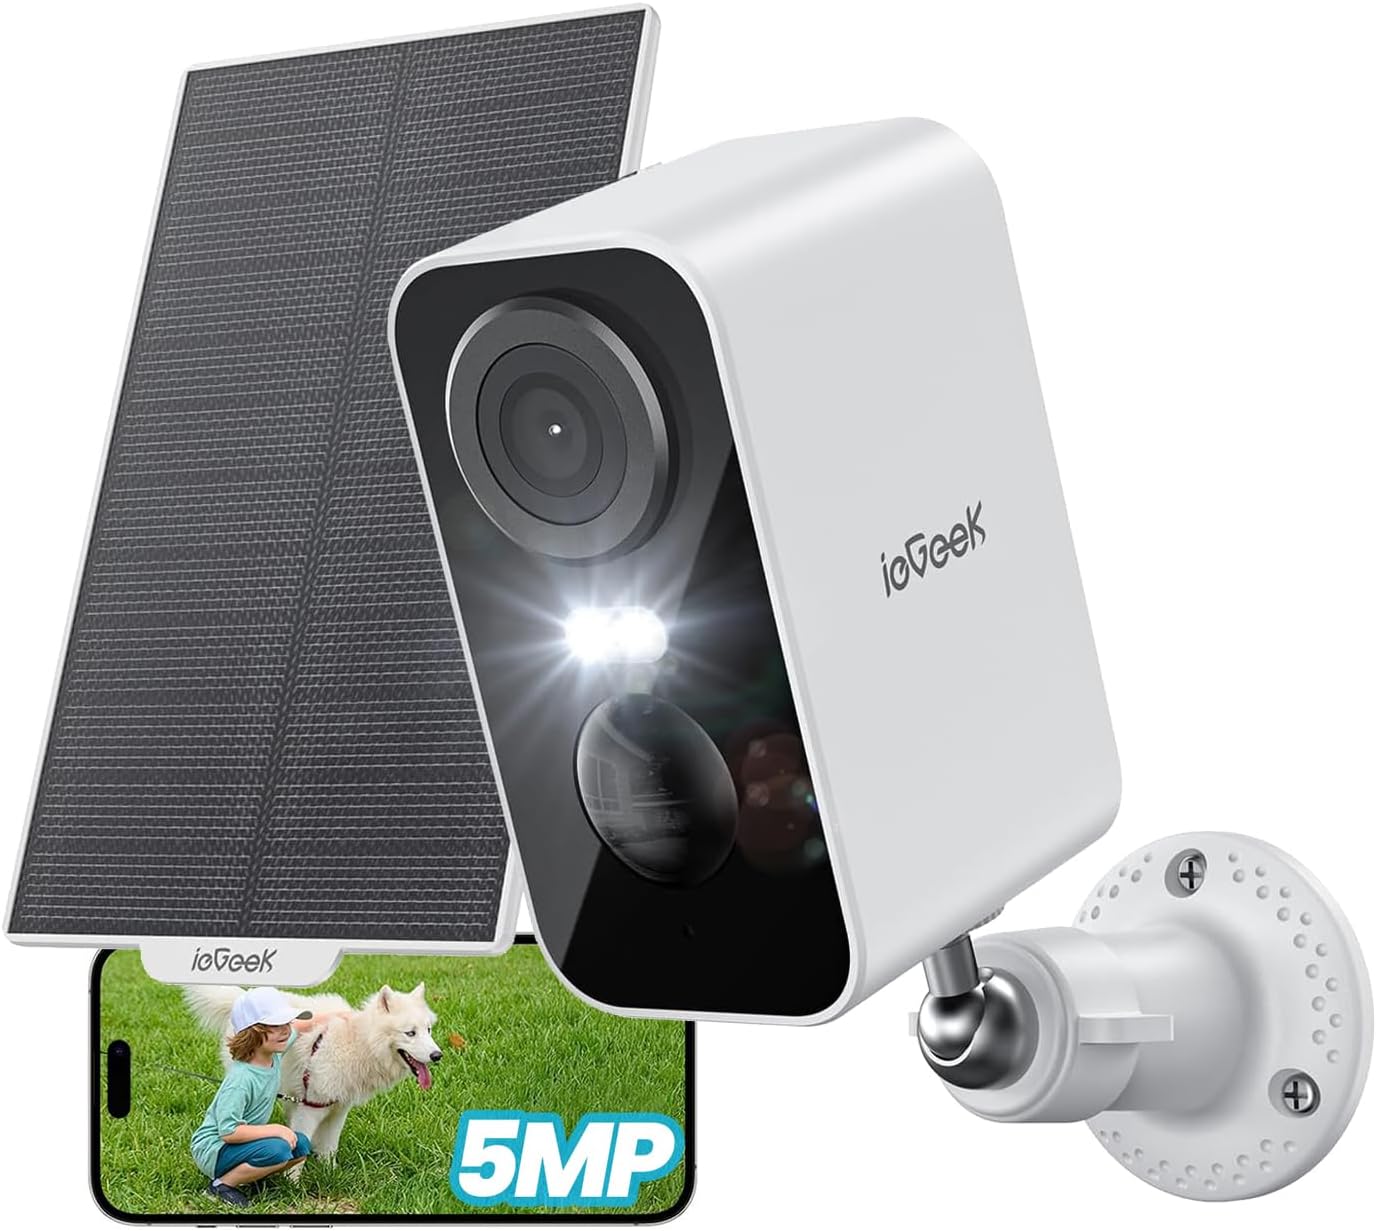
Figure 1: ieGeek ZY-C1 Camera with Solar Panel and App Interface
The ieGeek ZY-C1 is a high-resolution, wireless outdoor security camera designed for reliable surveillance. It features solar and USB charging, advanced motion detection, color night vision, two-way audio, and remote monitoring capabilities, ensuring comprehensive protection for your property.
2. Pakkens indhold
Kontroller venligst pakken for at sikre, at alle varer er til stede:
- Batteridrevet sikkerhedskamera x 1
- Solpanel x 1
- Mounting Stands x 2
- Skruer x 6
- Ankre x 6
- Strømkabel (USB) x 1
- Brugervejledning x 1

Figur 2: Inkluderede komponenter
3. Opsætning og installation
3.1 Opladning af kameraet
Before initial use, fully charge the camera's built-in 5200mAh battery using the provided USB power cable. This ensures optimal performance and a stable connection during setup.
3.2 Download af app og kontoregistrering
- Download the "ieGeek Cam" app from your smartphone's app store (iOS or Android).
- Opret en ny konto, eller log ind, hvis du allerede har en.
3.3 Tilslutning af kameraet til Wi-Fi
- Open the ieGeek Cam app and tap the "+" icon to add a new device.
- Follow the on-screen instructions to connect the camera to your 2.4GHz Wi-Fi network. Ensure your camera is within 15 meters of your Wi-Fi router for a stable connection.
- Scan the QR code displayed on your phone with the camera lens. You will hear a confirmation sound once connected.
3.4 Montering af kamera og solpanel
The camera and solar panel are designed for outdoor use and can be wall-mounted. Choose a location with optimal sunlight exposure for the solar panel and a clear view til kameraet.
- Mark the drilling points using the mounting stands as a template.
- Bor huller og isæt ankrene.
- Secure the mounting stands to the wall using the provided screws.
- Attach the camera and solar panel to their respective stands.
- Adjust the angle of the solar panel to maximize direct sunlight exposure.

Figur 3: Installation af kamera og solpanel
4. Betjeningsvejledning
4.1 Live View og fjernovervågning
Access real-time video feed from your camera via the ieGeek Cam app on your smartphone or tablet. You can monitor your property from anywhere with an internet connection.

Figure 4: Remote Monitoring via Smartphone
4.2 Bevægelsesdetektion og advarsler
The camera features a PIR motion sensor with an advanced human detection algorithm to minimize false alarms. When motion is detected, the camera will:
- Send push-notifikationer til din smartphone.
- Initiate recording (6-second free cloud storage for 1 week, or to an inserted SD card).
- Activate sound and light deterrence (siren alarm and spotlight) if configured.

Figure 5: Motion Detection and Instant Alarm
4.3 Nattesyn
The ZY-C1 camera provides clear surveillance even in low-light conditions with its color night vision capability. It utilizes both white and infrared LEDs.
- Infrarødt nattesyn: Provides black and white video in complete darkness, with a range of up to 15 meters.
- Farve Night Vision: When motion is detected, the white LEDs can illuminate the area, providing full-color video footage.

Figure 6: Color Night Vision in Action
4.4 Tovejslyd
Communicate with visitors or deter intruders using the built-in microphone and speaker. Simply tap the microphone icon in the app to speak.

Figure 7: Two-Way Audio Control
4.5 Lagringsmuligheder
Kameraet understøtter både lokal og cloud-lagring af optagede billeder.tage.
- MicroSD-kort: Insert a microSD card (up to 128GB, not included) for local storage. The camera supports automatic overwriting of old footage.
- Cloud Storage: Enjoy free 6-second cloud storage for 1 week. Paid cloud storage plans may also be available for extended storage.

Figur 8: Lokal og cloud-lagring
4.6 Alexa-integration
The ieGeek ZY-C1 is compatible with Alexa. You can use voice commands to view dit kamerafeed på kompatible Alexa-aktiverede enheder.
- Example command: "Alexa, show me the front door."

Figur 9: Alexa stemmestyring
5. Vedligeholdelse
5.1 Batteriopladning
The camera is equipped with a 5200mAh rechargeable battery. It can be charged via the integrated solar panel or the provided USB cable.
- Solopladning: Ensure the solar panel is positioned to receive at least 2 hours of direct sunlight daily for continuous operation. Adjust the panel's angle as needed.
- USB-opladning: If solar charging is insufficient (e.g., during prolonged cloudy weather or heavy snow), you can charge the camera using the USB cable and a standard 5V/2A USB power adapter (not included).

Figure 10: Solar Power and Internal Battery
5.2 Vejrbestandighed
The ieGeek ZY-C1 camera has an IP65 rating, making it waterproof and dustproof. It is designed to withstand various weather conditions, including rain, sun, and snow, with an operating temperature range of -10°C to 55°C.

Figur 11: IP65 vejrbestandigt design
5.3 Rengøring
Rengør kameralinsen og solpanelet regelmæssigt med en blød kludamp klud for at sikre klar billedkvalitet og effektiv solopladning. Brug ikke skrappe kemikalier eller slibende materialer.
6. Fejlfinding
- Kameraet opretter ikke forbindelse til Wi-Fi: Ensure the camera is within 15 meters of your 2.4GHz Wi-Fi router. Check that your Wi-Fi password is correct.
- Hyppige falske alarmer: Adjust the motion detection sensitivity to "Medium" in the app settings. Ensure the detection area is configured to avoid irrelevant zones.
- Weak detection sensitivity: Increase the motion detection sensitivity in the app settings.
- Camera not detecting vehicles: If you want to detect vehicles, ensure that human detection is turned OFF in the app settings, as the human detection algorithm may filter out non-human motion.
- Batteriet aflades hurtigt: Ensure the solar panel receives adequate direct sunlight daily. Reduce the frequency of motion detection events or live view adgang hvis muligt.
- Dårlig billedkvalitet: Rengør kameralinsen. Sørg for, at der ikke er nogen forhindringer i kameraets synsfelt. view. Check your Wi-Fi signal strength.
7. Specifikationer
| Feature | Specifikation |
|---|---|
| Model | ZY-C1 |
| Farve | Hvid |
| Video opløsning | 5 MP (2560P) |
| Billedhastighed | 15 fps |
| Night Vision Range | 15 meter |
| Forbindelse | 2.4 GHz Wi-Fi |
| Strømkilde | Solar, Battery Powered (5200mAh) |
| Materiale | ABS, PC |
| Vandmodstand | IP65 |
| Operation Voltage | 3.7 volt |
| Wattage | 5 W |
| Produktdimensioner | 47 x 54 x 90 mm |
| Vægt | 320 g |
| Opbevaringsmuligheder | MicroSD (op til 128 GB), Cloud-lagring |
| Særlige funktioner | Video recording, automatic overwrite, 5MP image sensor, human detection, two-way audio, IP65 weather resistance, 15M night vision range, night vision, siren alarm, Alexa compatible |
8. Garanti og support
8.1 Garantioplysninger
The ieGeek ZY-C1 security camera comes with a 24 måneders kvalitetsgaranti from the date of purchase. This warranty covers manufacturing defects and ensures the product meets its specified quality standards. Please retain your proof of purchase for warranty claims.
8.2 Teknisk support
For any technical assistance, troubleshooting, or inquiries regarding your ieGeek ZY-C1 camera, please contact ieGeek customer support. Our team is dedicated to providing the best support to ensure your satisfaction.
- Refer to the ieGeek official webwebsted for kontaktoplysninger.
- Check the ieGeek Cam app for in-app support options.

Figure 12: Support Options


