1. Introduktion og overview
The Rebel Active inflatable Stand-Up Paddleboard (SUP) is a high-quality and durable option designed for water sports enthusiasts. It is engineered for high stability and versatility, making it suitable for various water conditions and user skill levels.
This inflatable SUP is designed for easy inflation and deflation, ensuring convenient transport and storage. It comes as a complete set, including essential accessories to get you started and maintain your board.
The REBEL ACTIVE SUP features a non-slip deck pad, providing a secure and comfortable standing surface. It also includes a comfortable carrying handle for easy portability when inflated.
Constructed from durable PVC material, the board is both lightweight and highly resistant to wear and tear. When fully inflated, it offers excellent rigidity, mimicking the performance of a hard board. The slightly raised nose of the board enhances maneuverability and contributes to better speed on the water.
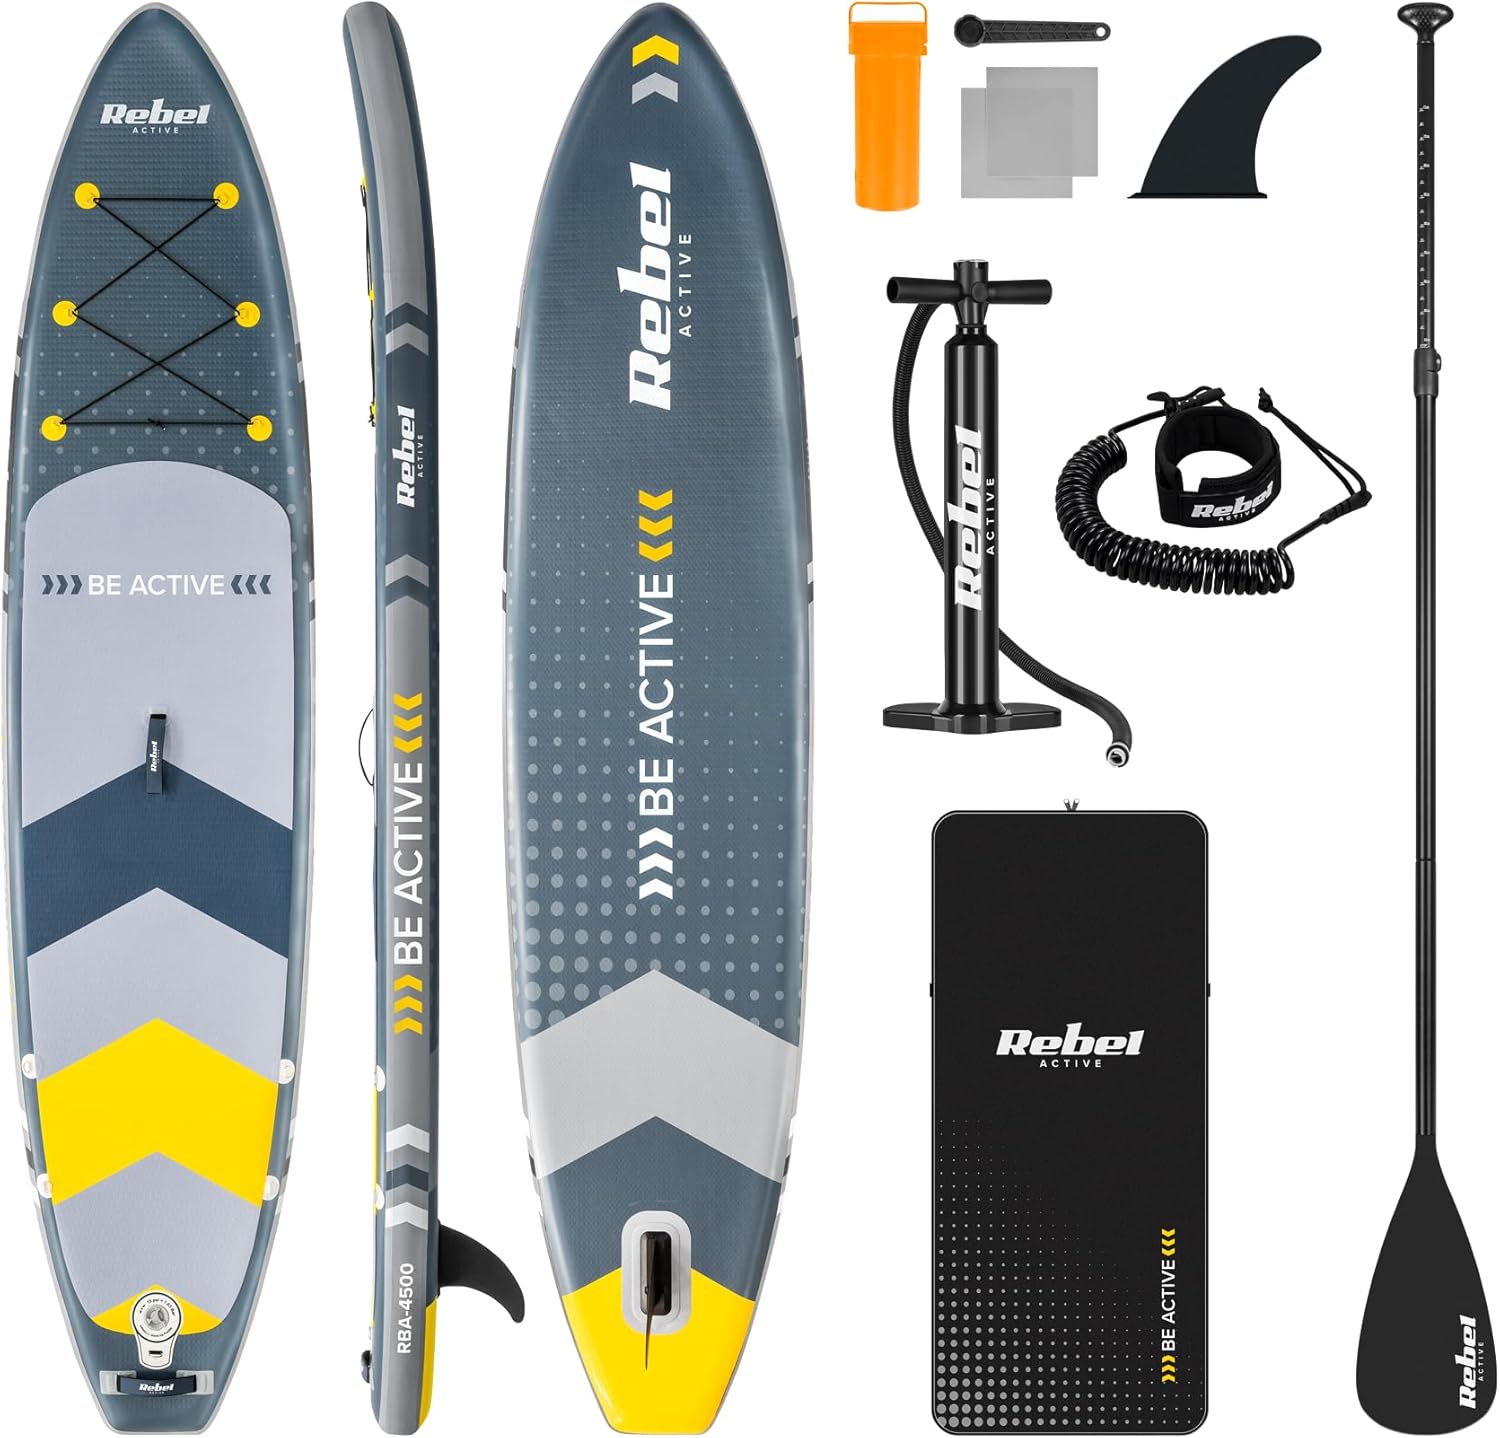
Image 1.1: The Rebel Active RBA-4500 inflatable SUP board shown with all included accessories: paddle, pump, leash, fin, repair kit, and travel backpack.
2. Opsætningsvejledning
2.1 Udpakning og komponentkontrol
Carefully unpack all items from the travel backpack. Ensure all components listed below are present:
- 1x Inflatable SUP Board
- 1x Adjustable Paddle
- 1x håndpumpe
- 1x Removable Fin
- 1x Coiled Leash
- 1x Travel Backpack
- 1x reparationssæt
2.2 Board Inflation
- Unroll the SUP board on a flat, clean surface, free from sharp objects.
- Locate the air valve, typically at the tail of the board. Remove the valve cap.
- Attach the hose of the hand pump to the valve. Ensure it is securely twisted into place to prevent air leakage.
- Begin pumping air into the board. The recommended inflation pressure is 15 PSI (Pounds per Square Inch). The pump's integrated pressure gauge will indicate the current pressure.
- Once the desired pressure is reached, quickly detach the pump hose and replace the valve cap firmly to prevent air from escaping.

Image 2.1: The included hand pump used for inflating the SUP board to the recommended pressure.
2.3 Fin Installation
- With the board inflated, locate the fin box at the bottom rear of the board.
- Slide the fin into the fin box track.
- Secure the fin in place using the provided clip or pin mechanism. Ensure it clicks firmly into position.
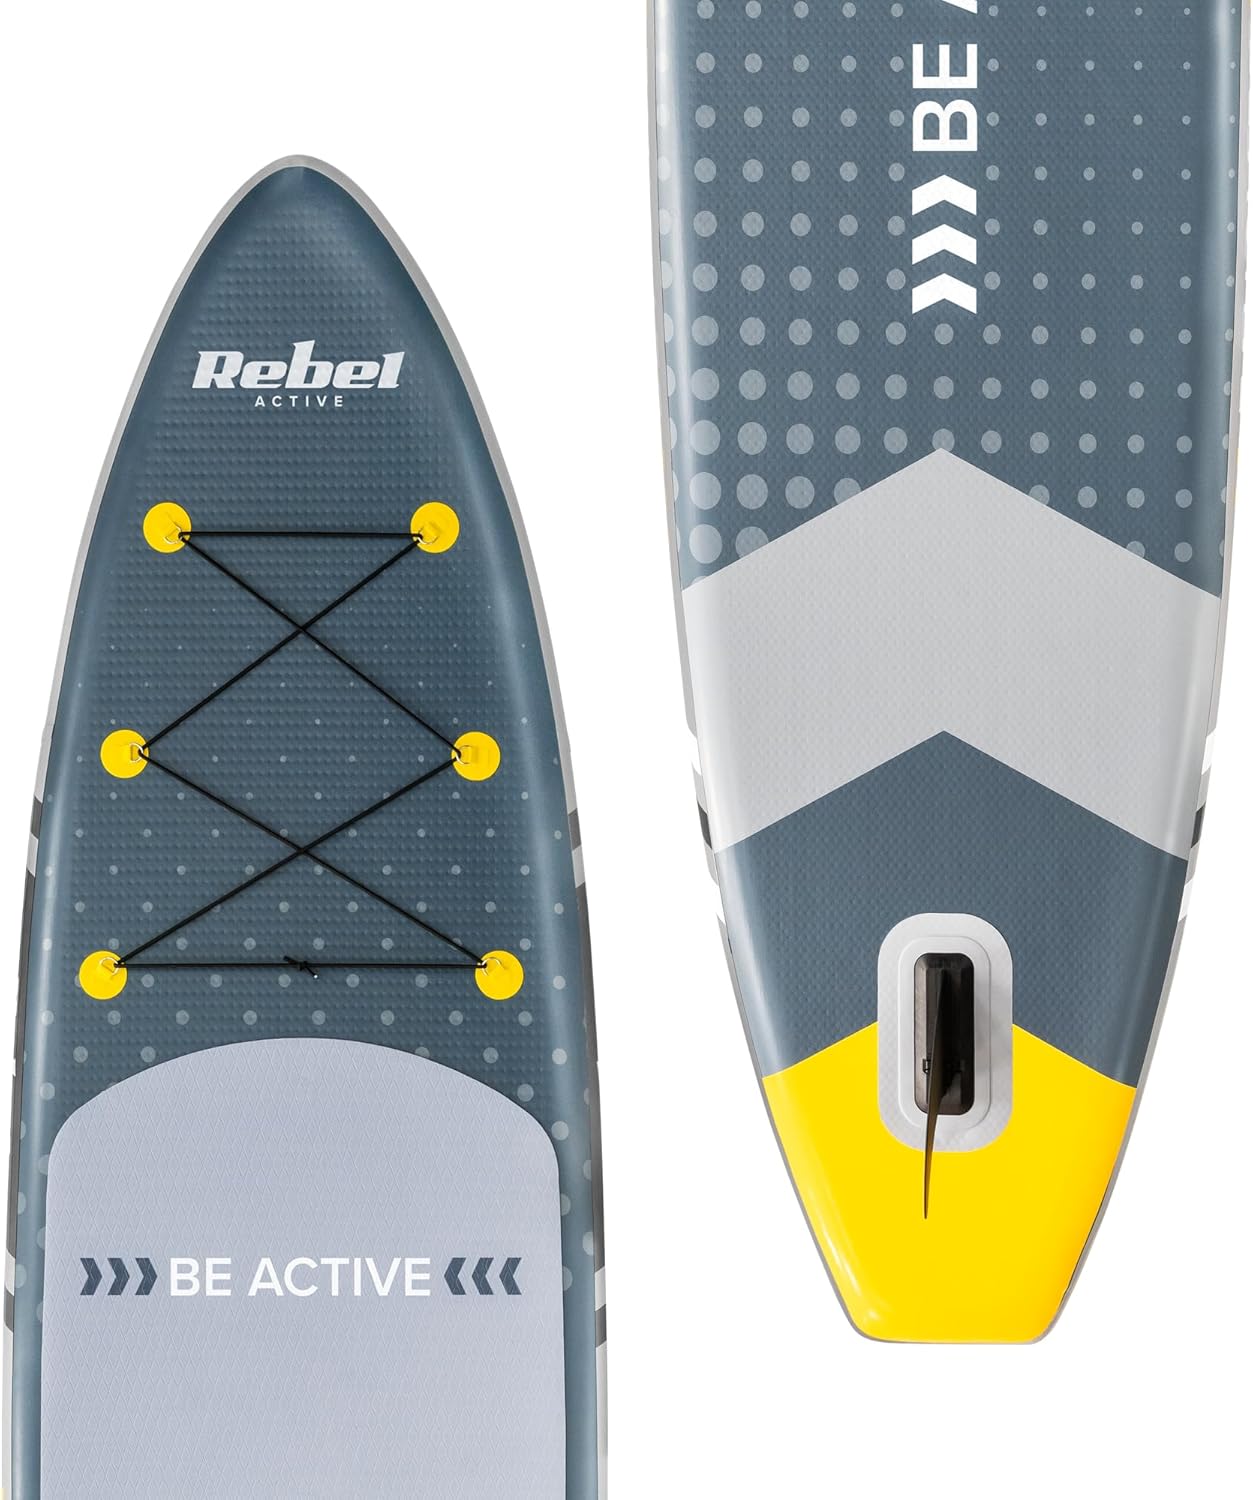
Image 2.2: The rear of the SUP board, illustrating the fin box where the removable fin is installed.
2.4 Paddle Assembly
- Assemble the paddle by connecting the shaft sections. Ensure the locking pins or clamps engage securely.
- Adjust the paddle length to your height. A common guideline is that the paddle handle should reach your wrist when your arm is raised above your head. Secure the adjustable section with the quick-release clamp.

Image 2.3: The adjustable paddle, demonstrating its ability to extend for different user heights.
2.5 Leash Attachment
- Attach one end of the coiled leash to the D-ring located at the tail of the SUP board.
- Secure the ankle cuff of the leash around your ankle. This safety device keeps the board tethered to you if you fall off.

Image 2.4: The coiled leash, an essential safety accessory for keeping the board close to the user.
3. Betjeningsvejledning
3.1 Launching the Board
Carry the inflated board to the water's edge using the central carrying handle. Gently push the board into the water until it floats freely. Step onto the board, initially kneeling for stability, then slowly stand up once comfortable.
3.2 Paddling Techniques
Hold the paddle with one hand on the top handle and the other on the shaft. The blade should be angled away from you. Use core muscles to propel the board forward, alternating sides for straight tracking. Practice turning by sweeping the paddle in a wider arc on one side.
3.3 Sikkerhedsretningslinjer
- Always wear a personal flotation device (PFD) when using the SUP.
- Attach the leash to your ankle to prevent the board from drifting away if you fall.
- Check weather conditions and water currents before heading out. Avoid strong winds and rough waters.
- Be aware of your surroundings, including other watercraft and swimmers.
- Overskrid ikke den anbefalede maksimale vægt på 154 kg (340 lbs).
- Inform someone of your paddling plans and estimated return time.

Image 3.1: A person actively paddling on the Rebel Active SUP board, demonstrating typical use on the water.
4. Vedligeholdelse
4.1 Cleaning and Drying
After each use, especially in saltwater, rinse the board thoroughly with fresh water. Use a mild soap if necessary to remove dirt or grime. Ensure the board is completely dry before deflating and storing to prevent mold and mildew.
4.2 Deflation and Storage
- Remove the fin and open the air valve. Press the valve stem down to release the air.
- Once most of the air has escaped, begin rolling the board tightly from the nose towards the tail, pushing out any remaining air.
- Place the deflated and rolled board, along with all accessories, into the travel backpack.
- Store the backpack in a cool, dry place, away from direct sunlight and extreme temperatures.
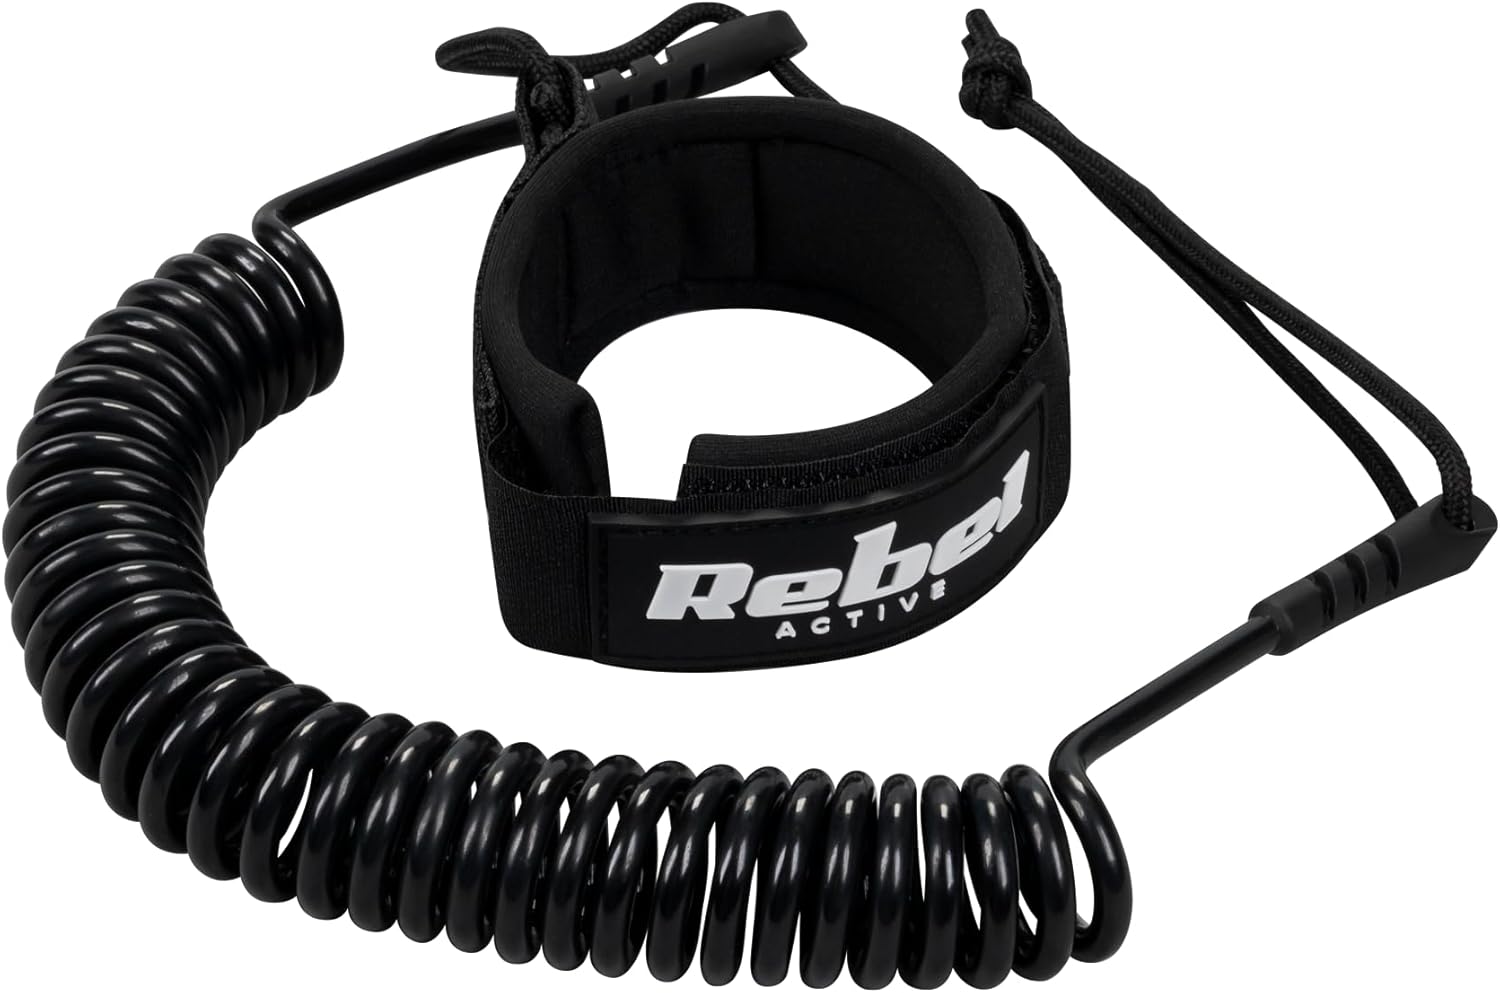
Image 4.1: The travel backpack, designed for convenient storage and transport of the deflated SUP and its accessories.
4.3 Repair Kit Usage
The included repair kit contains patches and glue for minor punctures. In case of a small leak:
- Locate the puncture. Clean and dry the area around the hole.
- Cut a patch slightly larger than the puncture, ensuring rounded corners.
- Apply a thin, even layer of glue to both the patch and the damaged area.
- Wait a few minutes for the glue to become tacky, then firmly press the patch onto the puncture.
- Apply pressure for several hours (e.g., by placing a heavy object on top) and allow 24 hours for the glue to fully cure before reinflating.

Image 4.2: The repair kit, containing patches and tools for minor repairs to the inflatable board.
5. Fejlfinding
5.1 Board Not Holding Air
- Valve Leak: Ensure the valve cap is tightly closed. Check if the valve stem is in the 'up' position for inflation and 'down' for deflation. If the valve itself is leaking, use the valve wrench from the repair kit to tighten it.
- Punktering: Inspect the board for any visible holes or tears. Use soapy water to spray the board; bubbles will indicate a leak. Repair small punctures using the provided repair kit (refer to Section 4.3). For larger damage, professional repair may be required.
5.2 Vanskeligheder med oppustning
- Pumpeforbindelse: Ensure the pump hose is securely twisted onto the board's valve. A loose connection will result in air escaping.
- Ventilposition: Make sure the valve stem is in the 'up' position (closed) before you start pumping. If it's in the 'down' position, air will escape as soon as you remove the pump.
- Pumpefejl: Check the pump for any blockages or damage to the hose or seals.
5.3 Board Drifts Sideways
- Fin Not Installed: Ensure the main fin is properly installed and secured in the fin box. The fin is crucial for tracking straight.
- Under-inflated: An under-inflated board will flex and not track efficiently. Ensure the board is inflated to the recommended 15 PSI.
- Padleteknik: Review your paddling technique. Ensure you are paddling evenly on both sides and keeping the paddle stroke close to the board.
6. Specifikationer
| Feature | Specifikation |
|---|---|
| Modelnummer | RBA-4500 |
| Mærke | Rebel |
| Produktdimensioner | 350 x 81 x 15 cm (approx. 11.5 ft x 32 in x 6 in) |
| Varens vægt | 8.5 kilo (18.7 lbs) |
| Maksimal vægtanbefaling | 154 kilo (340 lbs) |
| Maksimalt tryk | 15 pund per kvadrattomme (PSI) |
| Materiale Type | Ethylenvinylacetat (EVA) |
| Farve | Grå |
| Inkluderede komponenter | 1x Fin, Leash, Paddle, Hand Pump, Travel Backpack, Repair Kit |
7. Garanti og support
Specific warranty details for the Rebel Active RBA-4500 SUP board are not provided within this manual. For information regarding warranty coverage, claims, or technical support, please refer to the product packaging or contact Rebel customer service directly through their official webwebstedet eller den forhandler, hvorfra produktet blev købt.
Always retain your proof of purchase for any warranty-related inquiries.


