AquilaPro Laser Measuring Tool
Brugermanual
Model: KL02060
1. Introduktion
This manual provides comprehensive instructions for the safe and effective use of your AquilaPro Laser Measuring Tool. Designed for precision and ease of use, this compact device offers various measurement modes for both professional and home applications. Please read this manual thoroughly before operation and retain it for future reference.

Figure 1: AquilaPro Laser Measuring Tool
2. Sikkerhedsoplysninger
ADVARSEL: Laserstråling
- Stir ikke direkte ind i laserstrålen.
- Undgå direkte øjeneksponering for laserstrålen.
- Ret ikke laseren mod mennesker eller dyr.
- Brug kun som beskrevet i denne manual.
- Opbevares utilgængeligt for børn.
- Forsøg ikke at adskille eller modificere enheden.
This device emits Class 2 laser radiation. Maximum output power is less than 1mW at 635nm.
3. Produktet er slutview
The AquilaPro Laser Measuring Tool features a compact metal fuselage with an HD display for clear readings. Familiarize yourself with the device's components and controls:

Figur 2: Enhedens komponenter og kontroller
- Skærm: Displays measurements, modes, and battery status.
- UNIT/Laser Button: Activates laser for measurement, short press for single measurement, long press to switch units.
- +/- knap: For addition and subtraction measurements.
- PRESET/History Button: Accesses measurement history and preset values.
- FUNC/Reference Button: Cycles through measurement functions (Area, Volume, Pythagorean, etc.) and switches front/rear reference point.
- Power/Backlight Button: Long press to power on/off, short press to toggle backlight.
4. Opsætning
4.1 Opladning af enheden
The device is equipped with a rechargeable lithium-ion battery. Before first use, fully charge the device using the provided USB-C cable.
- Connect the USB-C cable to the charging port at the bottom of the device.
- Tilslut den anden ende af kablet til en USB-strømadapter (medfølger ikke) eller en USB-port på computeren.
- Batteriindikatoren på skærmen viser opladningsstatus.
- A full charge provides approximately 10,000 single measurements.

Figur 3: USB-C-opladningsport
4.2 Tænd/sluk
- Tænd: Tryk længe på Magt knap () i 2 sekunder.
- Sluk: Tryk længe på Magt button for 2 seconds. The device will also automatically power off after 45 seconds of inactivity to conserve battery.
5. Grundlæggende betjening
5.1 Enkeltmåling
- Tænd for enheden.
- Ret laserstrålen mod måloverfladen.
- Tryk kort på UNIT/Laser button. The measurement will be displayed on the screen.

Figure 4: Taking a Field Measurement
5.2 Enhedsskift
The device supports switching between meters (m), inches (in), and feet (ft).
- Tryk længe på UNIT/Laser button to cycle through the units.
- Slip knappen, når den ønskede enhed vises.

Figure 5: Unit Conversion Display
5.3 Reference Point Switching (Datum)
You can set the measurement reference point to either the front or rear of the device.
- Tryk kort på FUNC/Reference button to toggle between front and rear datum.
- The display will indicate the active reference point.

Figure 6: Front or Rear Measuring Reference
6. Avancerede måletilstande
The AquilaPro Laser Measuring Tool offers several advanced modes for complex measurements:

Figur 7: Flere måletilstande
- Kontinuerlig måling: Provides real-time distance updates as you move the device. Useful for scanning and finding minimum/maximum distances.
- Områdemåling: Measures length and width to calculate the area of a surface.
- Volumenmåling: Measures length, width, and height to calculate the volume of a space.
- Pythagoras mål: Calculates indirect distances using the Pythagorean theorem (e.g., height of a building).
- Addition/Subtraktion: Allows you to add or subtract measurements.
To select an advanced mode, short press the FUNC/Reference button repeatedly until the desired mode icon appears on the display. Follow the on-screen prompts to perform the measurements for each mode.
6.1 Addition/Subtraction Function
This function allows you to add or subtract consecutive measurements.
- Efter at have foretaget en måling, tryk på +/- button to enter addition or subtraction mode.
- Take the next measurement. The device will automatically add or subtract it from the previous value.
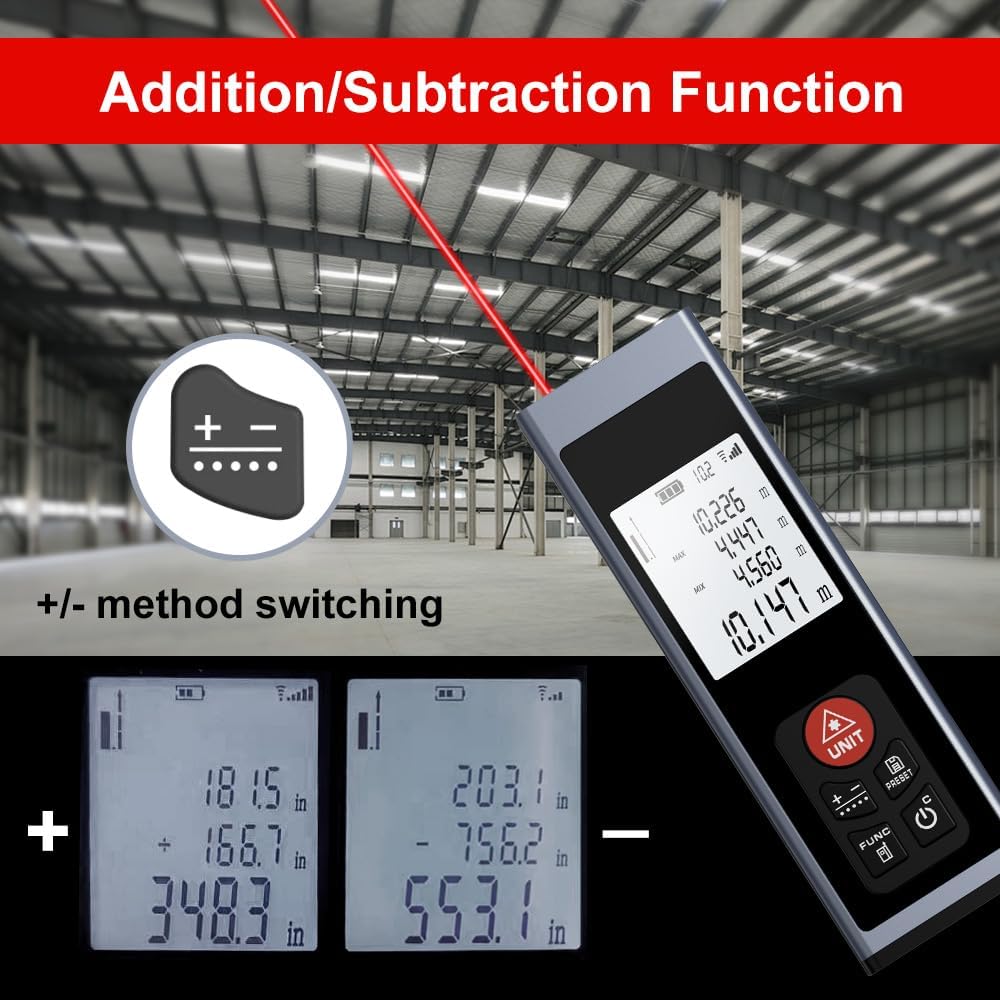
Figure 8: Addition/Subtraction Function
6.2 Memory Storage Function
Enheden kan gemme op til 28 sæt måledata.
- Til view stored data, short press the PRESET/History knap.
- Use the arrow buttons (if available, or cycle through with PRESET) to navigate through the stored measurements.

Figure 9: Memory Storage Display
7. Officiel produktvideo
Watch this official video from the seller for a quick introduction to the AquilaPro Laser Measuring Tool.
Video 1: AquilaPro Laser Measuring Tool Introduction (Source: AQUILA OPTICS)
8. Vedligeholdelse
- Rensning: Brug en blød, damp klud til at rengøre enheden. Brug ikke slibende rengøringsmidler eller opløsningsmidler.
- Opbevaring: Opbevar enheden et køligt, tørt sted, væk fra direkte sollys og ekstreme temperaturer.
- Batteripleje: If storing for extended periods, charge the battery every 3 months to prolong its lifespan.
- Vandtæthed: The device is rated IP54, meaning it is protected against dust and splashing water. Do not immerse in water.
9. Fejlfinding
| Problem | Mulig årsag | Løsning |
|---|---|---|
| Enheden tændes ikke. | Low battery; Device is off. | Charge the battery; Long press the Power button. |
| Upræcise aflæsninger. | Unstable surface; Obstruction in laser path; Incorrect reference point. | Ensure stable surface; Clear laser path; Check and adjust reference point (front/rear datum). |
| Skærmen er svag eller ulæselig. | Backlight off; Low battery. | Short press Power button to toggle backlight; Charge the battery. |
| Laseren er ikke synlig. | Bright ambient light; Laser not activated. | Use in lower light conditions; Short press UNIT/Laser button. |
10. Specifikationer
| Feature | Detalje |
|---|---|
| Mærke | AquilaPro |
| Modelnavn | KL02060 |
| Måleområde | 197 fod (60 m) |
| Nøjagtighed | ±0.078 inch (2mm) |
| Materiale | Aluminium |
| Farve | Sort |
| Produktmål (LxBxH) | 1.1 cm L x 0.6 cm B x 3.4 cm H |
| Batteritype | Genopladelig lithium-ion |
| International Protection Rating | IP54 (støv- og stænkbestandig) |
| Inkluderede komponenter | Snor |
11. Garanti og support
This AquilaPro Laser Measuring Tool comes with a 1 års producentgaranti fra købsdatoen. Gem venligst din købsbevis i tilfælde af garantikrav.
For technical support or warranty inquiries, please contact AquilaPro customer service through the retailer's platform or visit the official AquilaPro store on Amazon: AquilaPro Amazon Store.