1. Introduktion
This manual provides essential instructions for the safe and efficient operation of your GROVIEW Miniprojektor Bluetooth, Model Groview-B2D-US. Please read this manual thoroughly before using the projector and retain it for future reference.
Den Groview-B2D-US is a compact and portable projector featuring electric focus, Bluetooth 5.1 connectivity, and a fully sealed optical engine designed for reduced noise and extended lifespan. It supports Full HD 1080P input with a native 720P resolution and offers a digital zoom function.
2. Sikkerhedsoplysninger
- Se ikke direkte ind i projektorlinsen, når lamp er tændt.
- Sørg for tilstrækkelig ventilation omkring projektoren for at forhindre overophedning. Bloker ikke ventilationsåbningerne.
- Brug kun den strømadapter, der følger med projektoren.
- Udsæt ikke projektoren for regn, fugt eller ekstreme temperaturer.
- Undgå at placere projektoren på ustabile overflader.
- Forsøg ikke selv at skille projektoren ad eller reparere den. Kontakt kvalificeret servicepersonale for at få hjælp.
- Hold projektoren væk fra børn og kæledyr.
3. Hvad er der i æsken
Kontroller, at alle varer er til stede i emballagen:
- 1 x Groview Electric Focus Projector
- 1 x HDMI kabel
- 1 x strømkabel
- 1 x fjernbetjening
- 1 x Brugermanual (dette dokument)
4. Produktet er slutview
4.1 Projektorkomponenter
The following image illustrates the main components of the Groview Mini Projector.

4.2 Input/output porte
The rear panel of the projector features various ports for connecting external devices.
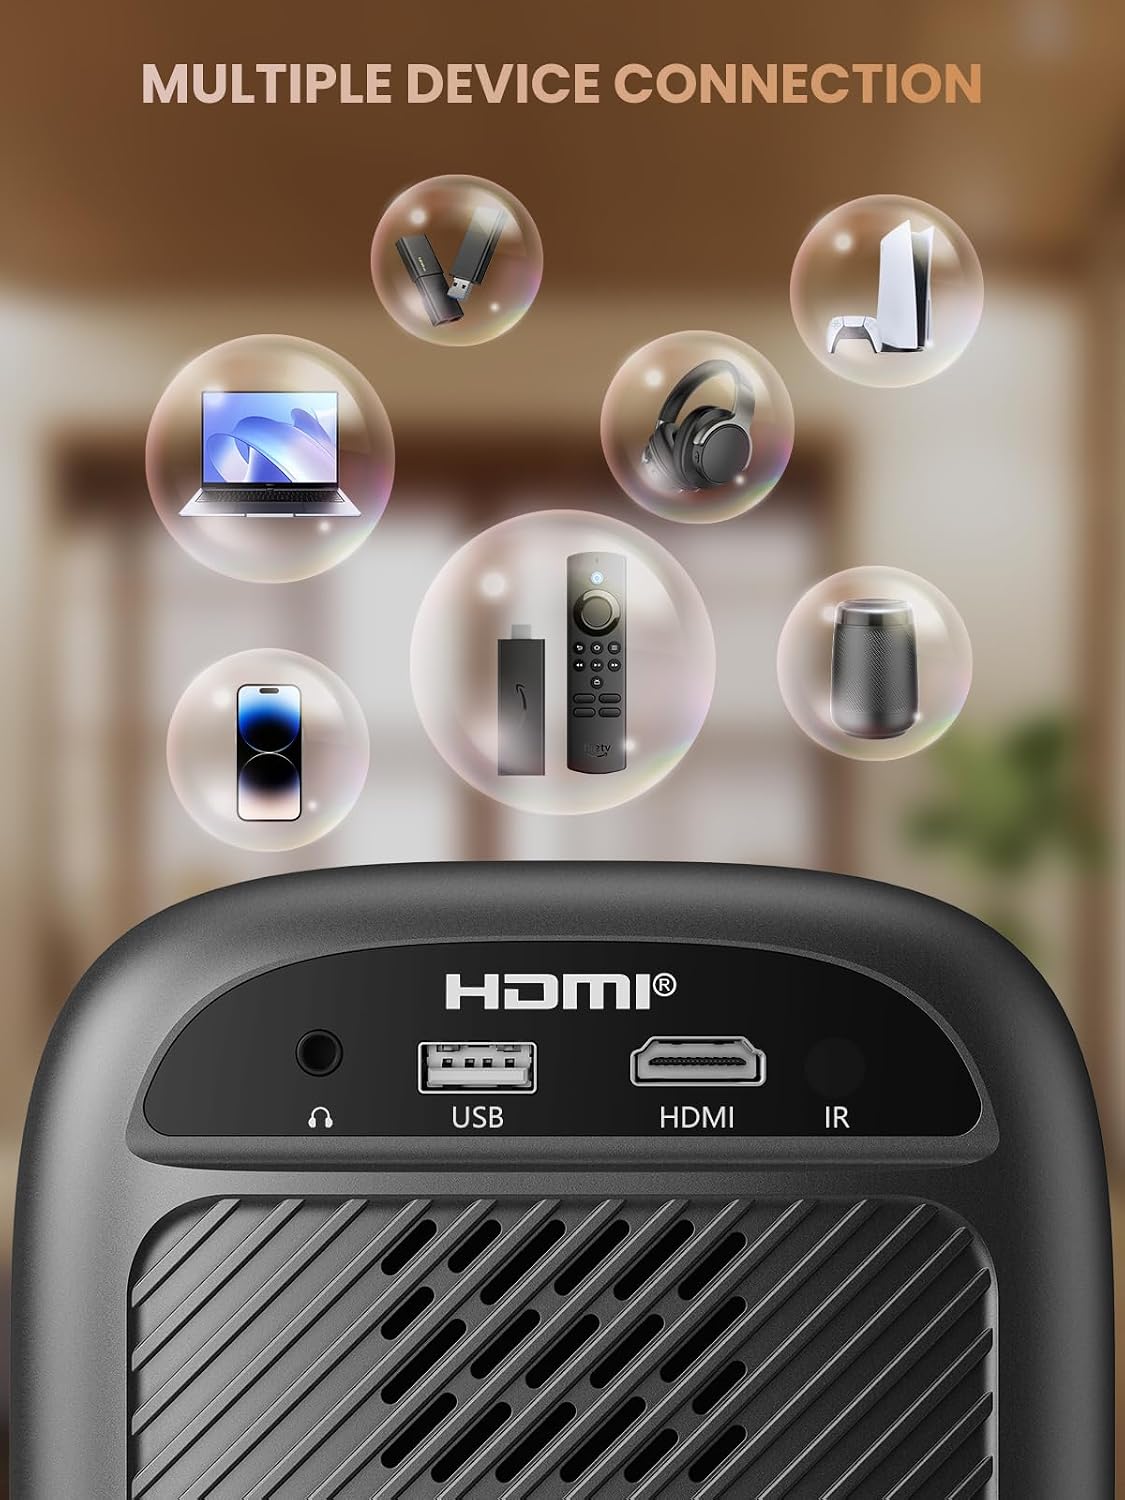
- HDMI-port: Connects to devices such as TV sticks, laptops, game consoles, and Blu-ray players.
- USB-port: Tilsluttes USB-flashdrev til afspilning af medier.
- Lydport (3.5 mm jack): Tilsluttes eksterne højttalere eller hovedtelefoner.
- IR-modtager: Til fjernbetjeningssignaler.
5. Opsætning
5.1 Strømtilslutning
- Tilslut netledningen til projektorens strømindgang.
- Sæt den anden ende af netledningen i en stikkontakt.
5.2 Projektorplacering
Place the projector on a stable, flat surface. For optimal image quality, position the projector perpendicular to the projection surface (wall or screen). The projector can create a large image from a relatively short distance.
5.3 Fokusjustering
Den Groview-B2D-US features electric focus, allowing for precise image clarity adjustment using the remote control.

- Tænd for projektoren.
- Point the remote control at the projector.
- Press the dedicated focus buttons (usually marked with 'F+' and 'F-' or similar icons) on the remote until the projected image is sharp and clear.
5.4 Keystone-korrektion
The projector includes a keystone adjustment slider on the rear panel. This allows you to correct trapezoidal distortion if the projector is not perfectly aligned with the screen. Adjust the slider until the image appears rectangular.
5.5 Indledende tænding
Tryk på tænd/sluk-knappen på projektoren eller fjernbetjeningen for at tænde enheden. Projektoren starter op og viser hovedgrænsefladen.
6. Betjeningsvejledning
6.1 Tilslutning af enheder
Projektoren tilbyder flere tilslutningsmuligheder:
- HDMI: Connect an HDMI cable from your source device (e.g., TV Stick, laptop, game console) to the projector's HDMI port. Select the HDMI input source from the projector's menu.
- USB: Insert a USB flash drive into the USB port. The projector's media player will typically detect the drive automatically, allowing you to browse and play supported media files.
- Bluetooth 5.1: Connect to external Bluetooth speakers or headphones for enhanced audio.

- Aktiver Bluetooth på din eksterne lydenhed, og indstil den til parringstilstand.
- Naviger til Bluetooth-indstillingerne på projektoren.
- Vælg din enhed fra listen over tilgængelige enheder, der skal parres.
Note: Bluetooth does not support smartphone mirroring.
6.2 Smartphone Connection Methods
To connect a smartphone, an adapter is required:

- iOS-enheder: Brug et Lightning til HDMI-adapterkabel.
- Android-enheder: Use a Micro USB/Type C to HDMI adapter cable or a Google Chromecast.
6.3 Navigation og menu
Use the arrow buttons on the remote control to navigate through the projector's on-screen menu. The 'OK' or 'Enter' button confirms selections, and the 'Back' or 'Return' button goes back to the previous menu.
6.4 Digital Zoom Function
The projector features a digital zoom function, allowing you to adjust the image size from 75% to 100% without moving the projector.

Access the zoom settings through the projector's menu and use the remote control to adjust the desired size.
6.5 Brug af fjernbetjening
The included remote control operates the projector's functions. Ensure batteries are correctly installed. Note: A coin may be needed to open the battery compartment.
7. Vedligeholdelse
7.1 Rengøring
- Linse: Tør forsigtigt linsen af med en blød, fnugfri klud, der er specielt designet til optiske overflader. Brug ikke slibende rengøringsmidler.
- Ydre: Tør projektorens yderside af med en blød, tør klud. Ved genstridige mærker kan du bruge en let tør klud.amp en klud kan bruges, efterfulgt af en tør klud.
7.2 Dust-proof Design
Den Groview-B2D-US features a fully sealed optical engine, which helps prevent dust and debris from entering the projector and affecting image quality or lifespan.

7.3 Opbevaring
Når projektoren ikke er i brug, skal den opbevares et køligt og tørt sted, væk fra direkte sollys og ekstreme temperaturer. Brug linsedækslet til at beskytte linsen mod støv og ridser.
8. Fejlfinding
- Intet billede: Check power connection, input source selection, and ensure the lens cap is removed. Verify the connected device is powered on and outputting a signal.
- Sløret billede: Adjust the electric focus using the remote control. Ensure the projector is placed at an appropriate distance from the screen.
- Ingen lyd: Check the volume settings on both the projector and the connected source device. If using Bluetooth, ensure the external audio device is properly paired and its volume is up.
- Fjernbetjeningen virker ikke: Check the batteries in the remote control and ensure there are no obstructions between the remote and the projector's IR receiver.
- Advarsel om overophedning: Ensure ventilation openings are not blocked. Turn off the projector and allow it to cool down before restarting.
For further assistance, please contact Groview kundesupport.
9. Specifikationer
| Feature | Specifikation |
|---|---|
| Mærke | Groview |
| Modelnummer | Groview-B2D-US |
| Indfødt opløsning | 1280 x 720 pixels |
| Understøttet opløsning | 1080P Full HD |
| Forbindelsesteknologi | 3.5mm Jack, Bluetooth 5.1, HDMI, USB |
| Særlige funktioner | Electric Focus, Fully Sealed Optical Engine, Mini size & Lightweight, 150" Display, Digital Zoom (75%-100%) |
| Anbefalede anvendelser | Indendørs/Udendørs |
| Varens vægt | 2.99 pund |
| Produktdimensioner | 4.8 x 5.7 x 6.9 tommer |
| Farve | Grå |
10. Garanti og support
Groview products are designed for reliability and performance. For information regarding warranty coverage and customer support, please refer to the warranty card included with your purchase or visit the official Groview website. Our service team is available to assist with any product-related inquiries.


