1. Introduktion
Denne brugsanvisning indeholder vigtige oplysninger til sikker og effektiv betjening, installation og vedligeholdelse af dit Carbest indbyggede gaskomfur med 2 blus. Designet til brug i campingvogne, autocampere og ...amping vehicles, this gas hob features two burners with ignition safety and manual ignition, offering easy temperature control. Constructed from polished stainless steel, it is both elegant and robust.
Læs venligst denne manual grundigt inden installation og brug, og gem den til senere brug.
2. Sikkerhedsoplysninger
- Ensure proper ventilation when operating the gas hob.
- Opbevar ikke brændbare materialer i nærheden af apparatet.
- Always check for gas leaks after installation and before each use.
- Hold børn og kæledyr væk fra apparatet under drift.
- If you smell gas, immediately turn off the gas supply, open windows and doors, and do not operate any electrical switches or appliances. Contact a qualified technician.
- Only use the appliance with the specified gas pressure (30 mbar).
- Ensure all burner components are correctly assembled before use.
3. Produktet er slutview
The Carbest 2-Burner Built-in Gas Hob is designed for compact spaces, offering reliable cooking performance. Its stainless steel finish ensures durability and ease of cleaning.
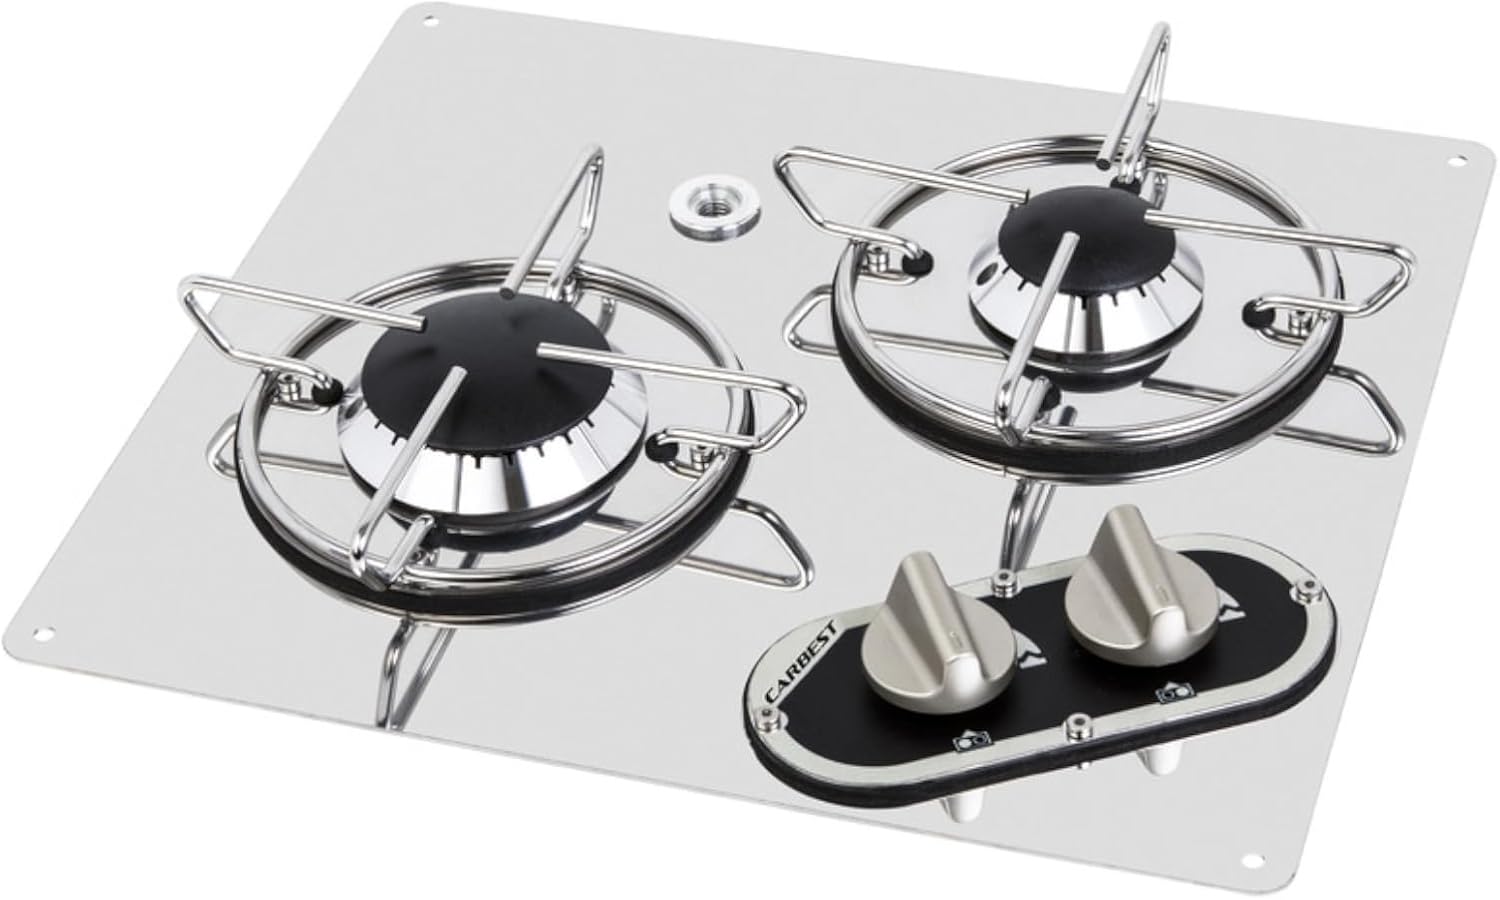
Figur 1: Øverst view of the Carbest 2-burner built-in gas hob, showcasing its polished stainless steel surface, two burners with grates, and control knobs.

Figure 2: Diagram illustrating the required cutout dimensions for installing the Carbest 2-burner gas hob, with measurements in millimeters.
4. Specifikationer
| Feature | Specifikation |
|---|---|
| Mærke | Carbest |
| Modelnummer | 180286185 |
| Farve | Sølv |
| Produktmål (L x B x H) | 32 x 32 x 6.5 cm |
| Power (Burners) | 1 x 1.8 kW, 1 x 1.0 kW |
| Gas forbrug | 204 g/t |
| Gastryk | 30 mbar |
| Materiale | Poleret rustfrit stål |
| Installation Dimensions (L x W) | Ca. 33 x 30 cm |
| Vægt | Ca. 2.5 kg |
| Funktioner | Ignition safety, Manual ignition |
5. Opsætning
5.1 Udpakning
Carefully remove the gas hob and all accessories from the packaging. Inspect for any damage during transit. Keep packaging materials until you are satisfied with the product.
5.2 Installation
- Prepare a cutout in your countertop with dimensions of approximately 33 cm (length) x 30 cm (width). Refer to Figure 2 for visual guidance.
- Ensure the installation area has adequate ventilation as required for gas appliances.
- Place the gas hob into the cutout, ensuring it sits securely and flush with the countertop.
5.3 Gastilslutning
The appliance is designed for a 30 mbar gas supply. Connection must be performed by a qualified and certified technician in accordance with local regulations and standards.
- Ensure the gas supply is turned off before making any connections.
- Connect the gas inlet of the hob to your 30 mbar gas supply line using appropriate fittings and a certified gas hose.
- After connection, perform a leak test using soapy water on all joints. Bubbles indicate a leak. Do not use an open flame for leak detection.
- Once connections are secure and leak-free, turn on the main gas supply.
5.4 Brændersamling
Place the burner components (burner caps, flame spreaders) and pan supports correctly on the hob. Ensure they are stable and properly seated to prevent abnormal flames or damage.
6. Betjeningsvejledning
6.1 Manual Ignition
- Push and turn the desired control knob counter-clockwise to the maximum flame setting.
- Immediately apply a flame source (e.g., a long match or lighter) to the burner until the gas ignites.
- Once ignited, hold the knob for a few seconds to allow the ignition safety device to activate. Release the knob. If the flame goes out, repeat the process.
6.2 Flammejustering
After ignition, you can adjust the flame intensity by turning the control knob between the maximum and minimum settings. Turn clockwise to decrease the flame, and counter-clockwise to increase it.
6.3 Slukning
To turn off a burner, turn the control knob clockwise until it clicks into the 'OFF' position. Ensure the flame is completely extinguished.
7. Vedligeholdelse
7.1 Rengøring
- Always ensure the hob is cool and the gas supply is turned off before cleaning.
- Wipe the polished stainless steel surface with a soft cloth and a mild, non-abrasive detergent. Avoid harsh chemicals or abrasive pads that could scratch the surface.
- Remove burner caps and pan supports for separate cleaning. Wash them with warm soapy water, rinse thoroughly, and dry completely before reassembling.
- Clean any spills immediately to prevent staining and buildup.
7.2 Regelmæssig inspektion
Periodically inspect the gas hose and connections for any signs of wear, cracks, or damage. If any issues are found, replace the components immediately with certified parts and have the inspection done by a qualified technician.
8. Fejlfinding
If you encounter problems with your gas hob, refer to the following common issues and solutions:
- Burner does not ignite: Check if the gas supply is open. Ensure the control knob is pressed and turned correctly. Verify that the burner components (cap, flame spreader) are properly seated.
- Irregular or yellow flame: This may indicate improper burner assembly or blockages. Ensure burner components are clean and correctly positioned. Clean any food debris from the burner ports.
- Gaslugt: Immediately turn off the gas supply at the source. Open windows and doors to ventilate the area. Do not operate any electrical switches or appliances. Contact a qualified gas technician for inspection and repair.
- Flame extinguishes unexpectedly: The ignition safety device should prevent gas flow if the flame goes out. If the flame consistently extinguishes after releasing the knob, ensure you are holding the knob for a few seconds after ignition to allow the safety device to engage. If the problem persists, contact support.
Ved problemer, der ikke er dækket her, bedes du kontakte kundesupport.
9. Garanti og support
For warranty information, technical support, or to order replacement parts, please refer to the contact details provided with your purchase documentation or visit the official Carbest webwebsted.
Hav venligst modelnummeret (180286185) og købsdatoen klar, når du kontakter support.


