1. Introduktion
Thank you for choosing the Pretul SOIN-110/130P Inverter Welder. This compact and efficient welding machine is designed for both coated electrode (SMAW) and tungsten (TIG) welding processes. It features an automatic BI-VOLTAGE 127-220V adaptation system, ensuring seamless operation across different power inputs without manual adjustments. This manual provides essential information for safe operation, setup, maintenance, and troubleshooting to ensure optimal performance and longevity of your welder.
2. Sikkerhedsinstruktioner
Always prioritize safety when operating welding equipment. Failure to follow these instructions can result in serious injury or death.
- Elektrisk stød kan dræbe: Rør ikke ved strømførende dele. Brug tørre svejsehandsker og beskyttelsestøj. Isoler dig selv fra arbejde og jord.
- Dampe og gasser kan være farlige: Hold hovedet væk fra dampene. Brug ventilation eller udsugning til at fjerne dampe fra indåndingszonen.
- Lysbuestråler kan brænde øjne og hud: Wear a welding helmet with a proper shade filter. Wear safety glasses with side shields. Use protective clothing to cover all exposed skin.
- Brand- og eksplosionsfare: Remove all flammables from the welding area. Have a fire extinguisher readily available. Do not weld on containers that have held combustibles.
- Varme dele kan forårsage alvorlige forbrændinger: Allow the welder and workpieces to cool before handling. Use insulated gloves and tongs.
- Læs hele manualen: Understand all safety warnings and operating procedures before use.
- Brug i et godt ventileret område: Ensure adequate airflow to prevent overheating and fume buildup.
- Korrekt jording: Always ensure the welder is properly grounded according to local electrical codes.
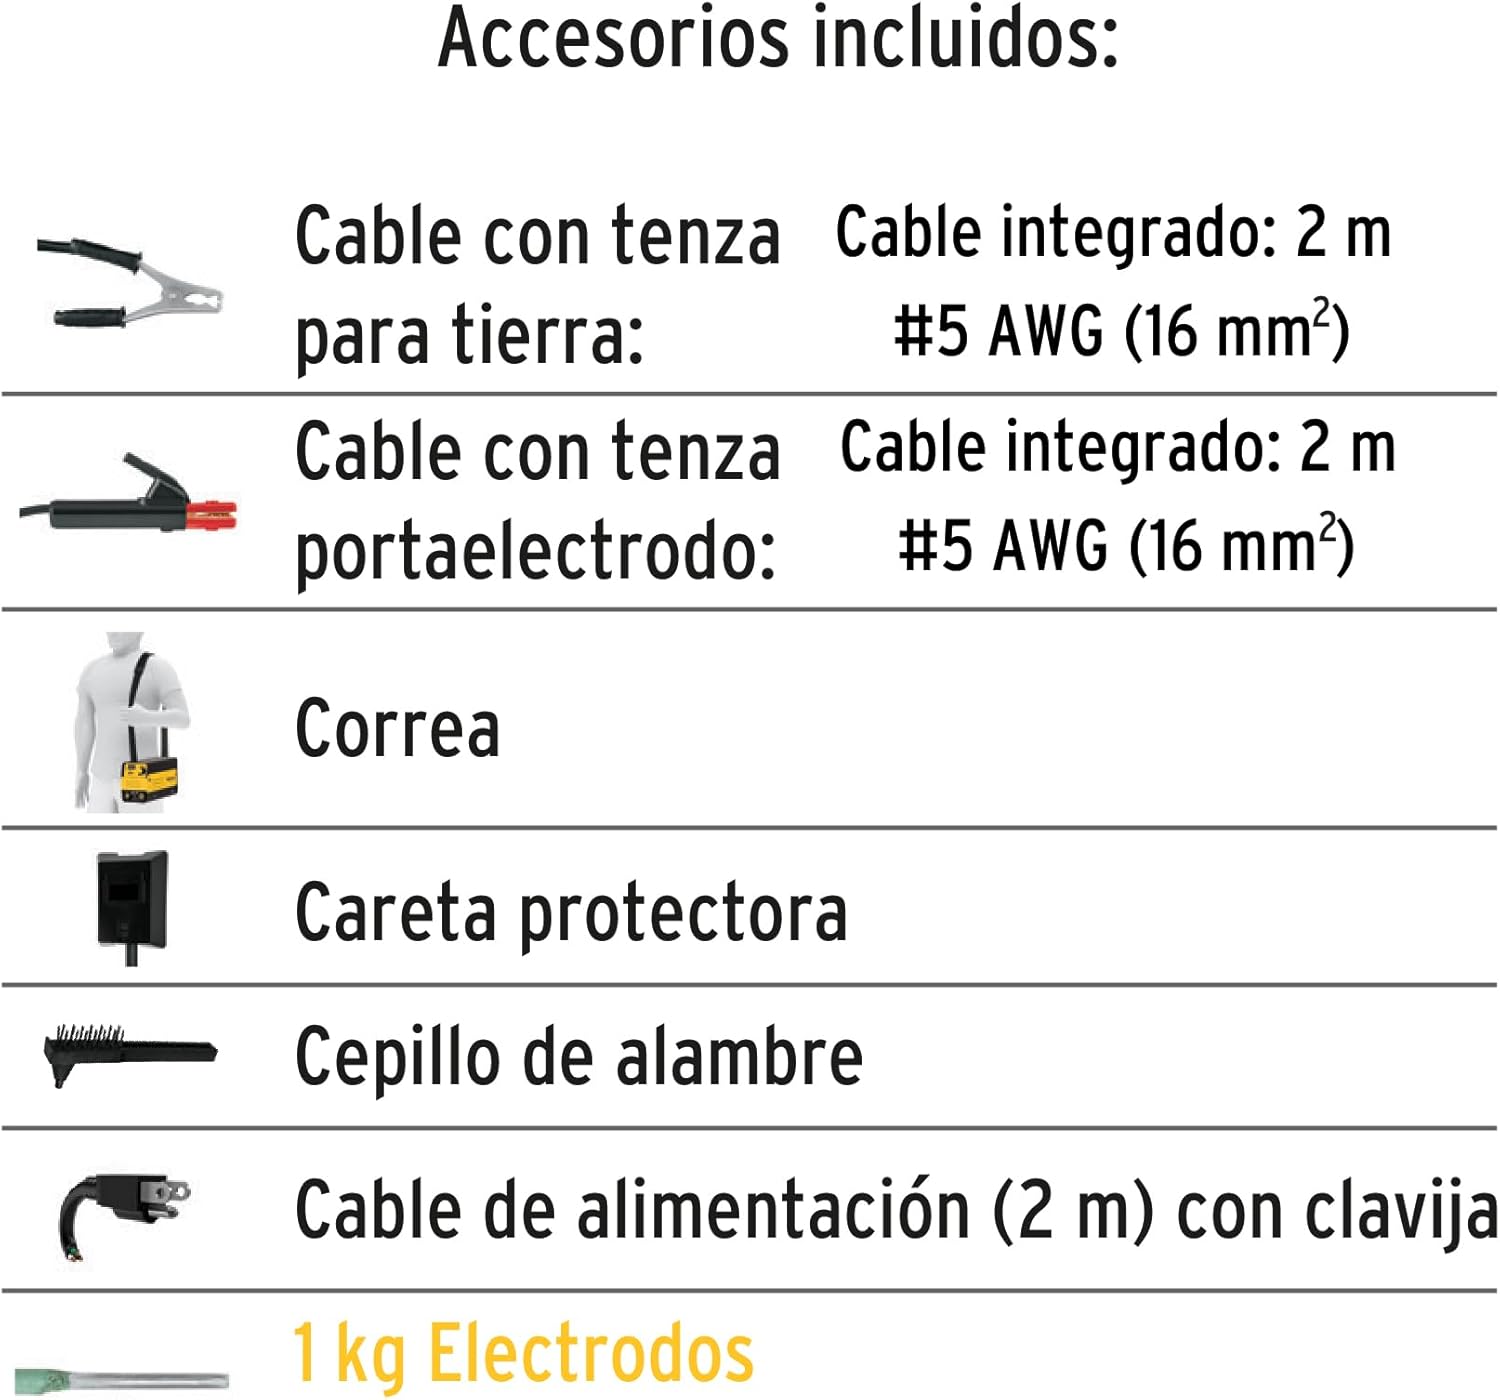
3. Pakkens indhold
Carefully unpack the box and ensure all items are present and undamaged. If any items are missing or damaged, contact your supplier immediately.
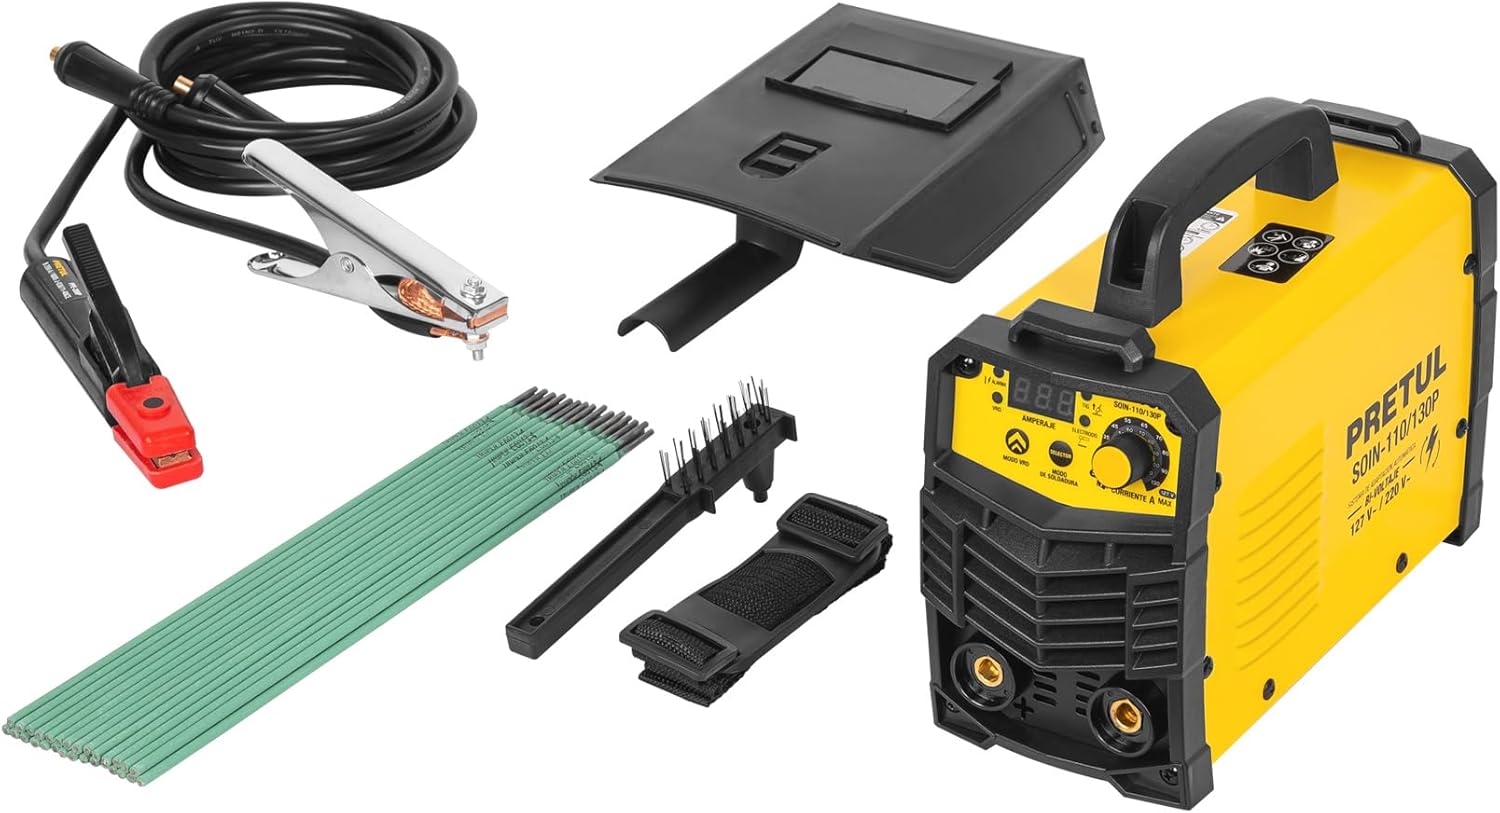
Figure 3.1: Pretul SOIN-110/130P Inverter Welder with all included accessories.
- Pretul SOIN-110/130P Inverter Welder Unit
- Strømkabel med stik
- 1 kg of 1/8" E6013-4 Electrodes
- Jord Clamp Kabel (2 m, #5 AWG / 16 mm²)
- Electrode Holder Cable (2 m, #5 AWG / 16 mm²)
- Protective Welding Mask
- stålbørste
4. Produktet er slutview
Familiarize yourself with the components and controls of your Pretul Inverter Welder.

Figur 4.1: Forside view of the welder with key components labeled.
- Strømkabel: Tilslutter svejsemaskinen til strømforsyningen.
- Tænd/sluk-knap: Tænder eller slukker for enheden.
- Thermal Protection Light: Illuminates to indicate overheating, activating the thermal protection system.
- Digital skærm: Shows current settings and other operational information.
- Strømjusteringsknap: Used to precisely set the welding current (Amperage).
- Hurtigskiftterminaler (Bornes): 3/8" terminals for quick and secure connection of welding cables.
- Håndtag: For easy portability of the unit.
Nøgleteknologier
Figur 4.2: Overview of integrated welding technologies.
- IGBT-inverterteknologi: Allows the welder to operate efficiently at any current level, providing a stable arc and reducing power consumption compared to conventional welders.
- Termisk beskyttelse: An integrated protection system that safeguards the machine from overheating due to prolonged use or excessive load. The thermal protection light will illuminate when active.
- Arc Force: Automatically adjusts the optimal arc value, enabling stable welding and allowing for welding in various positions.
- Anti-klæbende: Prevents the electrode from sticking to the workpiece, reducing overheating and making it easier to restart the arc.
- Hot Start: Facilitates easy arc ignition by providing a temporary increase in current at the start of welding.
5. Tekniske specifikationer
Below are the detailed technical specifications for the Pretul SOIN-110/130P Inverter Welder.
| Feature | Specifikation |
|---|---|
| Modelnummer | 29959 |
| Input bindtage | BI-VOLTAGE 127V / 220V (Automatic Adaptation) |
| Current Range (1 Phase) | 20 A DC - 110 A DC |
| Current Range (2 Phases) | 20 A DC - 130 A DC |
| Svejseprocesser | SMAW (Coated Electrode), TIG (Tungsten) |
| Electrode Compatibility (SMAW) | 6013, 6011 (Up to 5/32"), 7018 (Up to 1/8") |
| Tungsten Electrode Compatibility (TIG) | 1 mm (0.039") |
| Hurtigskiftterminaler | 3/8" |
| Dimensioner (pakke) | 36 x 27 x 22 cm |
| Vægt (pakke) | 6.24 kg |
Figure 5.1: Electrode compatibility chart.
6. Opsætning
Follow these steps to set up your Pretul Inverter Welder for operation.
- Vælg en passende placering: Select a dry, well-ventilated area free from flammable materials. Ensure stable footing for the welder.
- Tilslut jordforbindelseamp: Fastgør jorden clamp cable to the negative (-) quick-change terminal on the welder. Securely attach the ground clamp til emnet eller en ren, bar metaldel af svejsebordet, og sørg for god elektrisk kontakt.
- Tilslut elektrodeholder: For SMAW (stick welding), attach the electrode holder cable to the positive (+) quick-change terminal. Insert the appropriate electrode into the holder. For TIG welding, connect the TIG torch (not included) to the appropriate terminal and gas supply.
- Strømtilslutning: Ensure the welder's ON/OFF switch is in the OFF position. Plug the power cable into a suitable 127V or 220V electrical outlet. The welder will automatically detect and adapt to the input voltage.
- Prepare for Welding: Put on all necessary personal protective equipment (PPE), including a welding helmet, gloves, and protective clothing.
7. Betjeningsvejledning
Once the welder is set up, follow these steps for safe and effective operation.
- Tænd: Turn the ON/OFF switch to the ON position. The digital display will illuminate.
- Indstil strøm: Brug knappen til justering af strømstyrken til at indstille den ønskede amperage for your welding task. Refer to electrode manufacturer recommendations or a welding chart for appropriate settings.
- Start svejsning: Bring the electrode into contact with the workpiece to initiate the arc. The Hot Start feature will assist in easy arc ignition. Maintain a consistent arc length and travel speed.
- Monitor Thermal Protection: If the thermal protection light illuminates, stop welding immediately. Allow the machine to cool down before resuming operation. Do not bypass this safety feature.
- Finish Welding: When finished, turn the welder off. Allow the workpiece and electrode holder to cool before handling.
- Ryd op: Use the wire brush to clean slag from the weld.
Svejsetips:
- Practice on scrap metal to get a feel for the machine and settings.
- Maintain a consistent arc length for a stable weld.
- Tilpasse amperage based on material thickness and electrode type.
- Ensure good ventilation to disperse welding fumes.
8. Vedligeholdelse
Regular maintenance ensures the longevity and safe operation of your welder.
- Rensning: Regularly clean the exterior of the welder with a dry cloth. Use compressed air to blow out dust and debris from the ventilation openings. Ensure the welder is unplugged before cleaning.
- Kabelinspektion: Periodically inspect all cables (power, ground, electrode) for cuts, fraying, or damaged insulation. Replace damaged cables immediately.
- Terminaltjek: Ensure quick-change terminals are clean and free of corrosion. Tighten connections as needed.
- Opbevaring: Opbevar svejsemaskinen et tørt og rent miljø, væk fra direkte sollys og ekstreme temperaturer.
- Professionel service: For internal cleaning or repairs, always consult a qualified service technician. Do not attempt to open the welder casindig selv.
9. Fejlfinding
Dette afsnit omhandler almindelige problemer, du kan støde på med din svejser.
| Problem | Mulig årsag | Løsning |
|---|---|---|
| Svejser tænder ikke. | No power supply; faulty power cable; internal fuse blown. | Check power outlet and connections. Inspect power cable for damage. If problem persists, seek professional service. |
| Thermal protection light is on. | Overophedning på grund af langvarig brug eller utilstrækkelig ventilation. | Stop welding and allow the machine to cool down. Ensure proper ventilation around the unit. |
| Arc is difficult to strike or unstable. | Ukorrekt amperage setting; poor ground connection; damp or incorrect electrode; worn electrode holder. | Tilpasse amperage. Ensure ground clamp has good contact. Use dry, appropriate electrodes. Check electrode holder for wear. |
| Electrode sticks to workpiece. | Lav amperage setting; improper arc length; Anti Stick feature not functioning. | Øge amperage. Practice maintaining proper arc length. If Anti Stick is not working, professional service may be required. |
| Poor weld quality (porosity, spatter). | Incorrect settings; dirty workpiece; improper technique; damp elektroder. | Tilpasse amperage and travel speed. Clean workpiece thoroughly. Use proper welding technique. Ensure electrodes are dry. |
10. Garanti og support
Pretul products are manufactured to high-quality standards and are backed by a manufacturer's warranty against defects in materials and workmanship. Please refer to the warranty card included with your product for specific terms and conditions, or visit the official Pretul webwebstedet for detaljerede garantioplysninger.
For technical support, service, or to inquire about replacement parts, please contact Pretul customer service through their official channels. Keep your purchase receipt as proof of purchase for warranty claims.
Online support: www.pretul.com.mx (Bemærk: Dette er en pladsholder URL, please refer to the actual brand webhjemmeside for support.)


