iJoy trådløs karaokemikrofon (model IJMC210230) brugermanual
Din omfattende guide til opsætning, drift og vedligeholdelse.
1. Introduktion
Thank you for choosing the iJoy Wireless Karaoke Microphone. This device combines a microphone and a speaker, offering a portable solution for karaoke and entertainment. This manual provides essential information for the safe and efficient use of your new microphone.

This image displays the iJoy Wireless Karaoke Microphone alongside its retail packaging. The microphone features a metallic grille and a control panel with various buttons. The packaging highlights Bluetooth connectivity and up to 5 hours of playtime.
Sikkerhedsoplysninger
- Udsæt ikke enheden for ekstreme temperaturer, direkte sollys eller høj luftfugtighed.
- Undgå at tabe mikrofonen eller udsætte den for kraftige stød.
- Hold enheden væk fra vand eller andre væsker.
- Do not attempt to disassemble or repair the microphone yourself. Contact qualified service personnel.
- Brug kun det medfølgende opladningskabel eller et tilsvarende certificeret kabel.
2. Pakkens indhold
Tjek venligst pakken for følgende varer:
- iJoy Wireless Karaoke Microphone (Model IJMC210230)
- USB opladningskabel
- Brugermanual
3. Produktet er slutview
Kontrol og funktioner

Et nærbillede view of the microphone's control panel, illustrating the functions of each button and slider. Labels indicate 'PLAY/PAUSE', 'PREV' (Previous Track), 'NEXT' (Next Track), 'VOL+' (Volume Up), 'VOL-' (Volume Down), 'EFFECTS', 'MIC VOL' (Microphone Volume slider), and 'REVERB' (Reverb slider). A 'VOICE CHANGER' button is also visible.
- SPIL/PAUSE: Tryk for at afspille eller sætte musikafspilning på pause.
- PREV (Previous Track): Tryk på for at gå til den forrige sang.
- NEXT (Next Track): Tryk på for at gå til næste sang.
- VOL+ (lydstyrke op): Press to increase music volume.
- VOL- (lydstyrke ned): Press to decrease music volume.
- EFFECTS (Voice Changer): Press to cycle through different voice effects.
- MIC VOL (Microphone Volume Slider): Slide to adjust the microphone's vocal volume.
- REVERB (Reverb Slider): Slide to adjust the echo effect on your voice.
Porte og forbindelser

This image shows the side of the microphone handle, highlighting the various ports available. These include a '5V AUX' port, a 'REC' (Recording) port, a 'TF' (MicroSD card) slot, an 'OUT' port, and a 'USB' port for charging or external device connection.
- 5V AUX: Auxiliary input port for connecting external audio devices.
- REC: Recording output port.
- TF (MicroSD Card Slot): Insert a MicroSD card for music playback.
- UD: Audio output port.
- USB: Micro USB port for charging the microphone.
4. Opsætning
4.1 Opladning af mikrofonen
Before first use, fully charge the microphone. Connect the provided USB charging cable to the microphone's USB port and the other end to a 5V USB power adapter (not included) or a computer's USB port. The charging indicator light will illuminate during charging and turn off when fully charged. A full charge provides up to 5 hours of playtime.
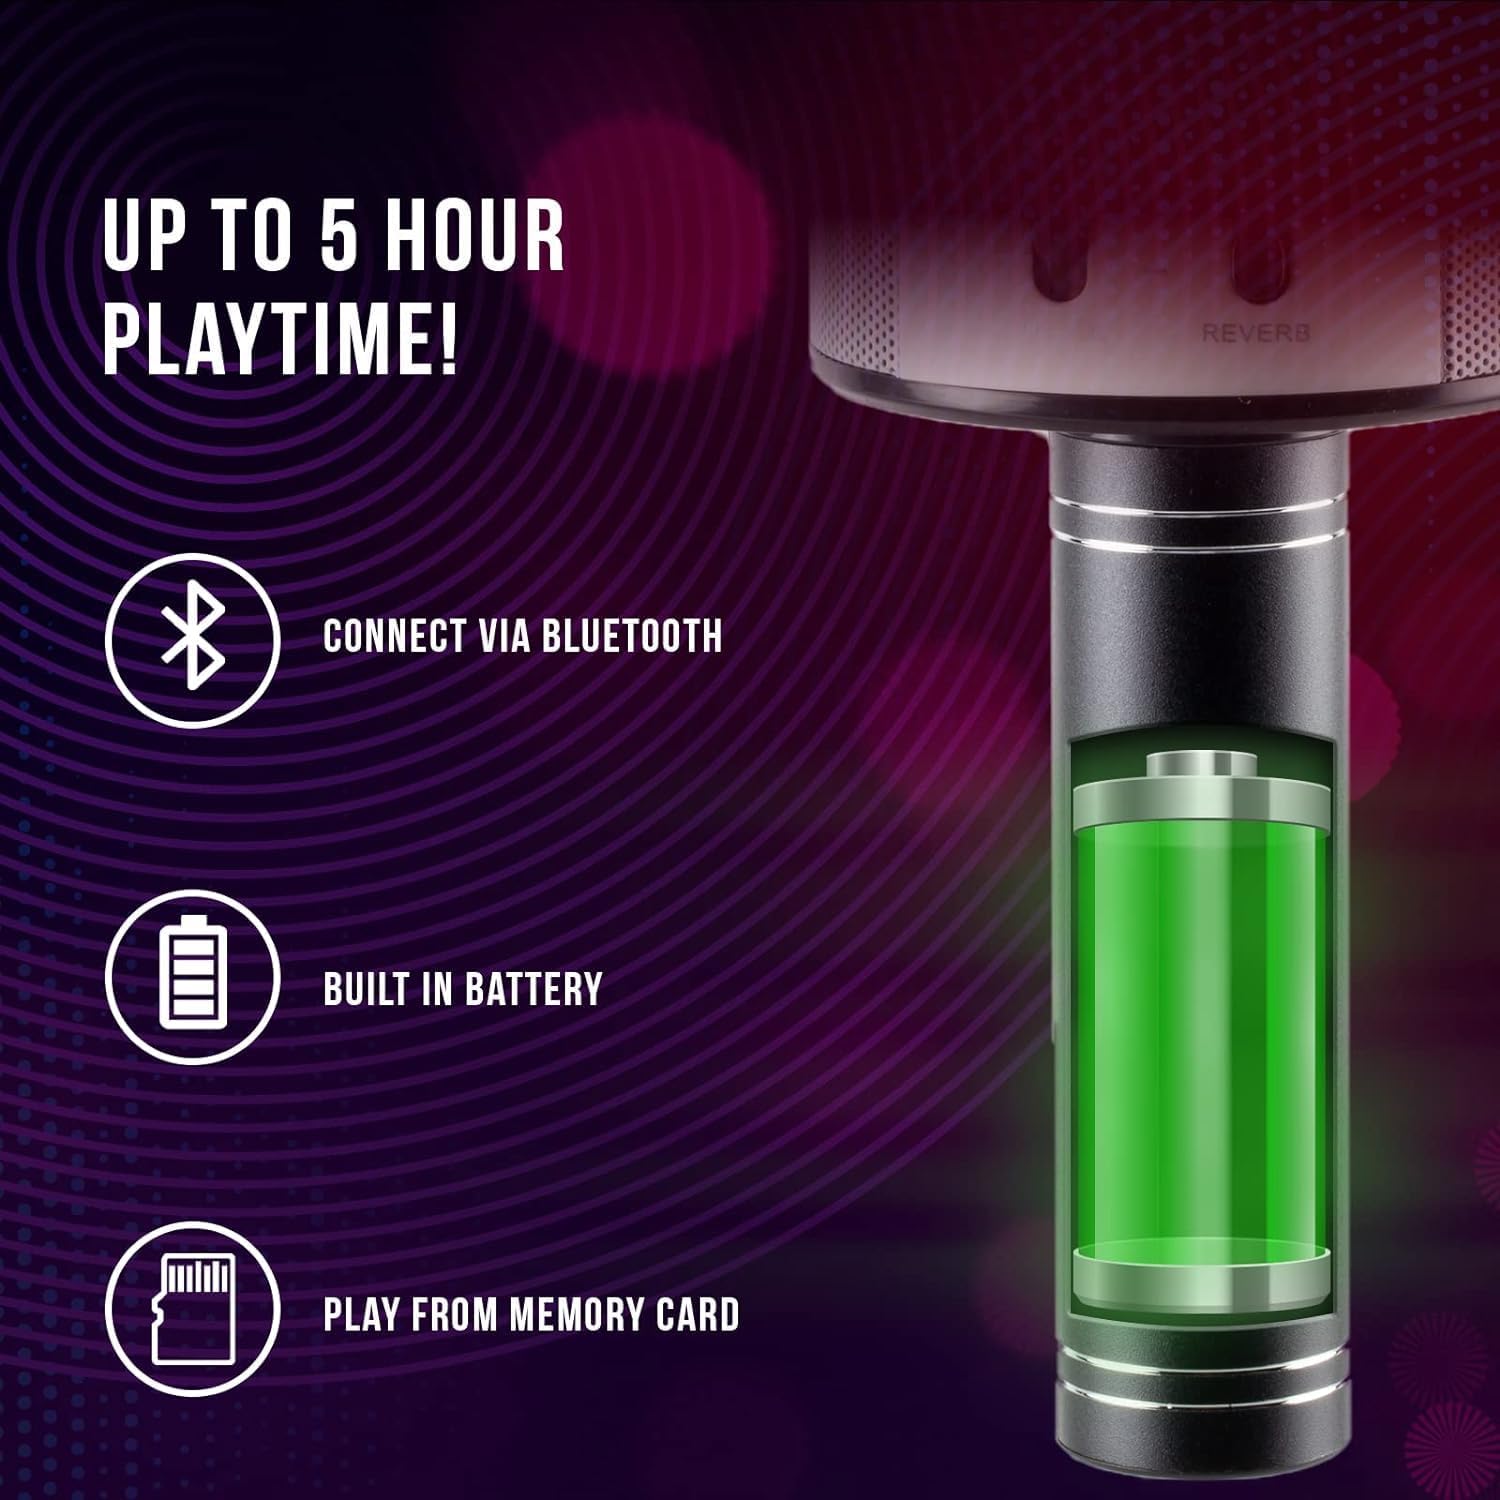
An infographic detailing key features: a Bluetooth icon indicating wireless connectivity, a battery icon representing the built-in rechargeable battery, and a memory card icon signifying the ability to play from a memory card. The image also shows a stylized internal view of the microphone's battery.
4.2 Tænd/sluk
To power on the microphone, press and hold the power button (often integrated with the PLAY/PAUSE button or a separate button, refer to your specific model's physical layout if different from the diagram) until you hear a power-on prompt or see an indicator light. To power off, press and hold the same button until you hear a power-off prompt.
4.3 Bluetooth -parring
- Ensure the microphone is powered on and in Bluetooth pairing mode (it usually enters this mode automatically upon power-on if not already connected). An indicator light may flash to show it's ready to pair.
- Gå til Bluetooth-indstillingerne på din smartphone, tablet eller anden Bluetooth-aktiveret enhed.
- Søg efter available devices. You should see "iJoy Karaoke Mic" or a similar name appear in the list.
- Select the microphone from the list to connect. You will hear an audible confirmation when the connection is successful.
- Once paired, the microphone will automatically connect to your device when both are powered on and within range.
5. Betjeningsvejledning
5.1 Singing with Music
After successfully pairing your microphone with a Bluetooth device, open your favorite music or karaoke app. Play a song, and the music will stream through the microphone's built-in speaker. You can then sing along into the microphone.
5.2 Adjusting Volume and Effects
- Musiklydstyrke: Brug VOL+ og VOL- buttons on the microphone to adjust the volume of the background music.
- Mikrofonlydstyrke: Brug MIC VOL slider to increase or decrease the volume of your voice.
- Reverb/Echo: Brug REVERB slider to add or reduce the echo effect on your voice.
- Stemmeskifter: Tryk på VIRKNINGER button repeatedly to cycle through the available voice changing effects. There are 4 different voice effects to choose from.
5.3 Playing from TF Card / USB
Insert a MicroSD (TF) card or a USB drive (if supported via the USB port) with MP3 music files into the corresponding slot. The microphone will automatically detect the media and begin playing. Use the FORR, NÆSTE, og AFSPIL/PAUSE knapper til at styre afspilning.
6. Vedligeholdelse
- Rensning: Wipe the microphone with a soft, dry cloth. Do not use abrasive cleaners or solvents.
- Opbevaring: Store the microphone in a cool, dry place away from direct sunlight when not in use.
- Batteripleje: To prolong battery life, avoid fully discharging the battery frequently. Charge the microphone regularly, even if not in use for extended periods.
7. Fejlfinding
| Problem | Løsning |
|---|---|
| Mikrofonen tændes ikke. | Ensure the microphone is fully charged. Connect it to a power source using the USB charging cable. |
| Ingen lyd fra højttaleren. | Check if the music volume (VOL+) and microphone volume (MIC VOL slider) are turned up. Ensure the device is properly connected via Bluetooth or auxiliary cable. |
| Kan ikke oprette forbindelse via Bluetooth. | Make sure the microphone is in pairing mode. Turn off and on Bluetooth on your device. Ensure no other device is currently connected to the microphone. Move closer to the microphone. |
| Forvrænget lyd. | Reduce the volume on both the microphone and your connected device. Ensure the microphone is not too close to the speaker, causing feedback. |
8. Specifikationer
| Feature | Detalje |
|---|---|
| Modelnummer | IJMC210230 |
| Forbindelsesteknologi | Bluetooth |
| Mikrofon formfaktor | Håndholdt |
| Strømkilde | Batteridrevet |
| Spilletid | Op til 5 timer |
| Materiale | Metal |
| Varedimensioner (L x B x H) | 3 x 3 x 8 tommer |
| Varens vægt | 1.6 pund |
| Talertal | 1 (integreret) |
| Særlige funktioner | Wireless, Bluetooth, Portable, Voice Changer |
| Kompatible enheder | Karaokemaskine, Bærbar computer, Smartphone, Tablet |
9. Garanti og support
For warranty information or technical support, please refer to the warranty card included with your product or visit the official iJoy website. You may also contact iJoy customer service directly for assistance with product issues or inquiries.


