1. Introduktion
The Imou ZR1 Smart Indoor Wireless Siren and Chime is designed to enhance your home security system. It functions as an alarm siren and chime, integrating seamlessly with Imou detectors and the Imou Alarm Hub (required, sold separately). When triggered by a connected sensor, the siren emits an 85 dB alarm and can provide visual alerts, effectively deterring intruders and notifying occupants. Its compact design and flexible installation options make it suitable for various indoor environments.

Image: The Imou ZR1 wireless sound and flash alarm siren, designed to better protect your home.
2. Sikkerhedsoplysninger
- Læs alle instruktioner omhyggeligt før brug.
- Hold enheden væk fra vand og fugt.
- Forsøg ikke selv at skille enheden ad eller reparere den. Kontakt kvalificeret personale for service.
- Ensure the device is installed in a stable location to prevent accidental falls.
- Use only the specified power supply (12 Volts) for the device.
- The siren produces a loud sound (85 dB). Avoid prolonged exposure to the sound at close range.
- Denne enhed er kun designet til indendørs brug.
3. Pakkens indhold
Kontroller venligst pakkens indhold ved åbning for at sikre, at alle varer er til stede:
- Imou ZR1 Smart Indoor Wireless Siren and Chime Unit
- Monteringstilbehør (skruer, vægdyvler)
- Brugervejledning (dette dokument)
- Power Adapter (if included, otherwise powered by hub)
4. Produktet er slutview
Familiarize yourself with the components of your Imou ZR1 siren.

Image: Diagram showing the indicator light, volume adjustment & network access button, and power interface of the Imou ZR1 siren.
- Indikatorlys: Provides status feedback (e.g., pairing mode, alarm active).
- Volume Adjustment & Network Access Button: Used for pairing with the Imou Alarm Hub and adjusting the siren volume.
- Strømgrænseflade: Connects to the power adapter for continuous operation.
- Anti-tampeh Switch: Triggers an alarm if the device is moved or tampered with after installation.
- On/Off knap: Tænder eller slukker for enheden.

Image: Detailed diagram illustrating the LED Indicator, Buzzer, Volume Button, Anti-tamper Switch, On/Off Button, and Power Port.
5. Opsætning
The Imou ZR1 siren requires an Imou Alarm Hub (sold separately) to function as part of a security system.

Image: The Imou ZR1 siren held in hand, demonstrating its compact size and ease of handling for installation.
5.1 Initial Pairing with Imou Alarm Hub
- Tænd: Connect the Imou ZR1 siren to a power source using the provided adapter.
- Activate Pairing Mode on Hub: Follow the instructions for your Imou Alarm Hub to put it into pairing mode. This usually involves pressing a button on the hub or initiating it through the Imou Life app.
- Pair Siren: Press and hold the Network Access Button on the Imou ZR1 siren until the indicator light flashes, indicating it's in pairing mode.
- Bekræftelse: Once successfully paired, the indicator light on the siren will change (e.g., turn solid green), and the Imou Life app will confirm the addition of the device.
5.2 Montering af sirenen
The ZR1 supports flexible installation, including wall or ceiling mounting.
- Vælg placering: Select a central location where the siren's sound can be heard throughout the desired area. Ensure it's within range of your Imou Alarm Hub.
- Markér borepunkter: Use the mounting bracket (if applicable) to mark the positions for drilling.
- Bore huller: Drill holes at the marked positions and insert wall plugs if mounting on drywall or masonry.
- Sikkert beslag: Attach the mounting bracket to the wall/ceiling using screws.
- Attach Siren: Securely attach the Imou ZR1 siren to the mounting bracket. Ensure the anti-tamper switch is properly engaged if you wish to utilize this feature.
6. Betjeningsvejledning
The Imou ZR1 siren operates primarily in conjunction with the Imou Alarm Hub and connected sensors.
6.1 Alarm Triggering
When any Imou detector (e.g., motion sensor, door/window contact sensor) connected to your Imou Alarm Hub detects an intrusion or specified event, the hub will send a signal to the ZR1 siren, causing it to activate.
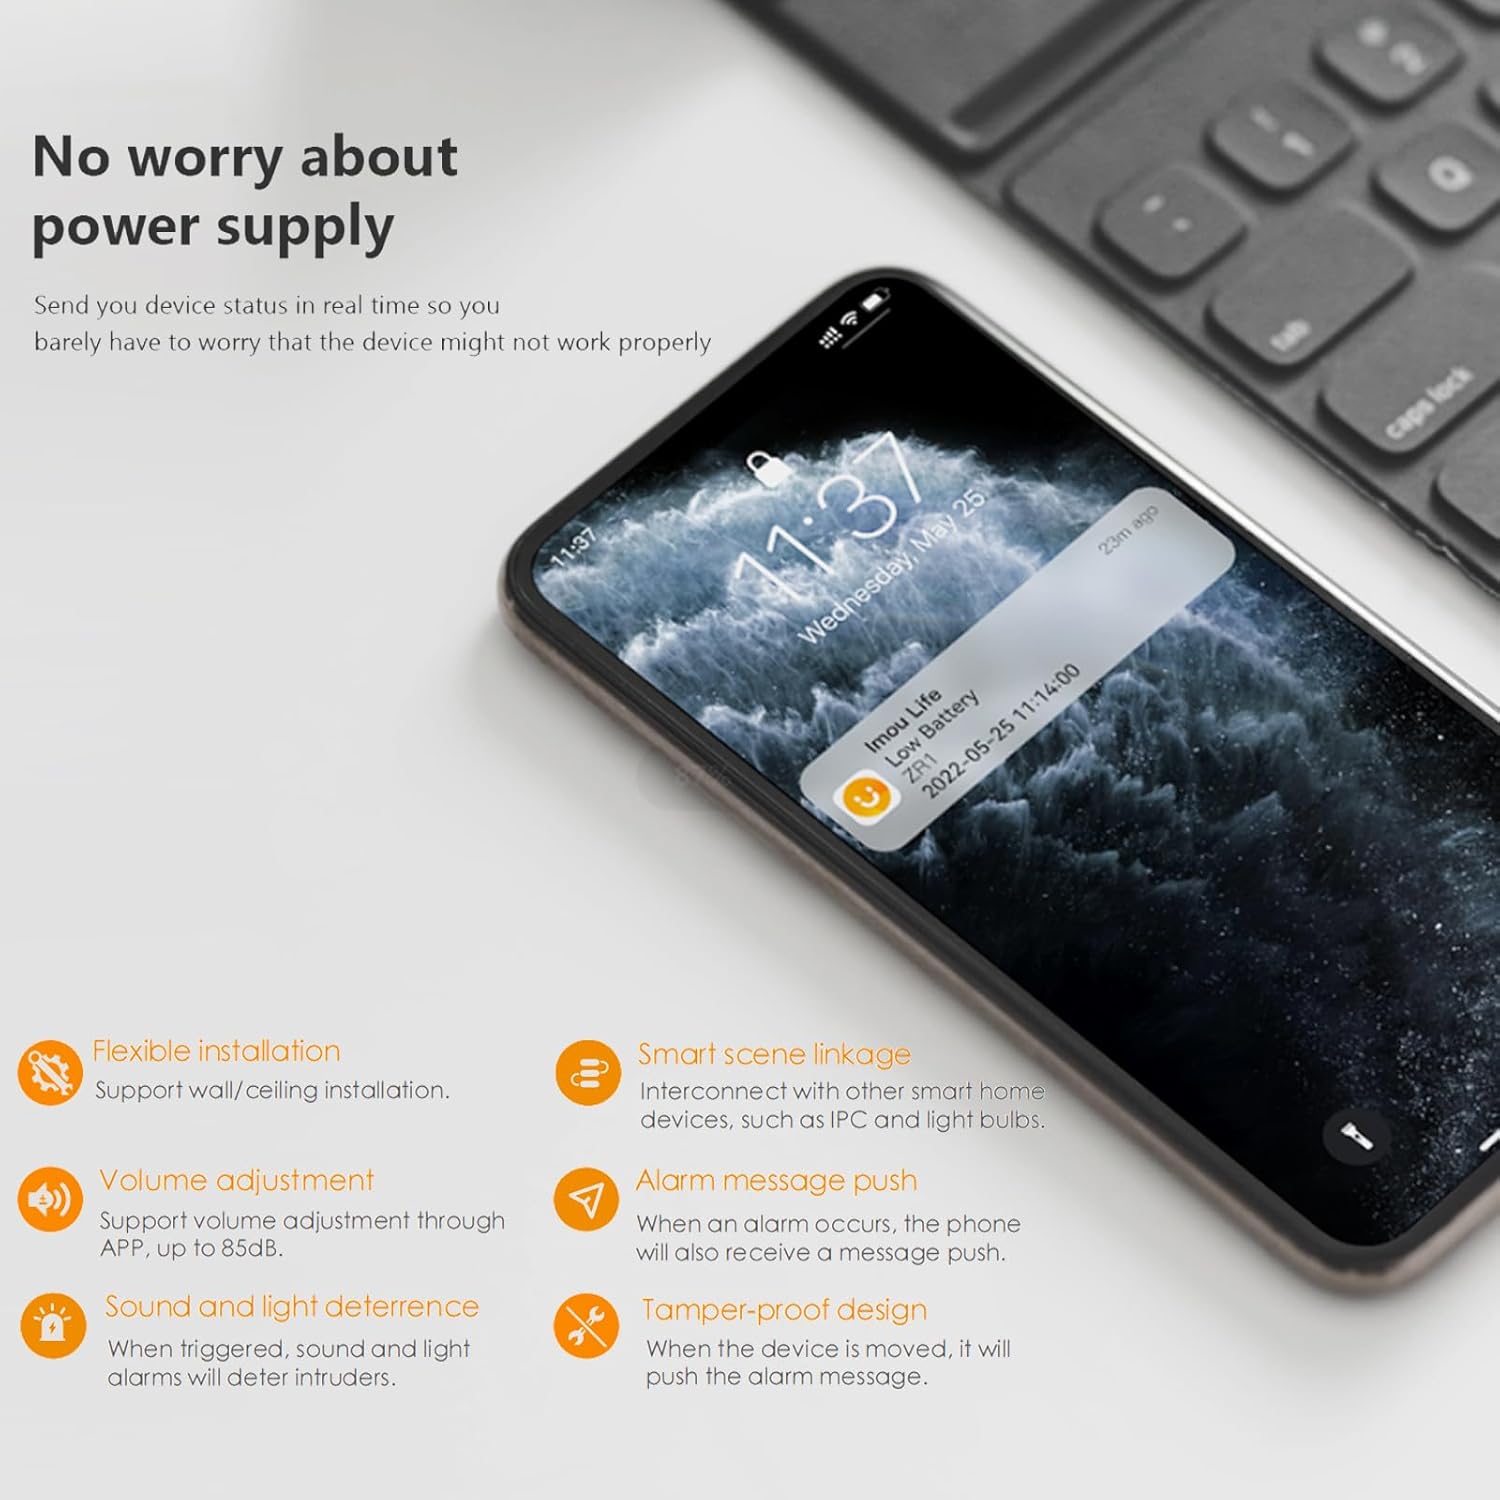
Image: Flow diagram illustrating how a message from the Imou Alarm Hub triggers the 85dB alarm on the siren, providing a loud deterrent.
6.2 Lydstyrkejustering
The siren's volume can be adjusted through the Imou Life application. Navigate to the device settings for the ZR1 siren within the app to modify the sound level, up to 85 dB.
6.3 Deaktivering af alarmen
The alarm can be disarmed or muted in several ways:
- Via Imou Life App: Use the Imou Life app to disarm the alarm system or mute the siren directly.
- Via Alarm Hub: Some Imou Alarm Hubs may have a physical button to disarm the system.
- Local Mute: The siren may have a button to locally mute the sound, as indicated in the product overview.


Image: Screenshots of the Imou Life app showing Home Mode settings and options to set modes for sensors, which control alarm behavior.
6.4 Meddelelser
The Imou Life app provides real-time notifications when the alarm is triggered or when the device status changes (e.g., low battery). This ensures you are always aware of your home's security status.

Image: A smartphone displaying an Imou Life app notification for a low battery status on the ZR1 device, ensuring timely awareness of device health.
7. Vedligeholdelse
The Imou ZR1 siren requires minimal maintenance to ensure optimal performance.
- Rensning: Gently wipe the device with a soft, dry cloth to remove dust. Do not use liquid cleaners or abrasive materials.
- Firmwareopdateringer: Periodically check the Imou Life app for available firmware updates for your siren and alarm hub. Keeping the firmware updated ensures the best performance and security.
- Strømforsyning: Ensure the siren is continuously powered. The Imou Life app will notify you of any power supply issues or low battery status if applicable.
- Tamper-Proof Check: Occasionally check that the siren is securely mounted and the anti-tamper switch is functioning correctly.
8. Fejlfinding
If you encounter issues with your Imou ZR1 siren, refer to the following common problems and solutions:
| Problem | Mulig årsag | Løsning |
|---|---|---|
| Siren does not sound when alarm is triggered. |
|
|
| Siren indicator light is off. |
|
|
| Cannot pair siren with hub. |
|
|
| Siren triggers unexpectedly. |
|
|
9. Specifikationer
Technical specifications for the Imou ZR1 Smart Indoor Wireless Siren and Chime:
| Feature | Detalje |
|---|---|
| Model | ZR1 |
| Mærke | Imou |
| Lydniveau | 85 dB |
| Voltage | 12 volt |
| Forbindelse | Wireless (requires Imou Alarm Hub) |
| Rækkevidde | Up to 150m (from entry point to alarm device) |
| Funktioner | Tamper-proof design, Sound and light deterrence, Real-time notifications, Flexible installation (wall/ceiling) |
| Materiale | Flame retardant material on cover |
10. Garanti og support
10.1 Garantioplysninger
Imou products typically come with a limited warranty. Please refer to the warranty card included with your product or visit the official Imou webwebstedet for detaljerede garantivilkår og -betingelser, der er specifikke for din region. Gem din købskvittering som købsbevis i tilfælde af garantikrav.
10.2 Kundesupport
For technical assistance, troubleshooting beyond this manual, or warranty inquiries, please contact Imou customer support through one of the following channels:
- Imou Officiel Webwebsted: Besøg www.imoulife.com for ofte stillede spørgsmål, supportartikler og kontaktoplysninger.
- Imou Life-appen: The app often includes a support section where you can submit inquiries or find help.
- E-mail support: Refer to the Imou website for the appropriate support email address for your region.
When contacting support, please have your product model (ZR1) and serial number ready.


